Connecting Cloudentity IDP
Instructions on how to configure Cloud Identity Plane as IDP
Note
Cloudentity IDP is required for the integration of Authorization Control Plane and Identity. See more details in Integrating Authorization Control Plane with Identity.
Prerequisites
- Login credentials to the ACP administrator portal
- At least one workspace in ACP
Select a workspace
-
Navigate to the ACP administrator portal in your browser and log in with your credentials.
-
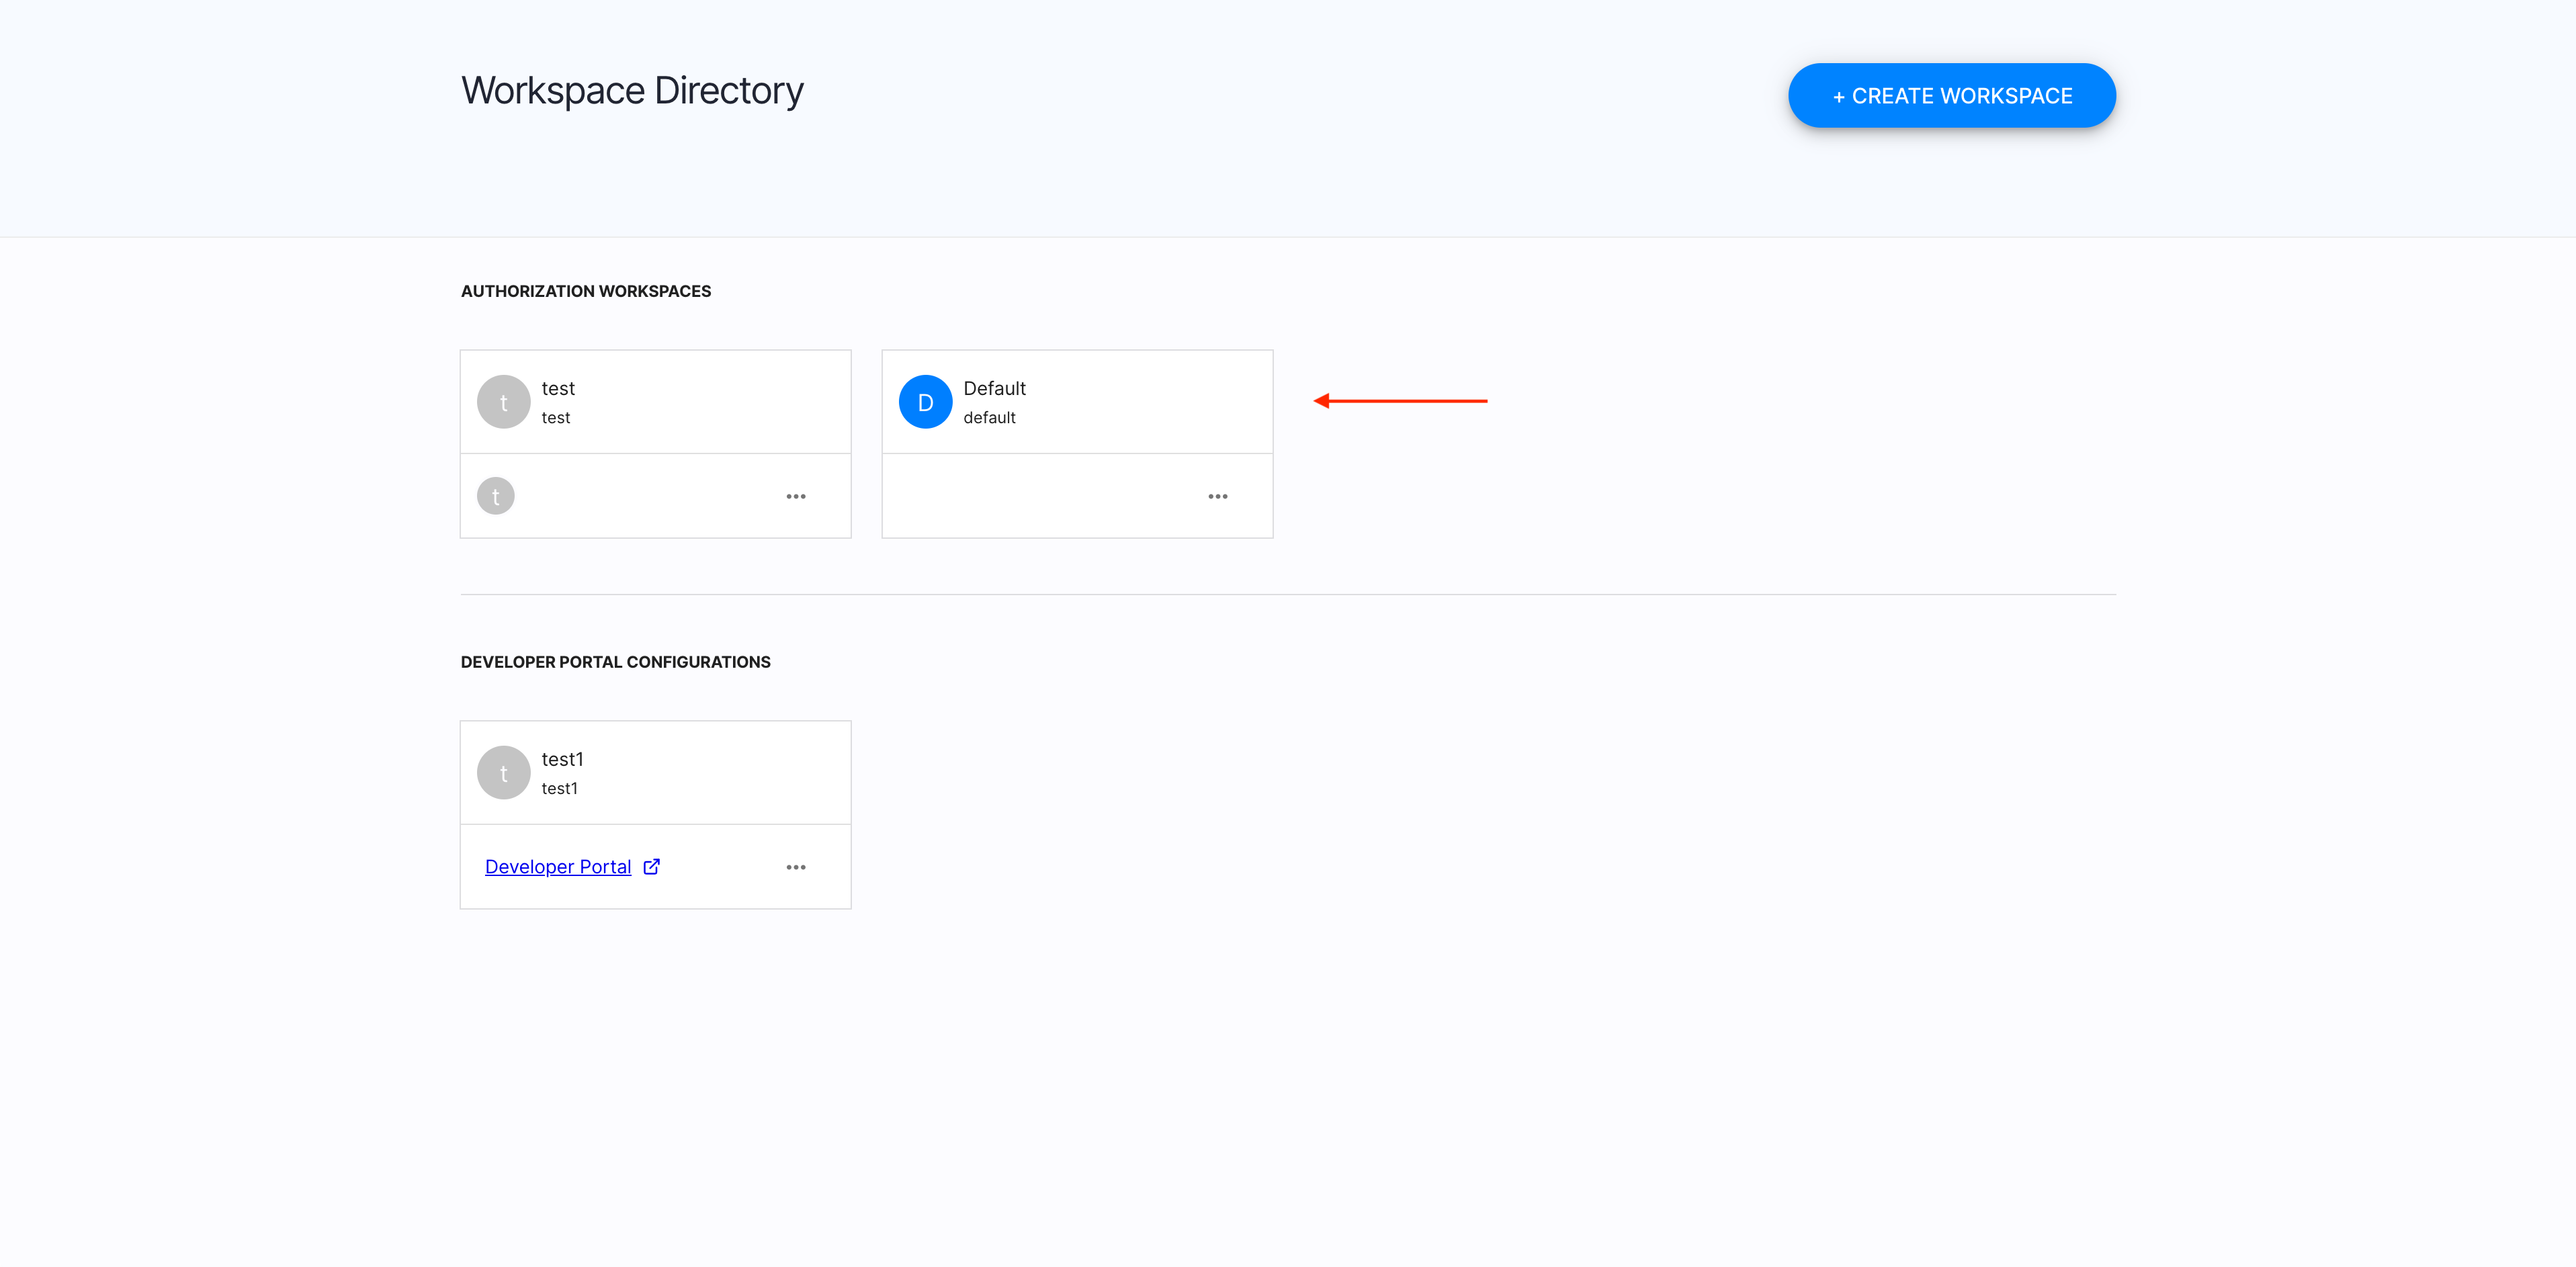
In Workspace Directory, select a workspace that you want to add a new IDP for.
Create a new IDP
-
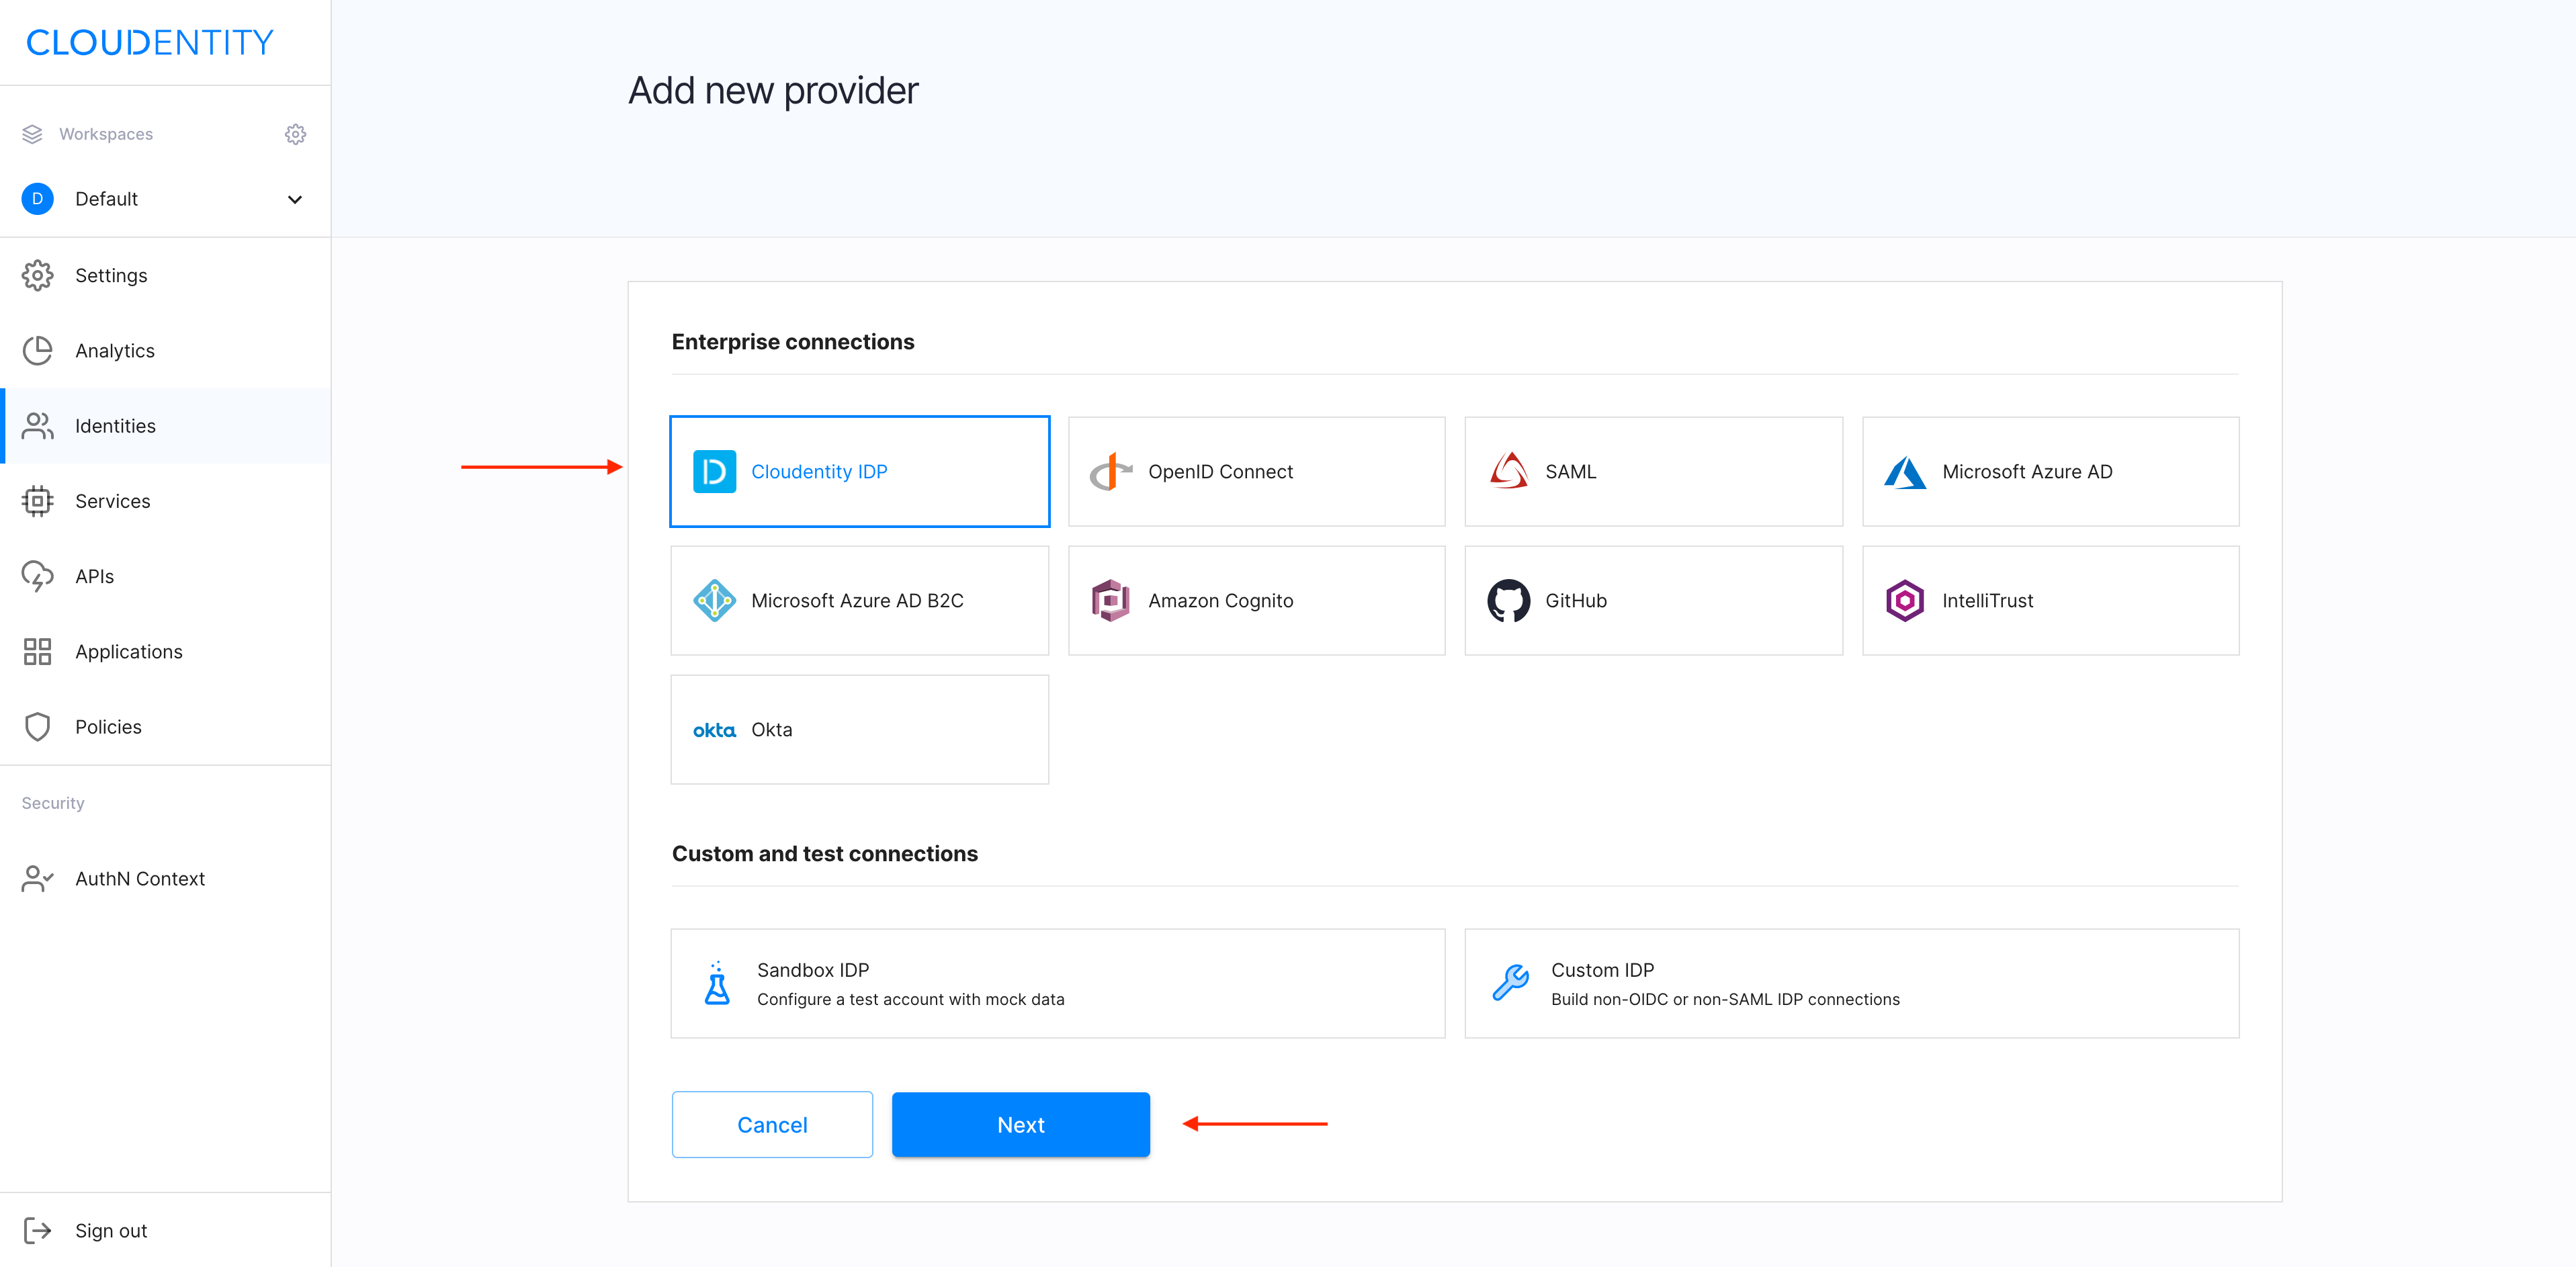
Make sure you’re in the Identities view and select +CREATE IDENTITY.

-
From the Add new provider view, select Cloudentity IDP and confirm your choice by clicking Next.
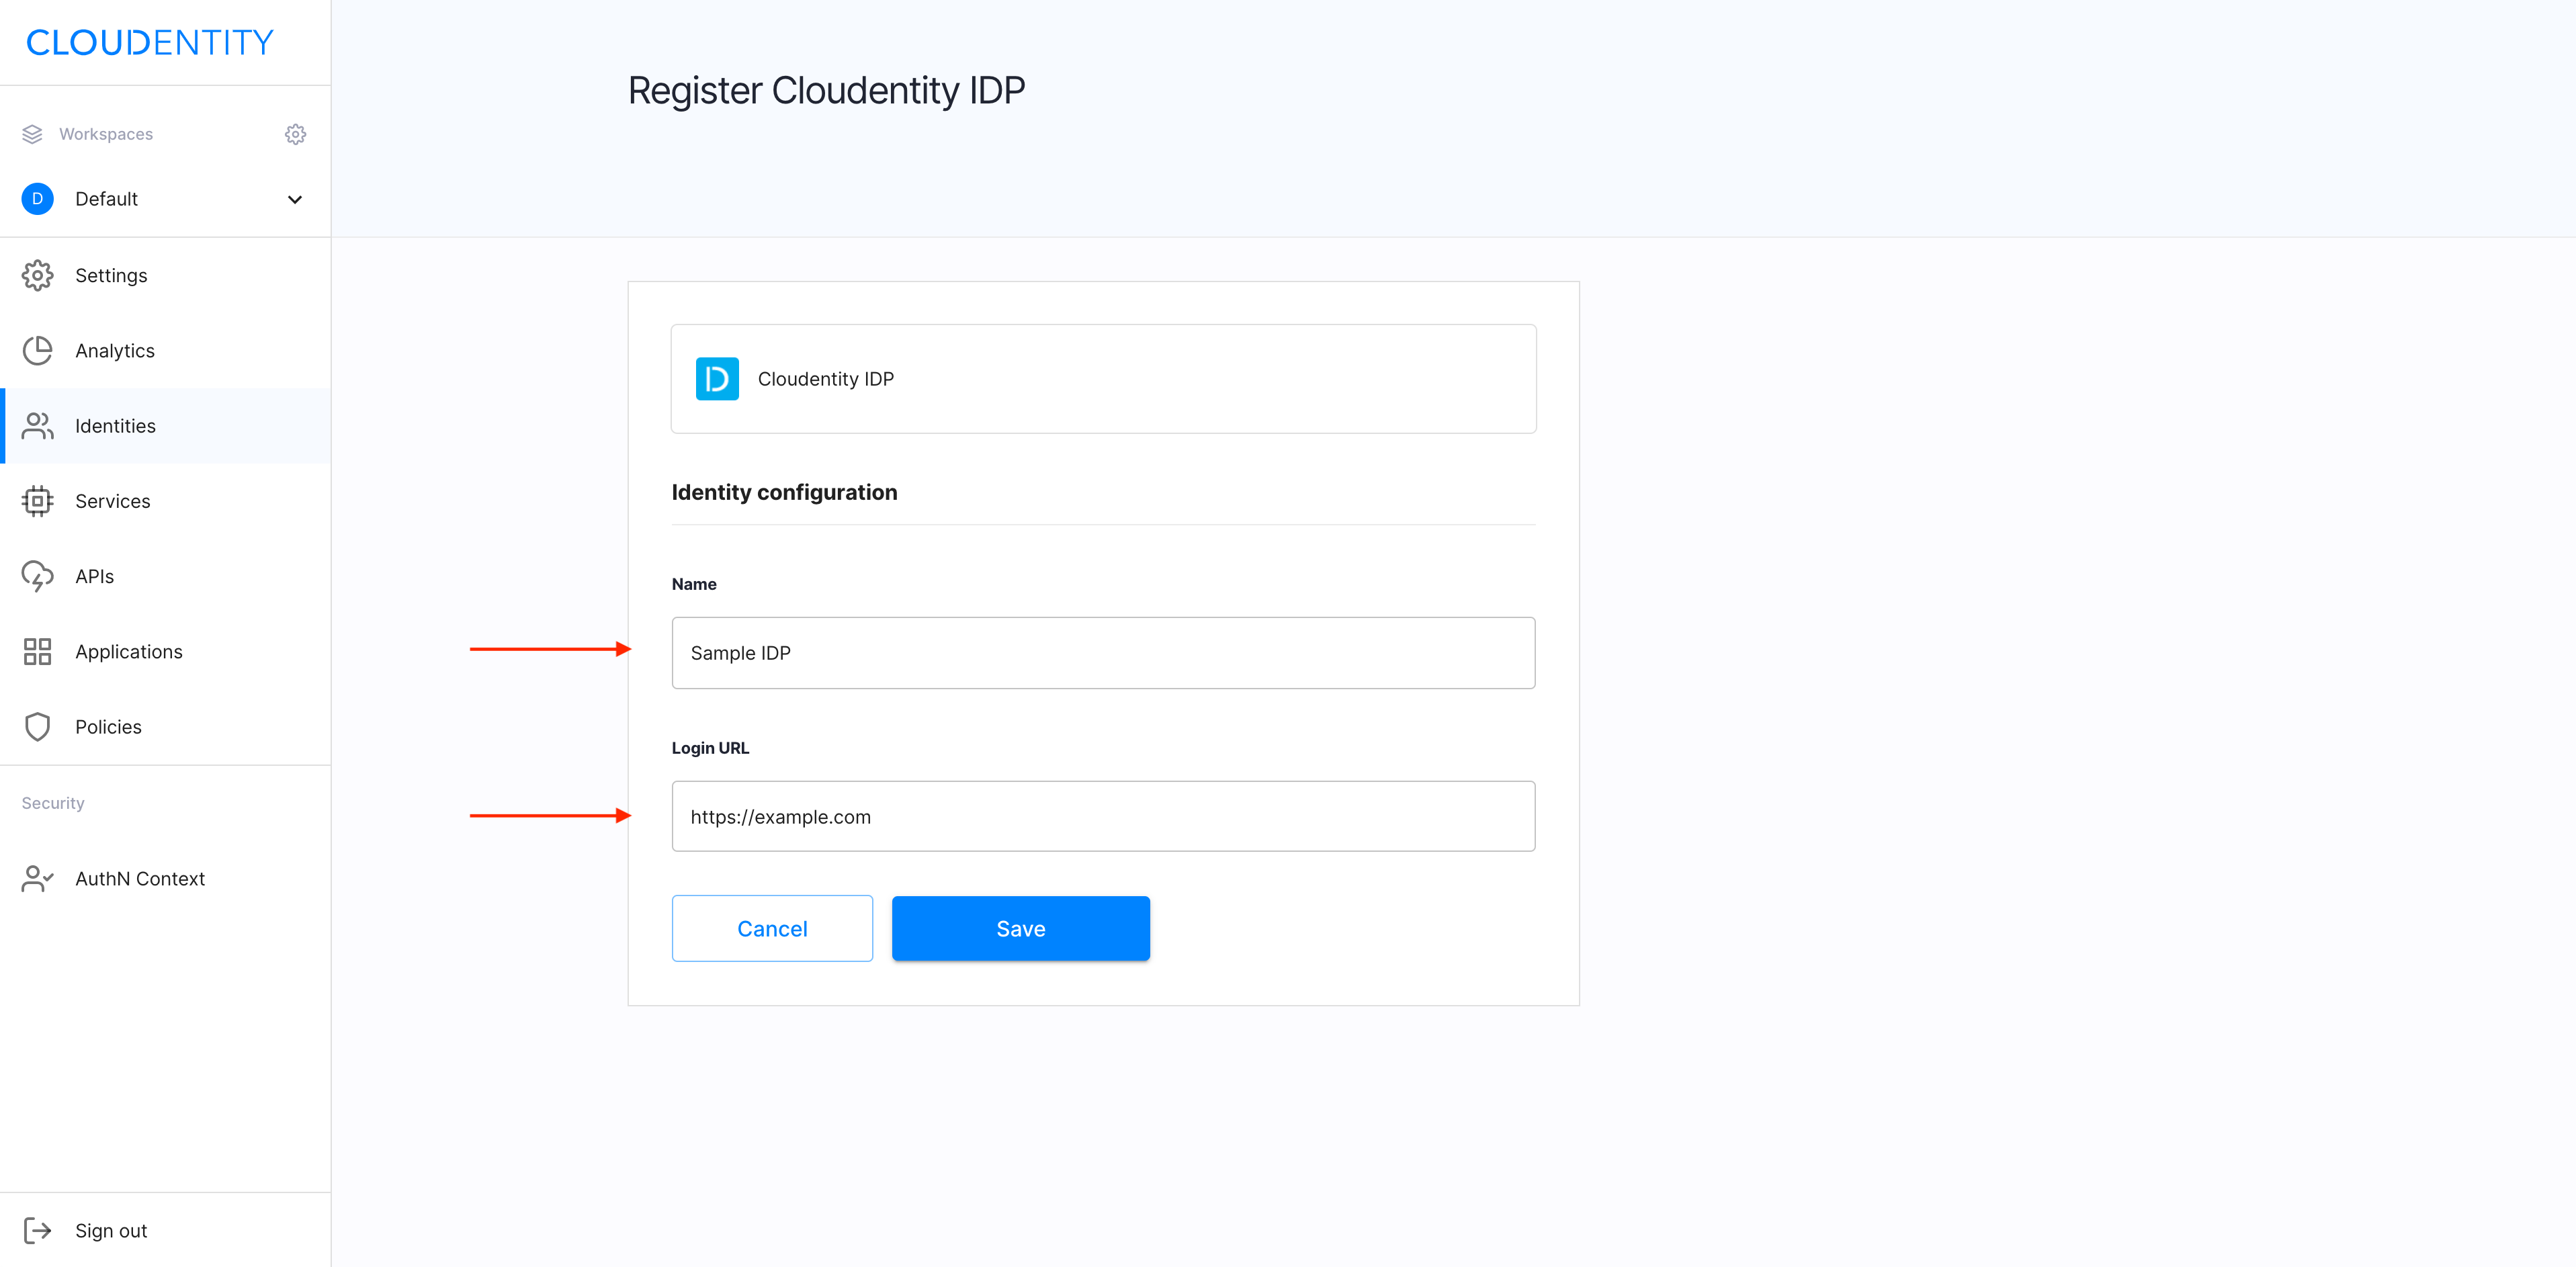
-
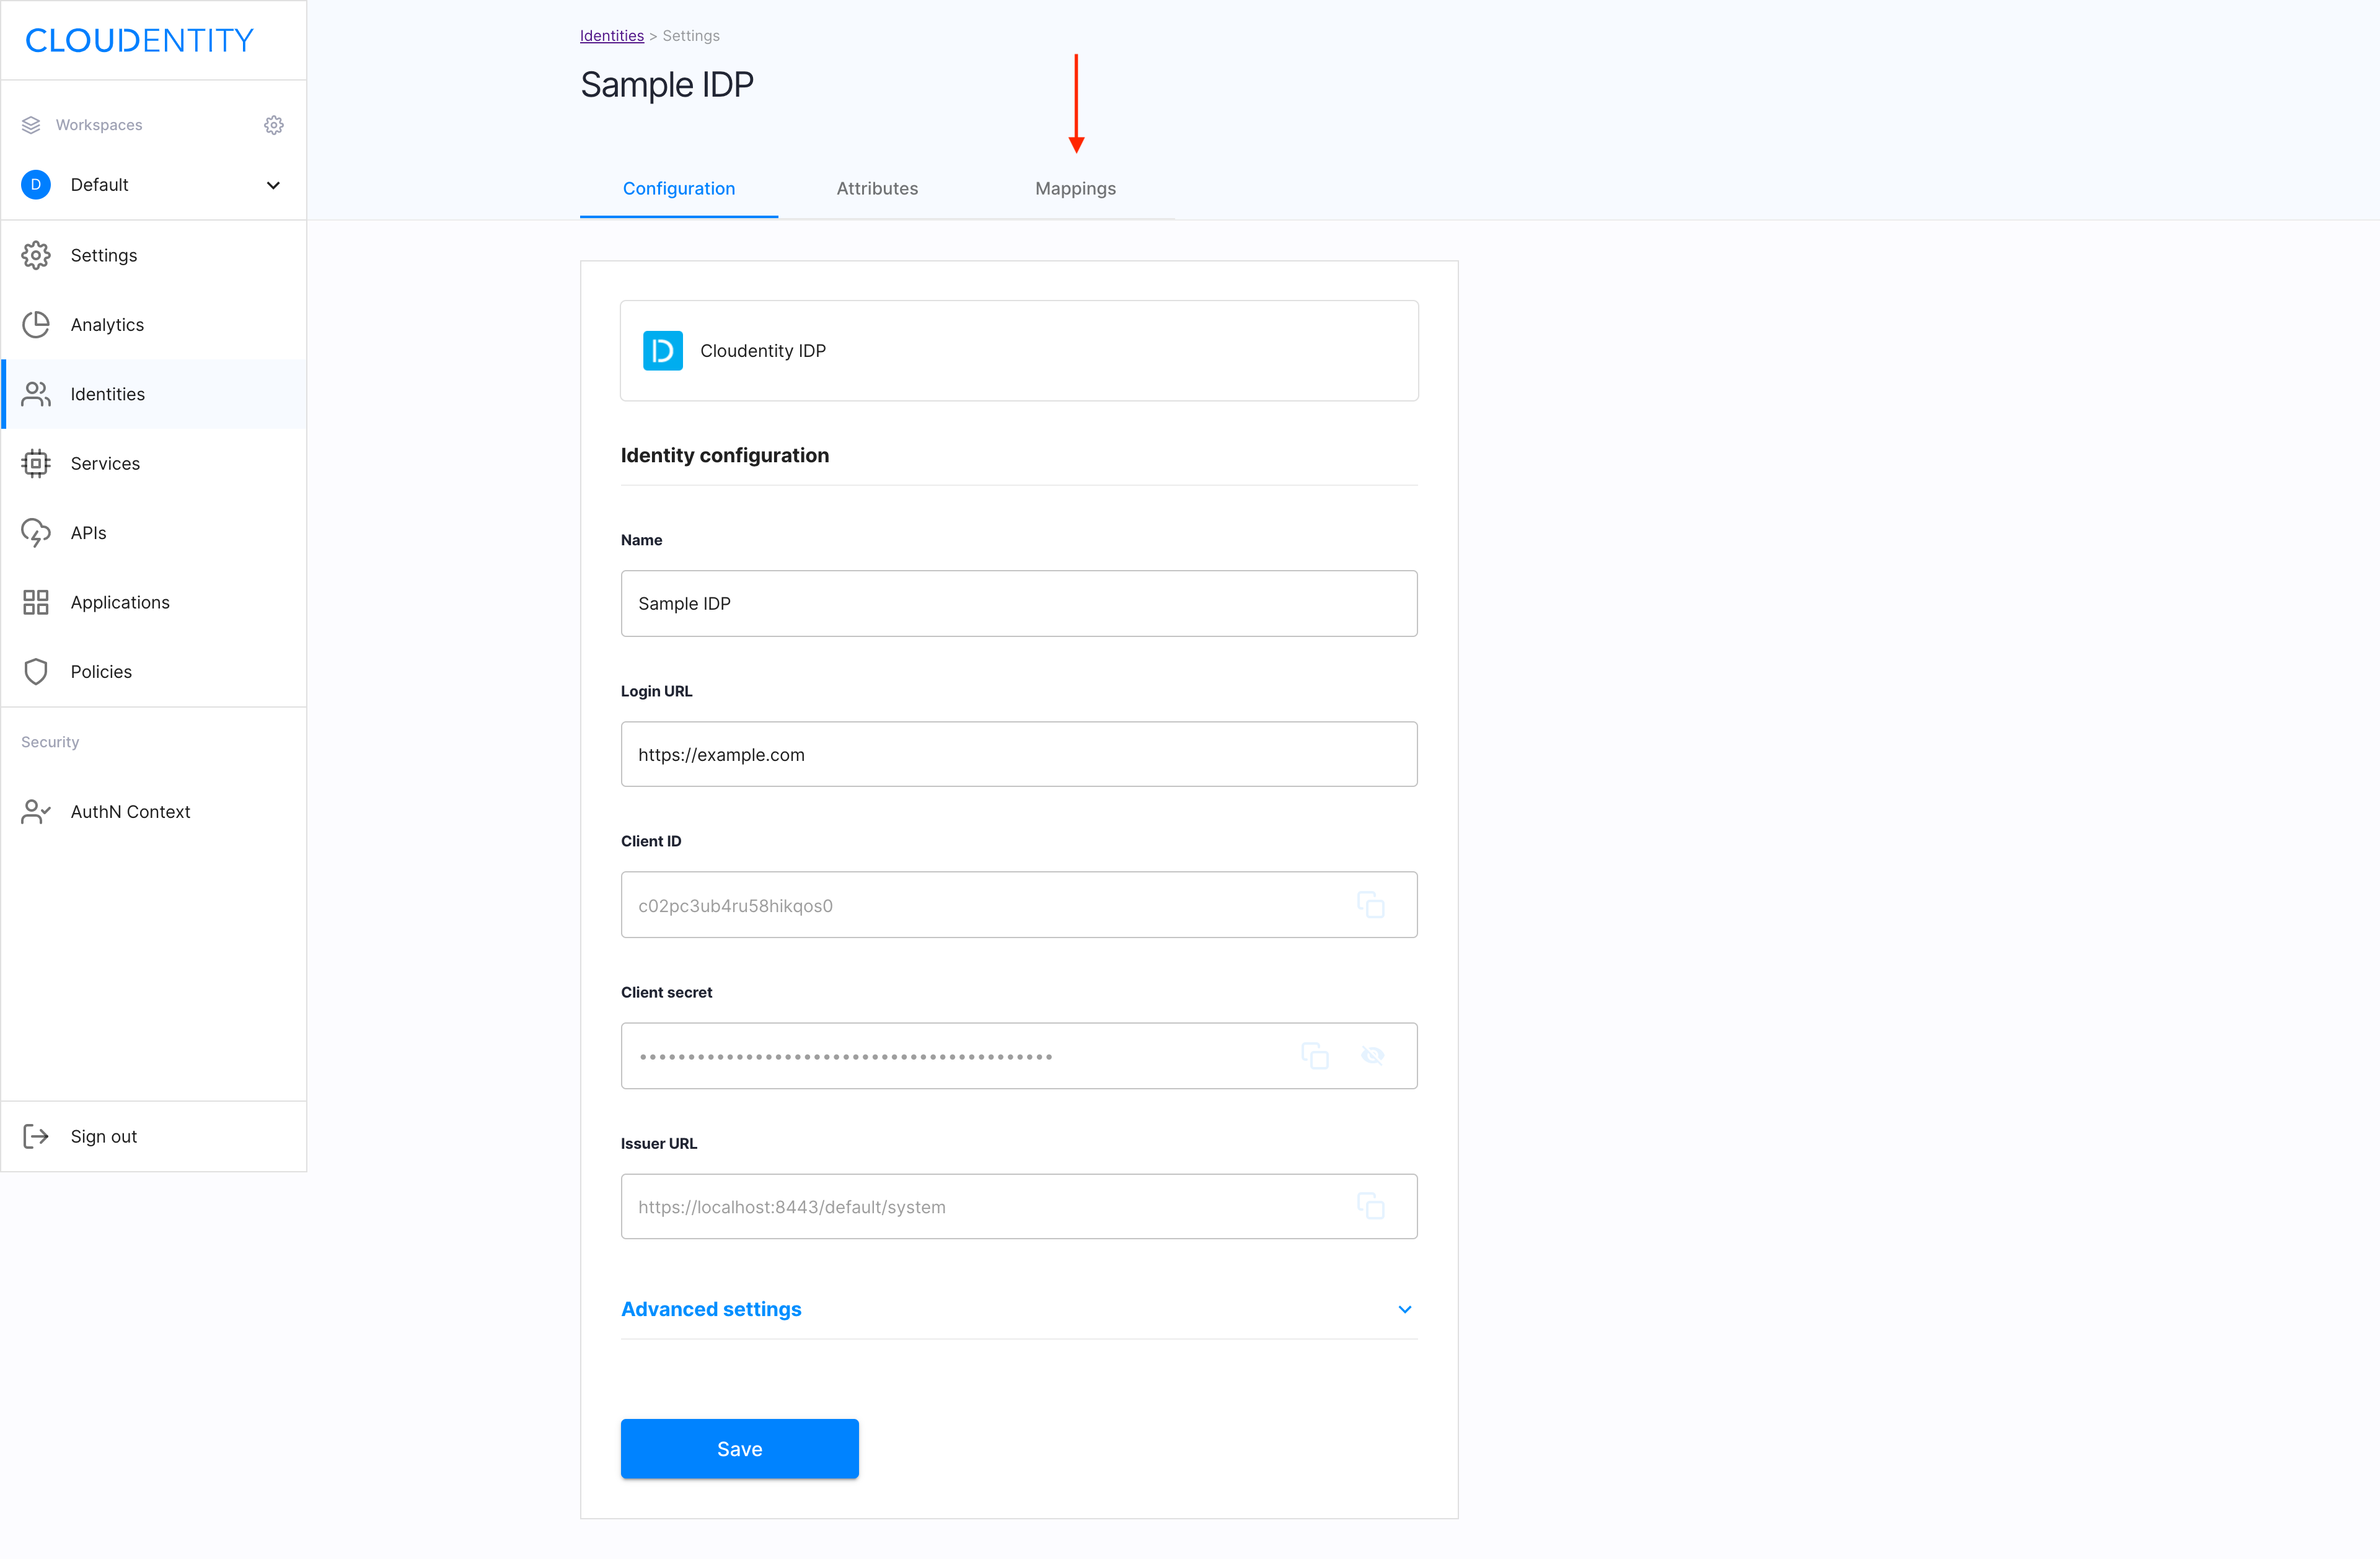
In the Register Cloudentity IDP view, enter Name and Login URL for your new IDP. Next, select Save to proceed.
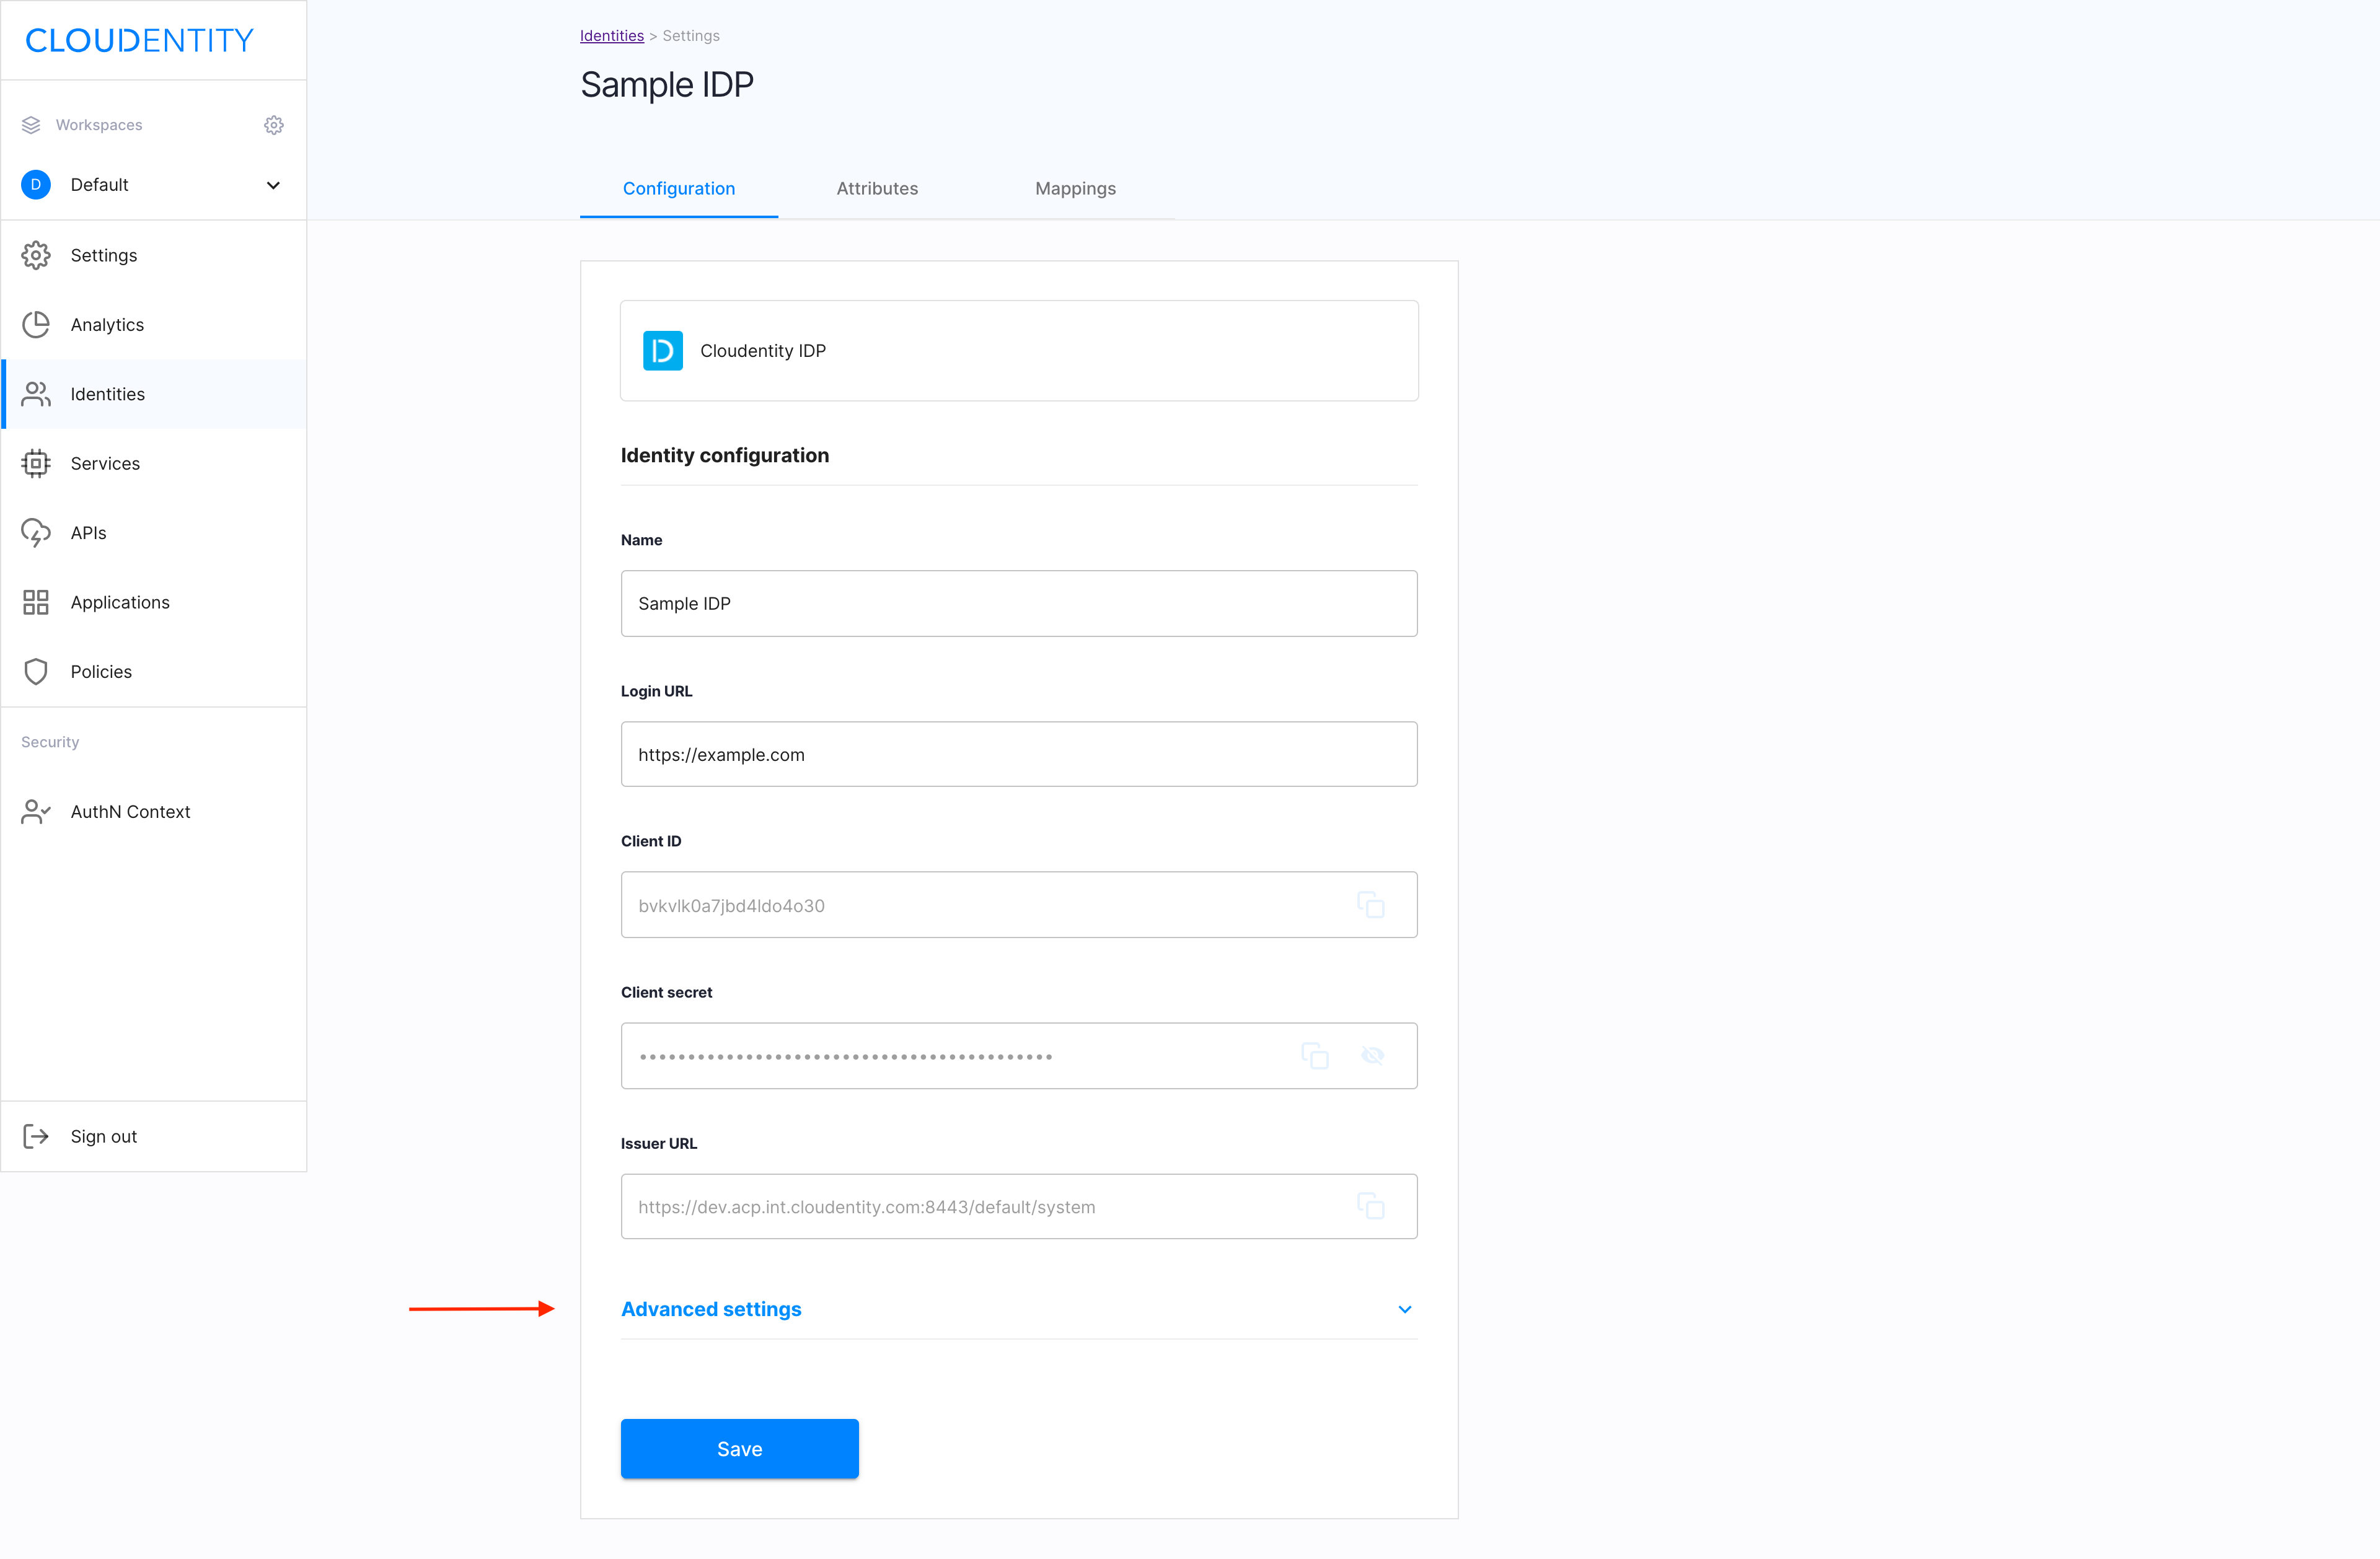
-
In the Configuration view of your new IDP, identify and save Client ID, Client secret, and Issuer URL.
Note
The saved details are required for configuring your identity at your provider’s site.

Advanced settings
-
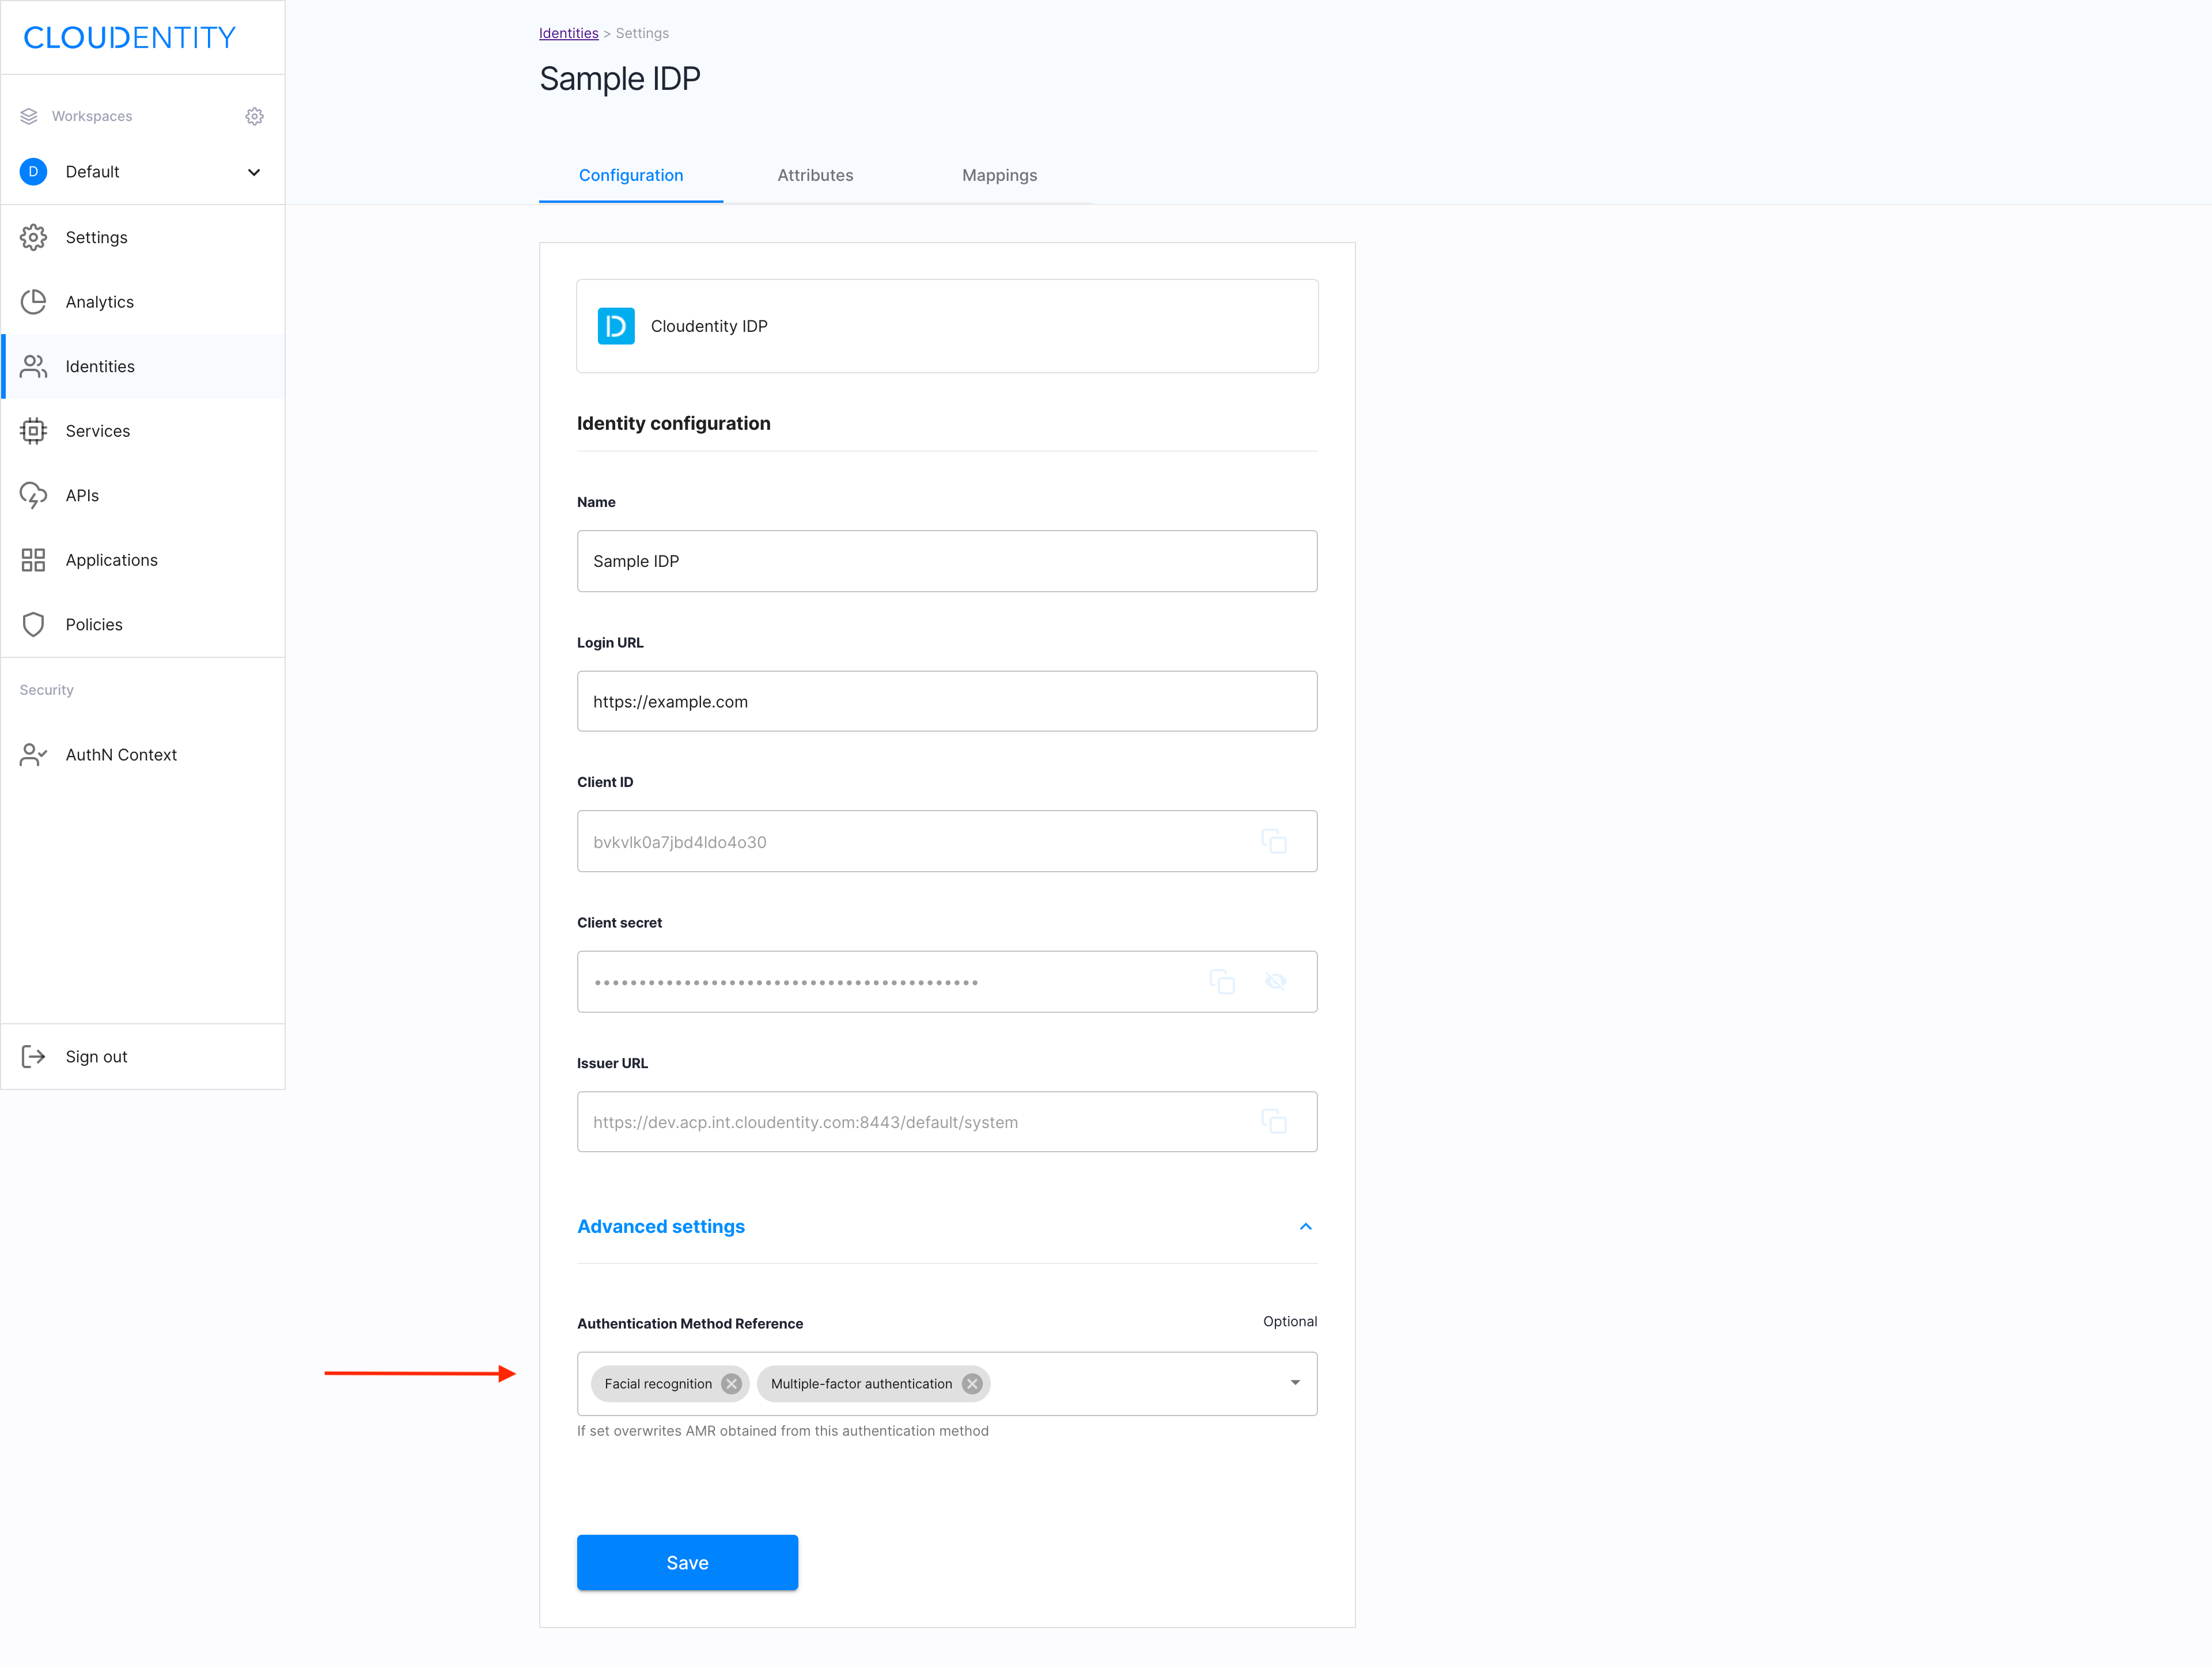
In the Configuration view of your new IDP, select Advanced settings.
-
Select Authentication Method Reference from the drop-down menu and click Save to confirm your changes.
Result
Your new IDP is ready and available in the Identities view of the ACP administrator portal.
Enable the stateful authorization
This step is optional.
To have the user’s data cached in ACP and avoid re-authenticating within one use’s session, follow the instruction in Enable the stateful authZ in ACP.
Attributes
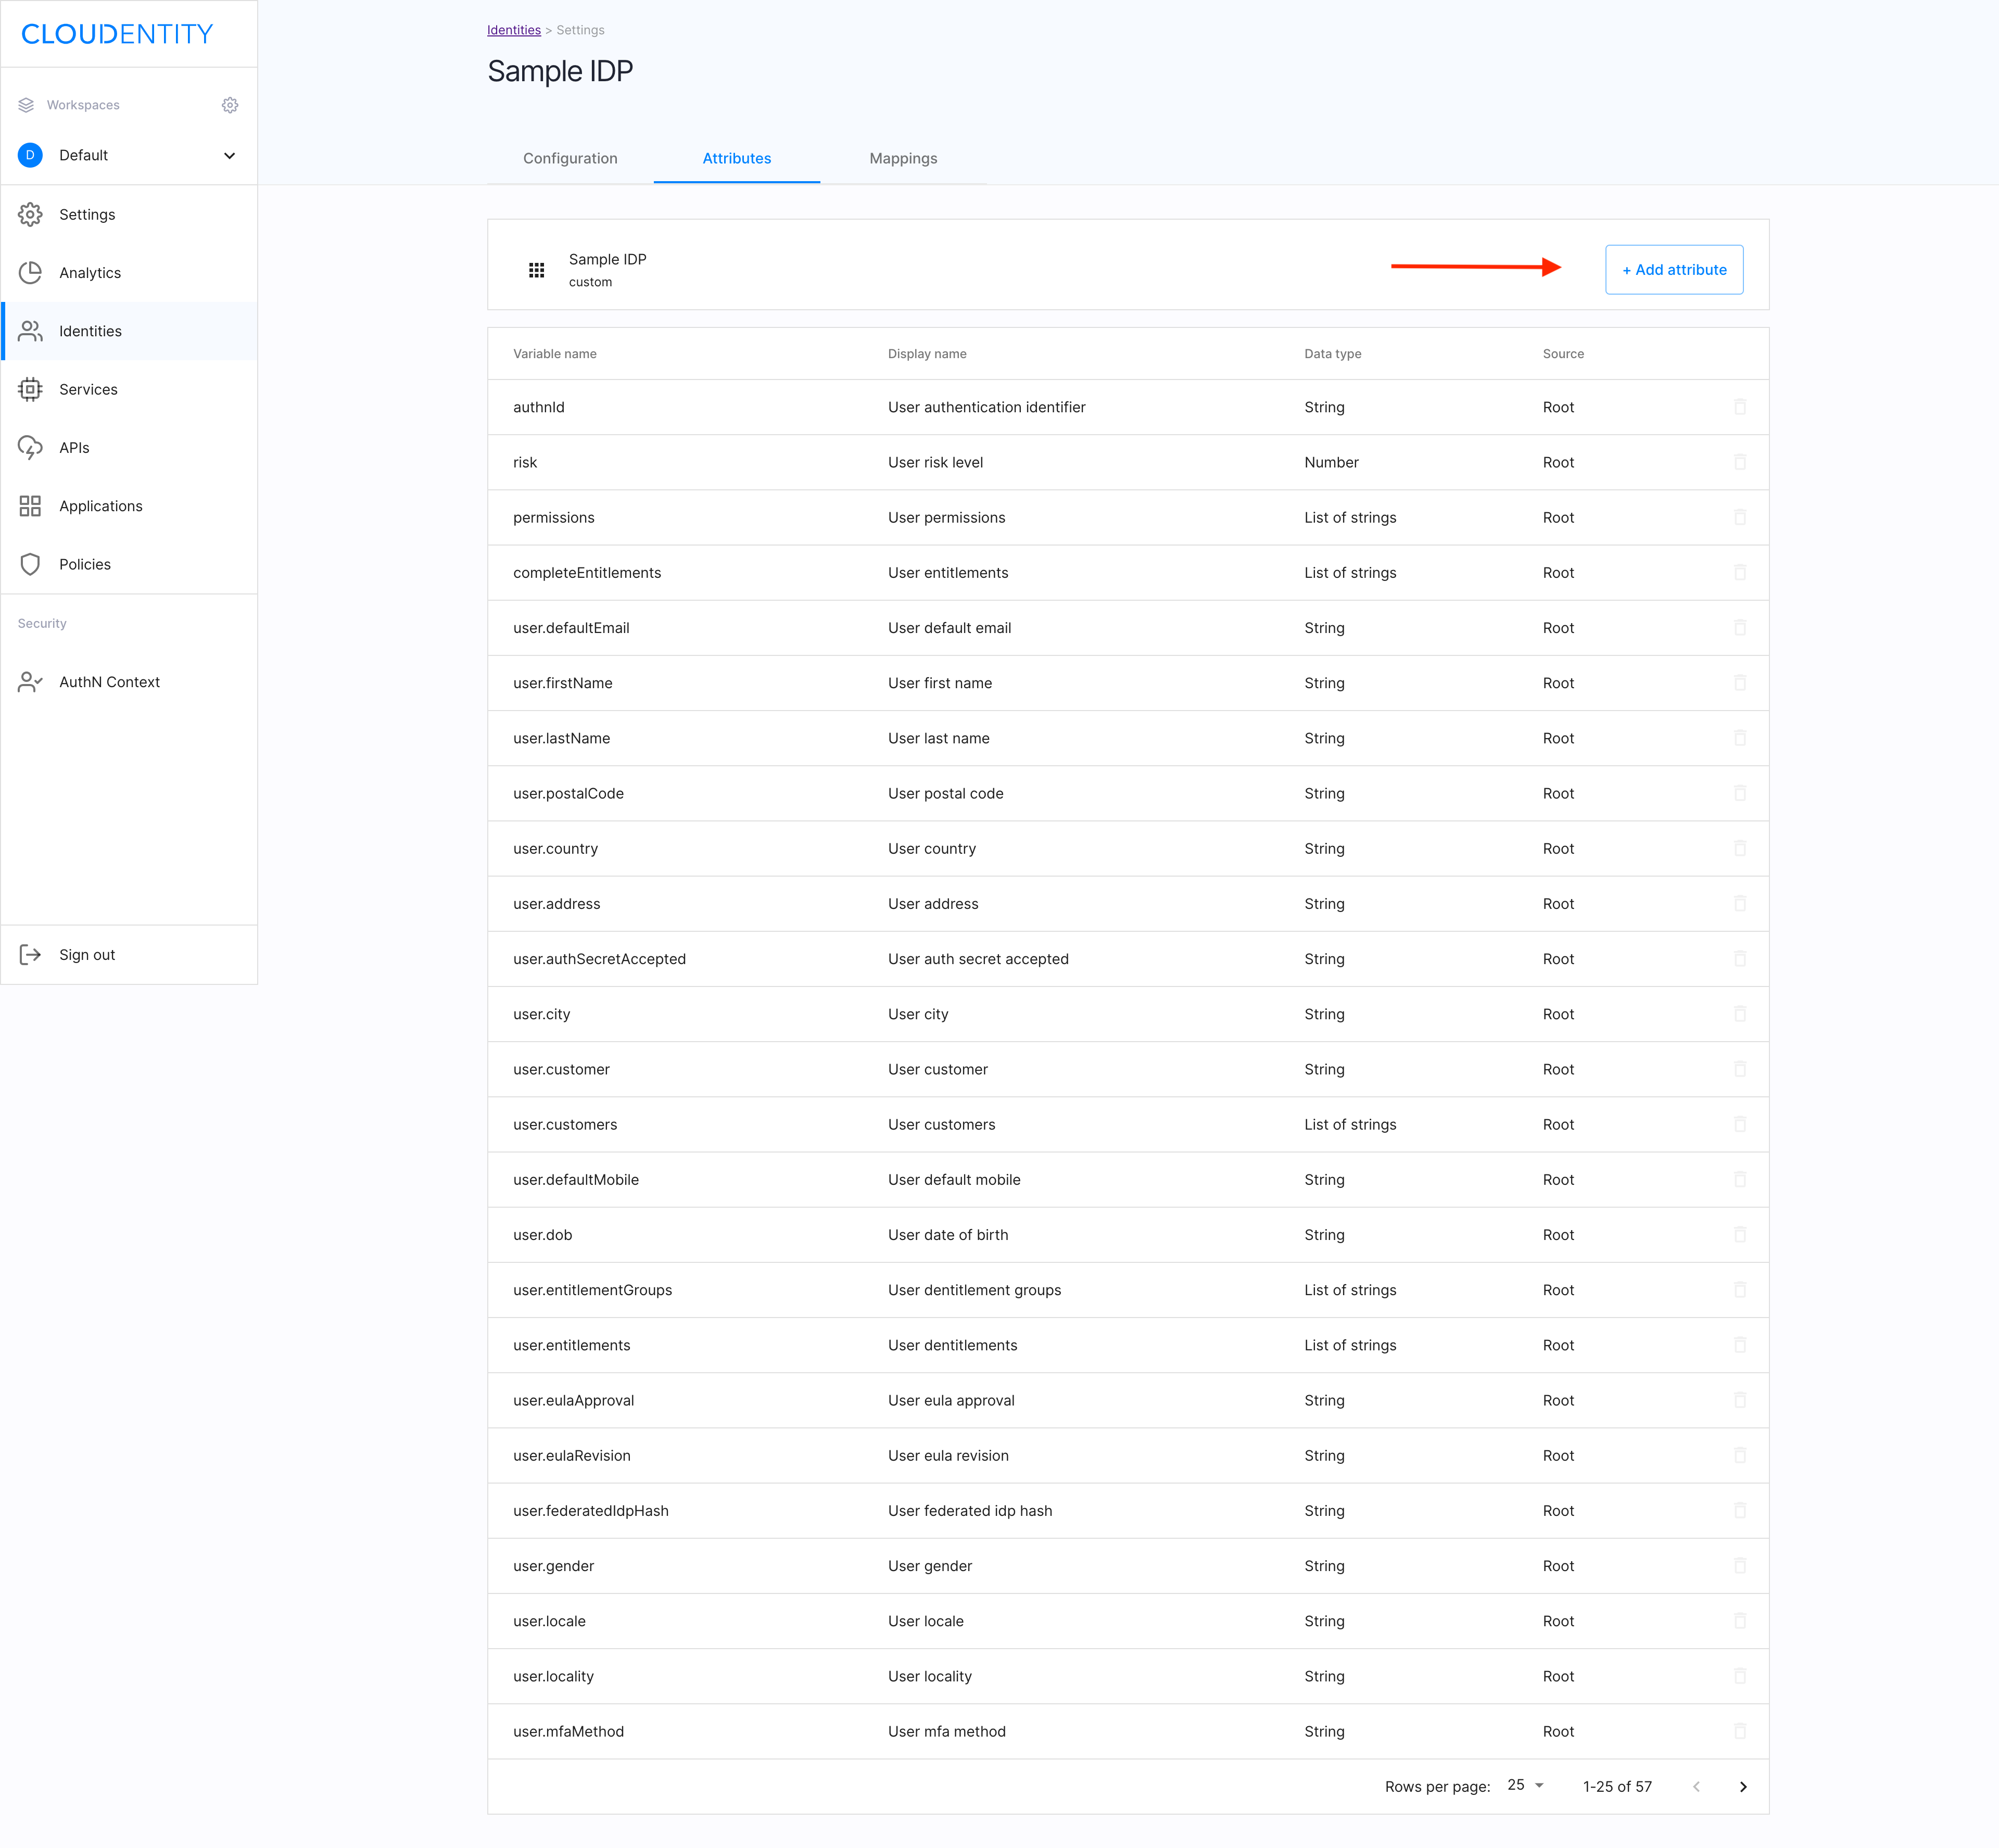
In the ACP portal, you can preview and/or configure the list of attributes available for the user who logs in with the Cloudentity IDP in the Attributes view of of your Cloudentity IDP.
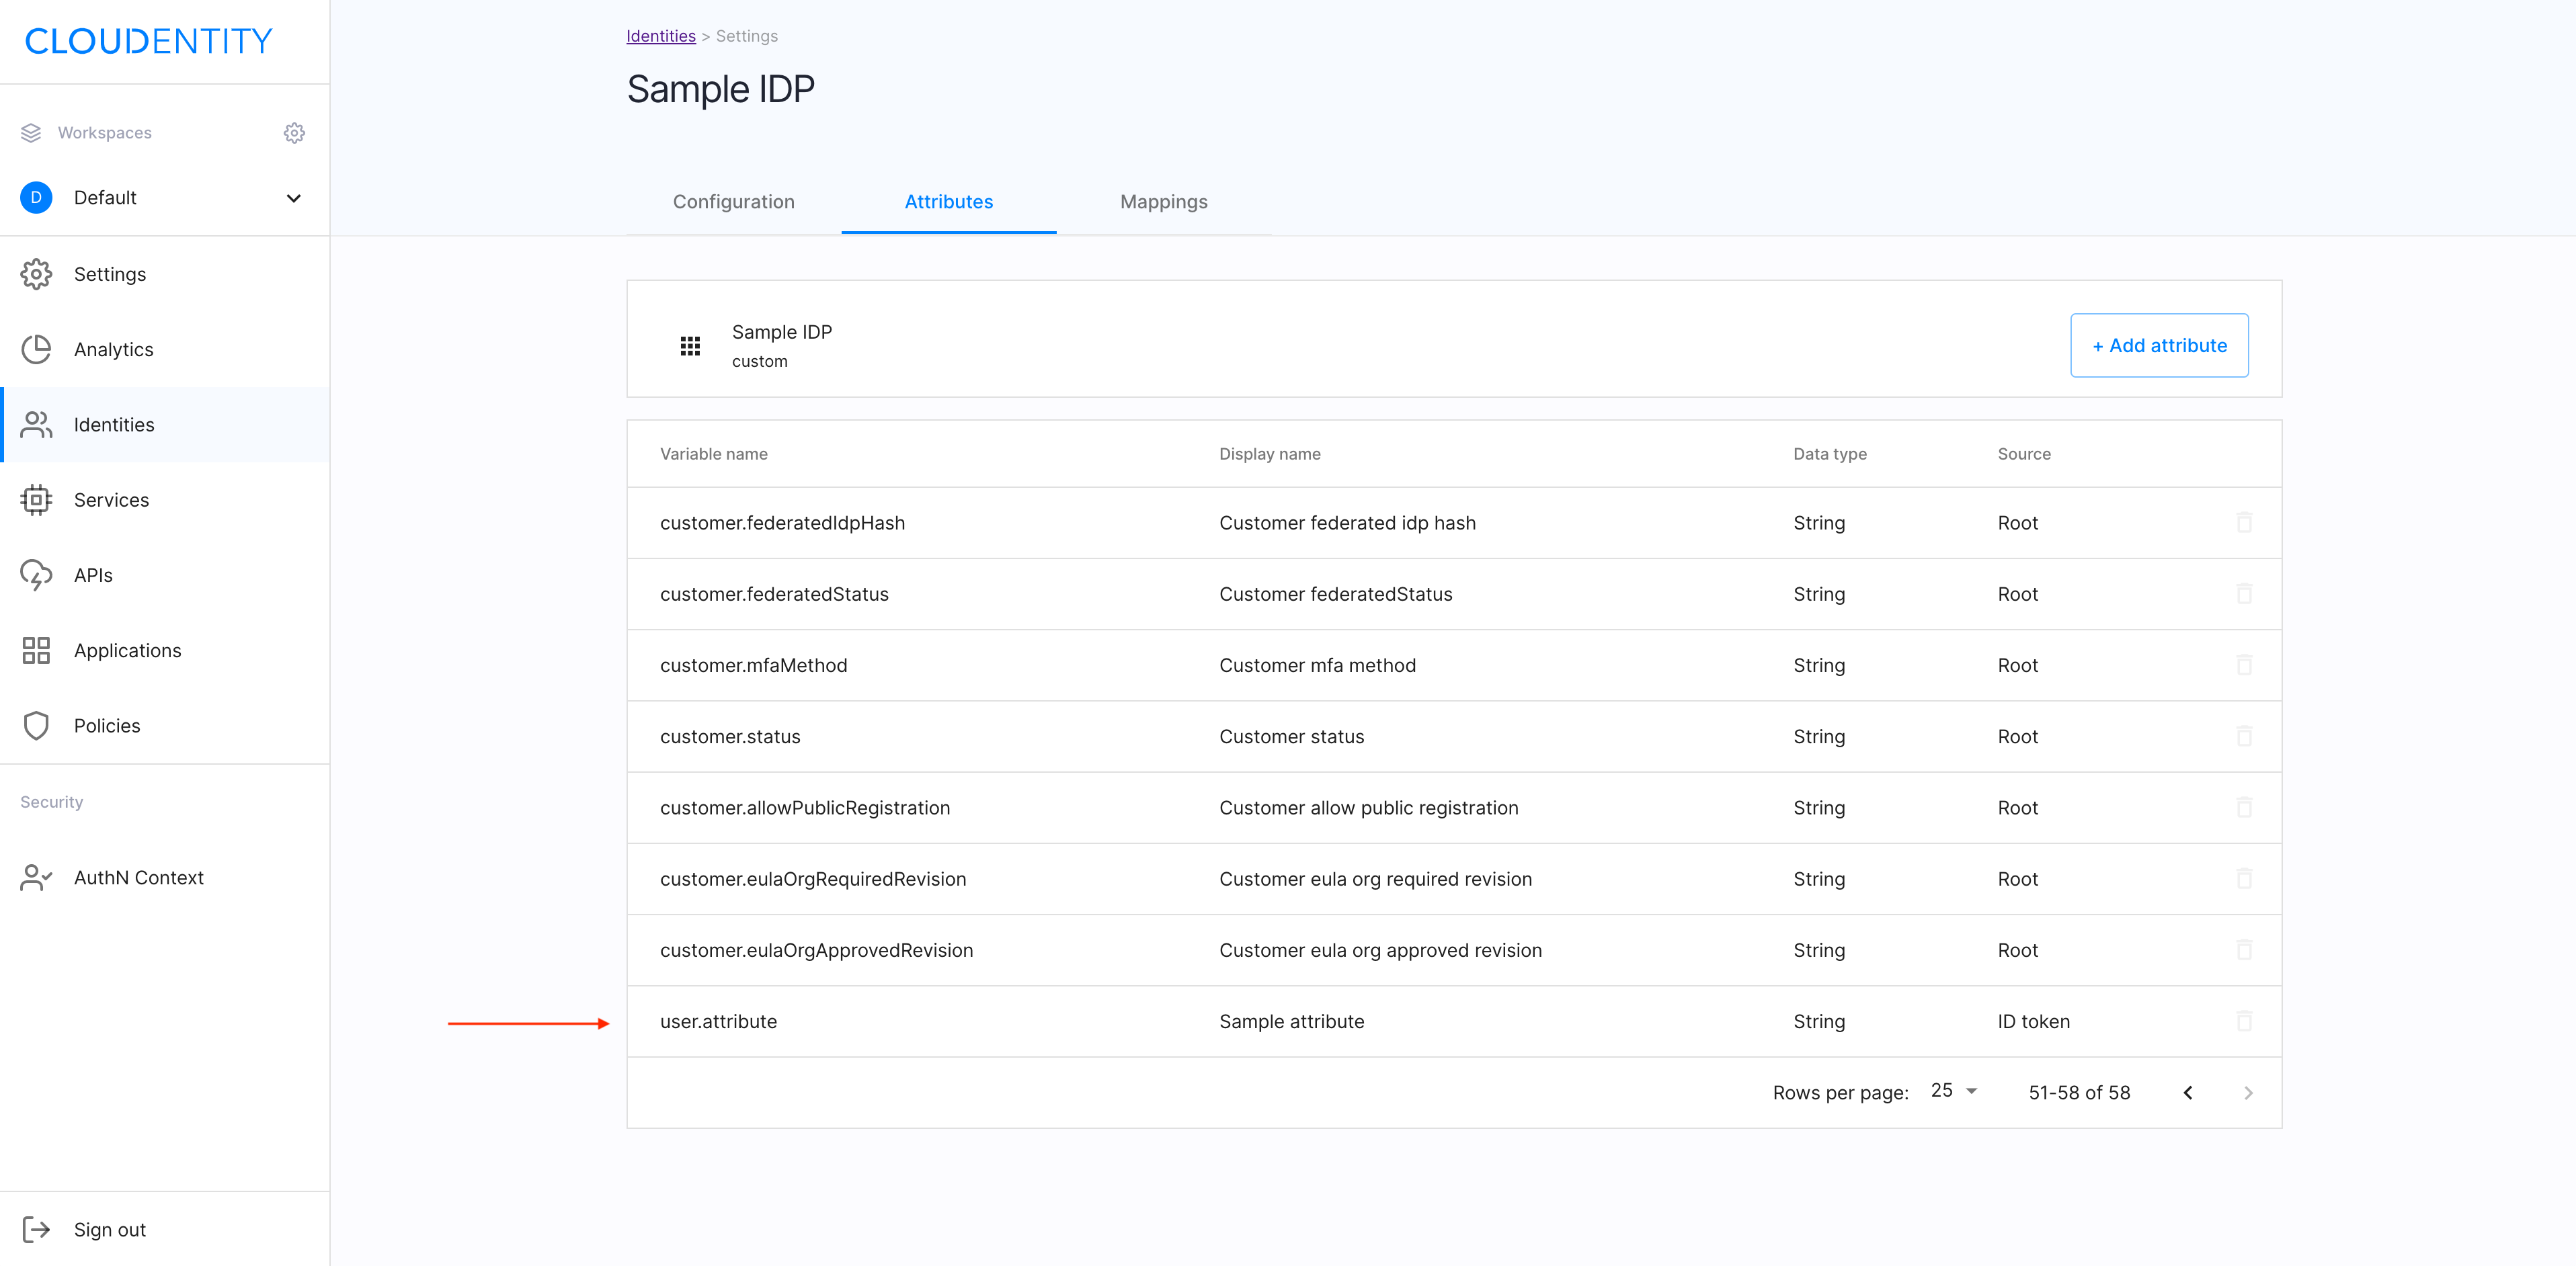
Check the attributes
Navigate to the Attributes view of your Cloudentity IDP.

Result
You can see the predefined list of attributes for the Cloudentity IDP user.
Add an attribute
-
Select +Add attribute in the Attributes view.
-
In the Add attribute pop-out window, provide details on the attribute: its source, display name, variable name, datatype. Select Next to proceed.
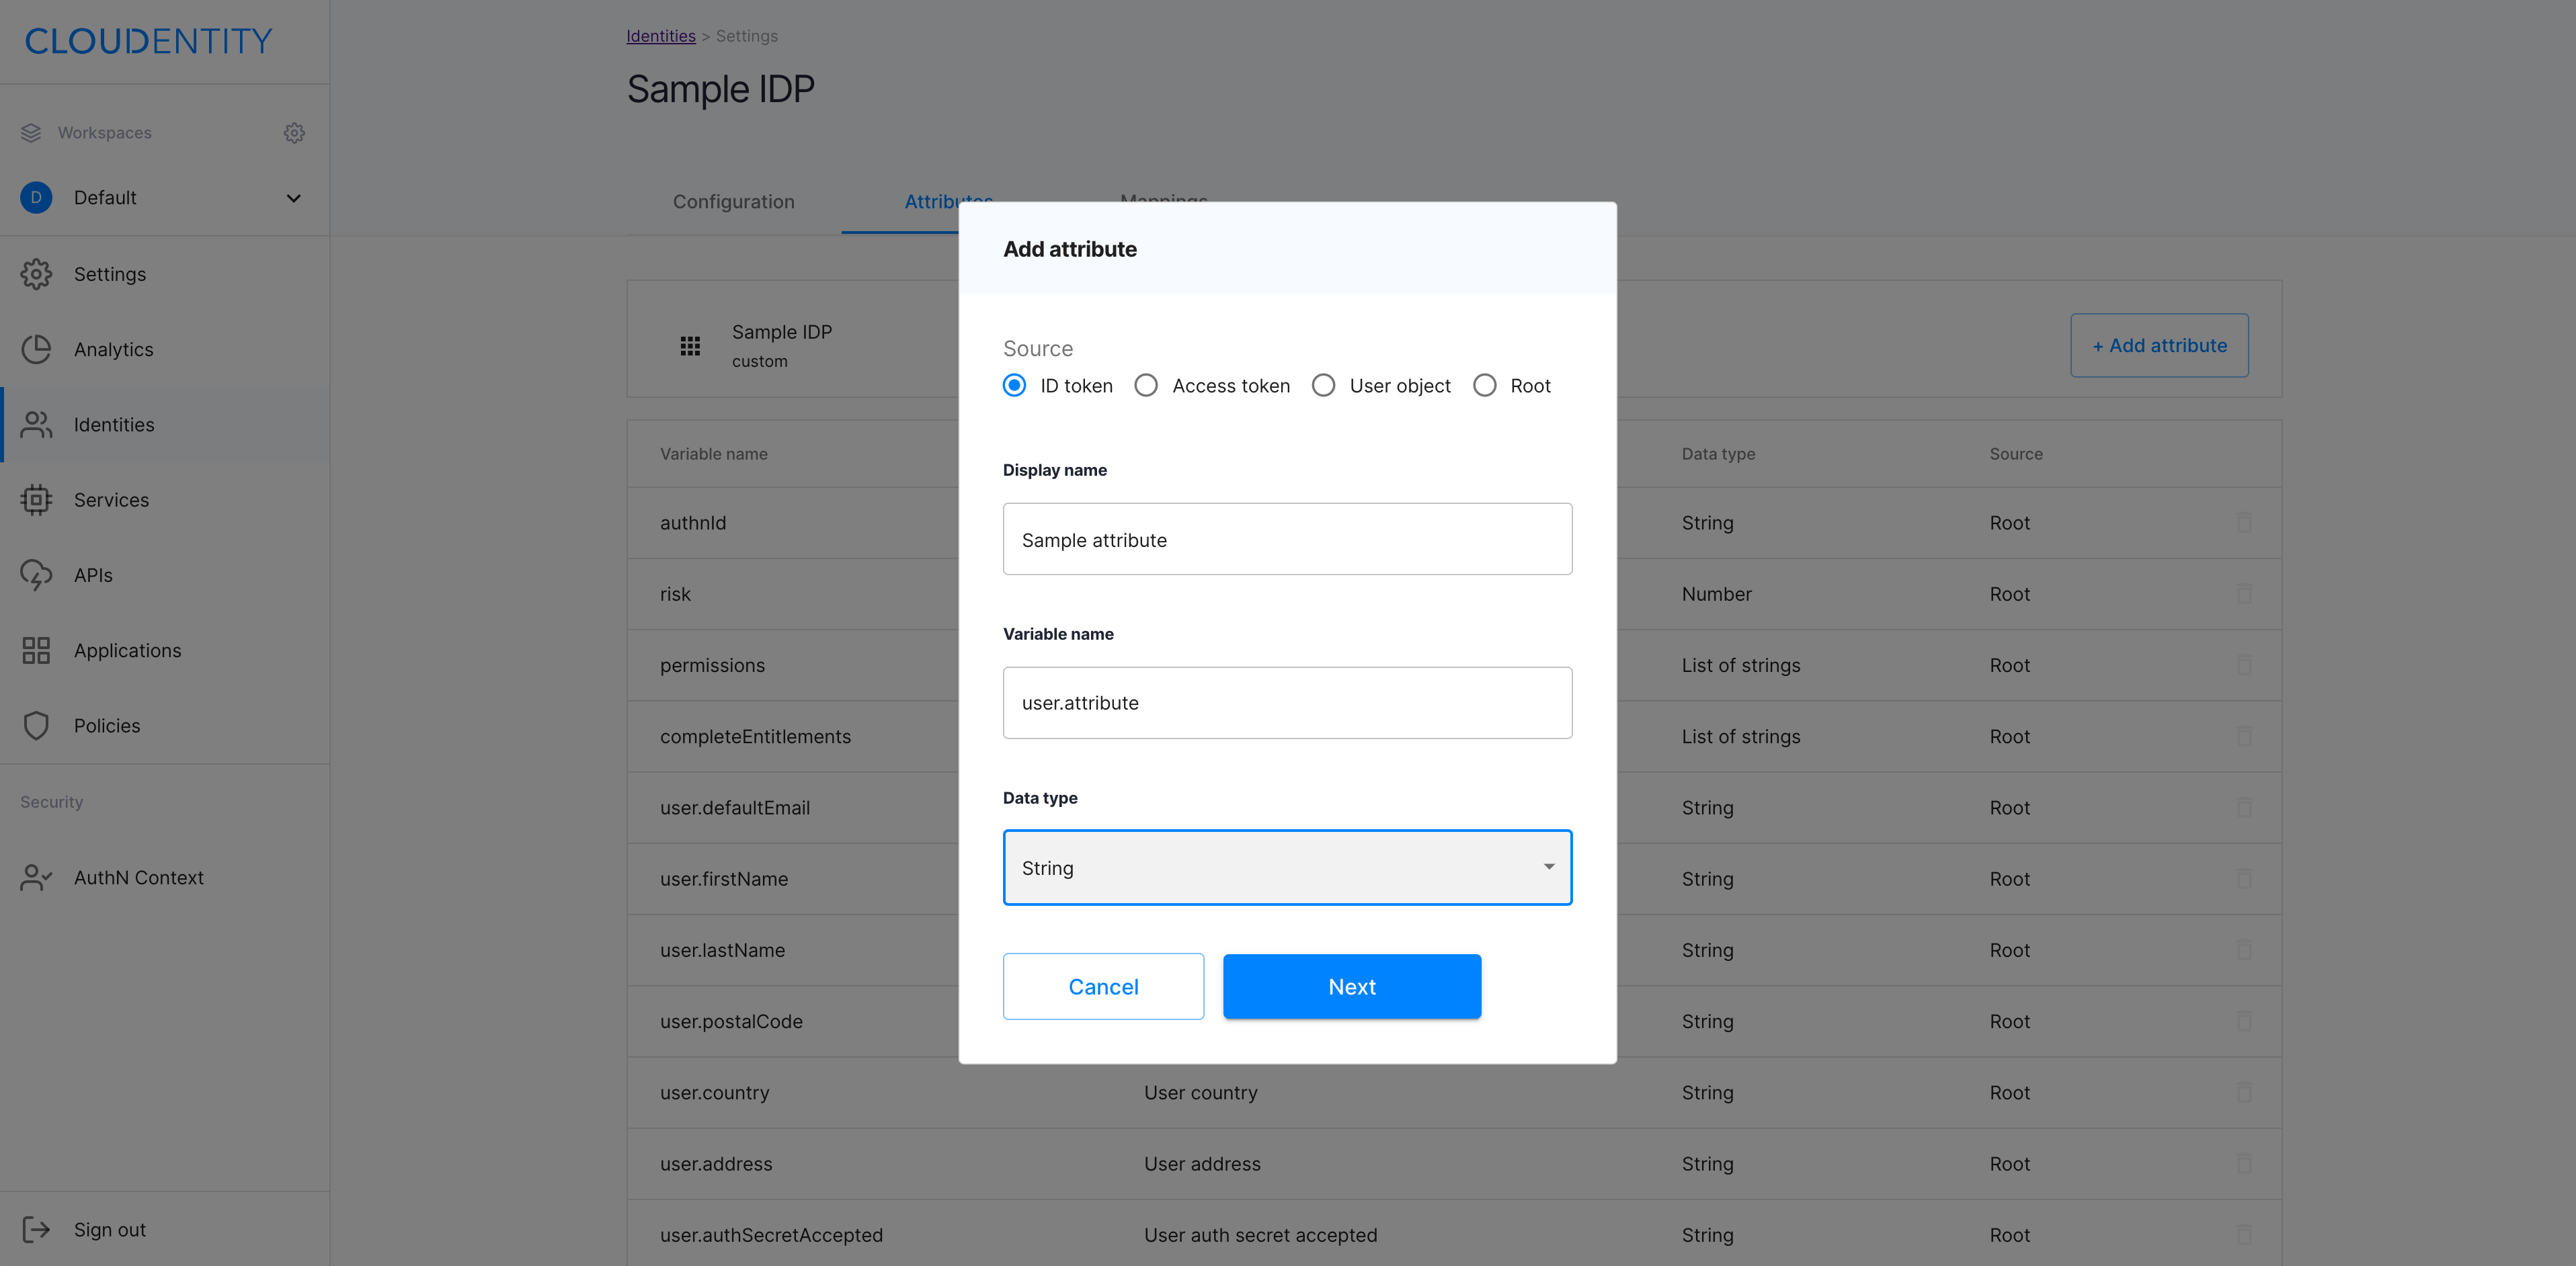
Result
Your new attribute has been added to the list.
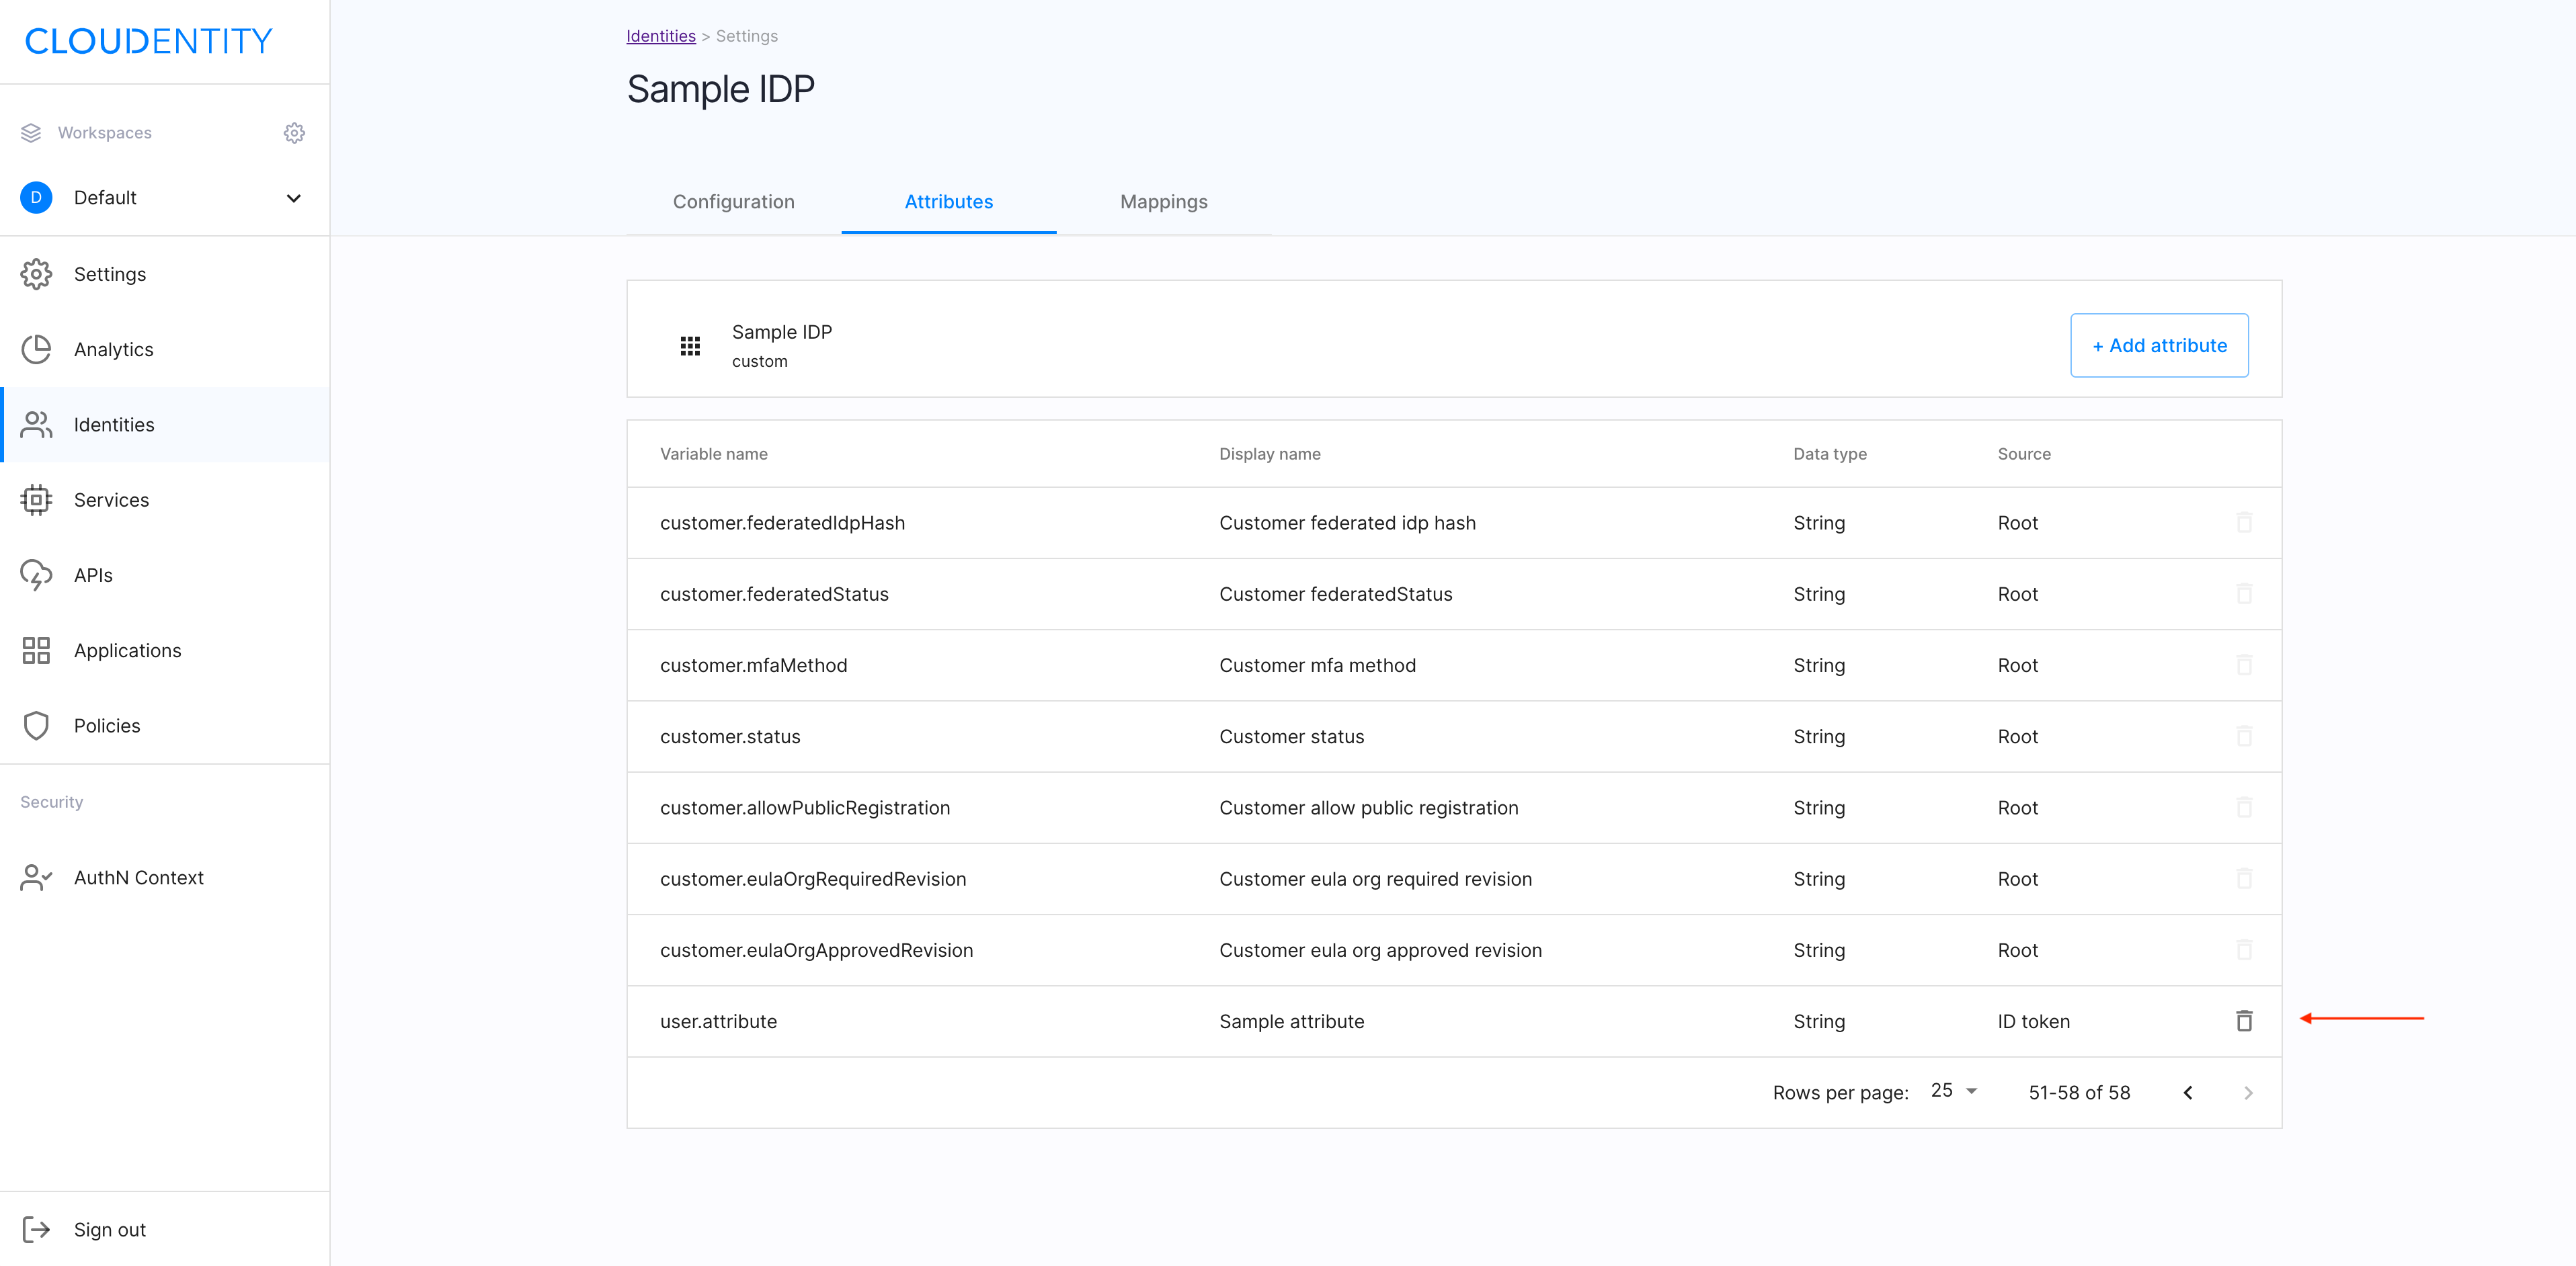
Remove an attribute
-
In the Attributes view, select the trash-can icon next to the superfluous attribute to be removed.
-
In the Delete attribute pop-out window, confirm your intent by selecting Yes, delete.
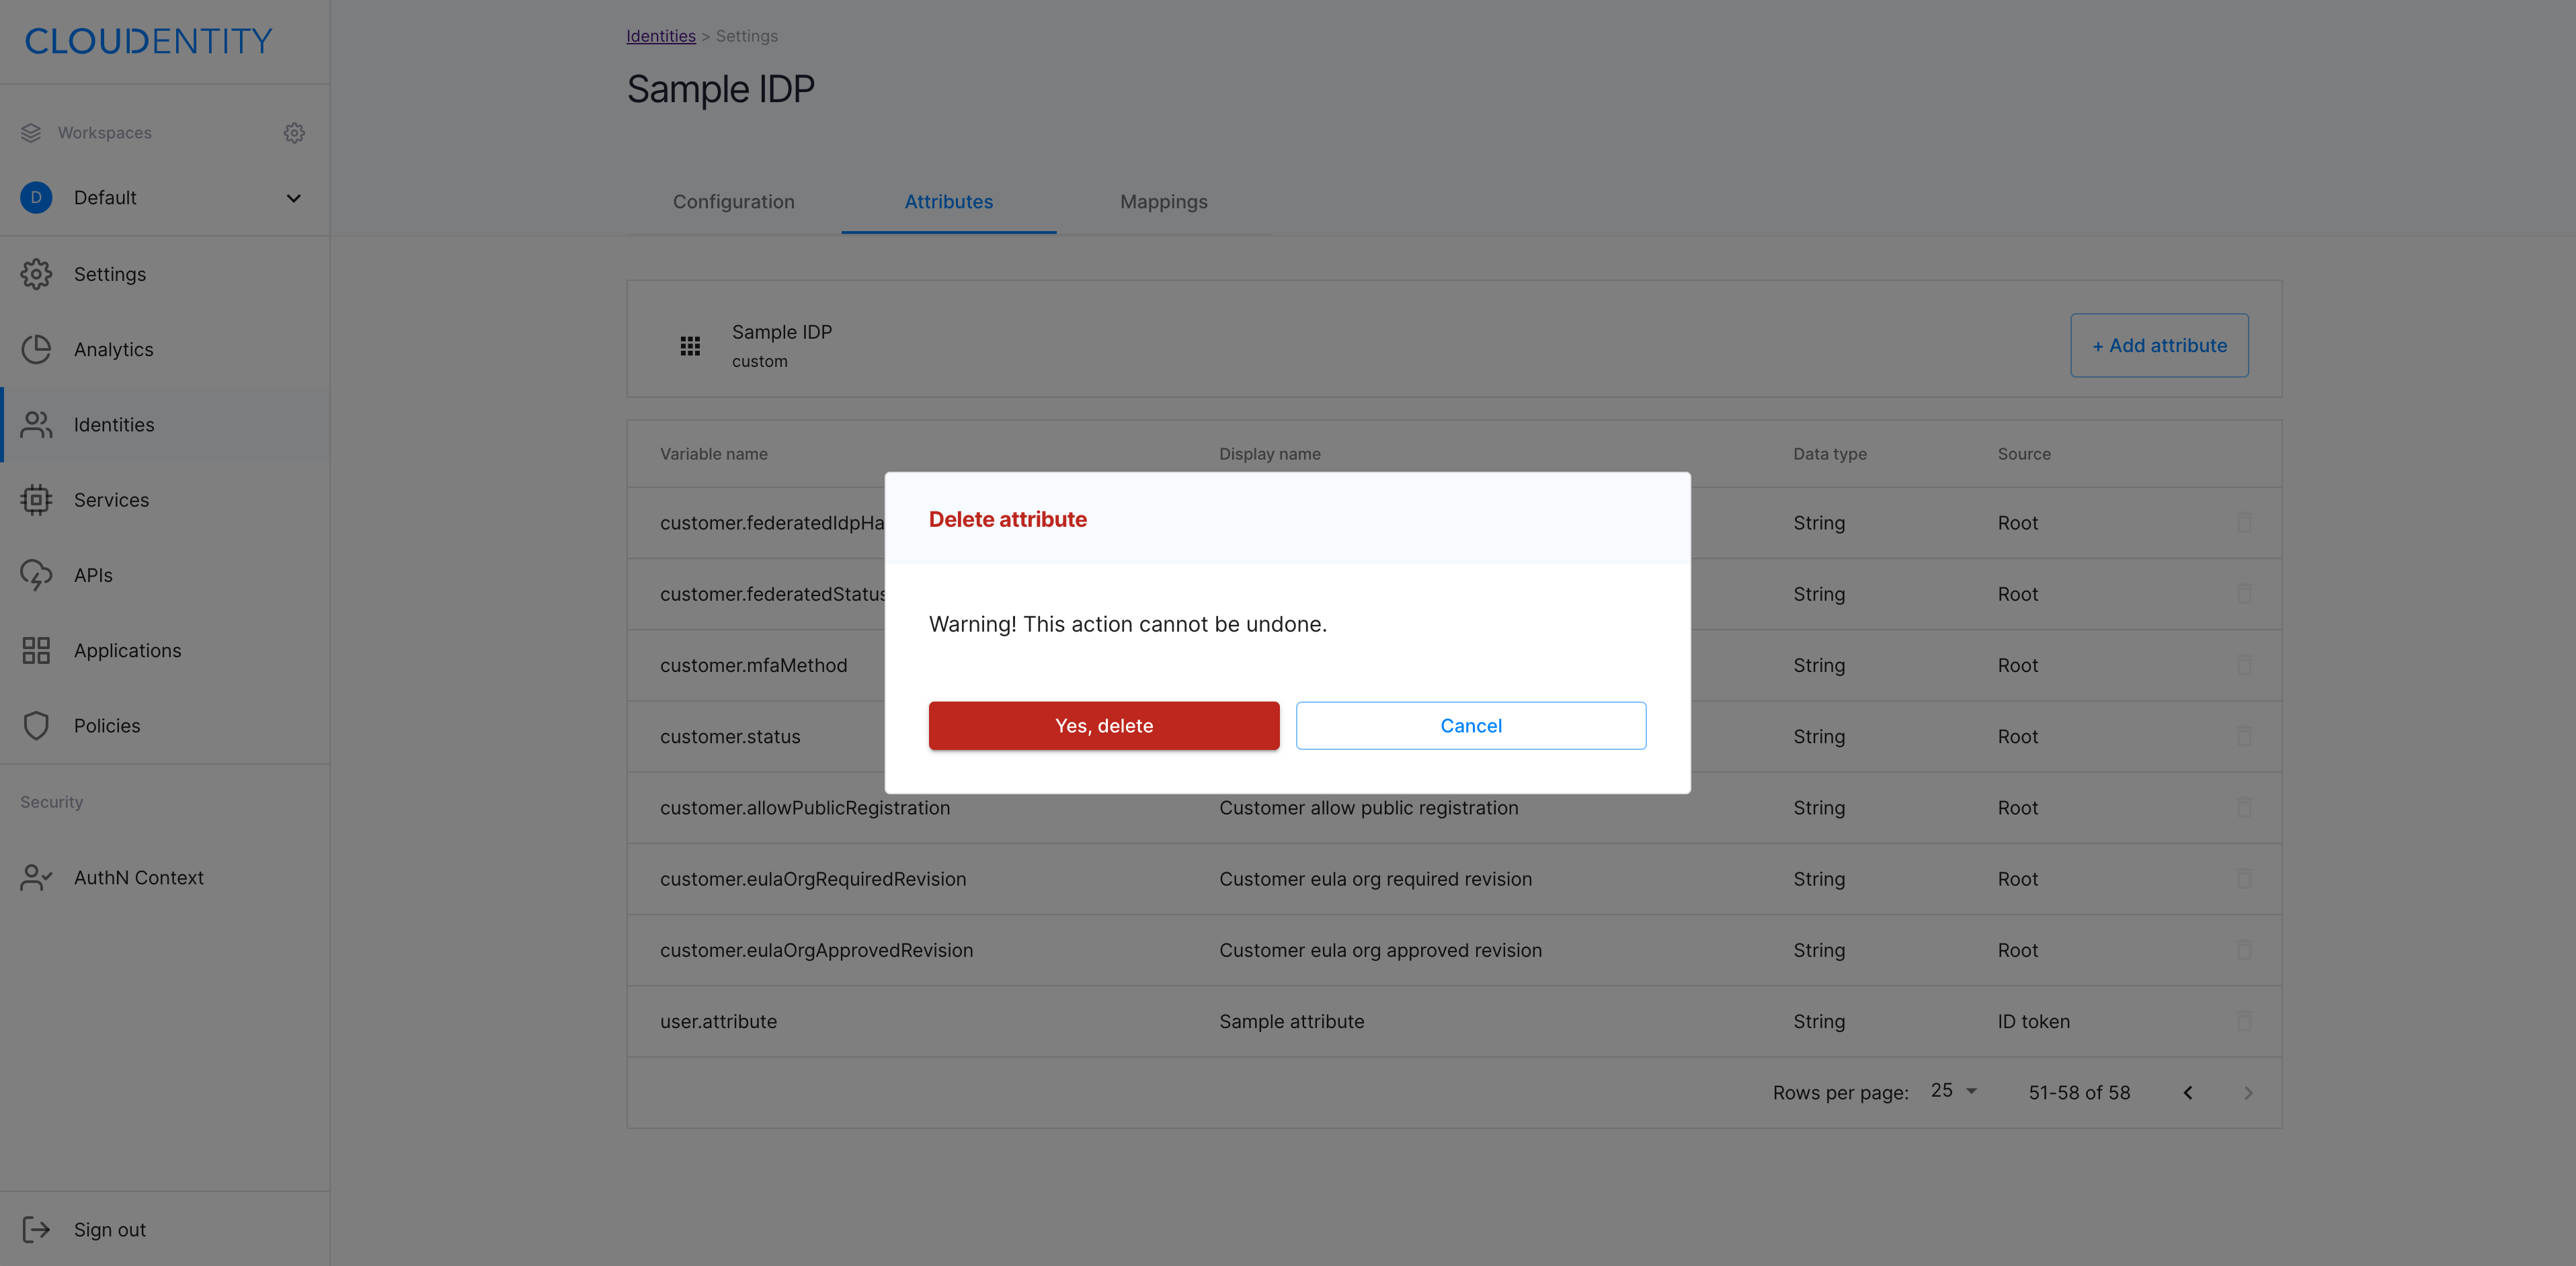
Result
The attribute has been removed from the attributes list for your Cloudentity IDP.
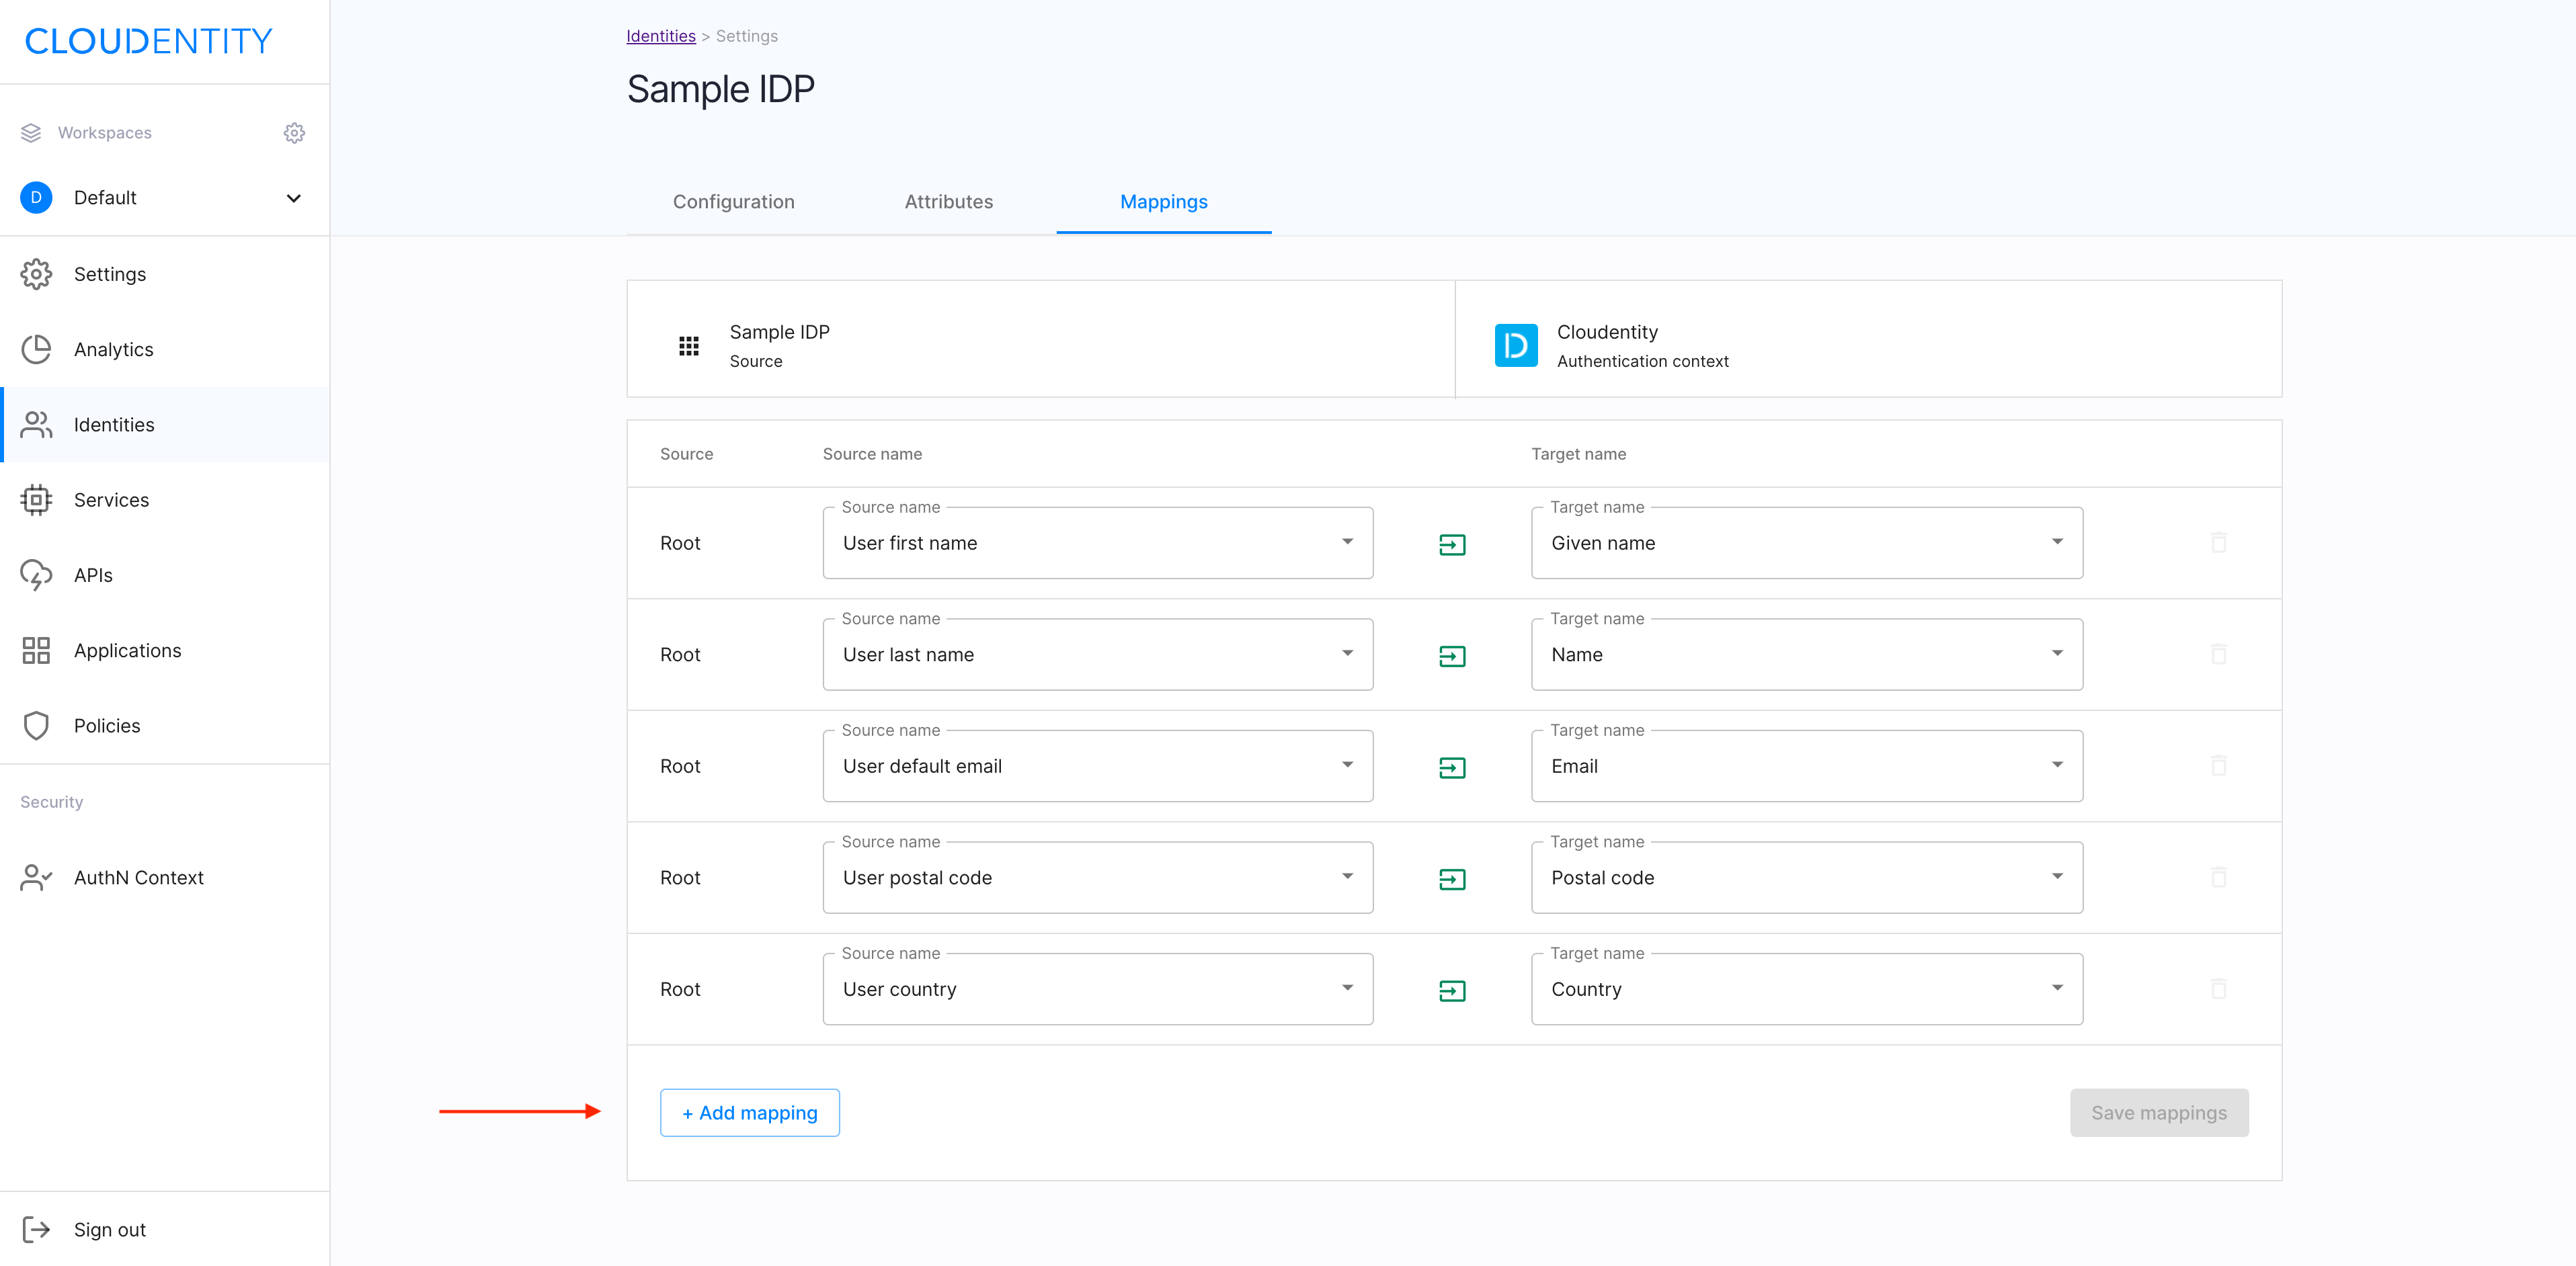
Mappings
In the Mappings view of your Cloudentity IDP, you can preview and/or configure the list of mapped attributes available for the user who logs in with the Cloudentity IDP.
Note
There are additional attributes that can be mapped to the authentication context: Check the the Attributes view of of your Cloudentity IDP and section Attributes.
Read more
For more information on the authentication context, see Configuring authentication context attributes.
In the Mappings view, you can map attributes to the authentication context. When mapped, they can be used for building policies.
Read more
For the information on how to use attributes for creating policies, see Creating a policy.
Check the mappings
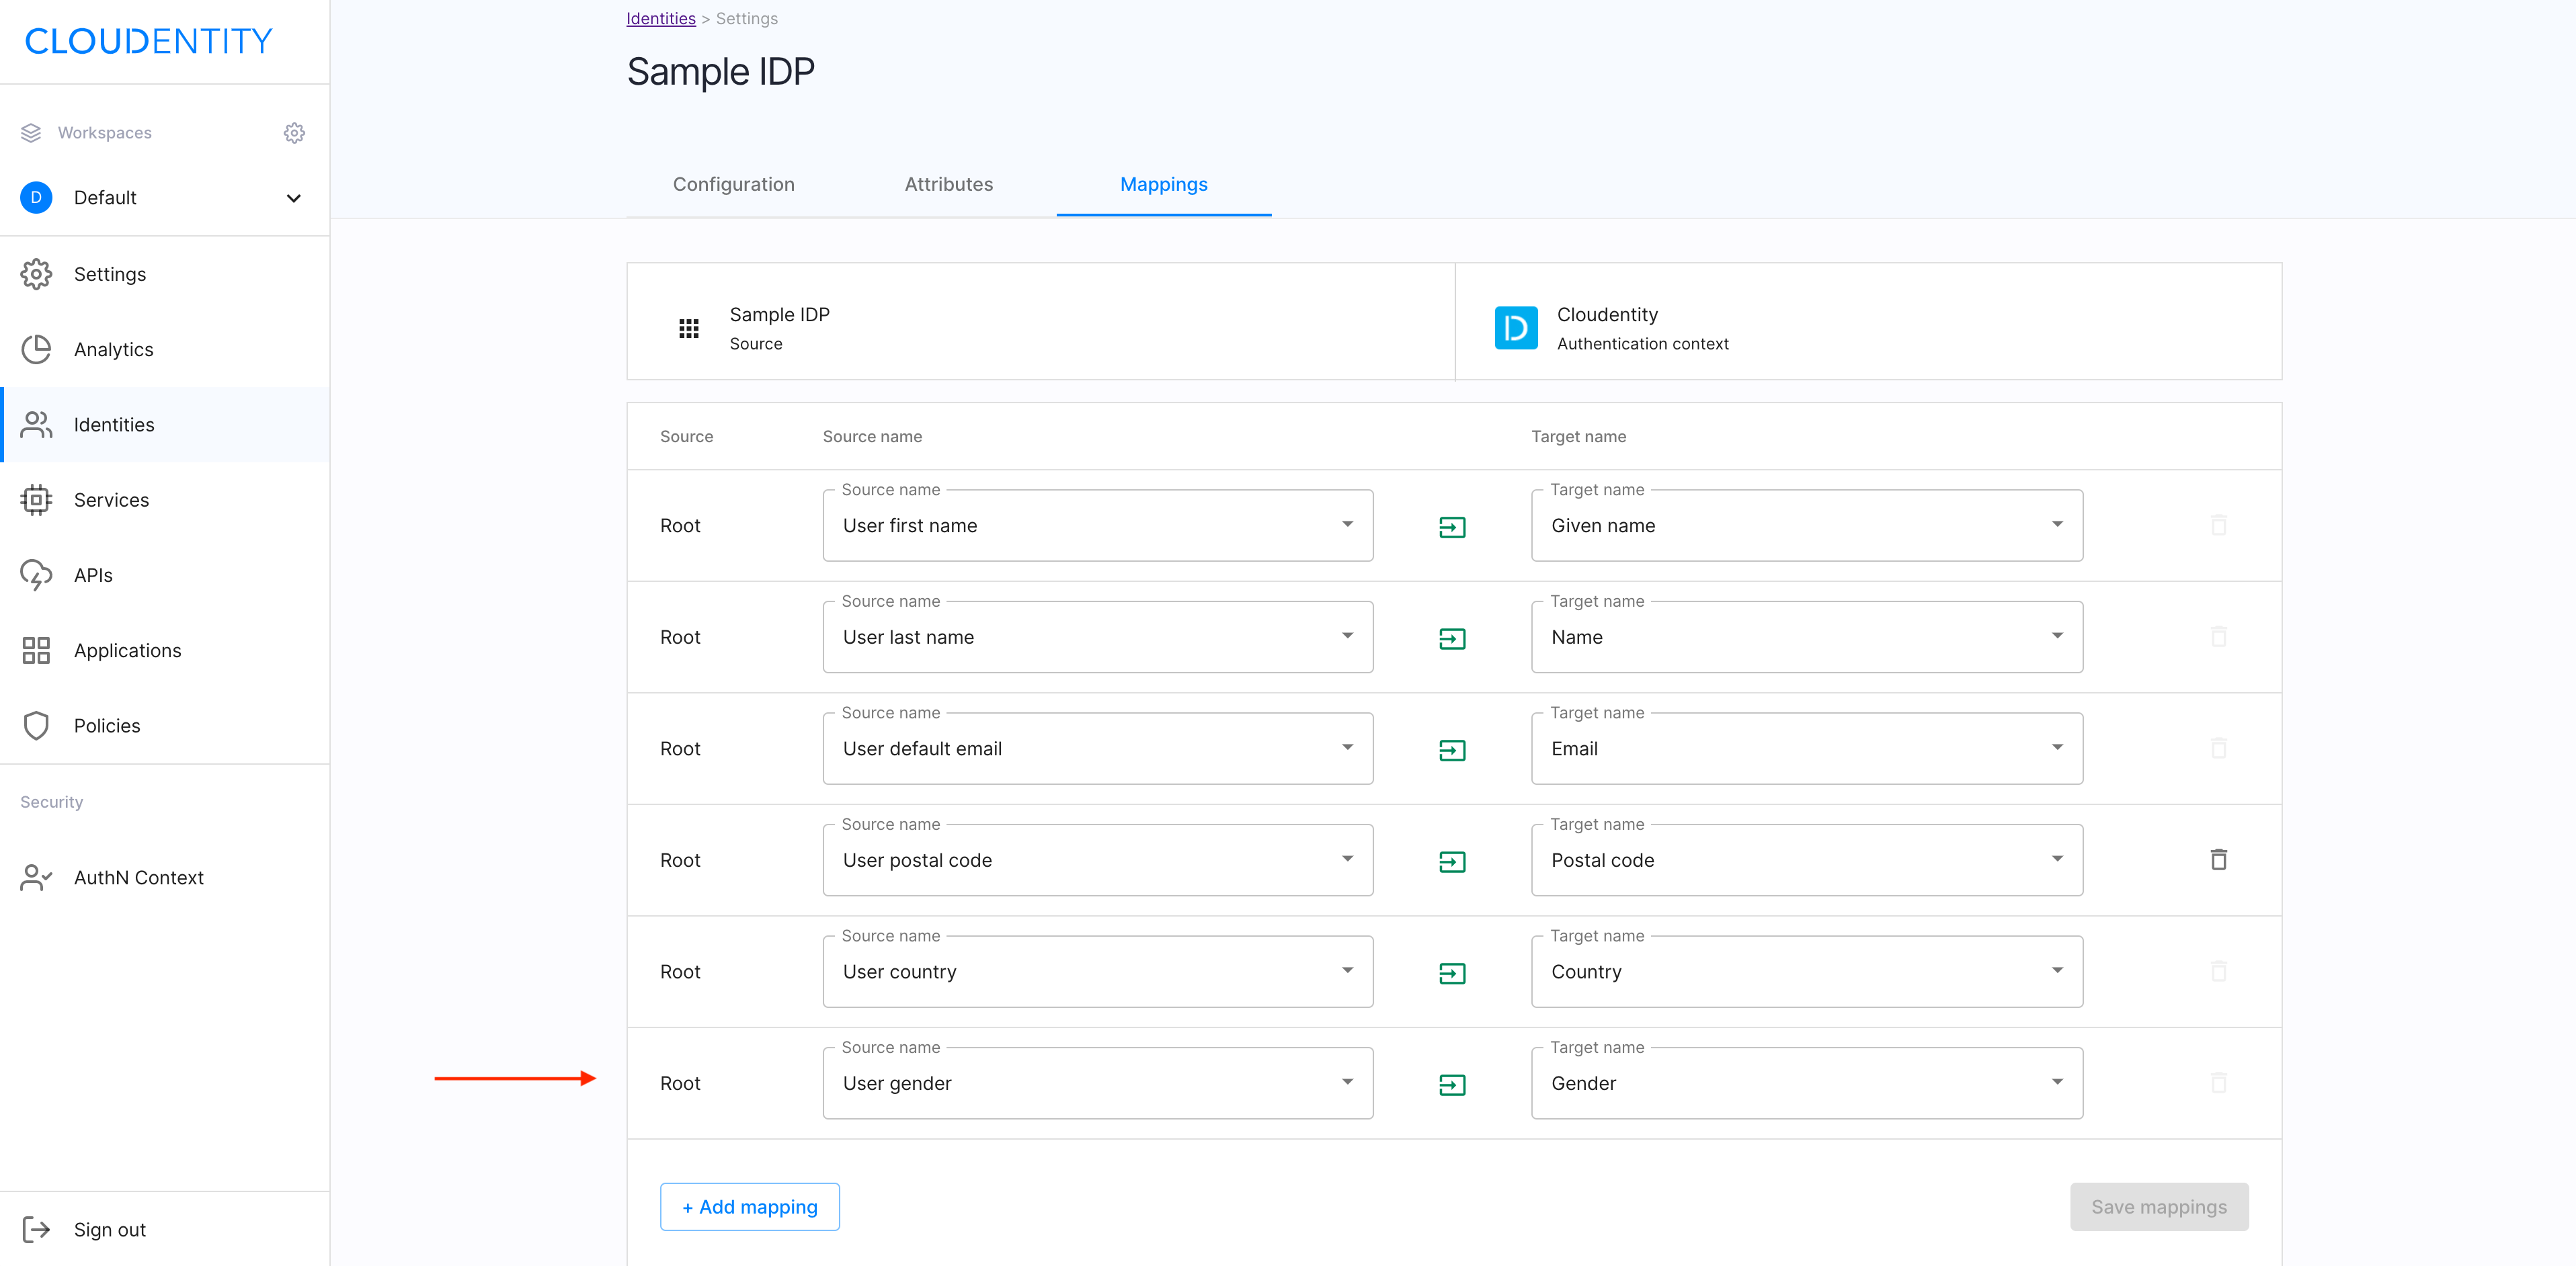
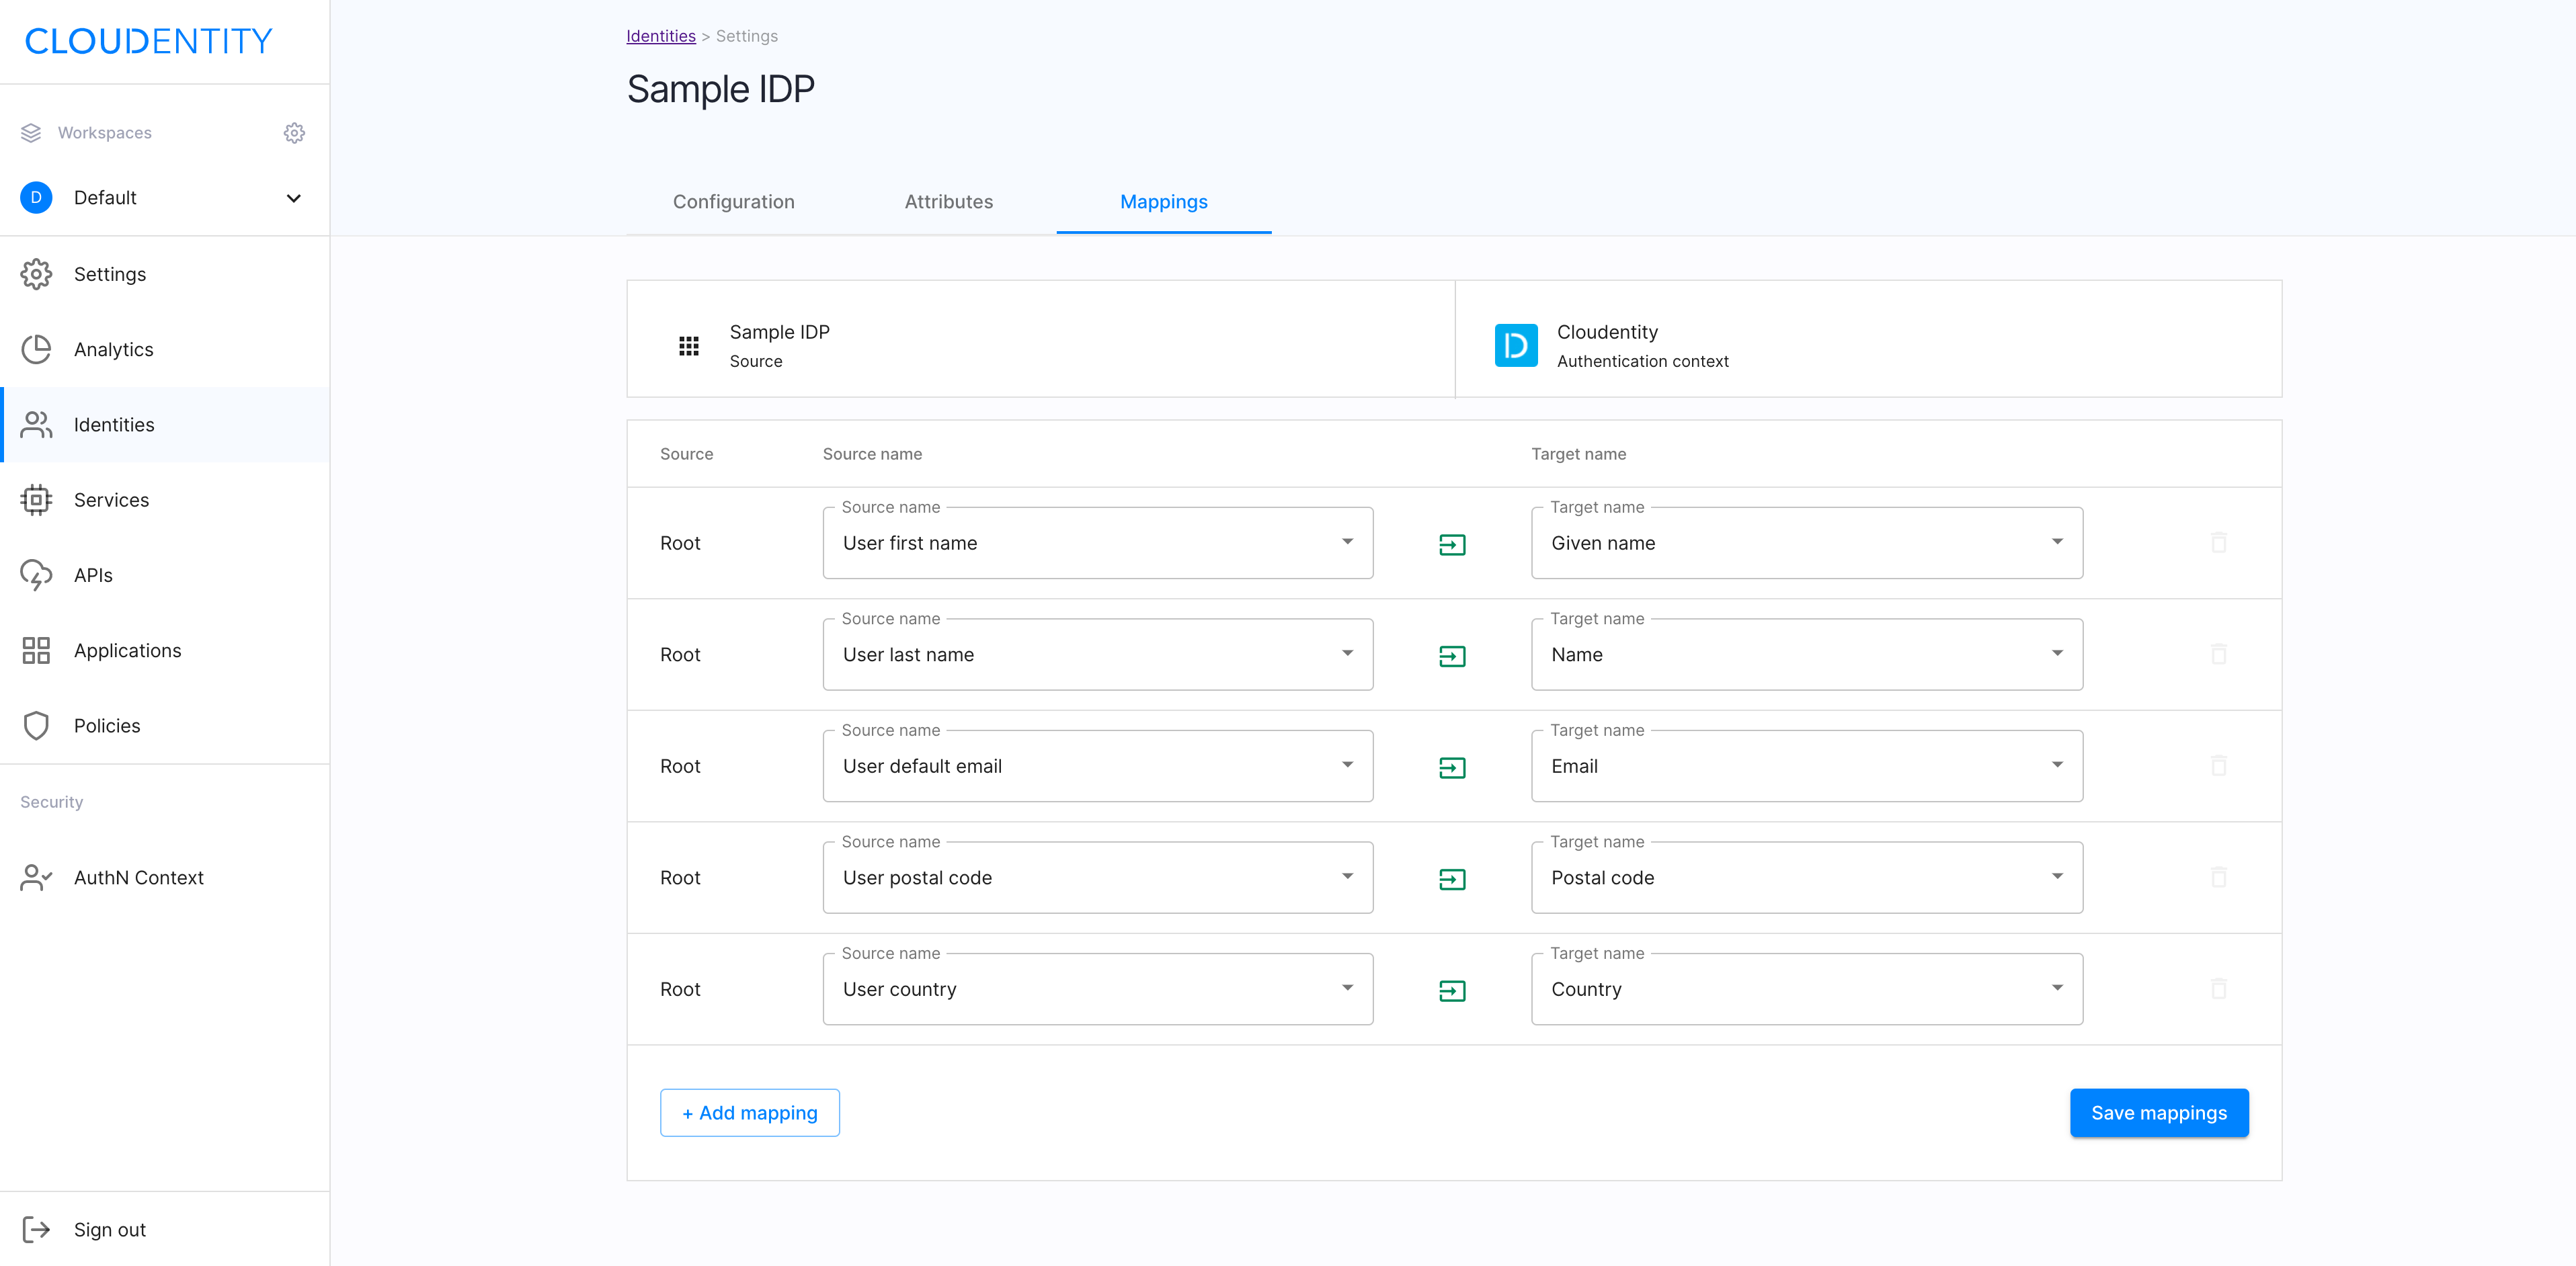
Navigate to the Mappings view of your Cloudentity IDP.
Result
You can see the predefined list of attributes mapped for the Cloudentity IDP user.

Add a mapping
-
Select +Add mappings in the Mapping view.
-
For the new blank attribute created on the list, select Source name and Target name from the drop-down menus.
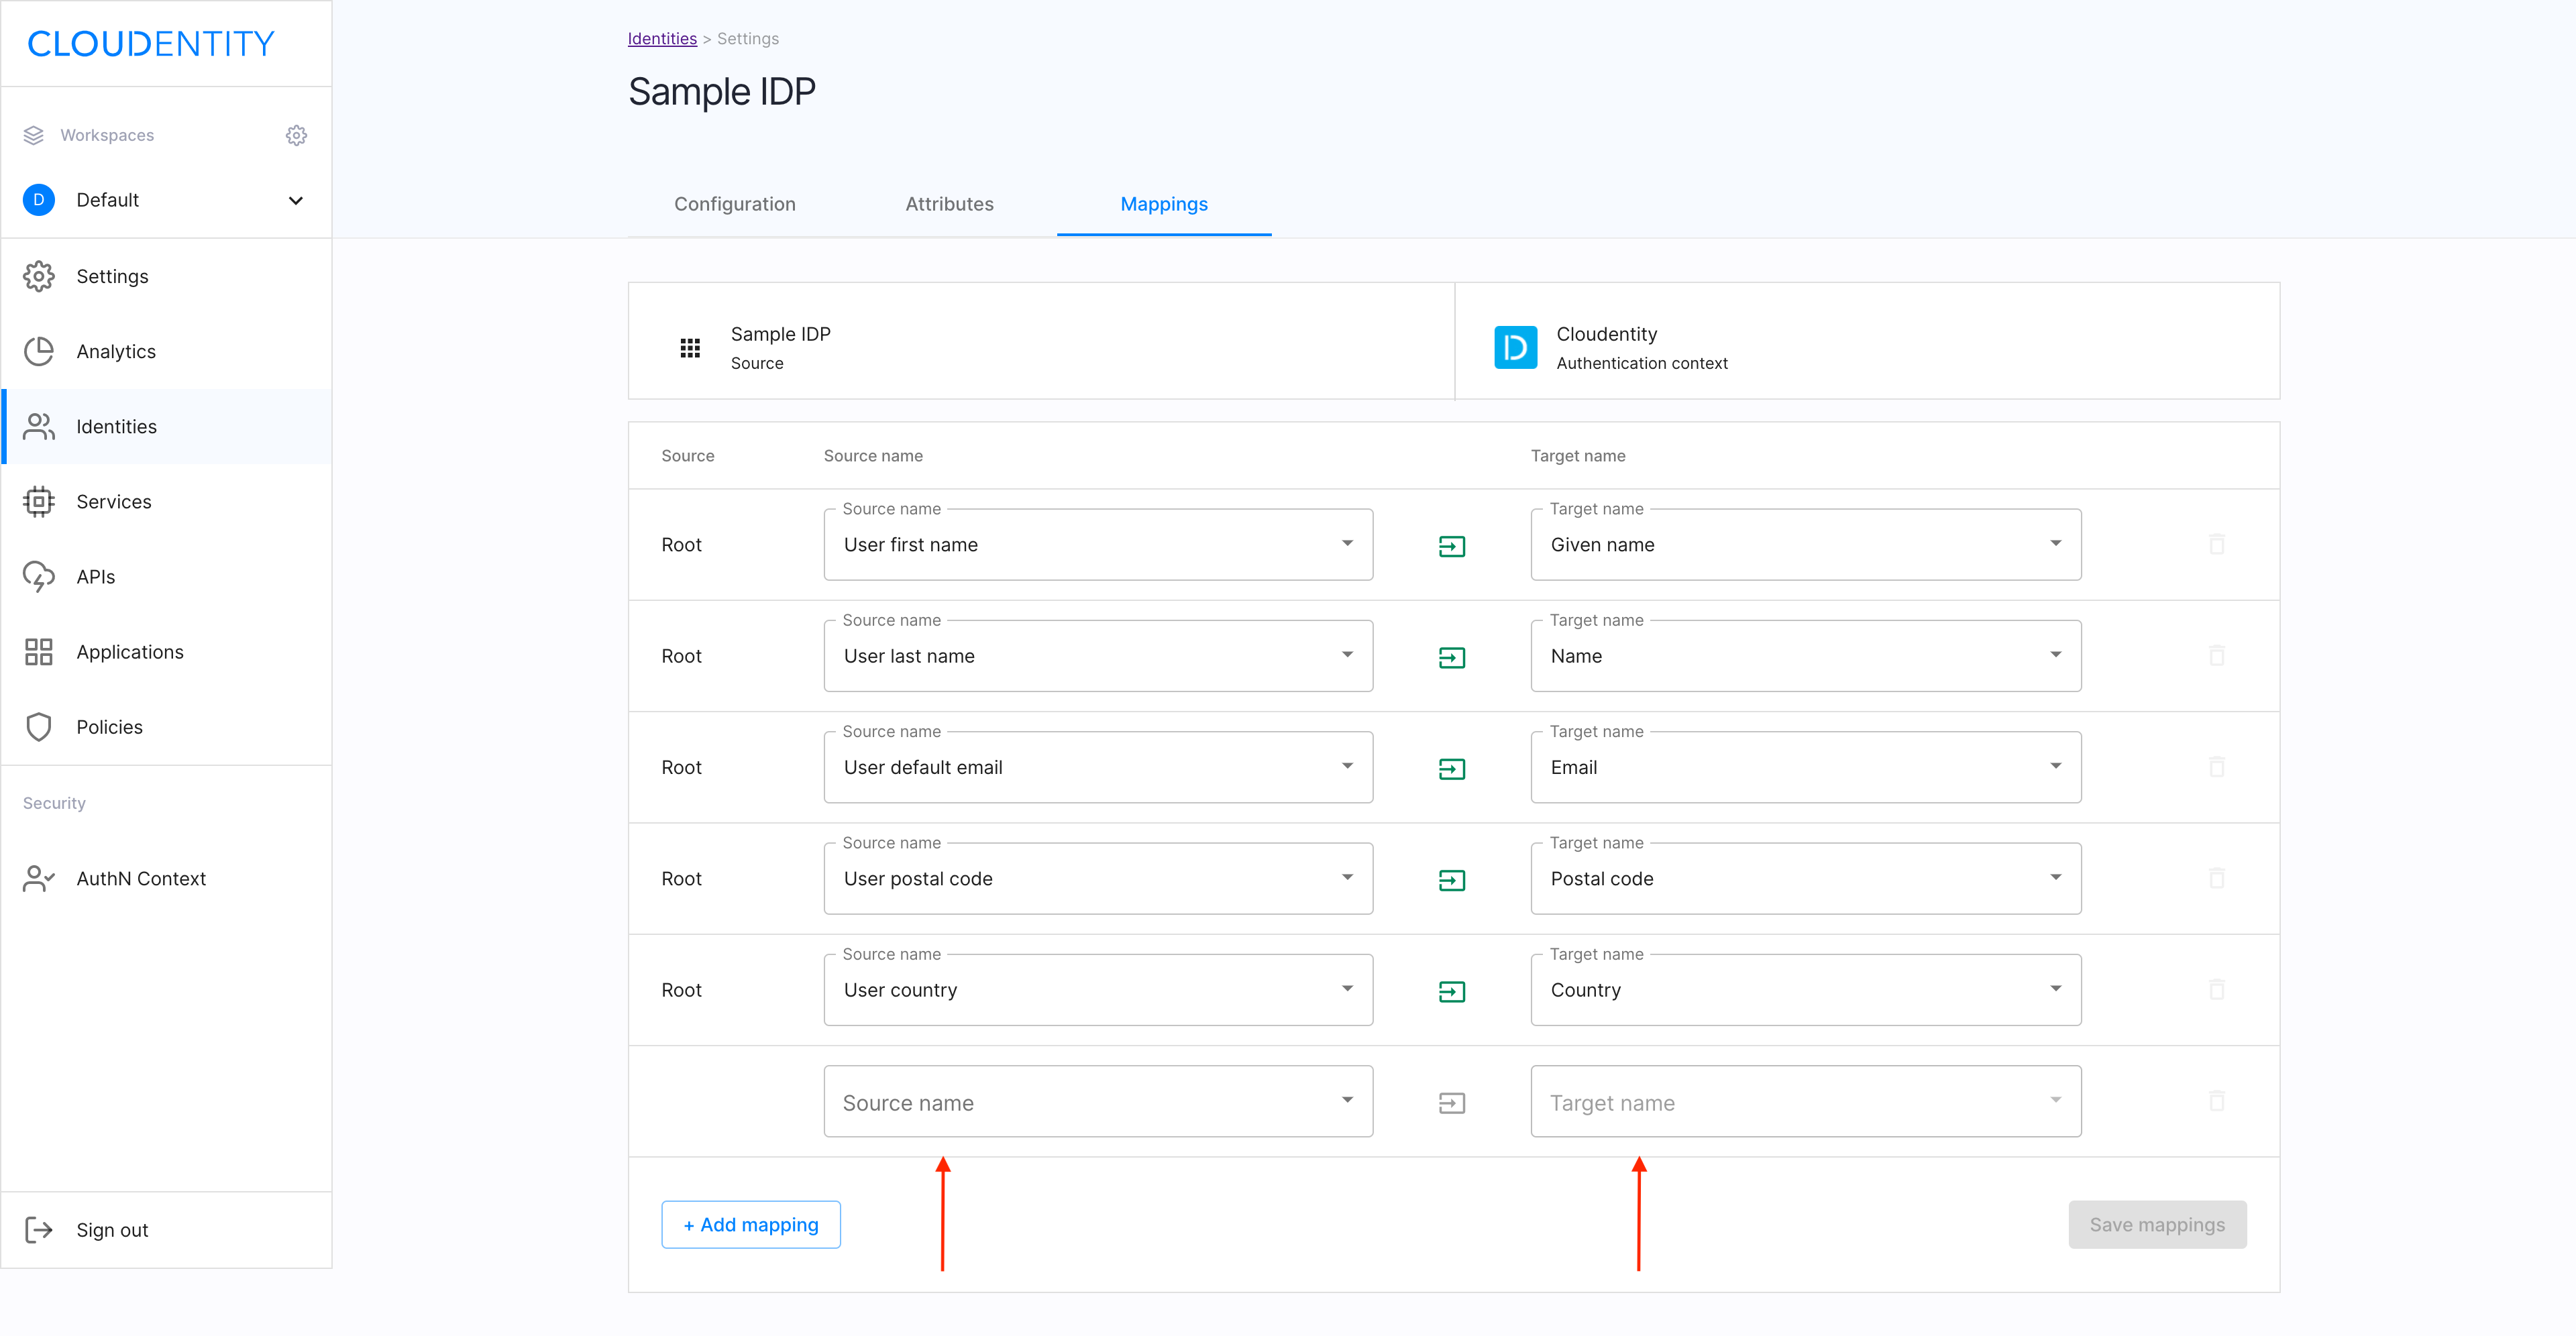
-
Select Save mappings to proceed.
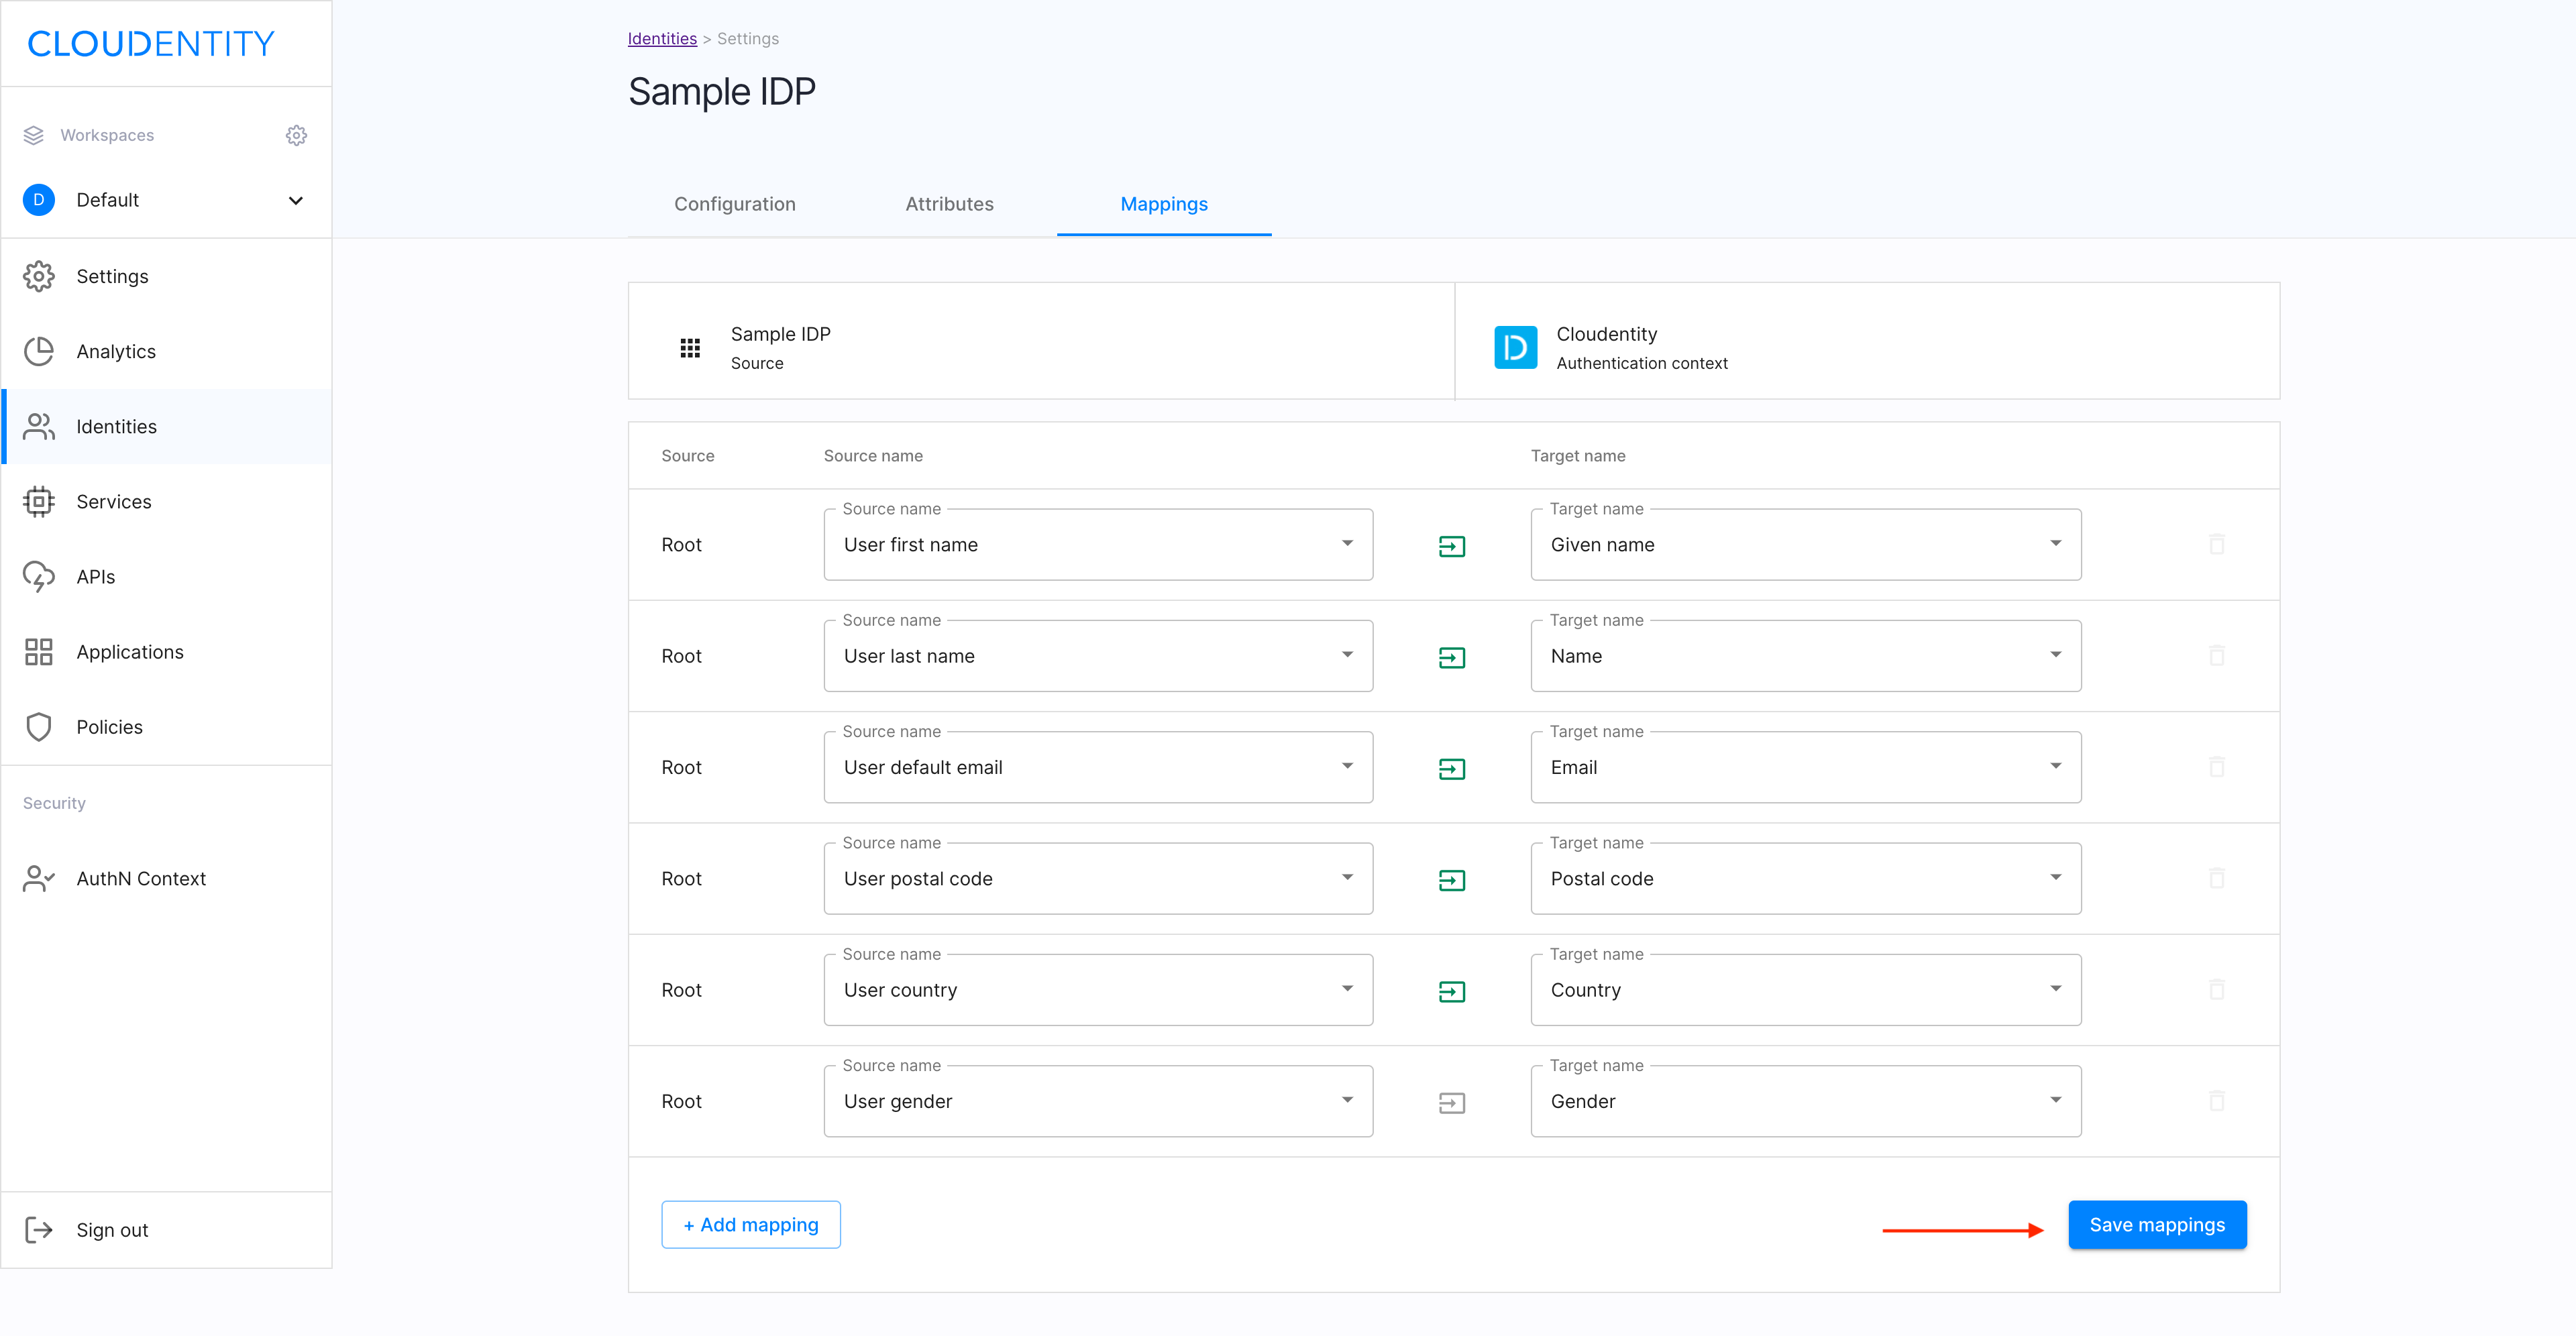
Result
Your new mapping has been added to the list.
Remove a mapping
In the Mappings view, select the trash-can icon next to the superfluous mapping to be removed.
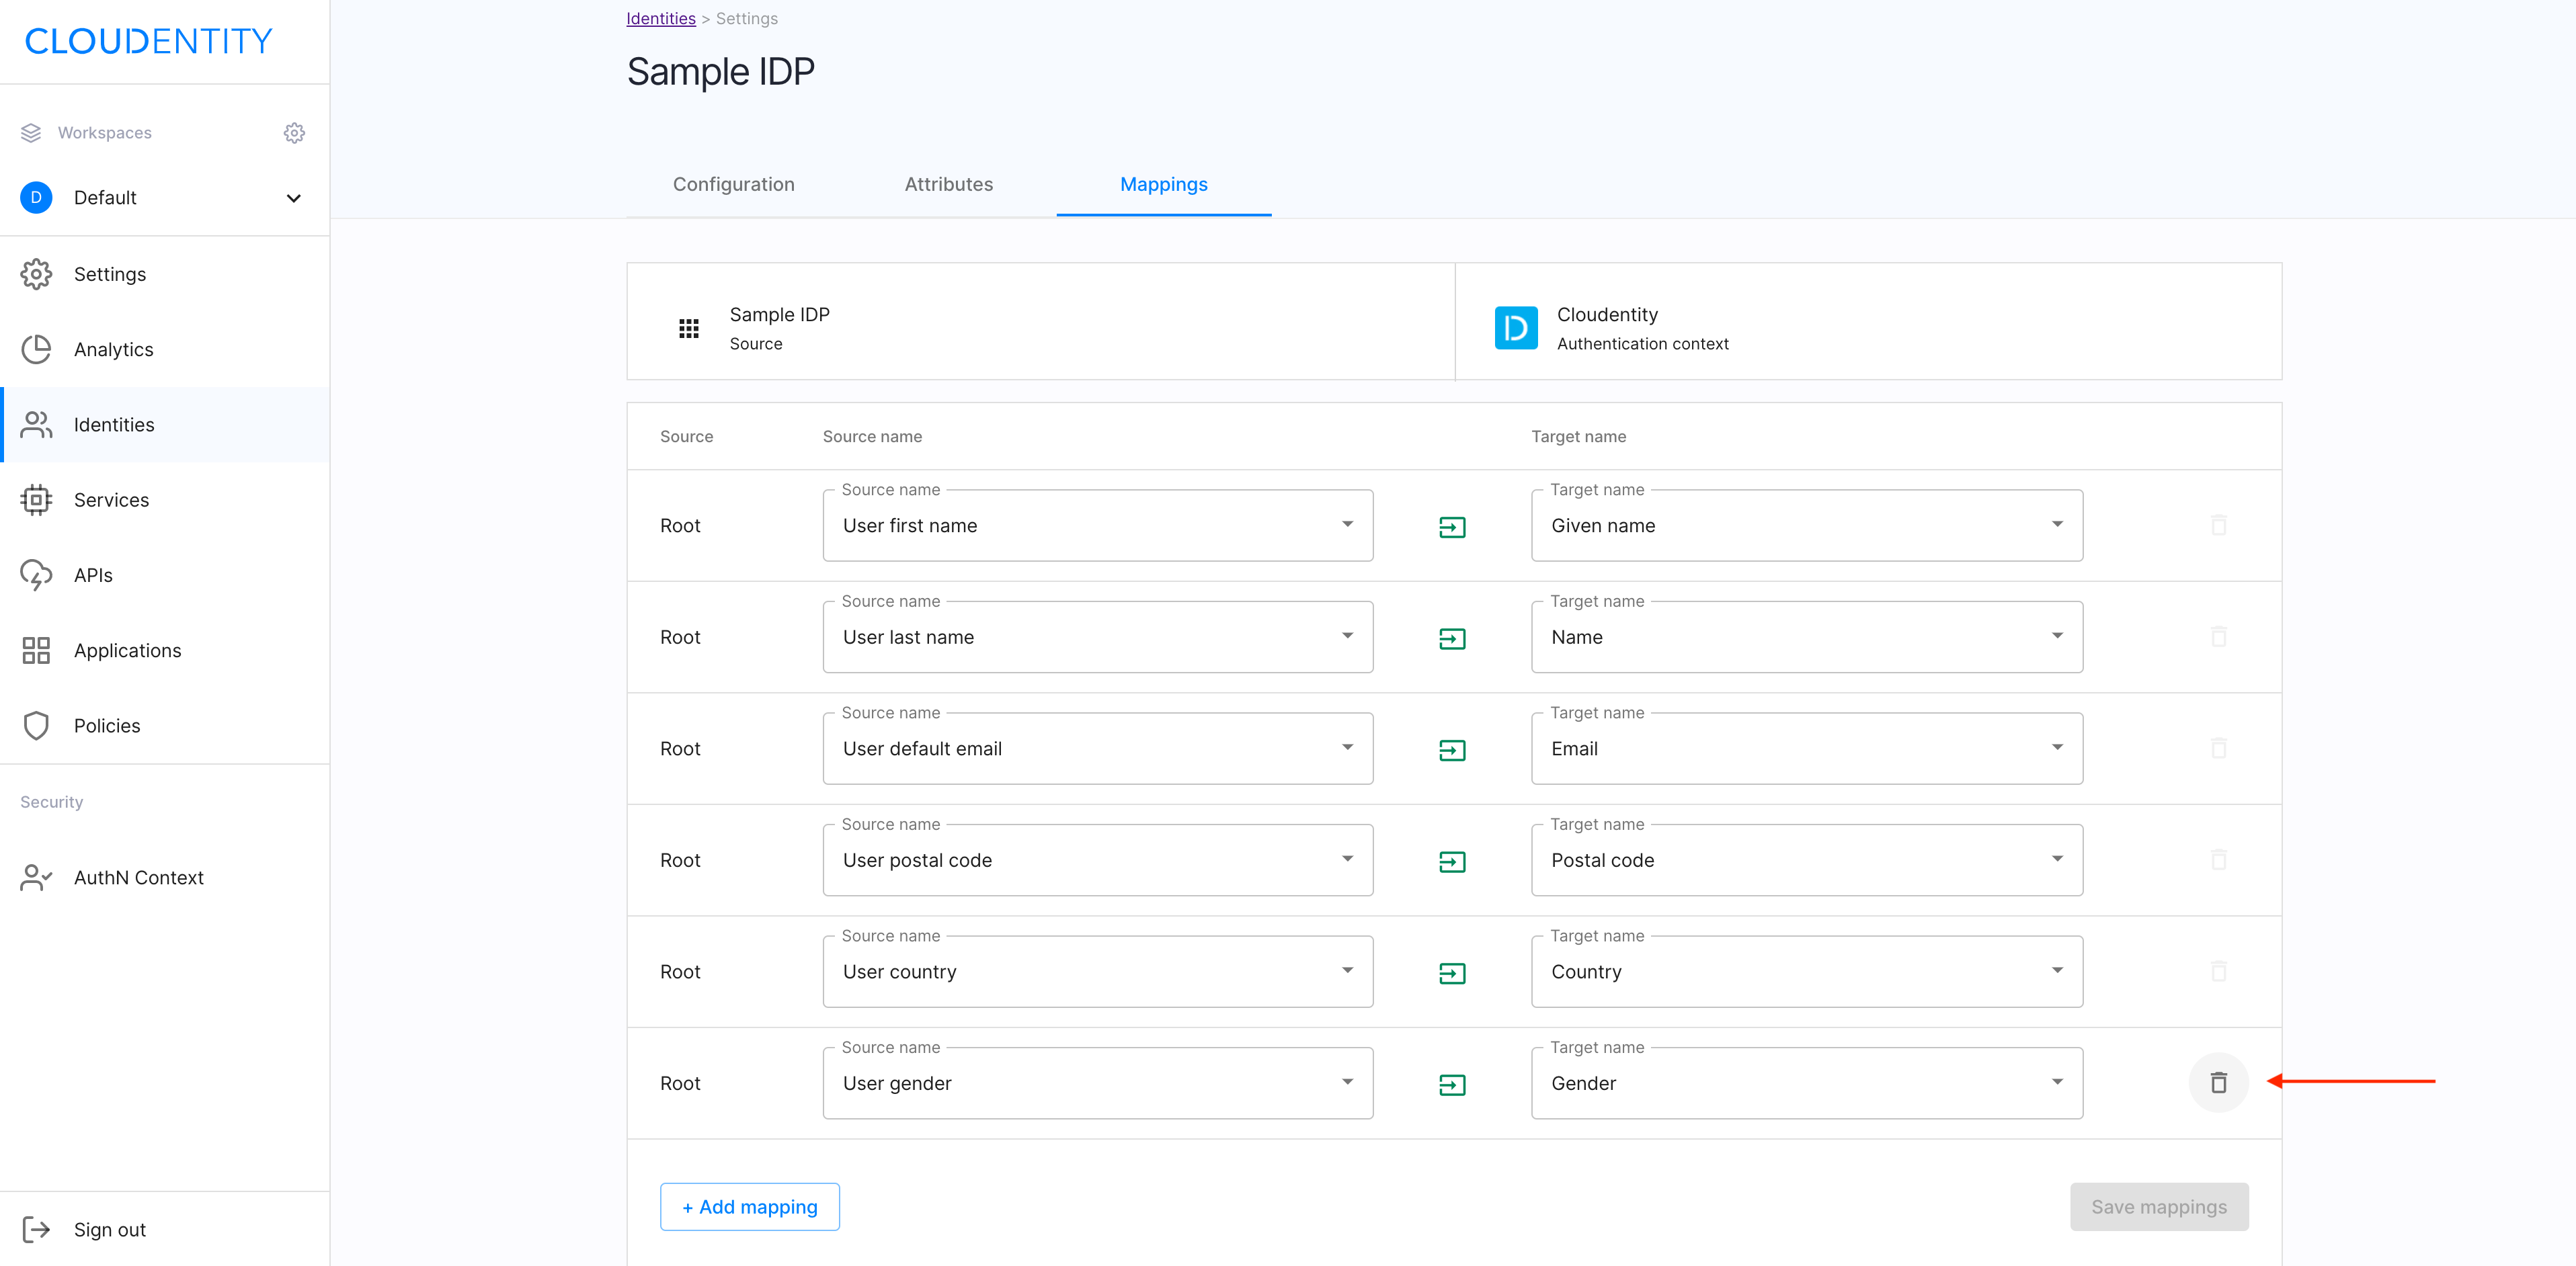
Result
The attribute has been removed from the attributes list for your Cloudentity IDP.
User’s test
Purpose
Test your new IDP as a user
Prerequisite
Your provider is configured as a user-authentication method by your administrator.
Test
-
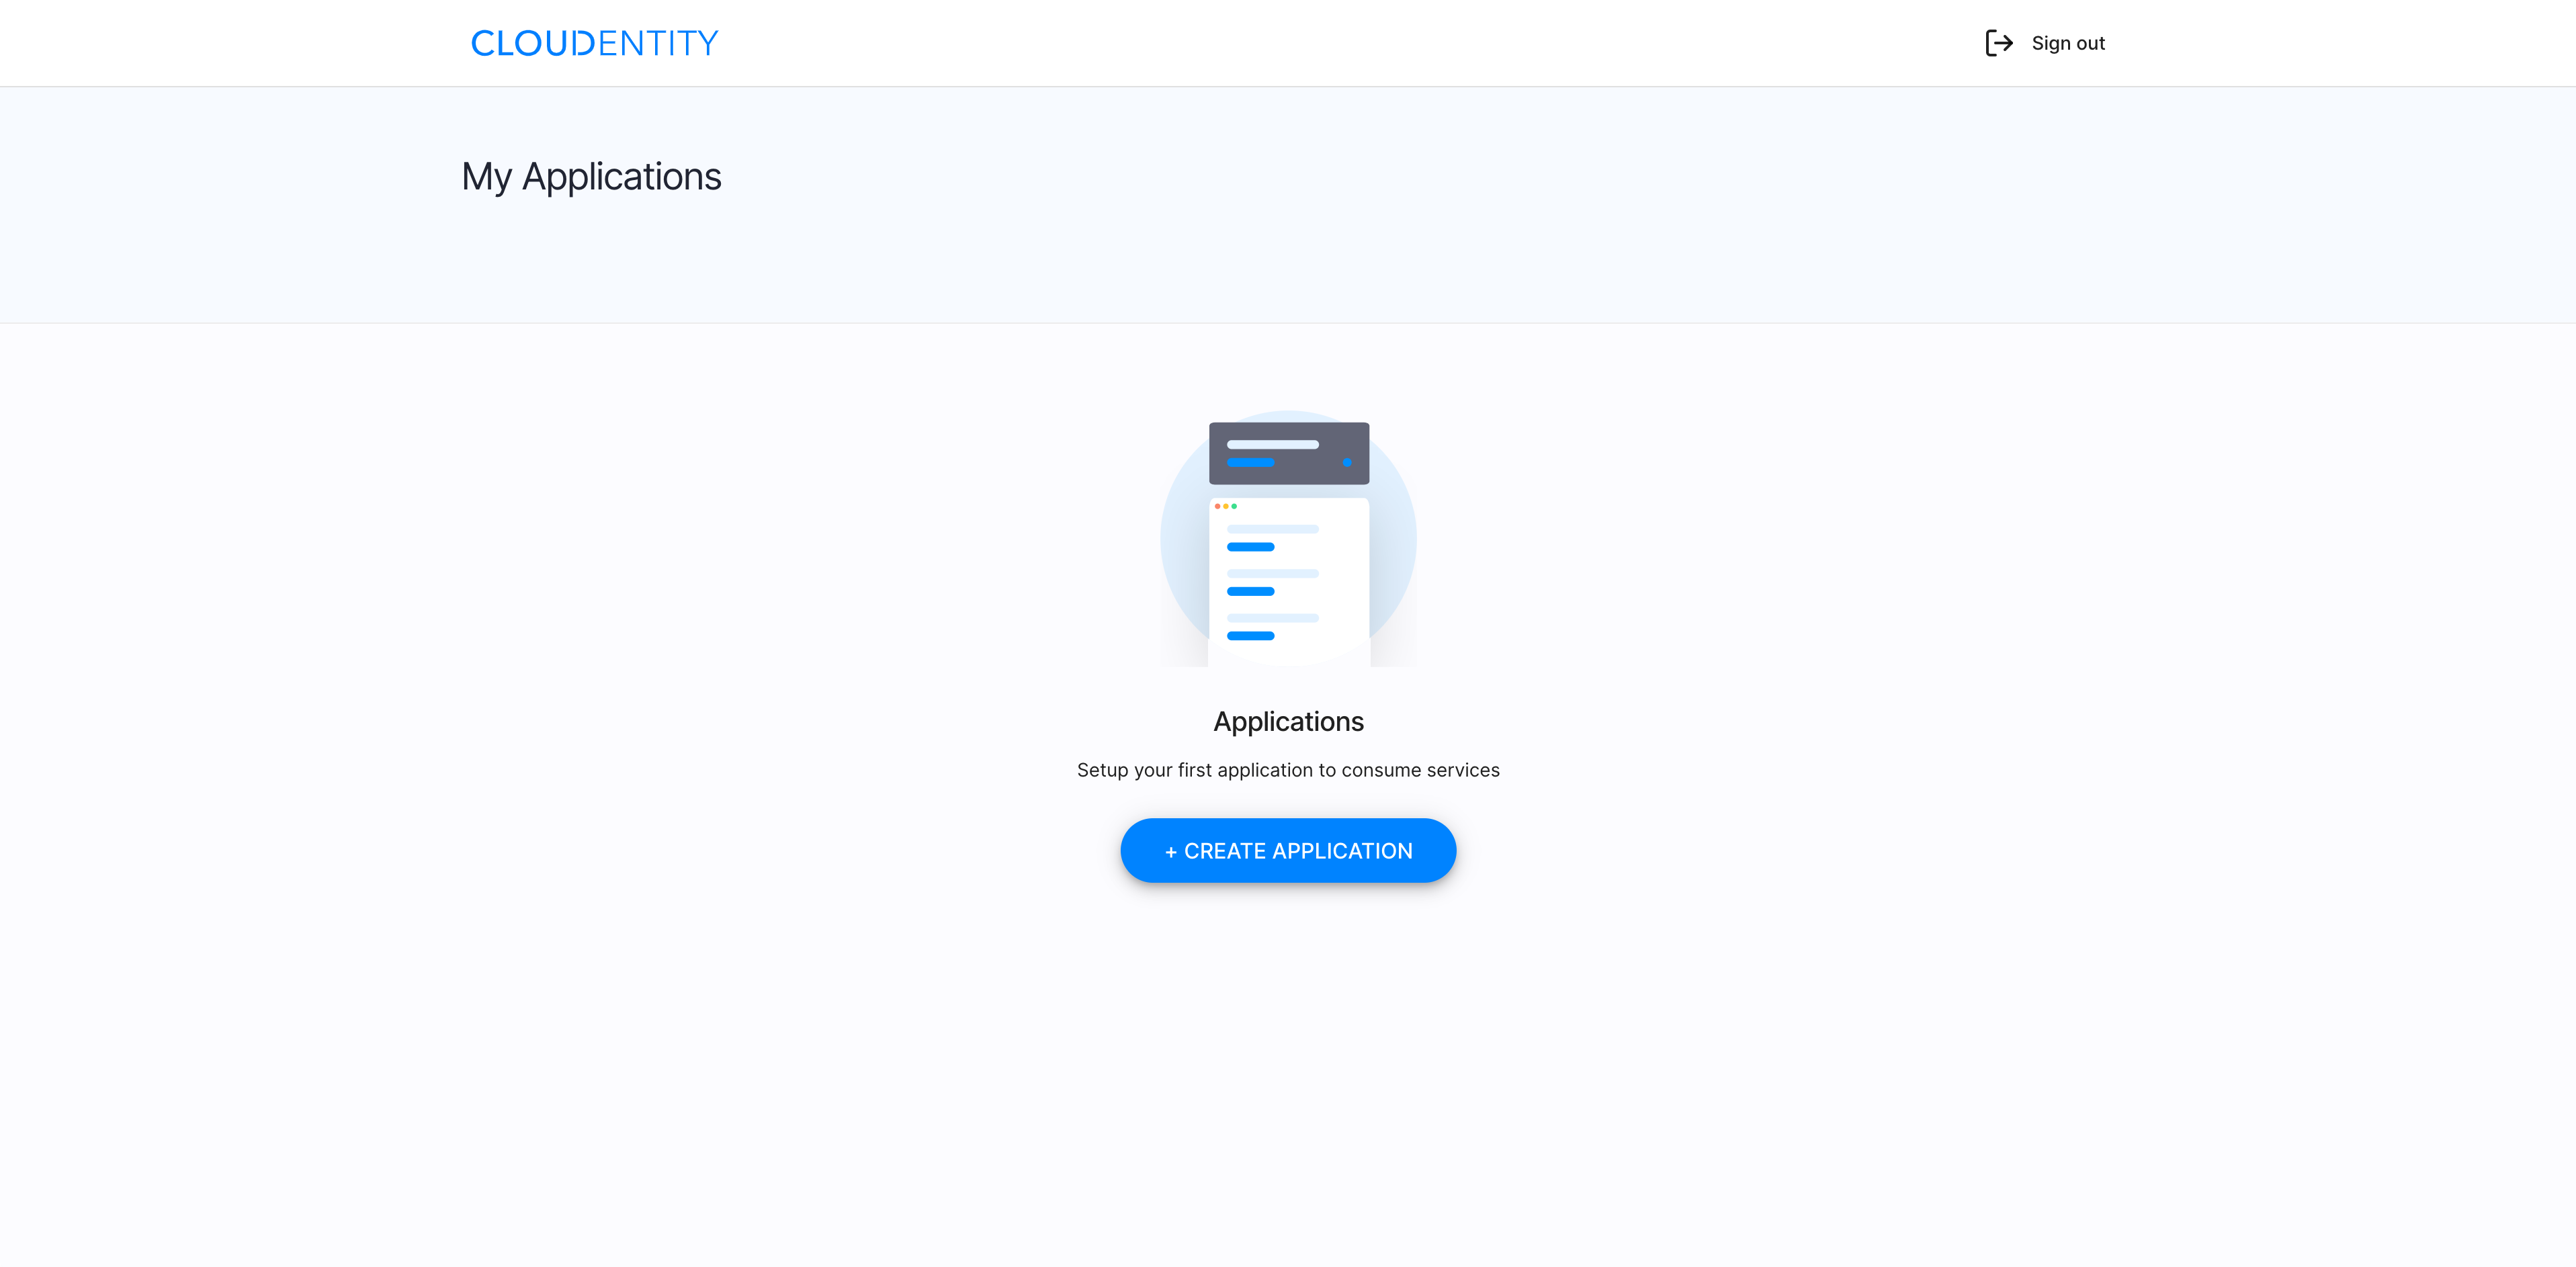
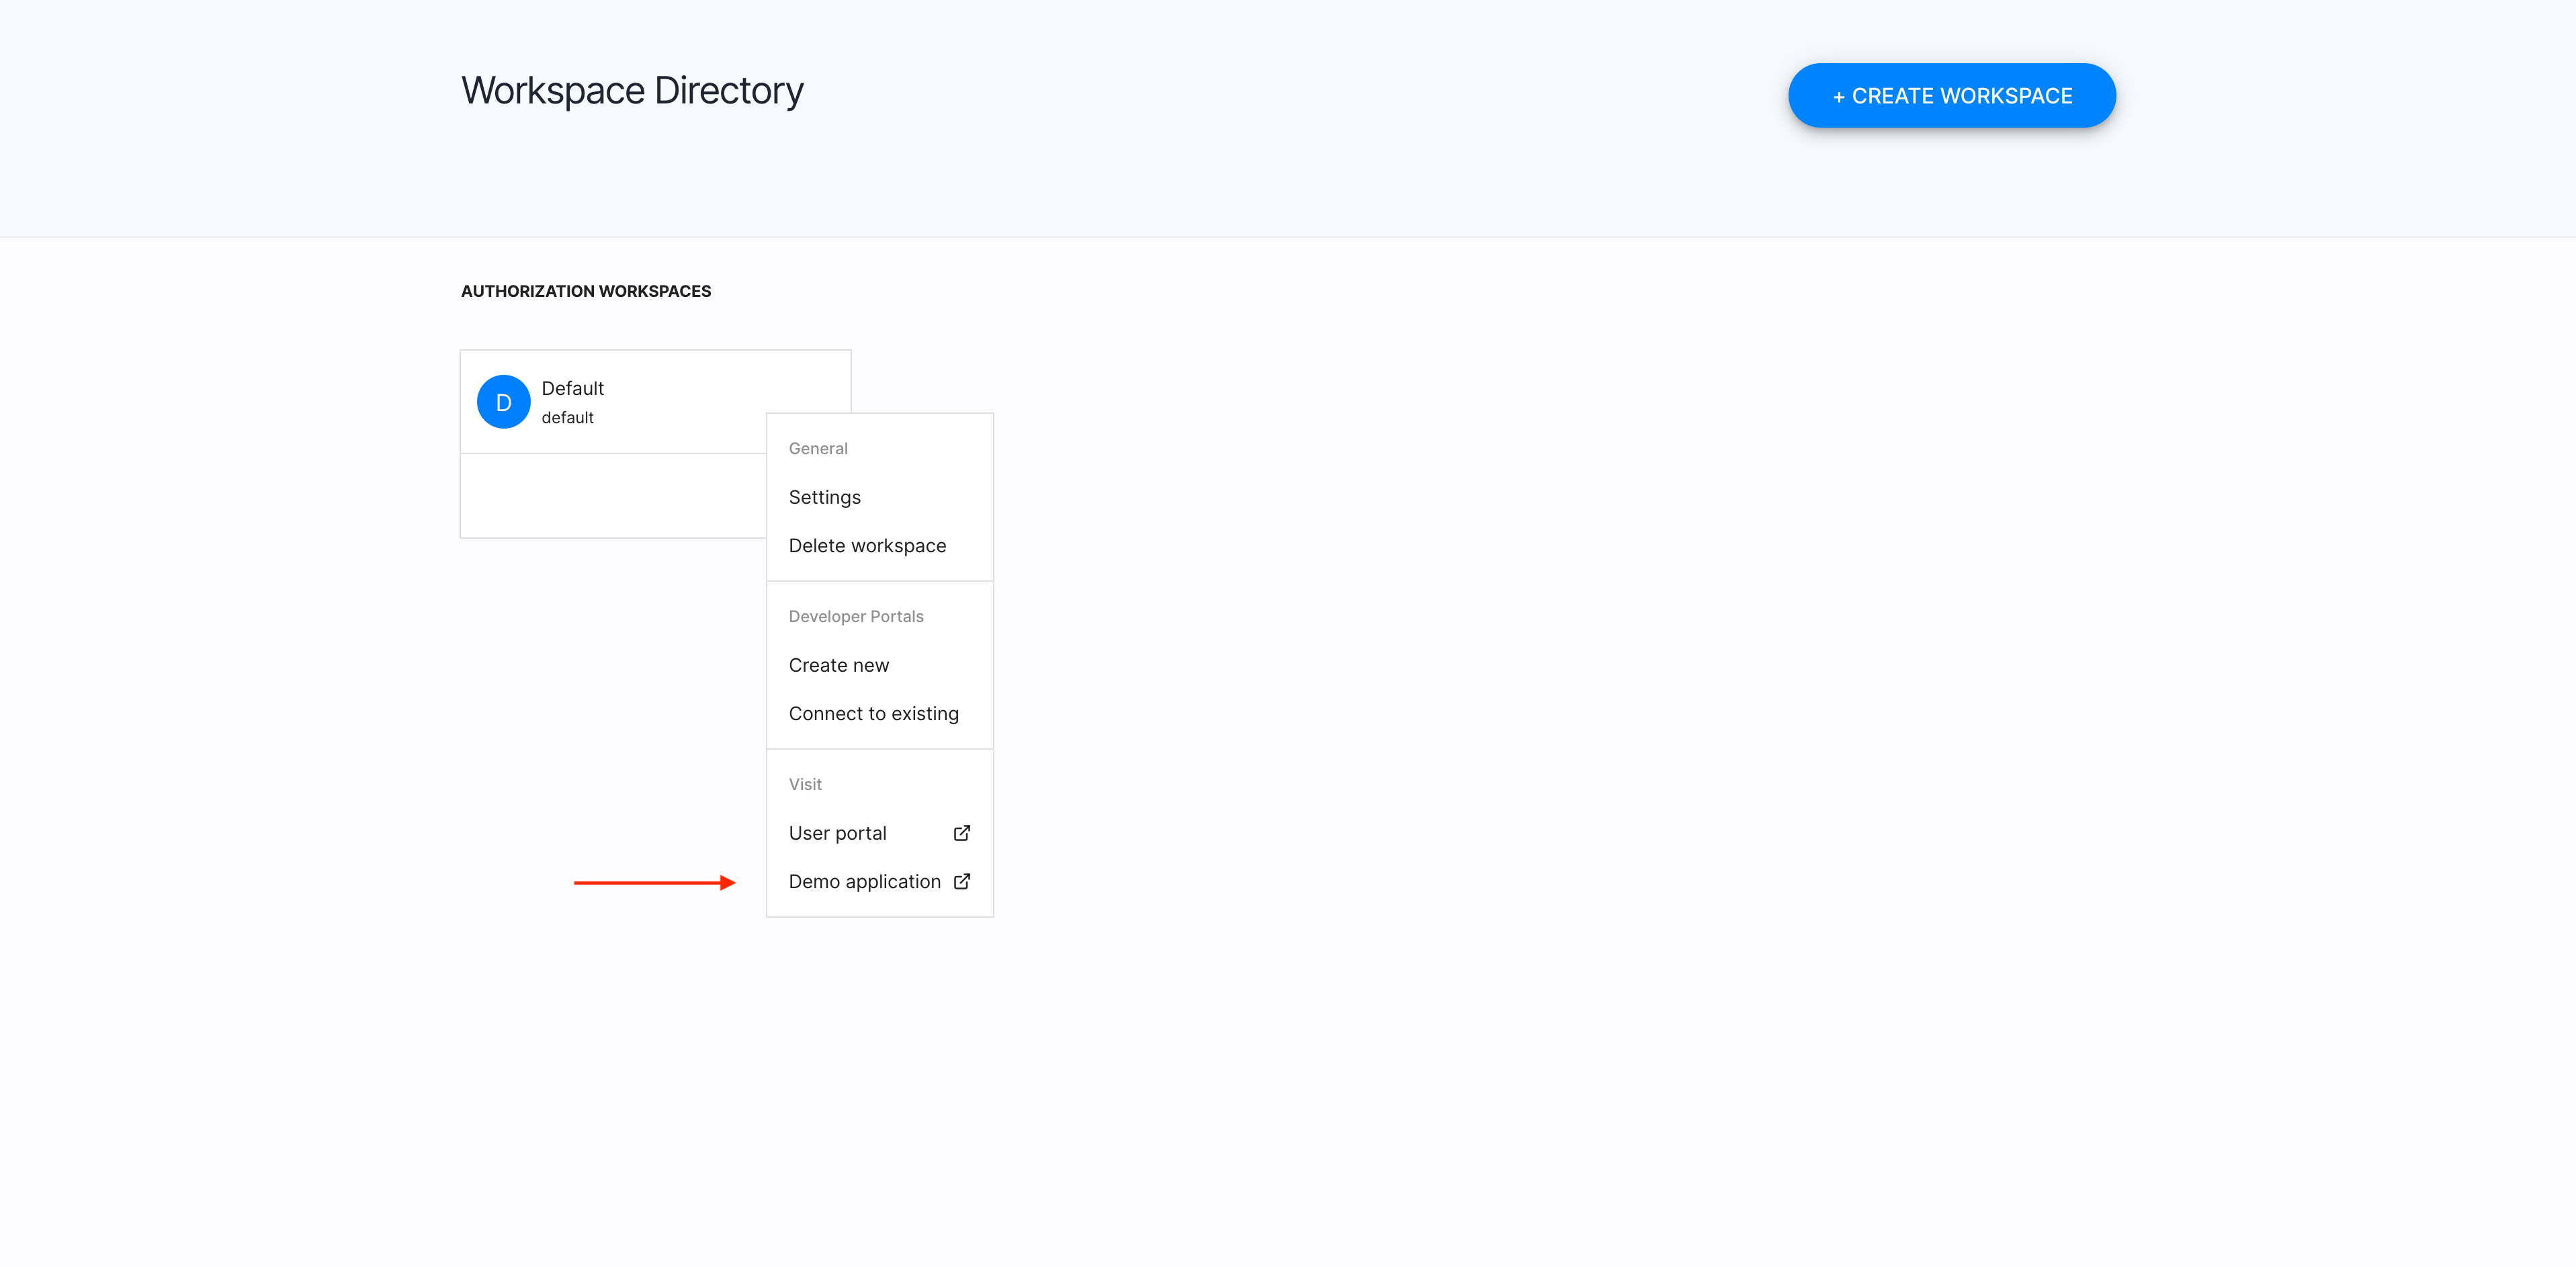
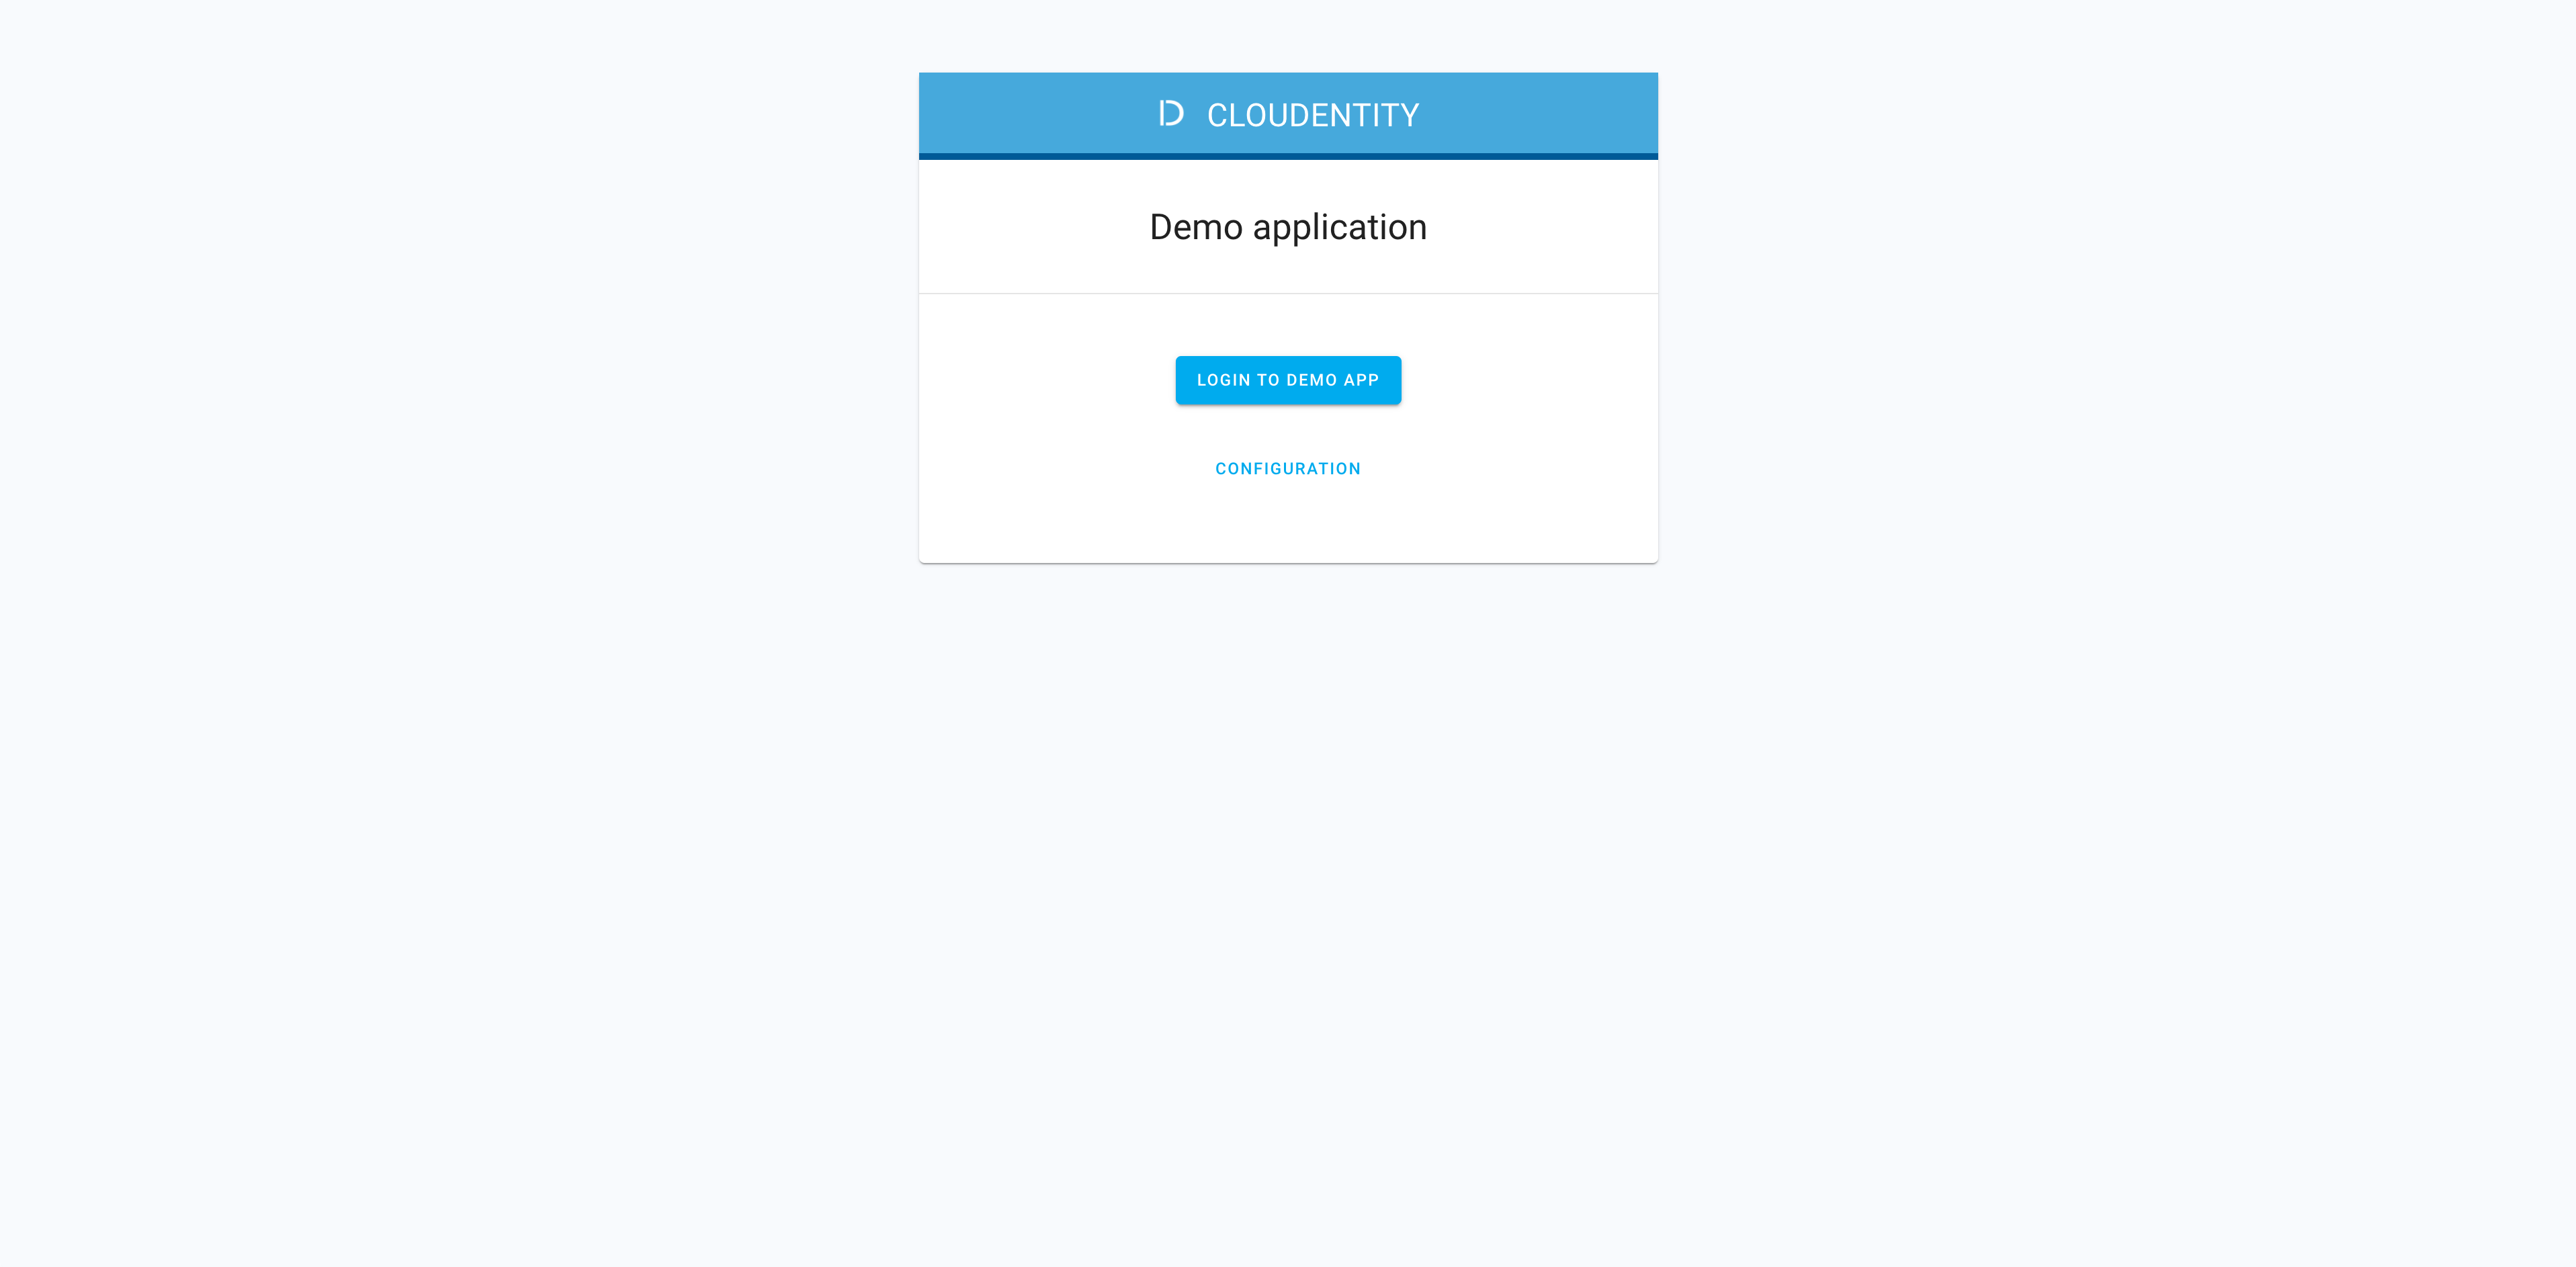
In the ACP administrator portal, go to Workspace Directory > AUTHORIZATION WORKSPACES > Demo Application.
-
Select LOG IN TO DEMO APP.
-
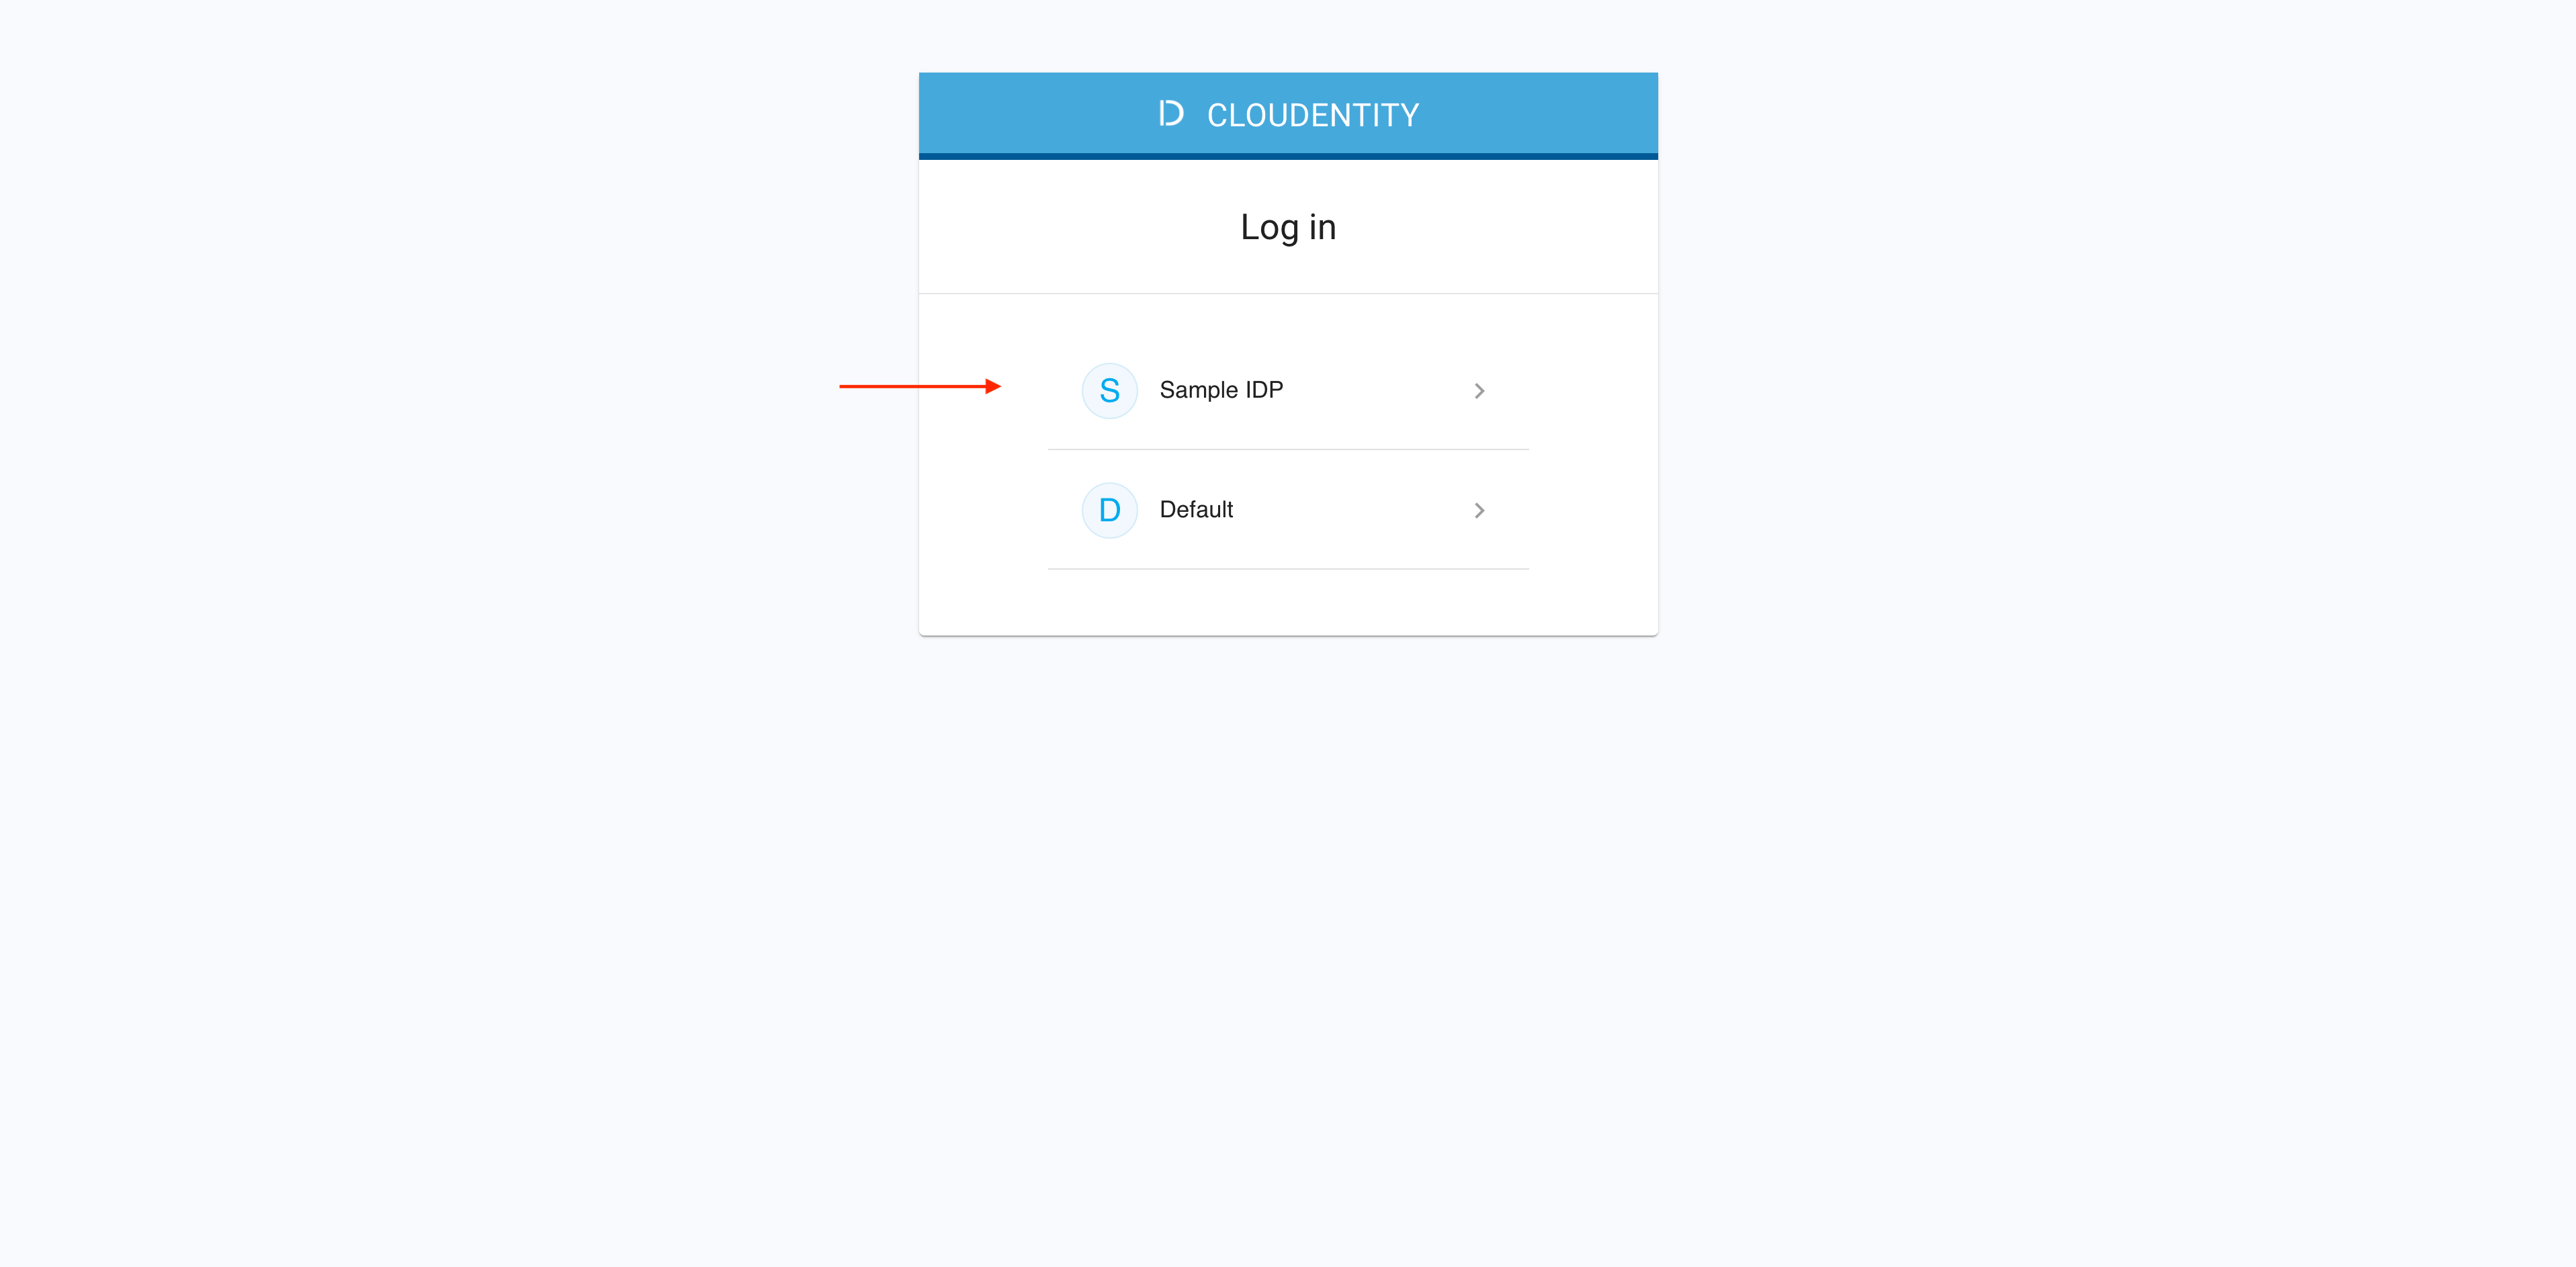
Select your newly-configured IDP.
-
Authenticate in the selected IDP.

Result
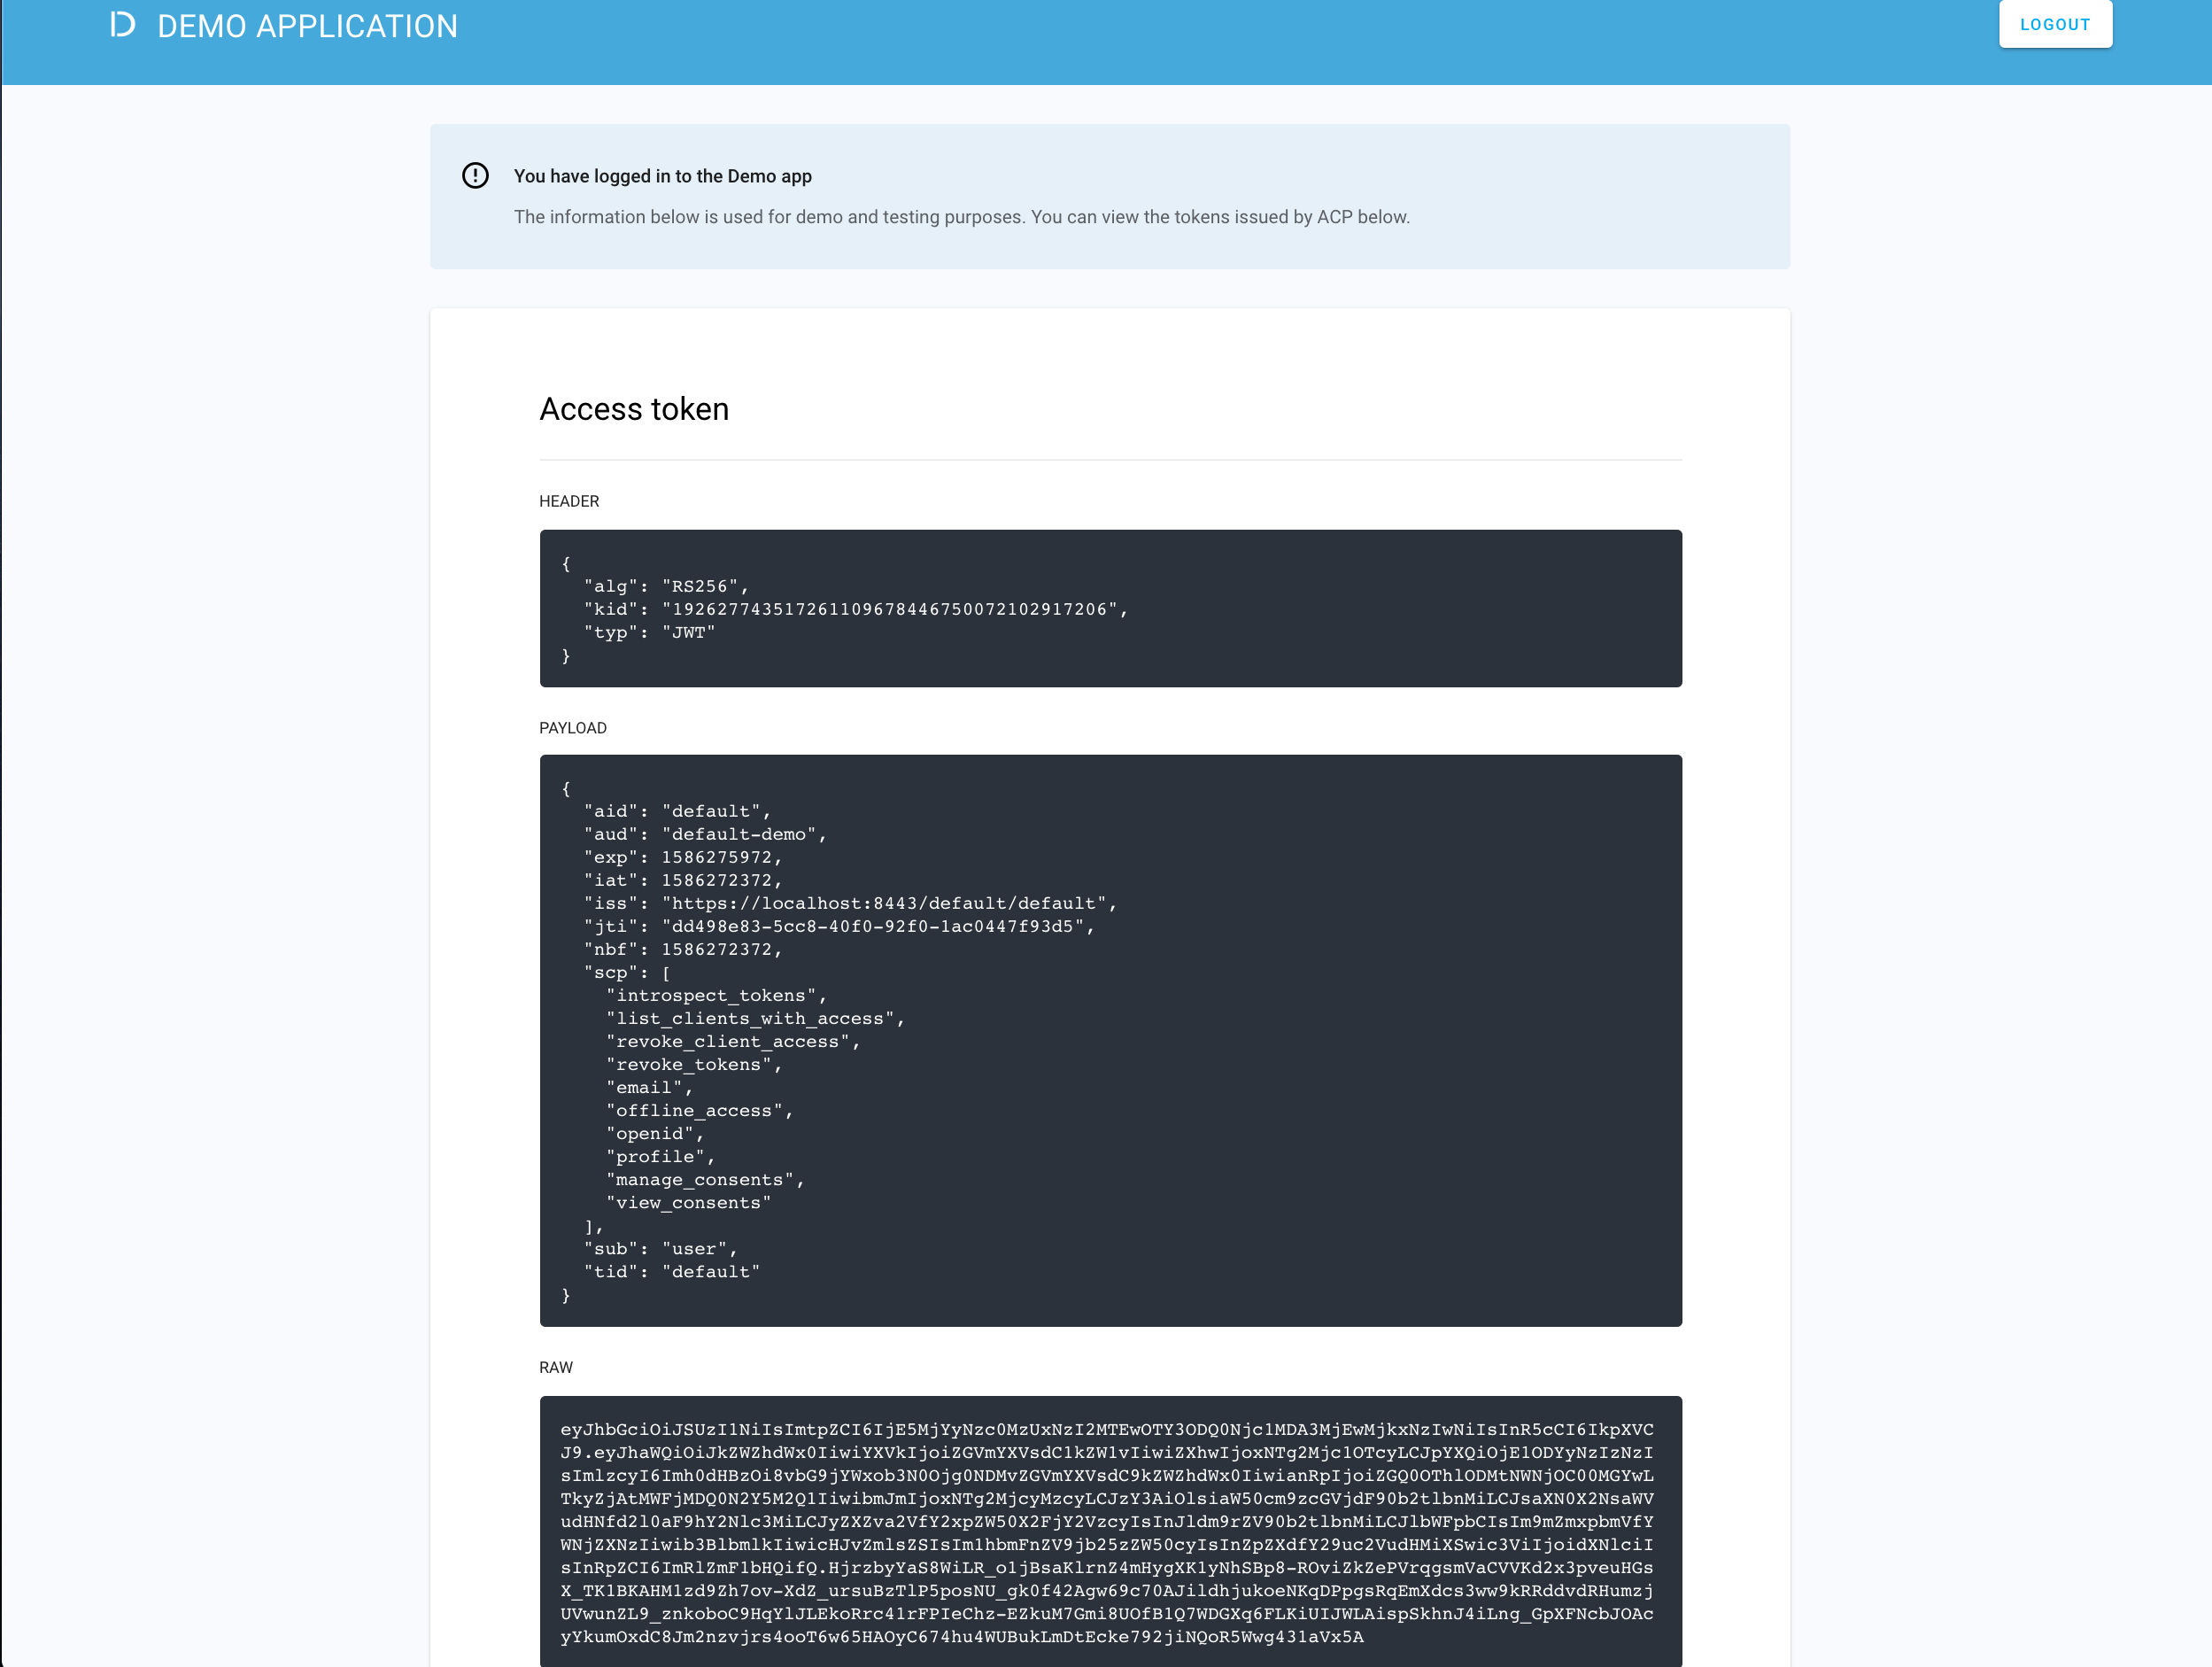
ACP displays the consent page that lists data scopes to be shared with the application. When you proceed to the application (ALLOW ACCESS), the PII data coming from IDP is delivered through the access token and the ID token generated by ACP.
Read more
For information on granting and managing ACP consents, see ACP OAuth consents.
Developer’s test
Purpose
Test your new IDP as a developer
Prerequisite
Your provider is configured as a developer-authentication method by your administrator. A developer portal that you use for testing purposes needs to be connected to the workspace that you added your new IDP to.
Test
-
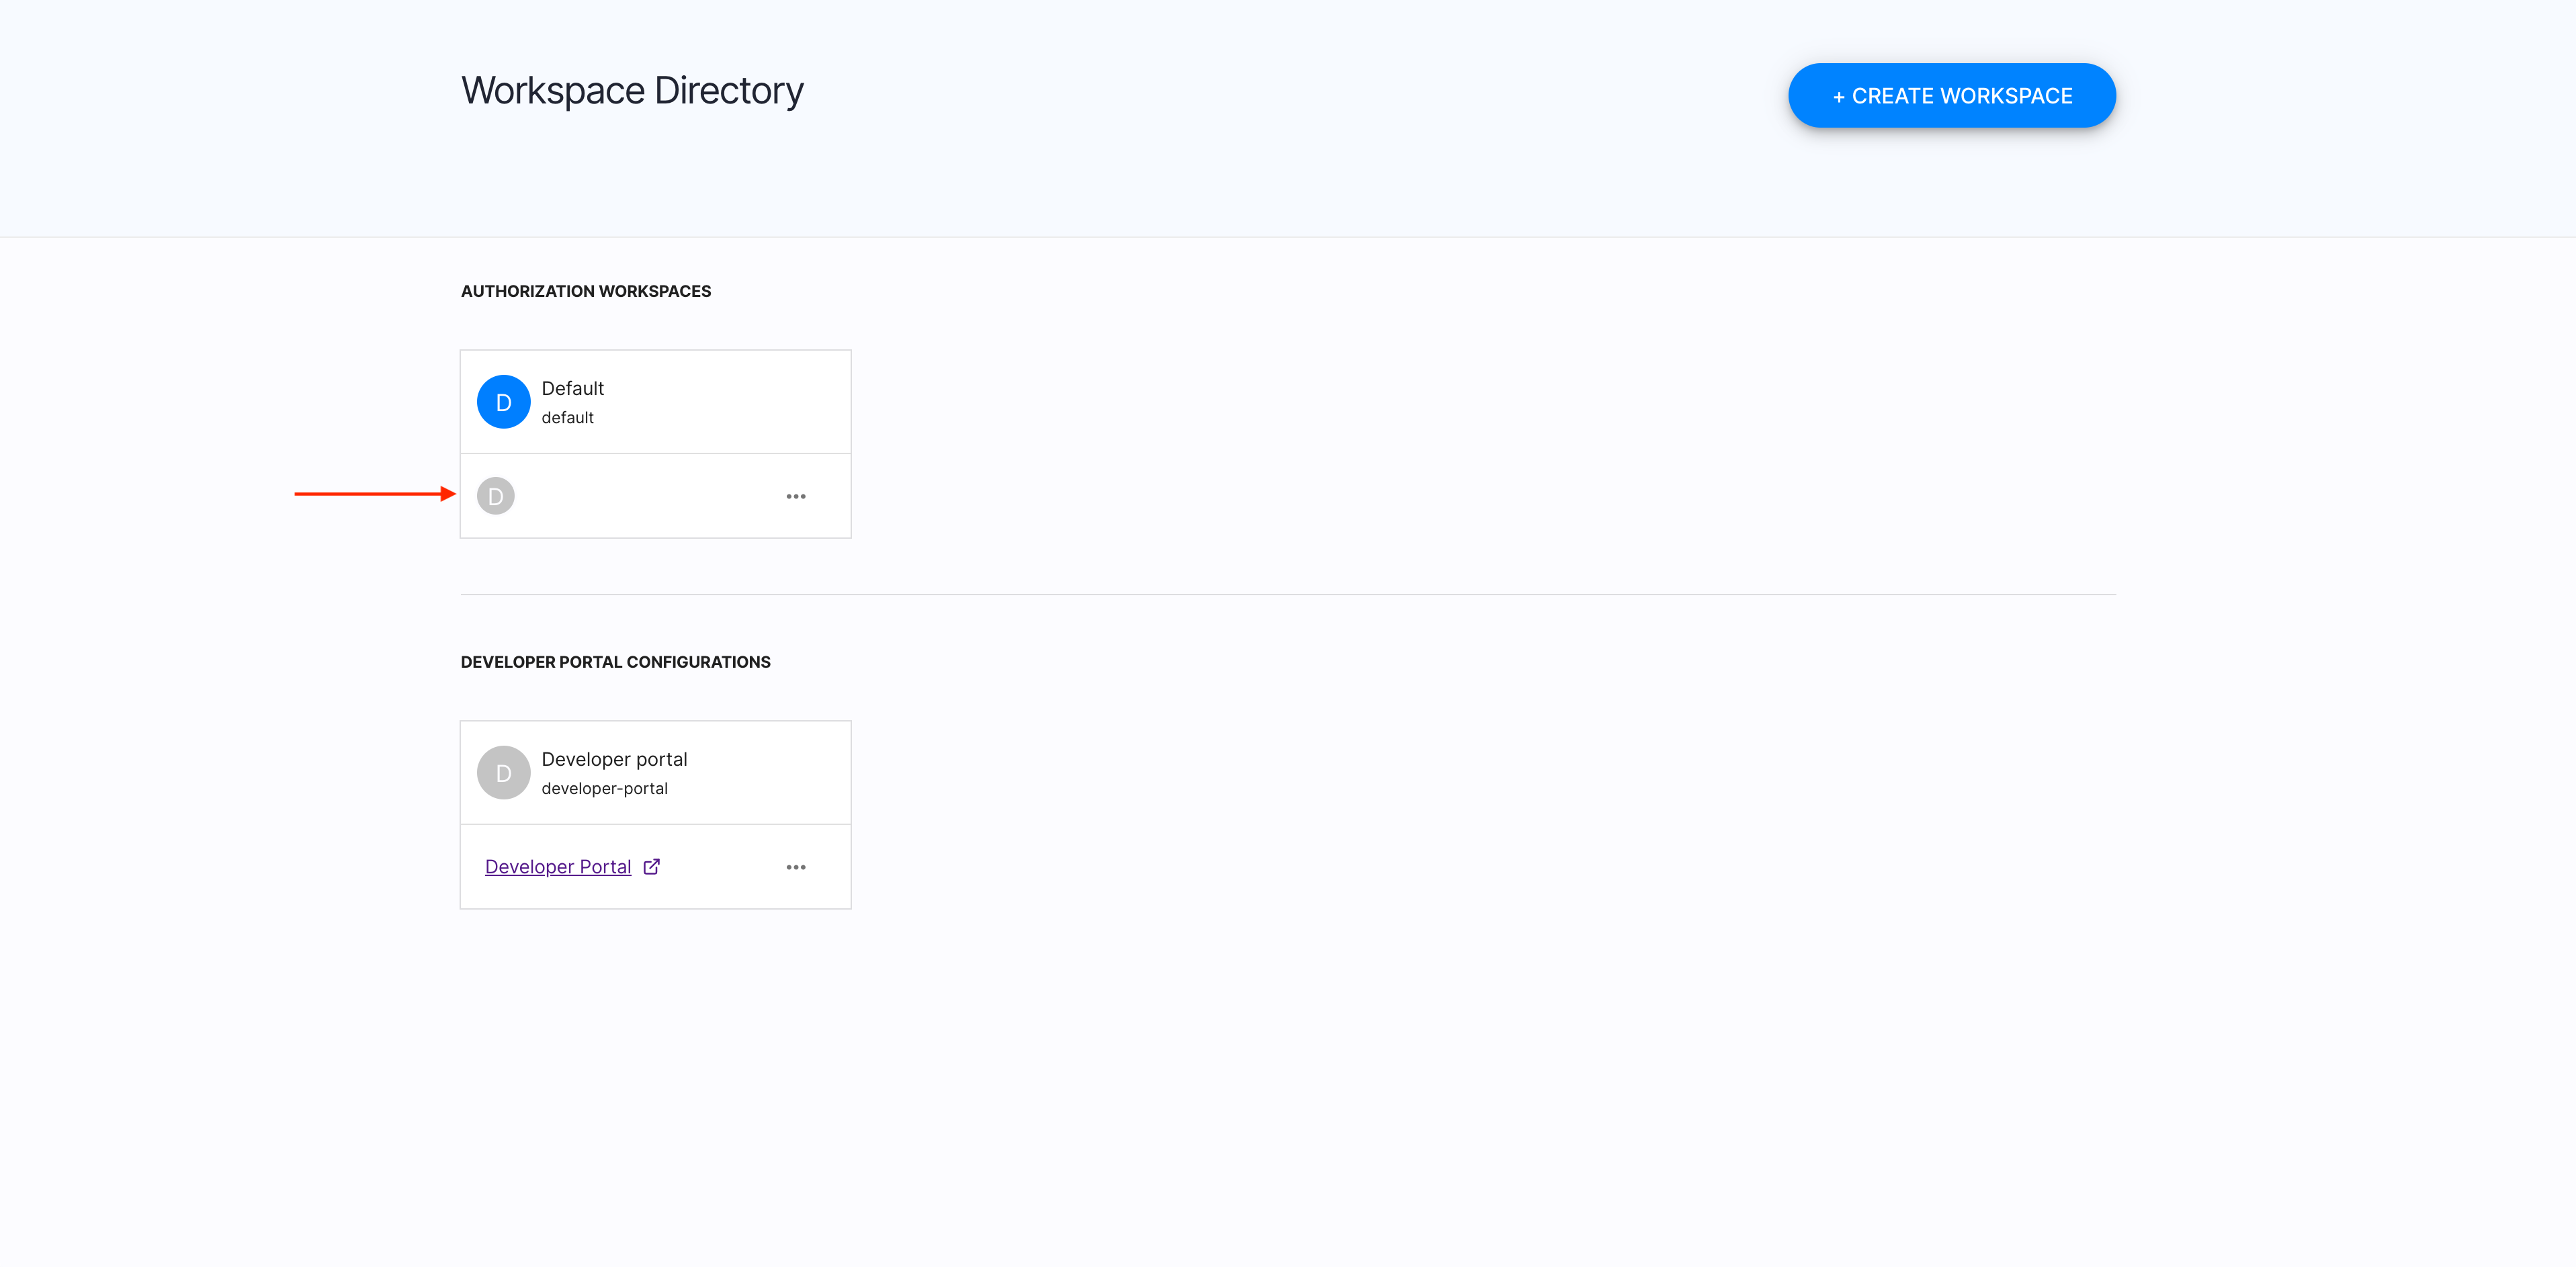
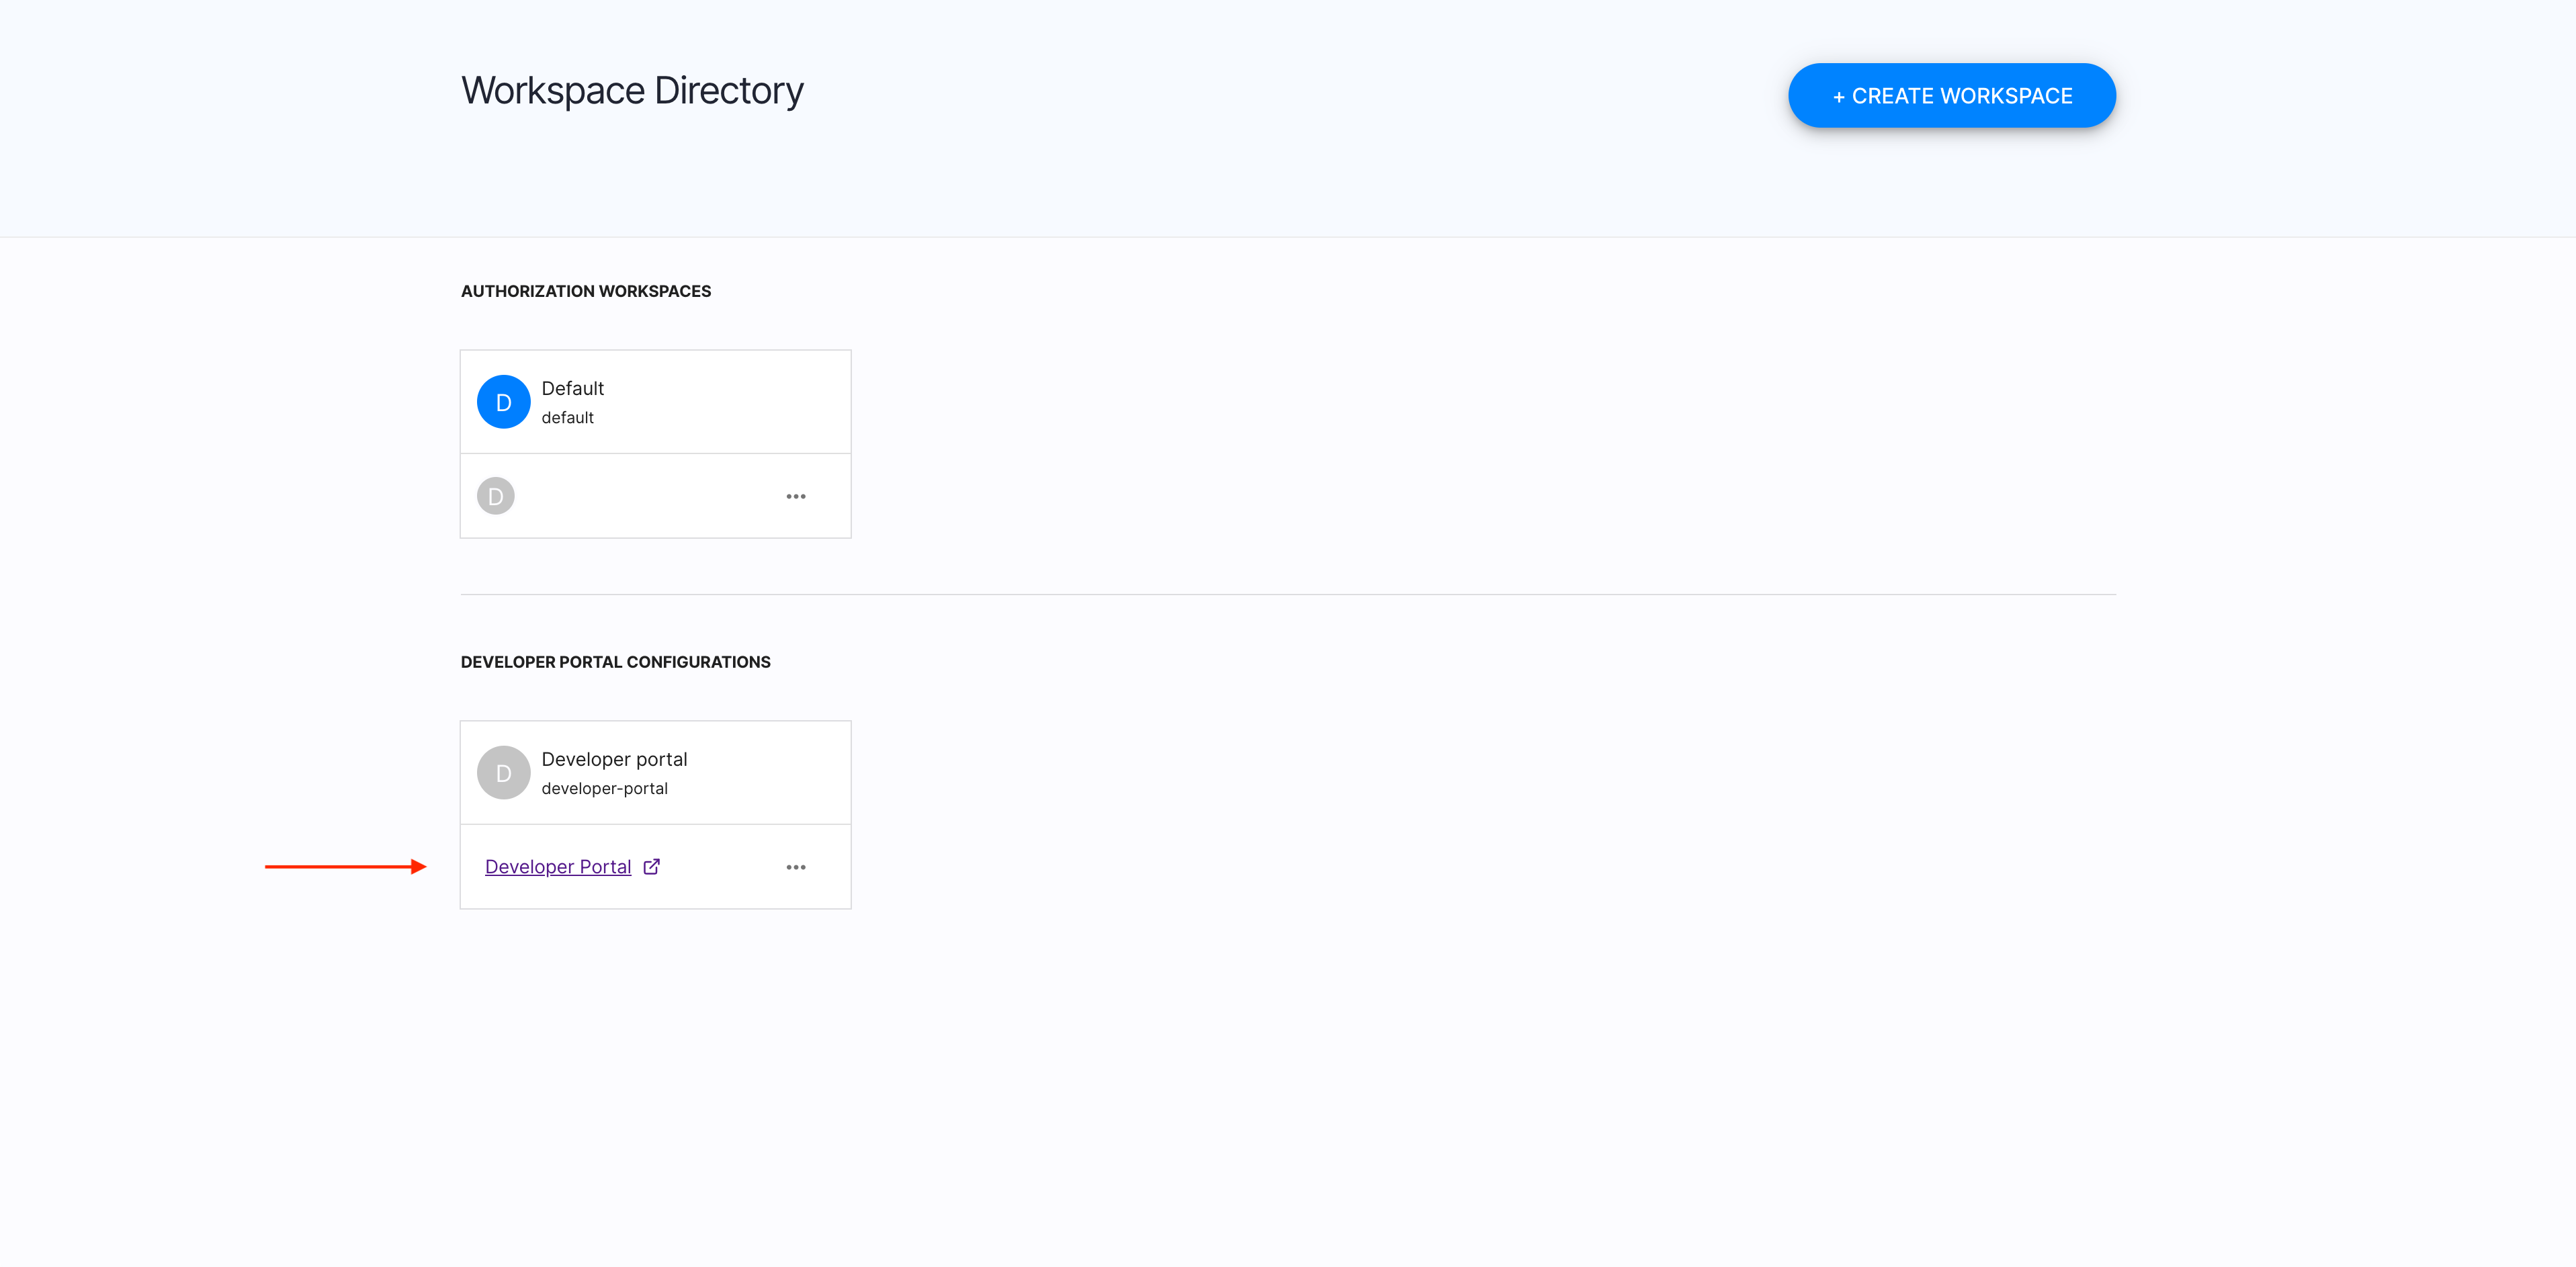
In the ACP administrator portal, go to Workspace Directory > DEVELOPER PORTAL CONFIGURATIONS > Developer Portal.
-
Select your newly-configured IDP.
-
Authenticate in the selected IDP.
Result
You are logged in to the ACP developer portal with the newly-configured IDP.