ACP user portal description
The ACP user portal offers all the features that end users need to manage authorizations and consents that they grant to their applications. This section introduces the user features available in the portal.
Logging in
After you navigate to the ACP user portal URL in your web browser, there are two possible pages that can open depending on how many identity providers (IDPs) you have configured.
-
If you have multiple IDPs configured, first you need to select an IDP that you want to log in with.
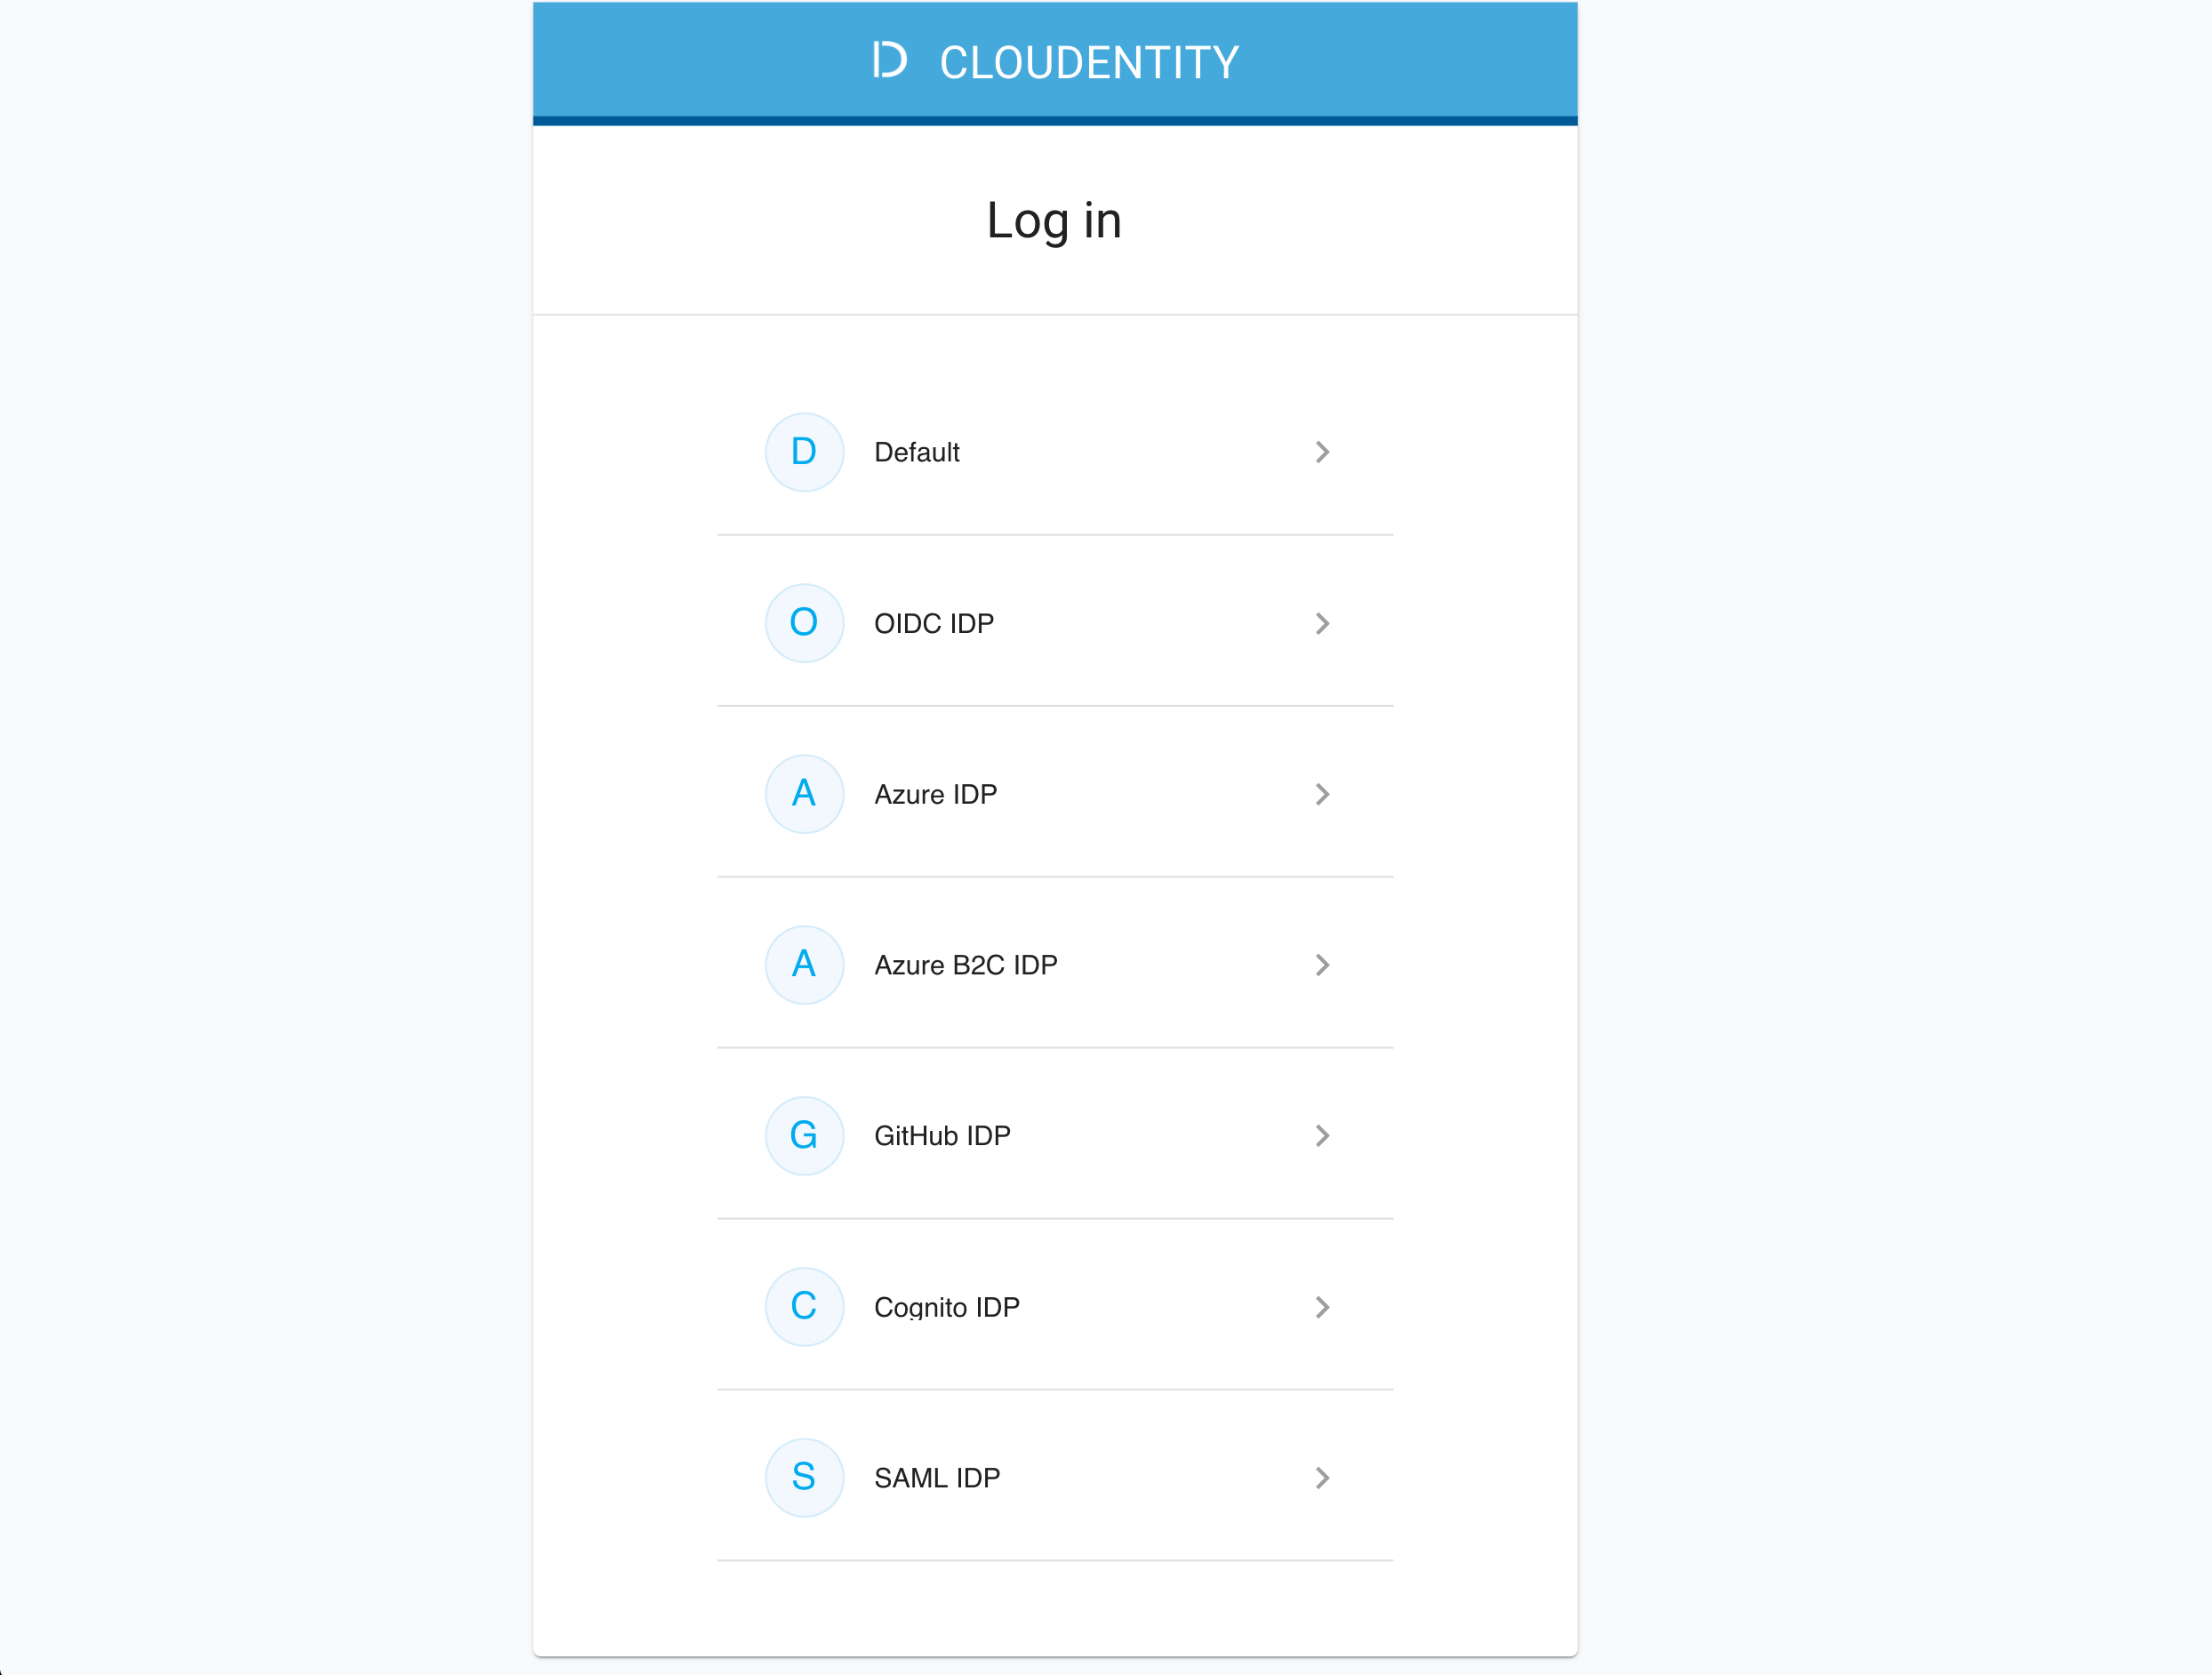
> # Note > In ACP you have a wide choice of IDPs that you can use to log in to your > applications. You can configure IDP types in the ACP administrator portal ([Connecting > identity providers to ACP](/info/concepts/portals/dev_portal/)). > >  -
If you have only one IDP configured, you go straight to its login page to log in to your application(s).
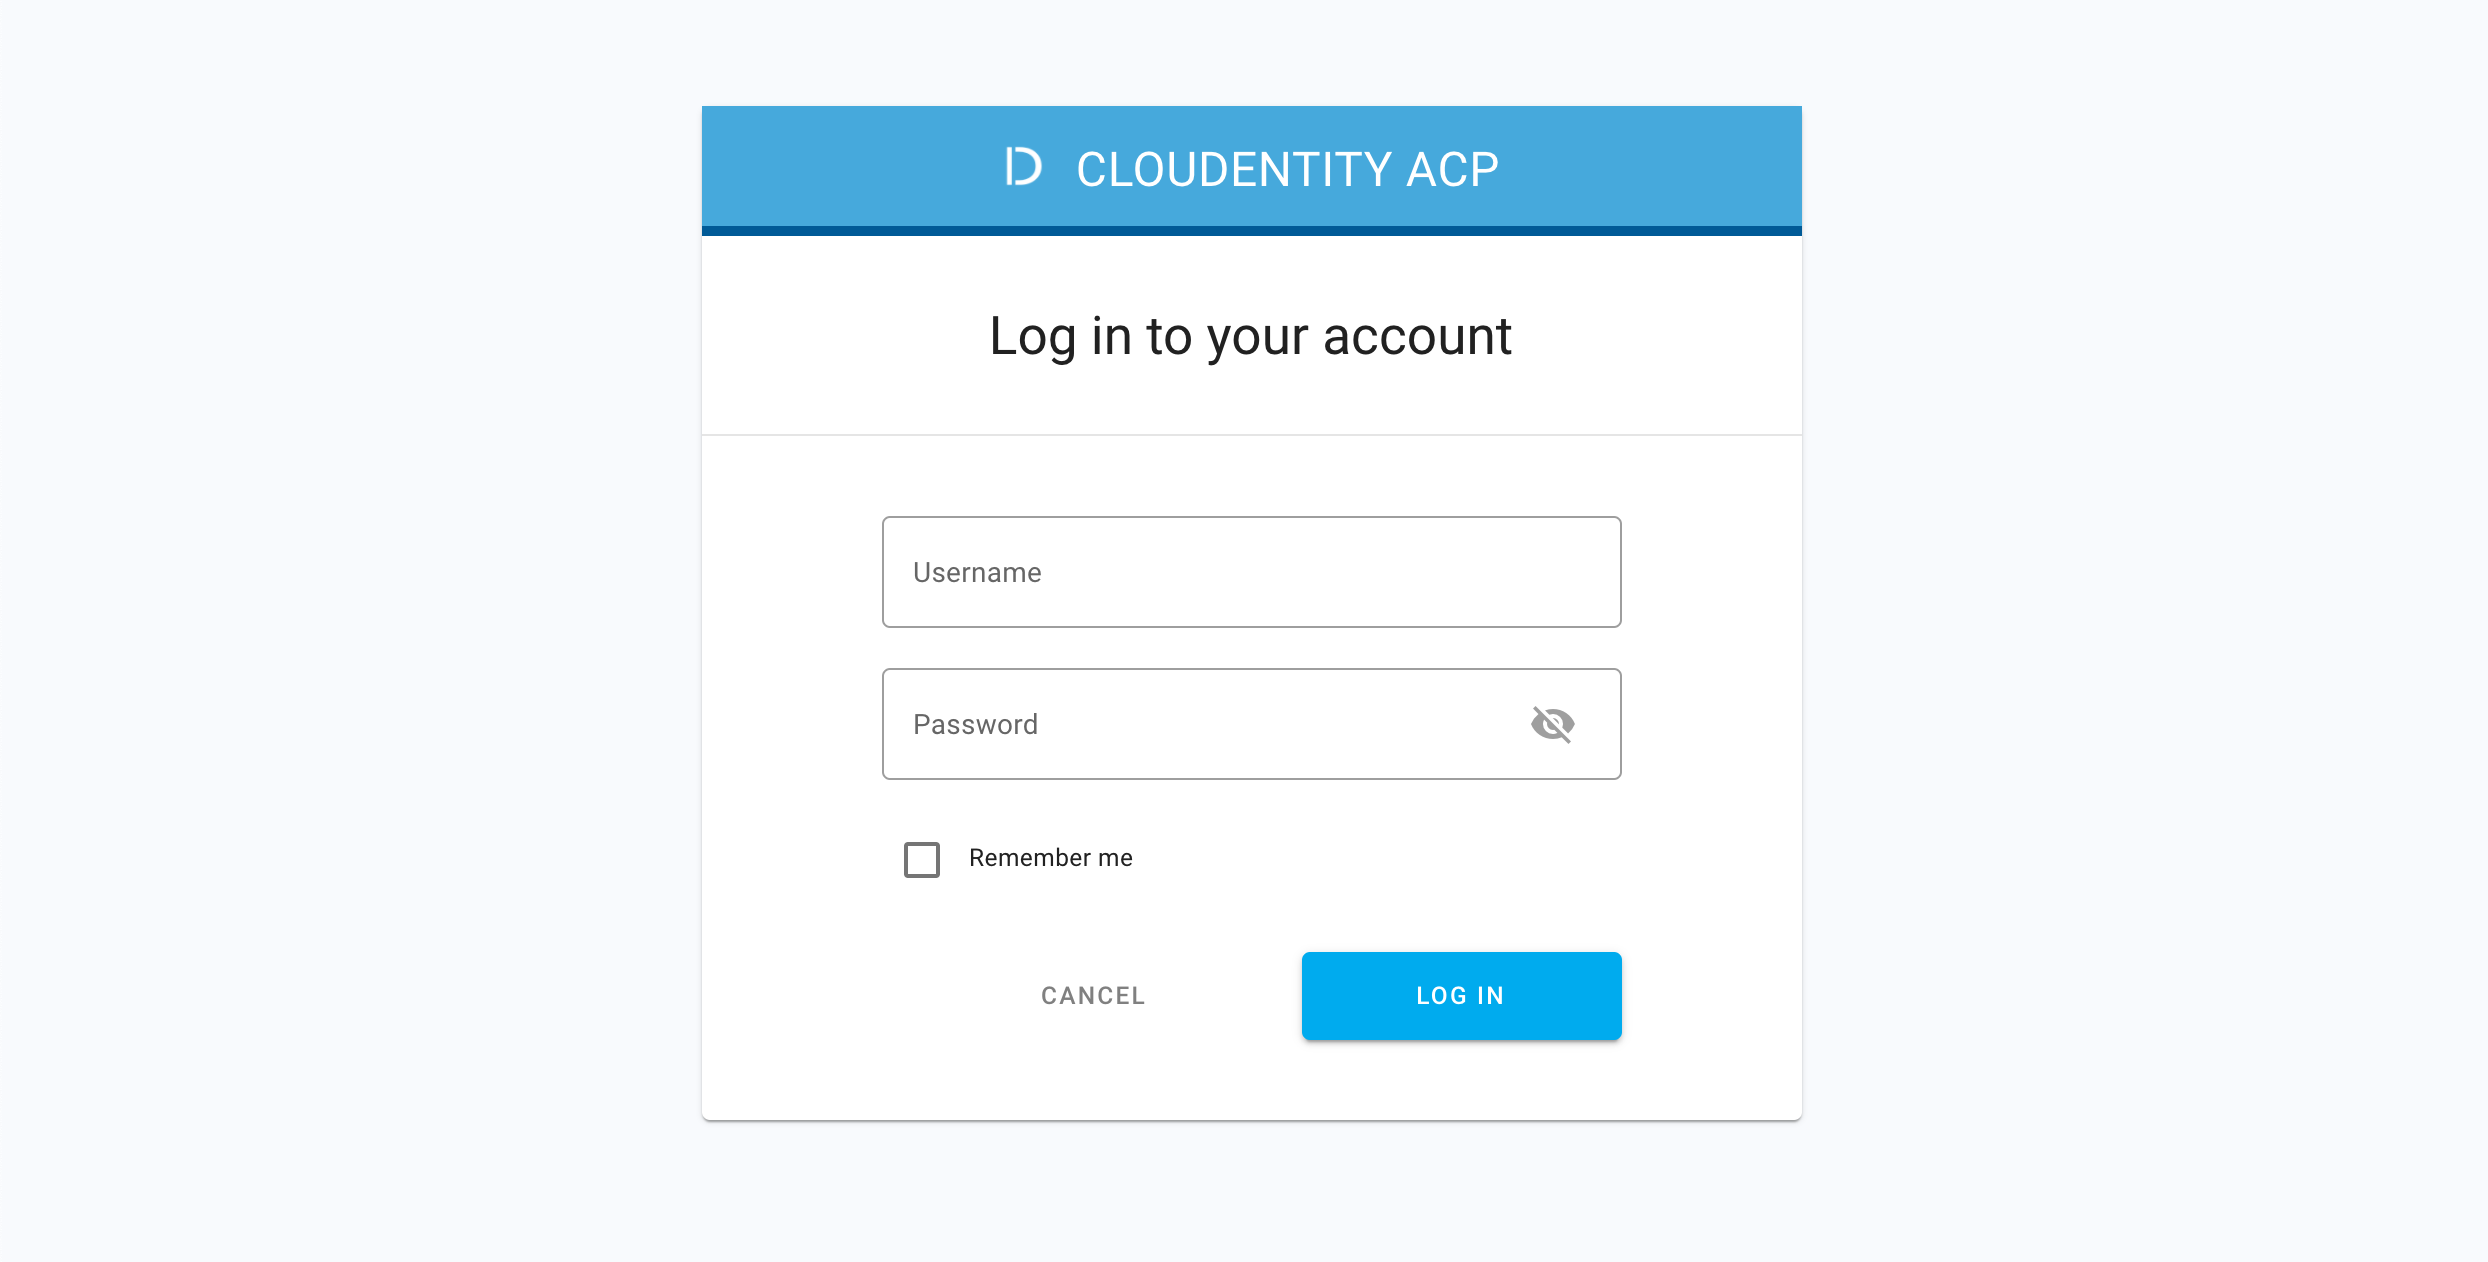
After entering your login credentials, the ACP user portal opens.
Authorized applications
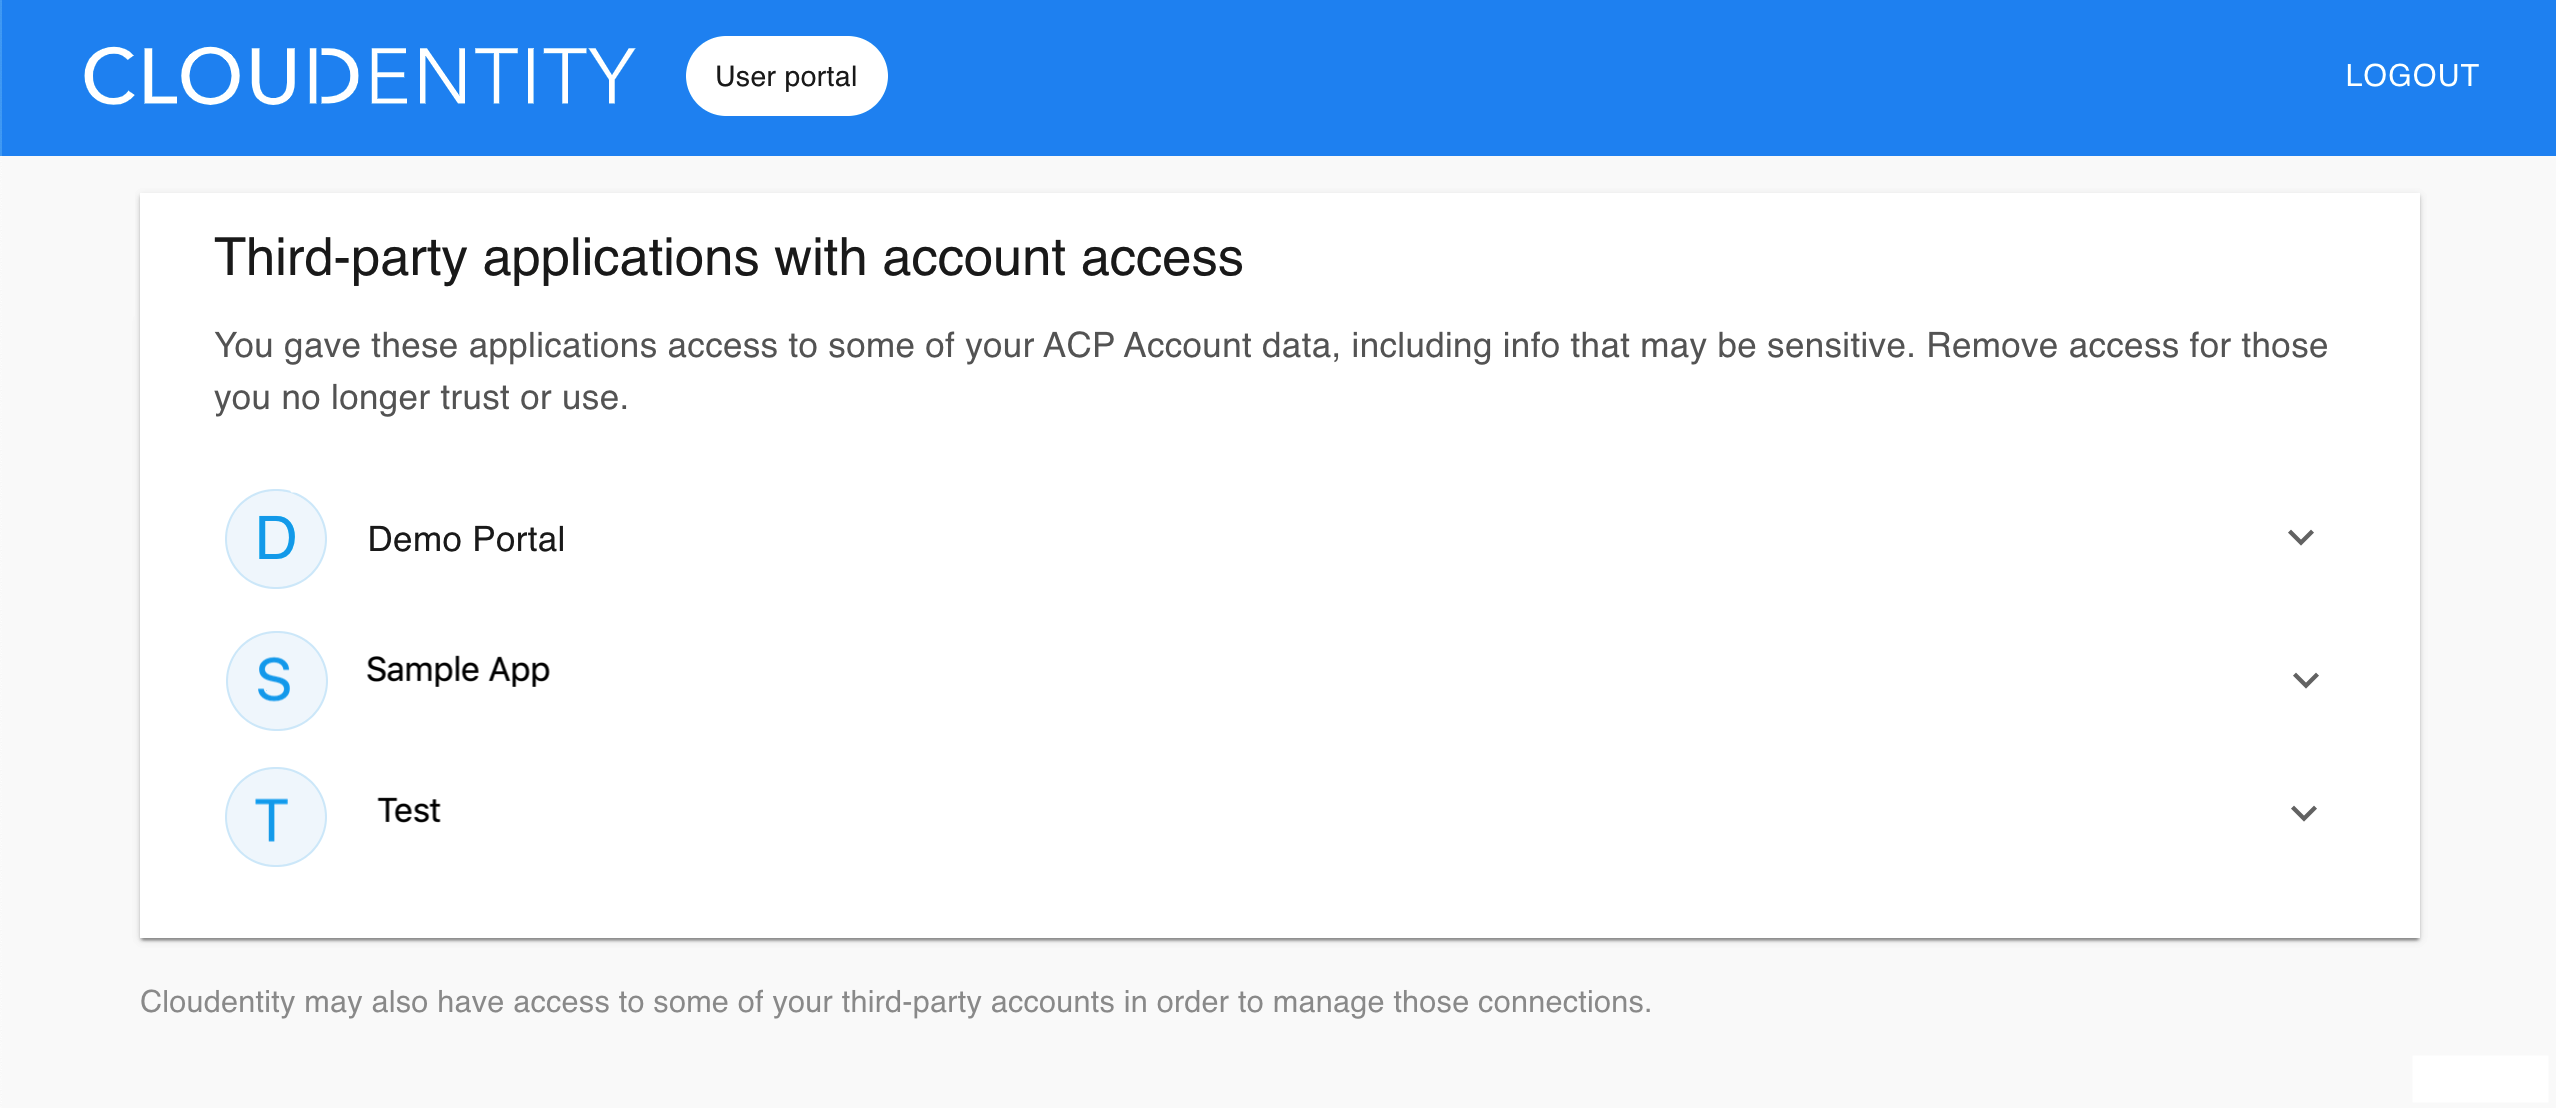
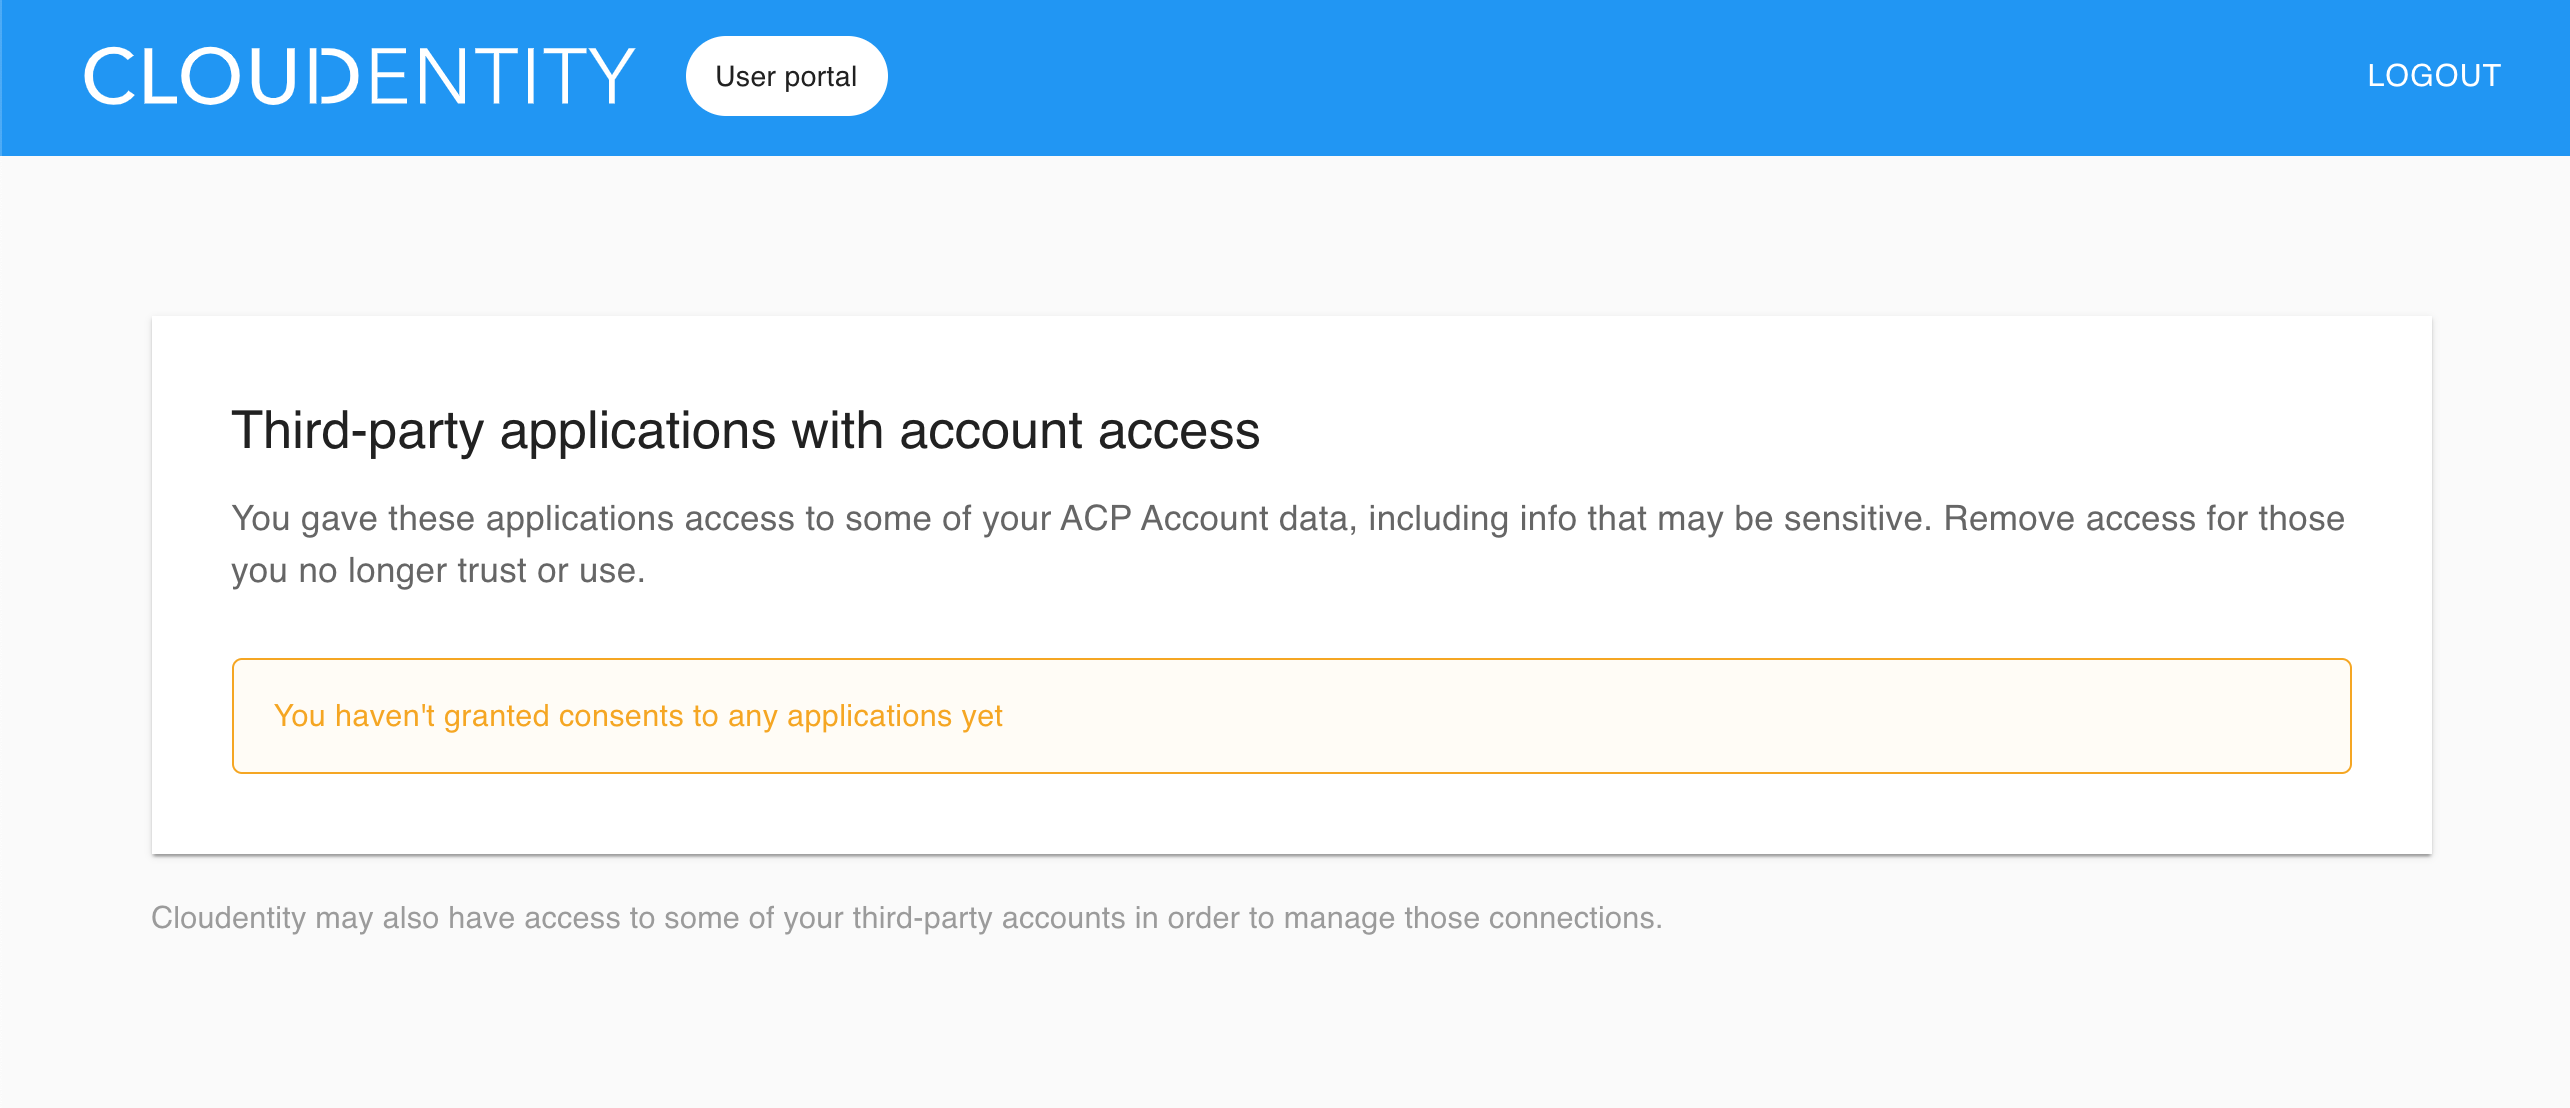
What the ACP user portal displays depends on whether you have authorized any applications to access your account:
- If you do have authorized applications, the ACP user portal shows them listed as Third-party applications with account access.
- If you have not authorized any applications to access your account, the ACP user portal displays message You haven’t granted consents to any applications yet.
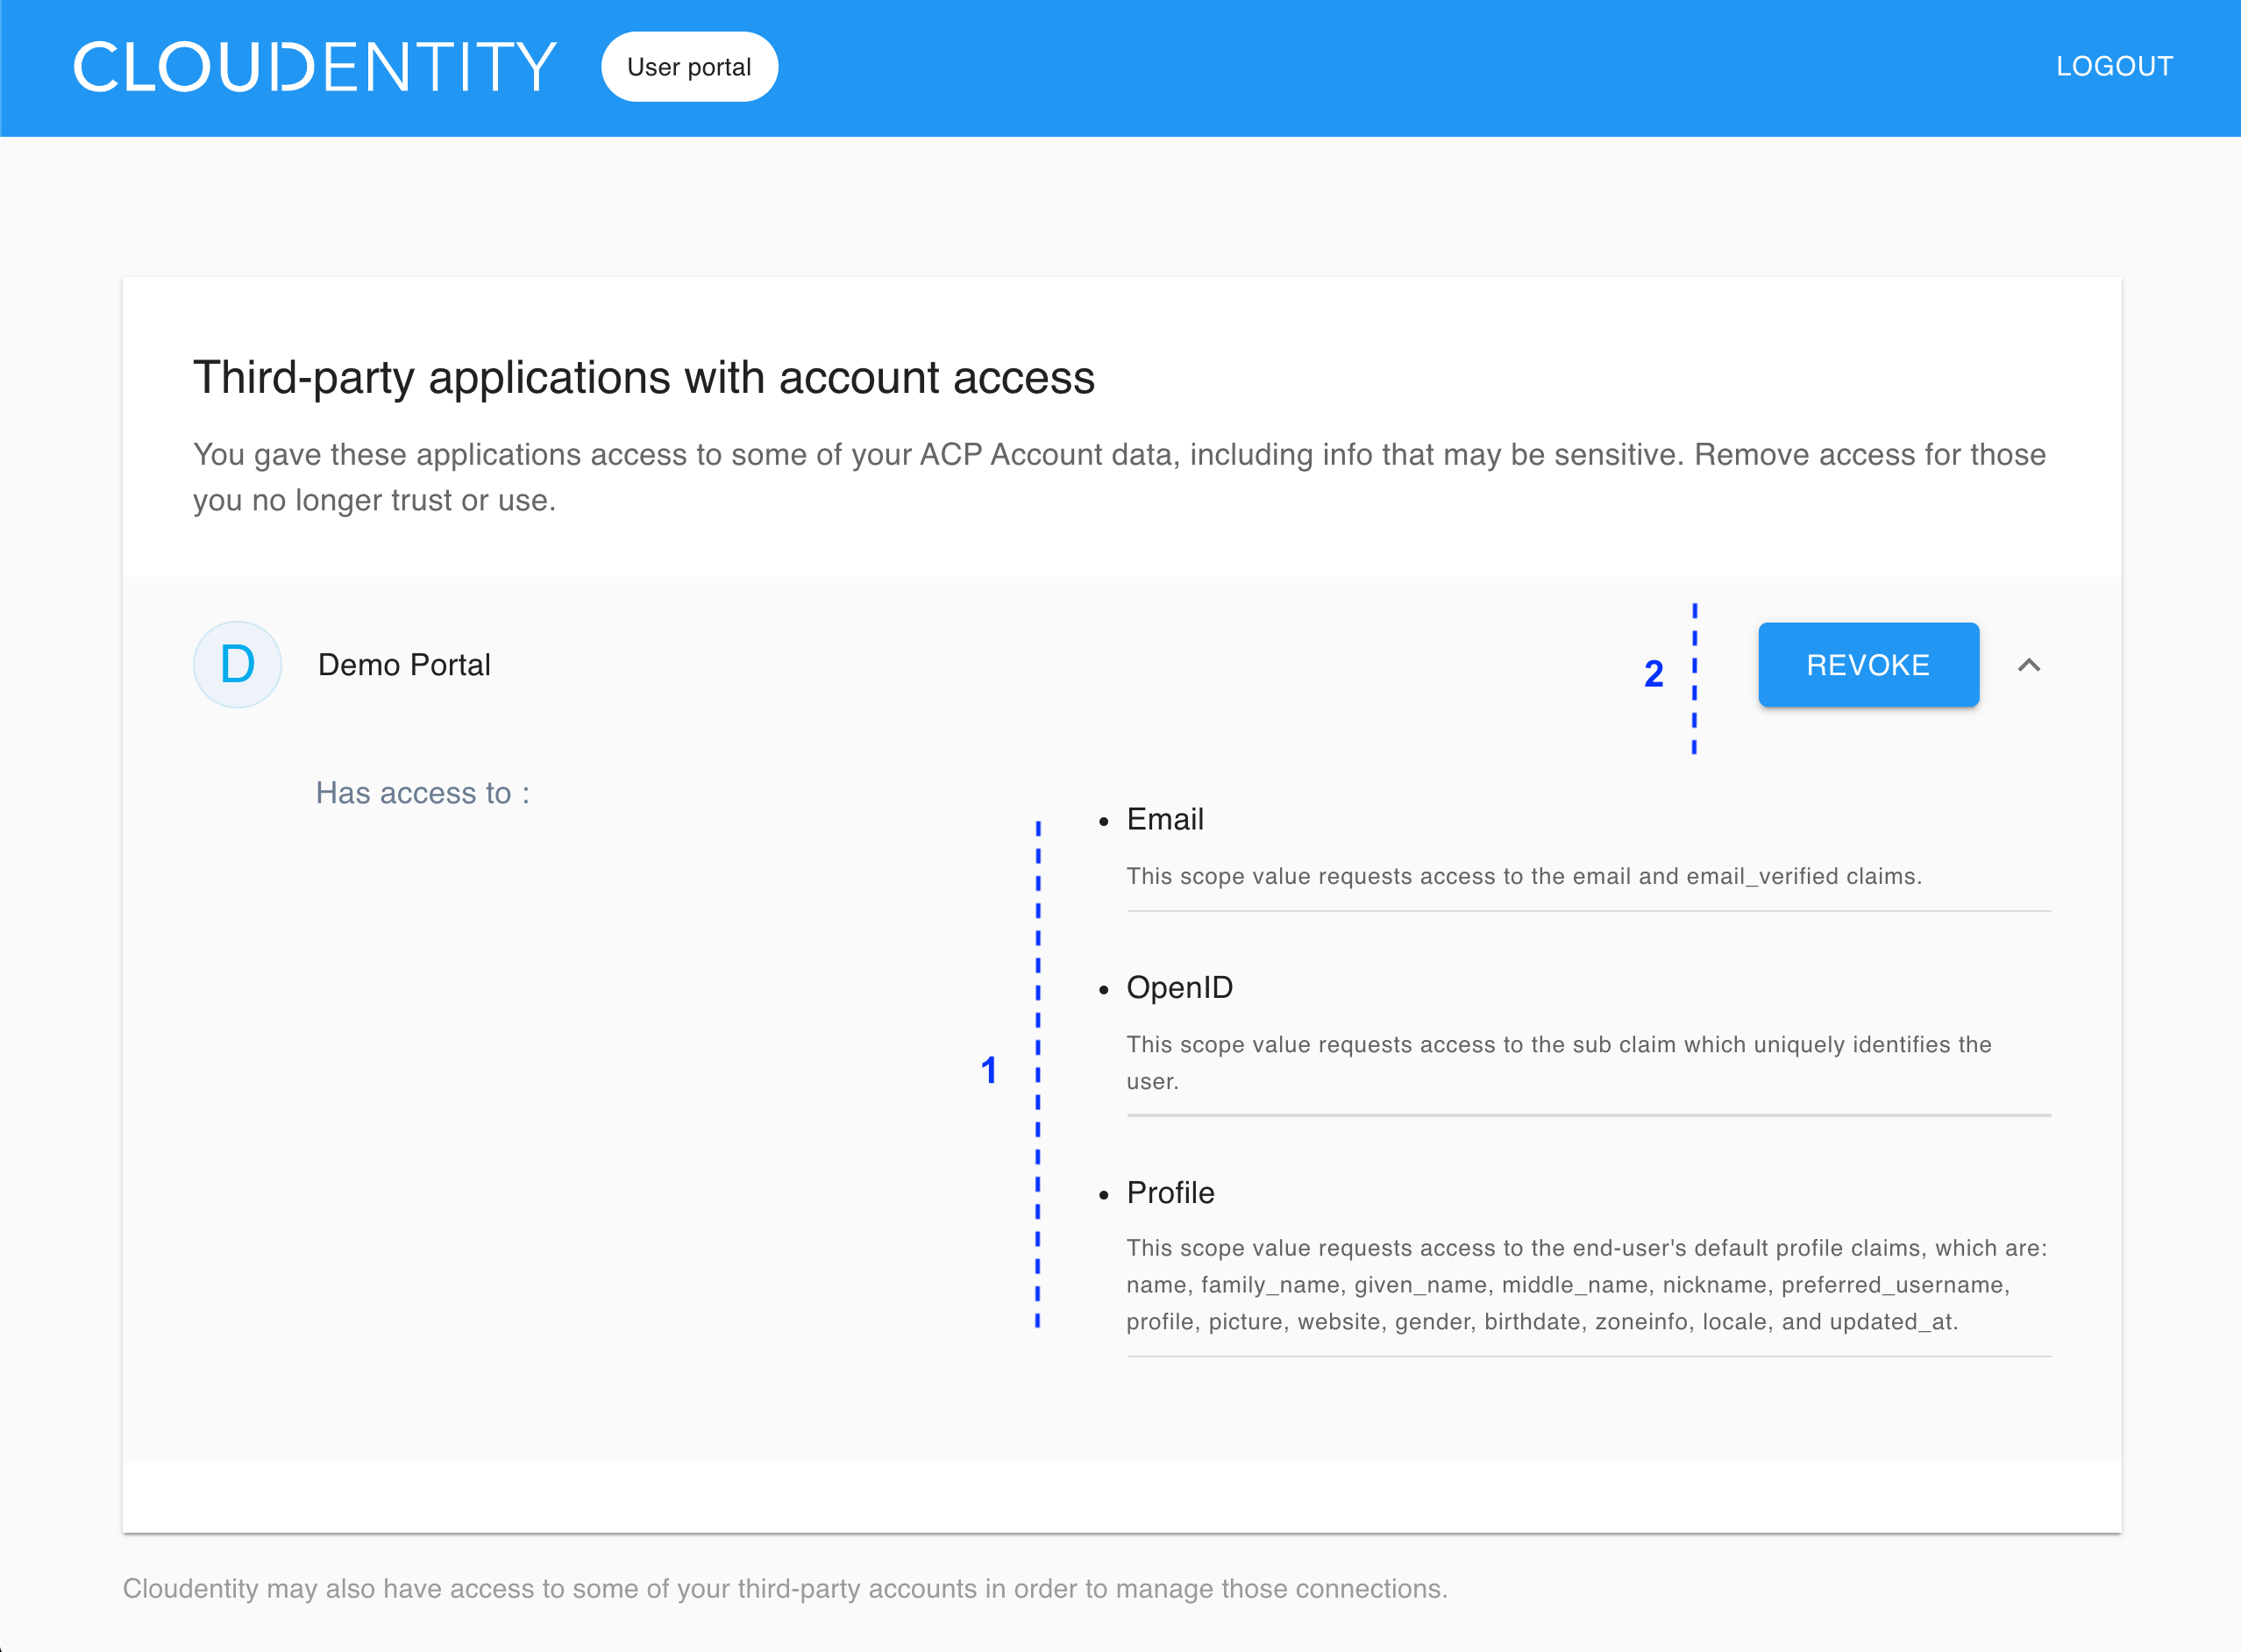
App-access details
After selecting a particular application from the list of the authorized applications, the detailed view of the application access information unfolds. The view includes
-
List of data scopes that the application has access to (for example, email, profile, openid)
-
REVOKE button for removing the authorization, which
- Revokes all scopes granted to the application
- Invalidates all access and refresh tokens issued for the application
See related articles