Using Dynamic Client Registration for Open Banking
Instructions on how to configure and use the Open-Banking-compliant DCR in ACP
Note
DCR allows developers to dynamically register third-party applications with authorization servers under your tenant.
Prerequisites
- You have login credentials to ACP.
- You have an Open Banking workspace in ACP.
Select a workspace
-
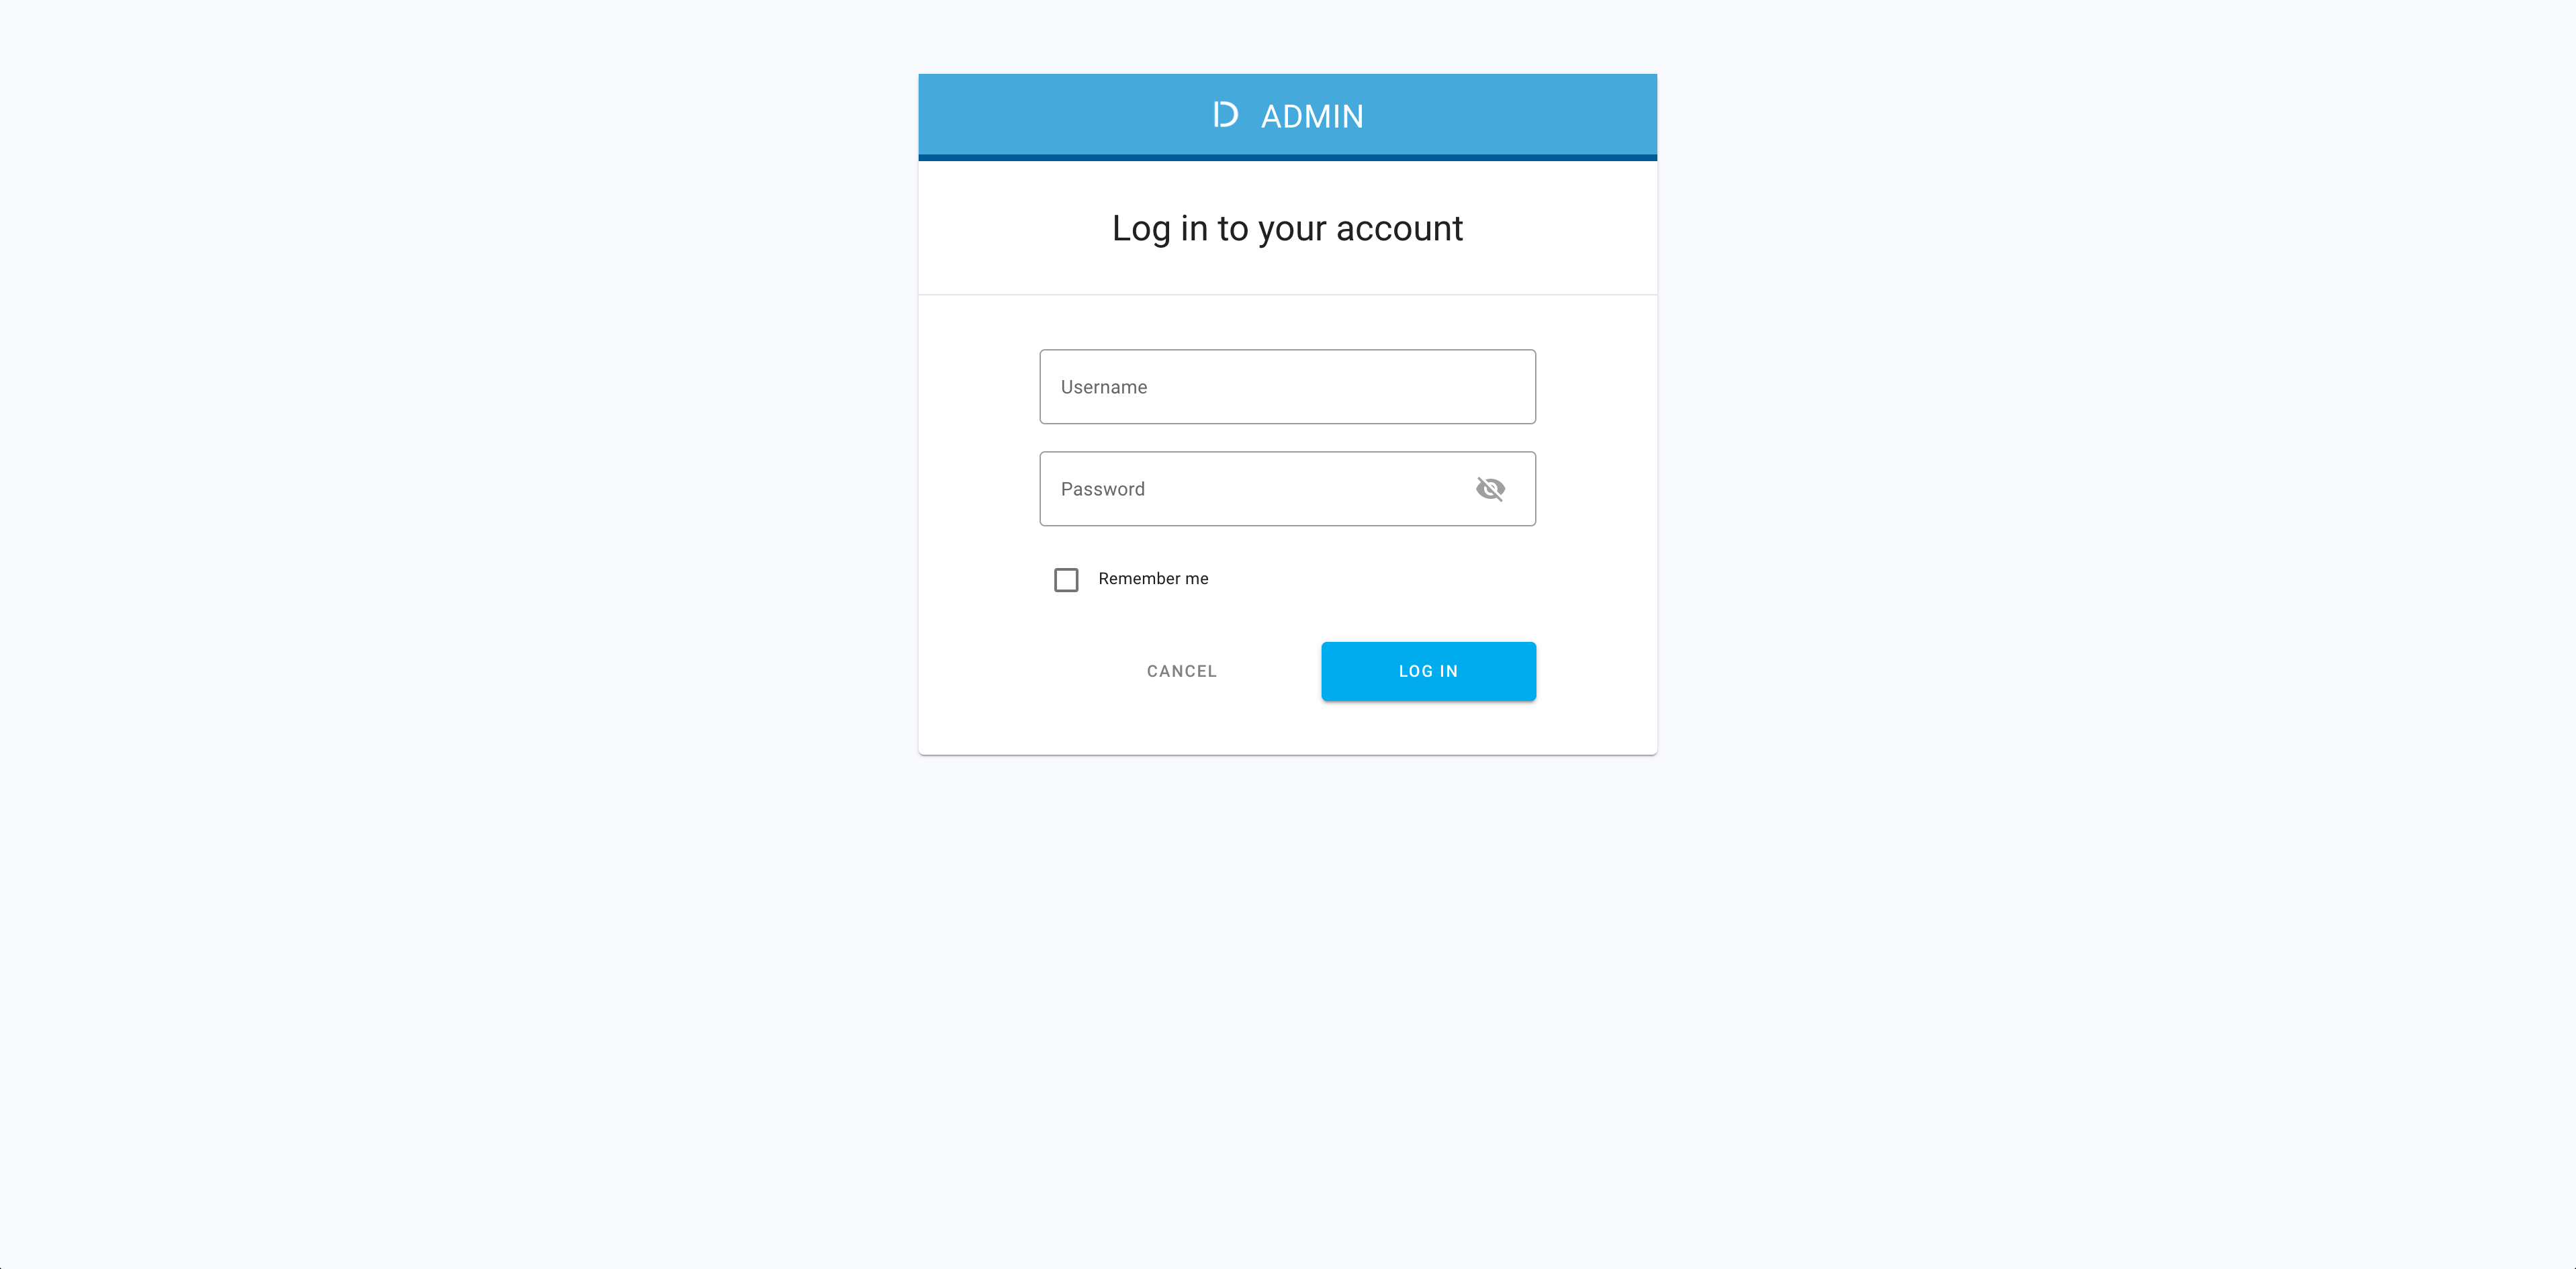
In your browser, navigate to ACP and log in with your credentials.
-
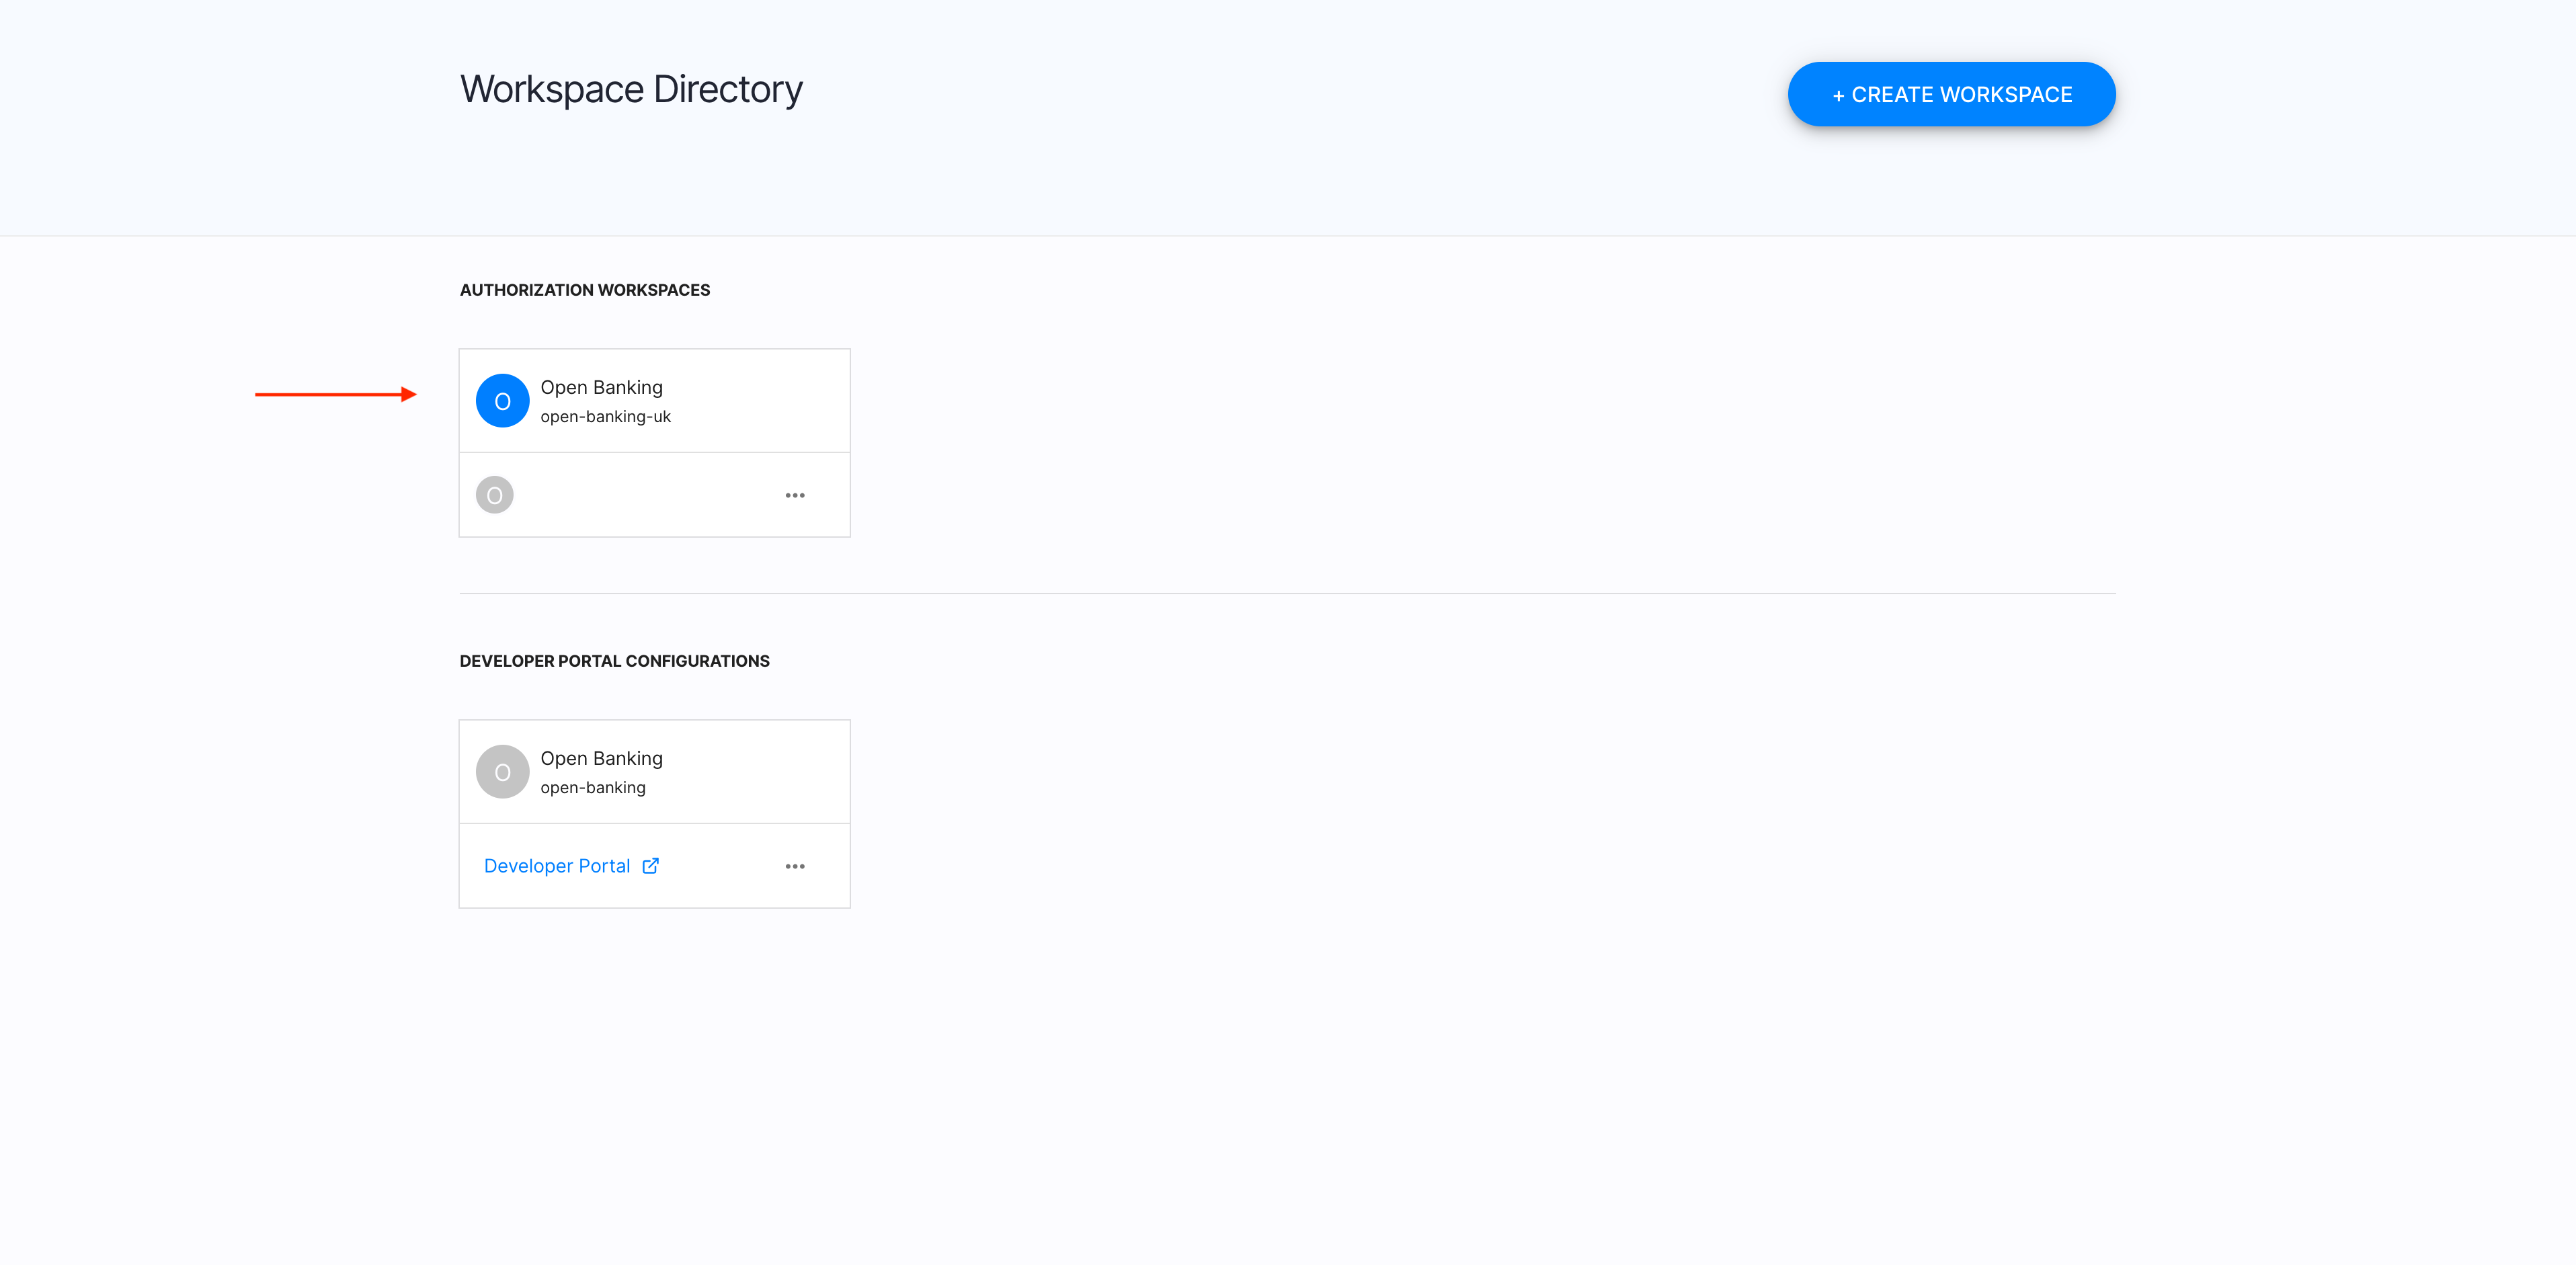
From Workspace Directory, select an Open Banking workspace that you want to enter.
Navigate to auth settings
-
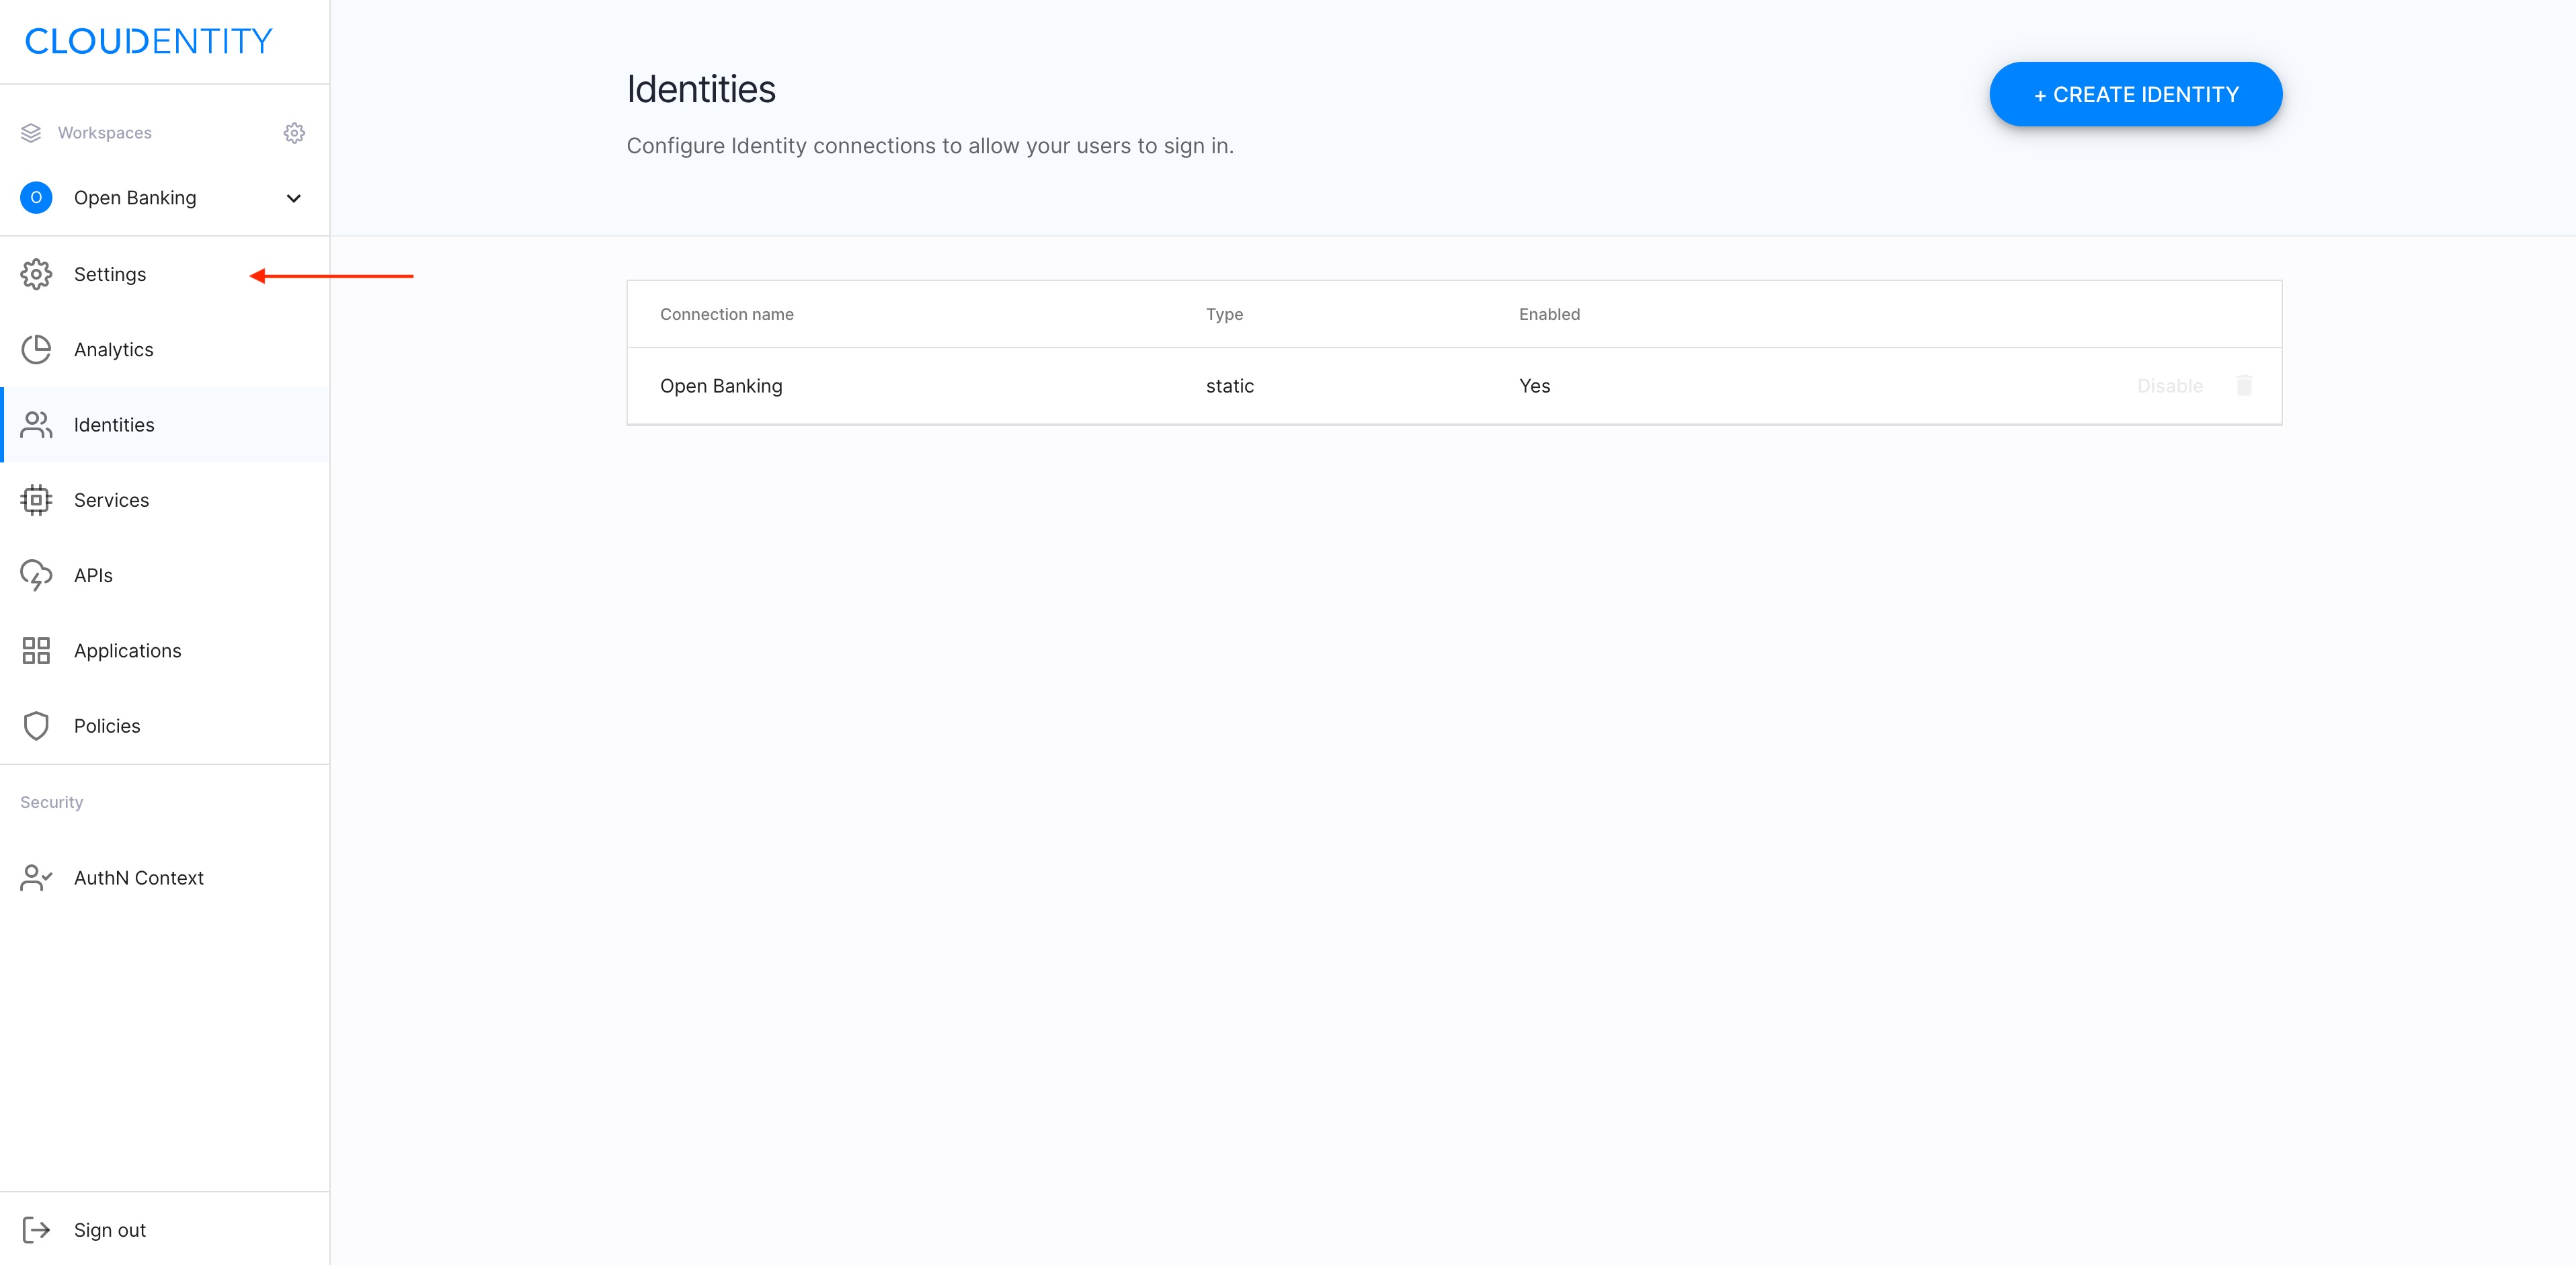
In the workspace, select Settings from the sidebar.
-
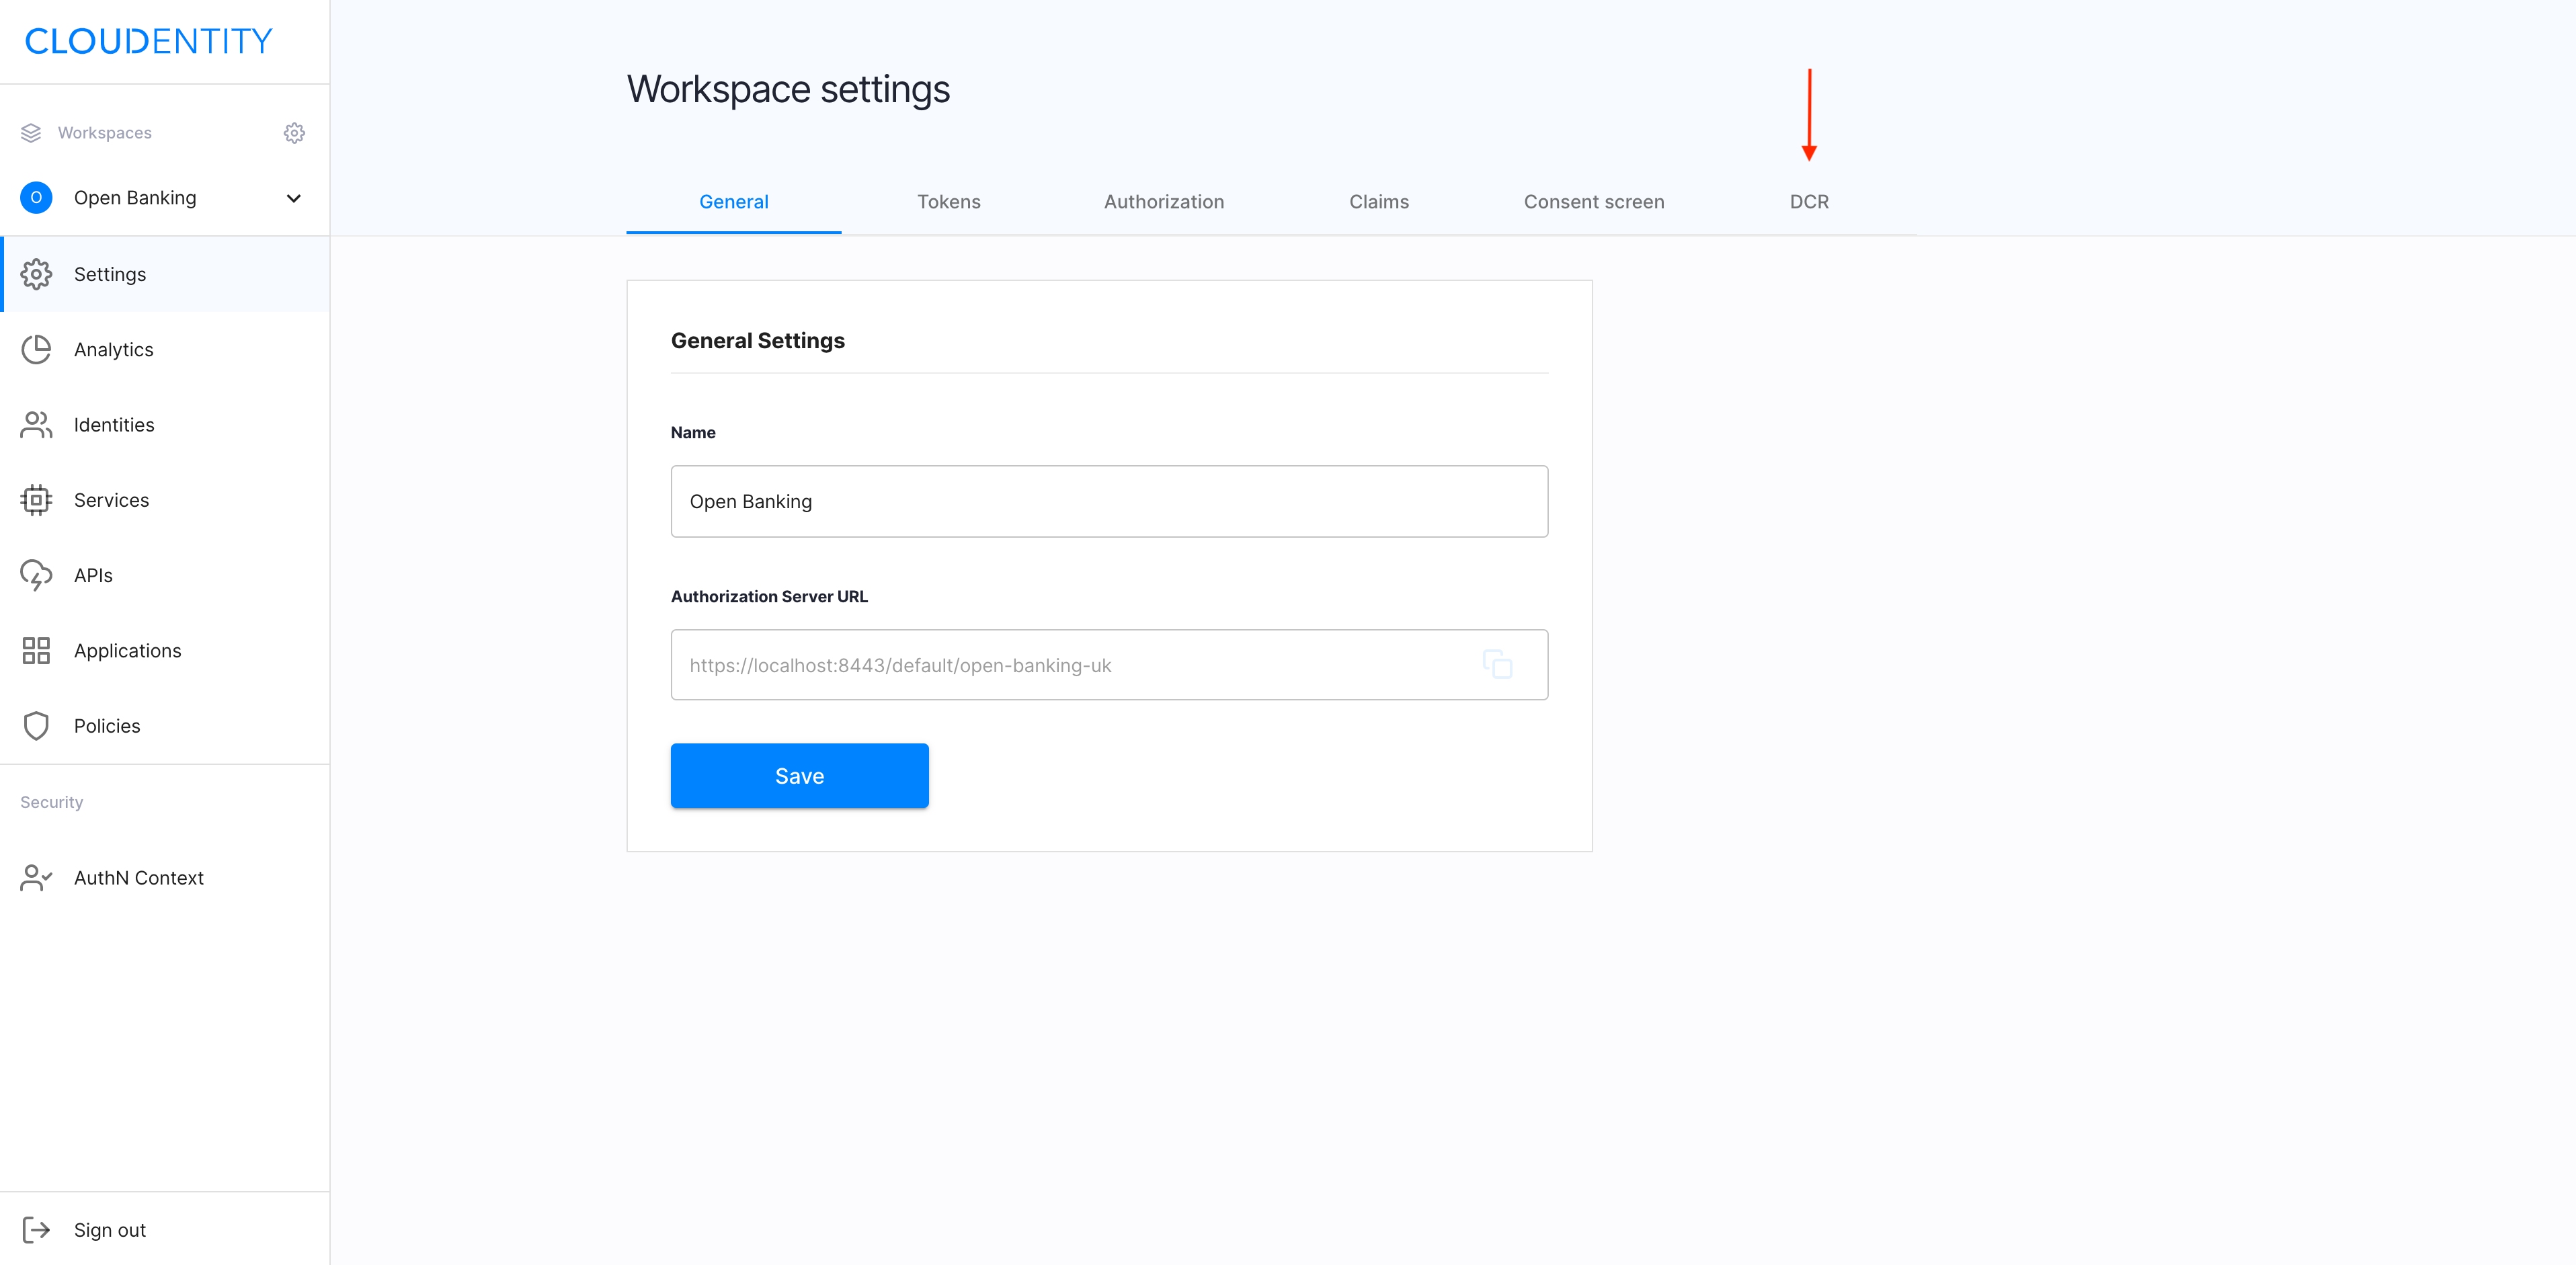
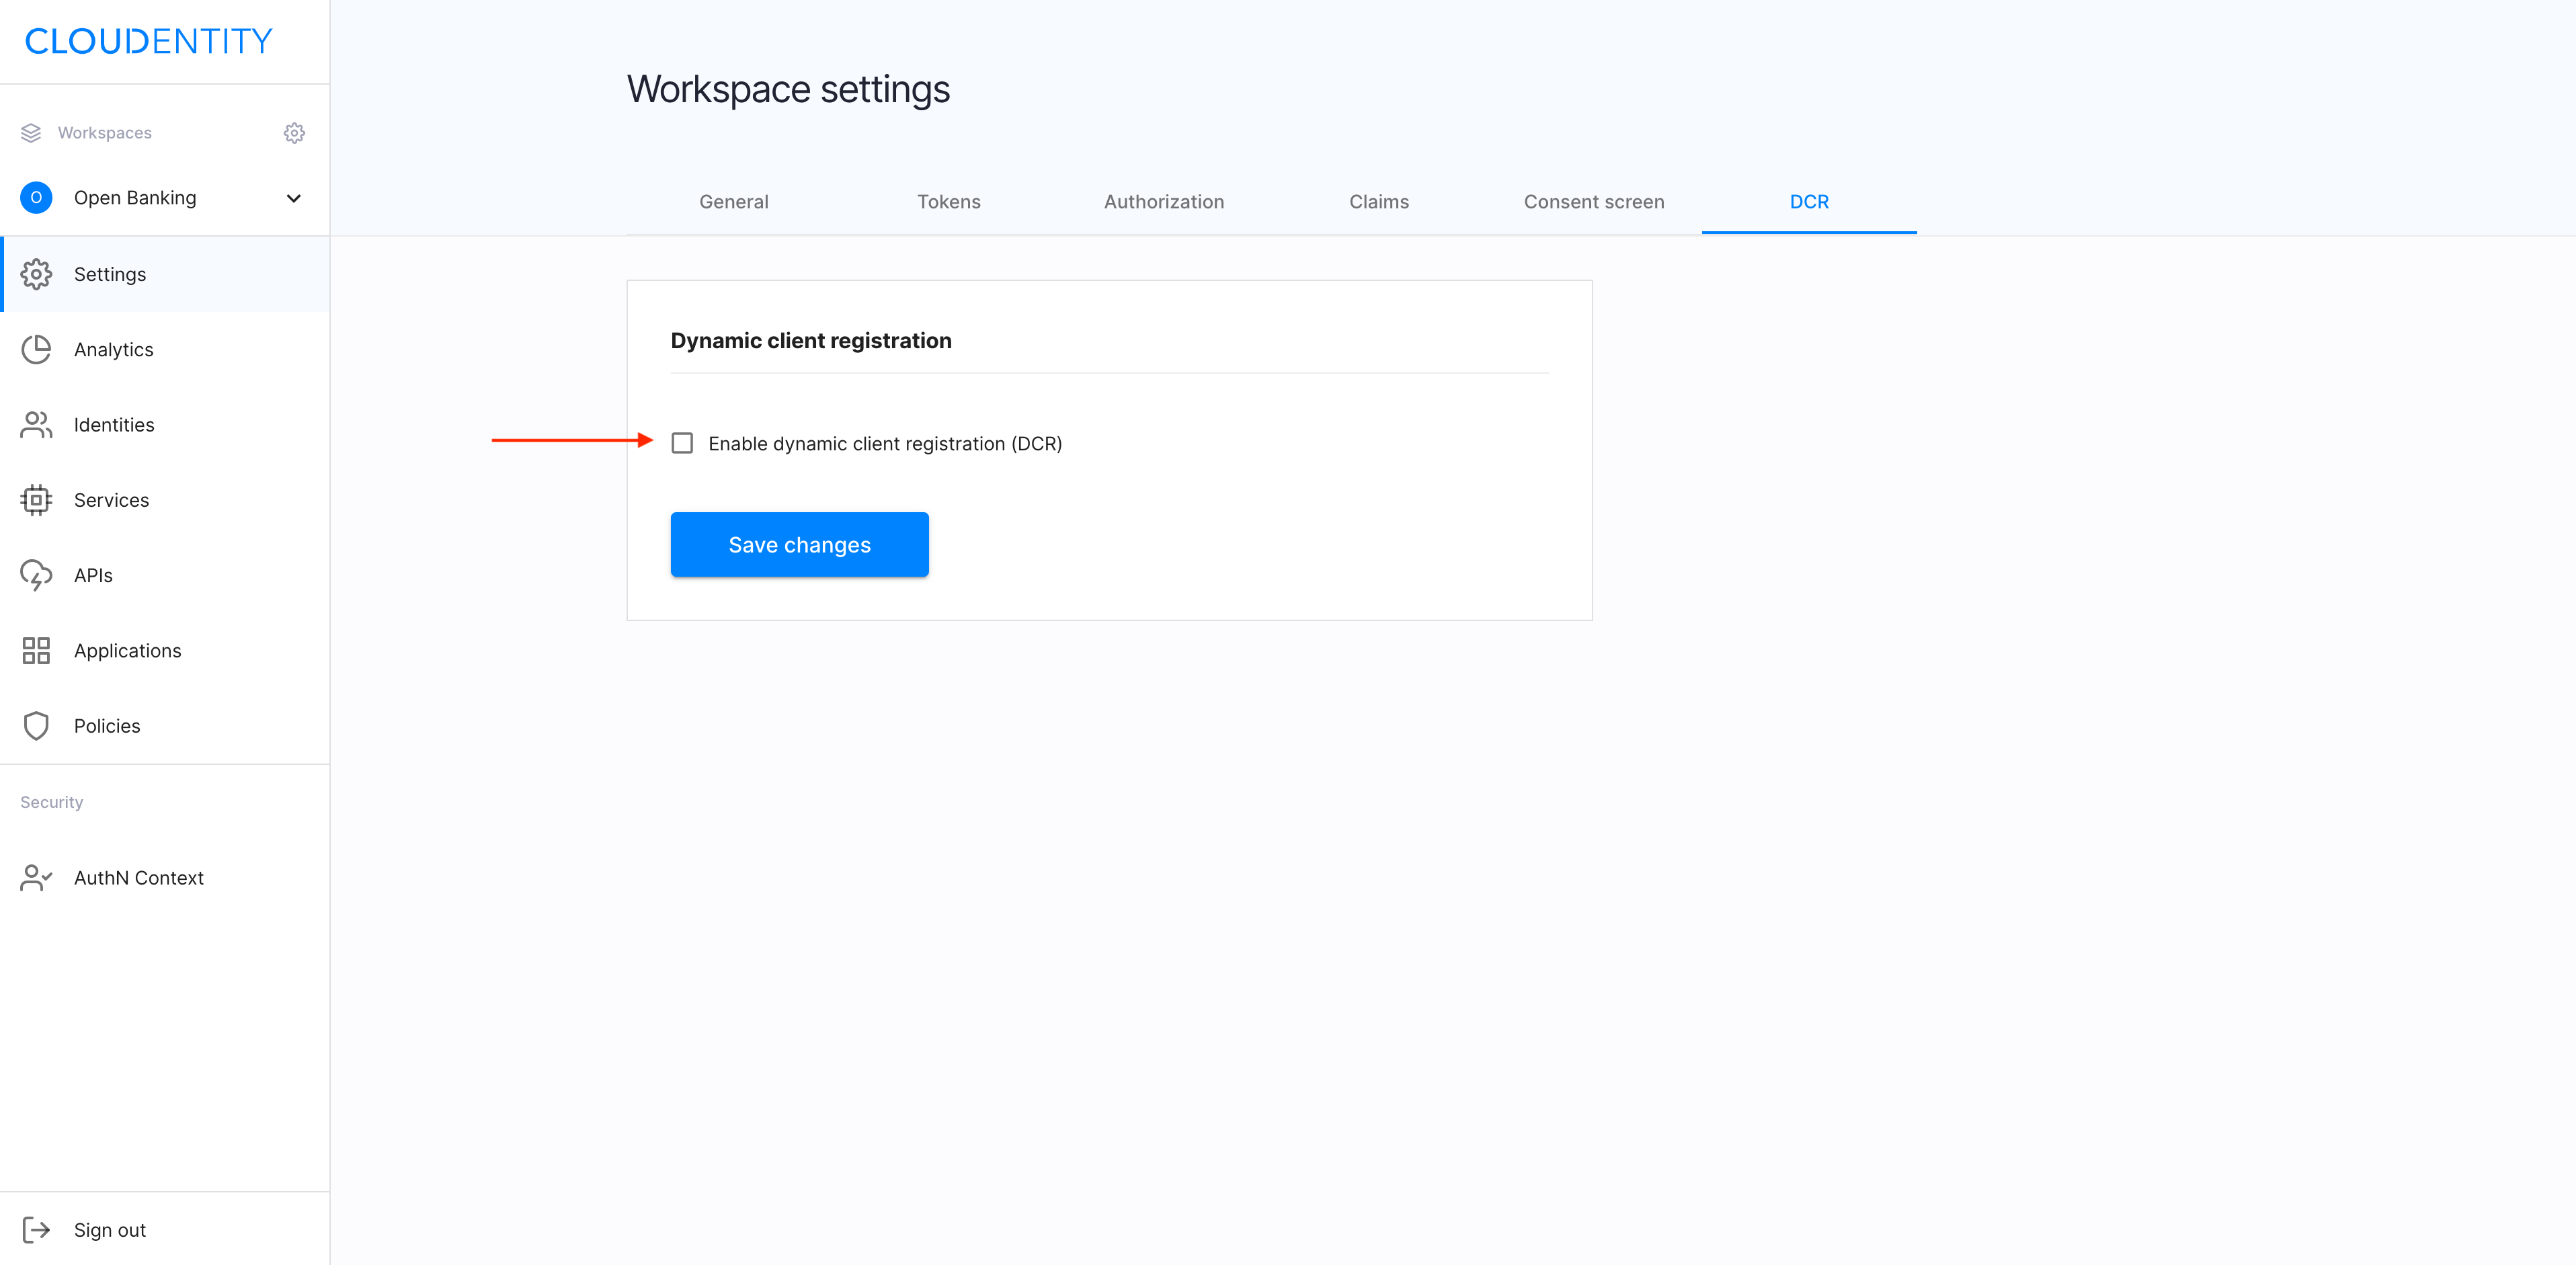
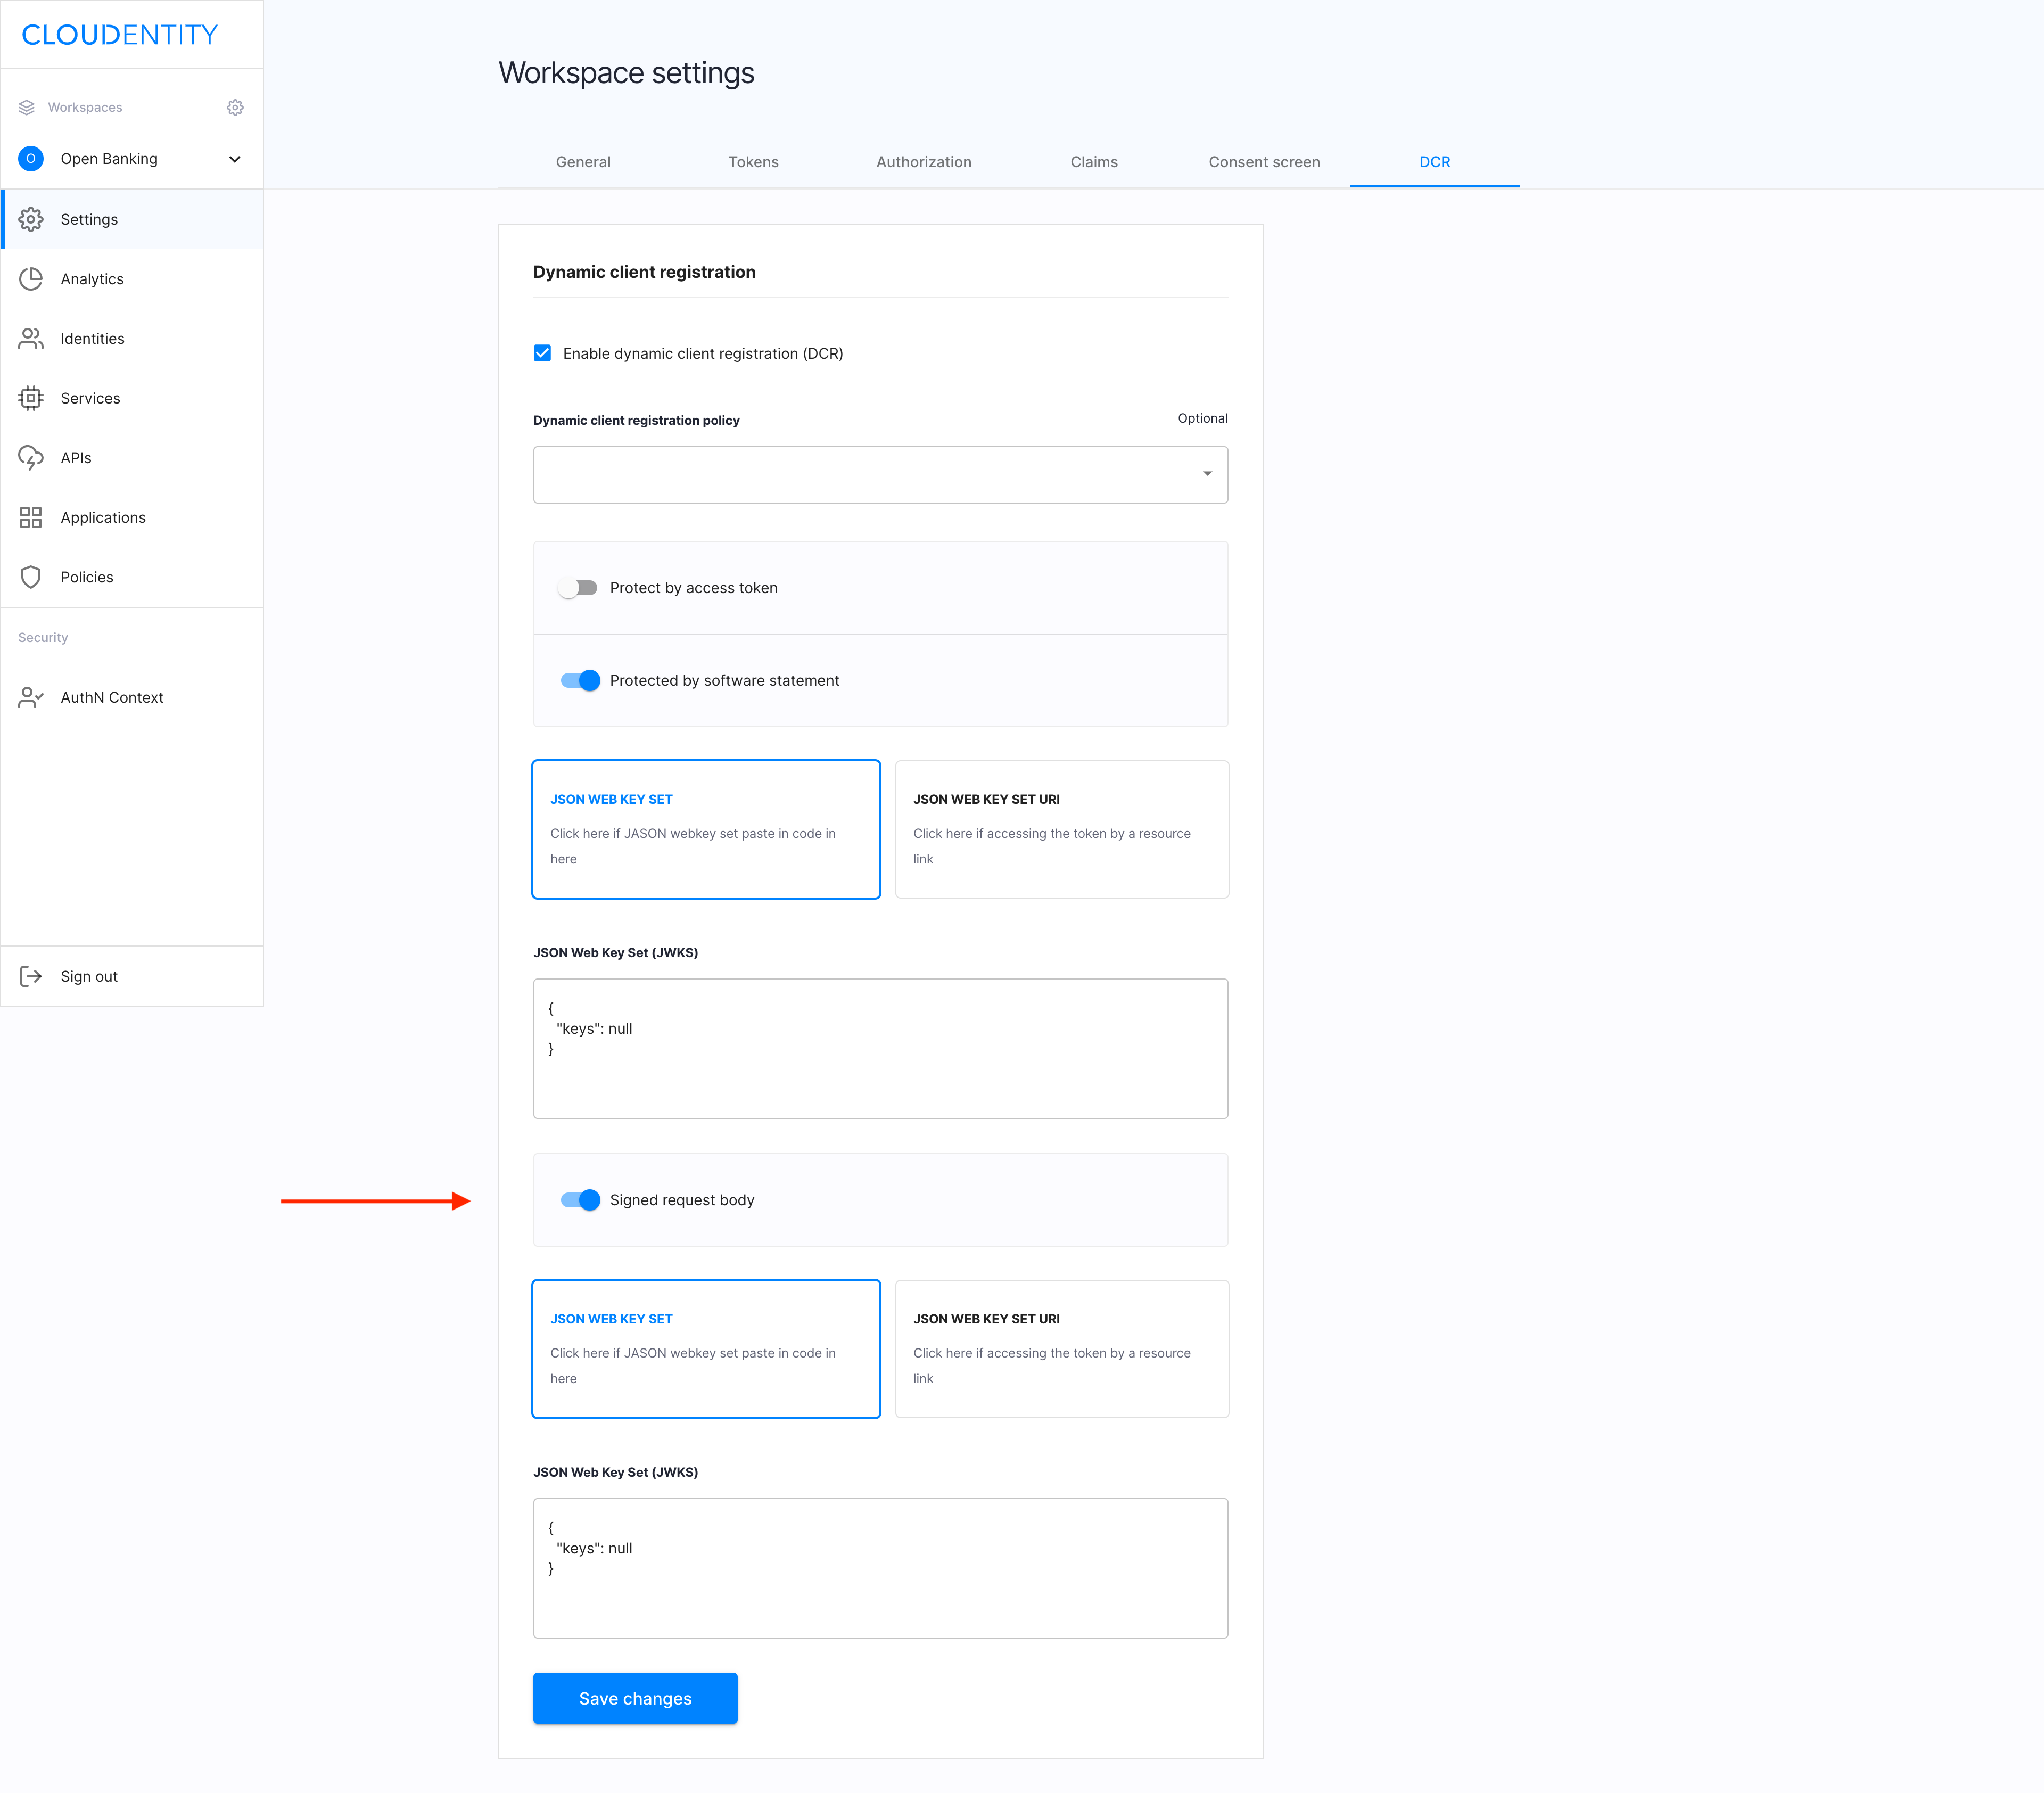
From the Workspace Settings view, select the DCR tab.
Enable DCR
In the DCR tab, select checkbox Enable dynamic client registration, and click Save changes to complete.
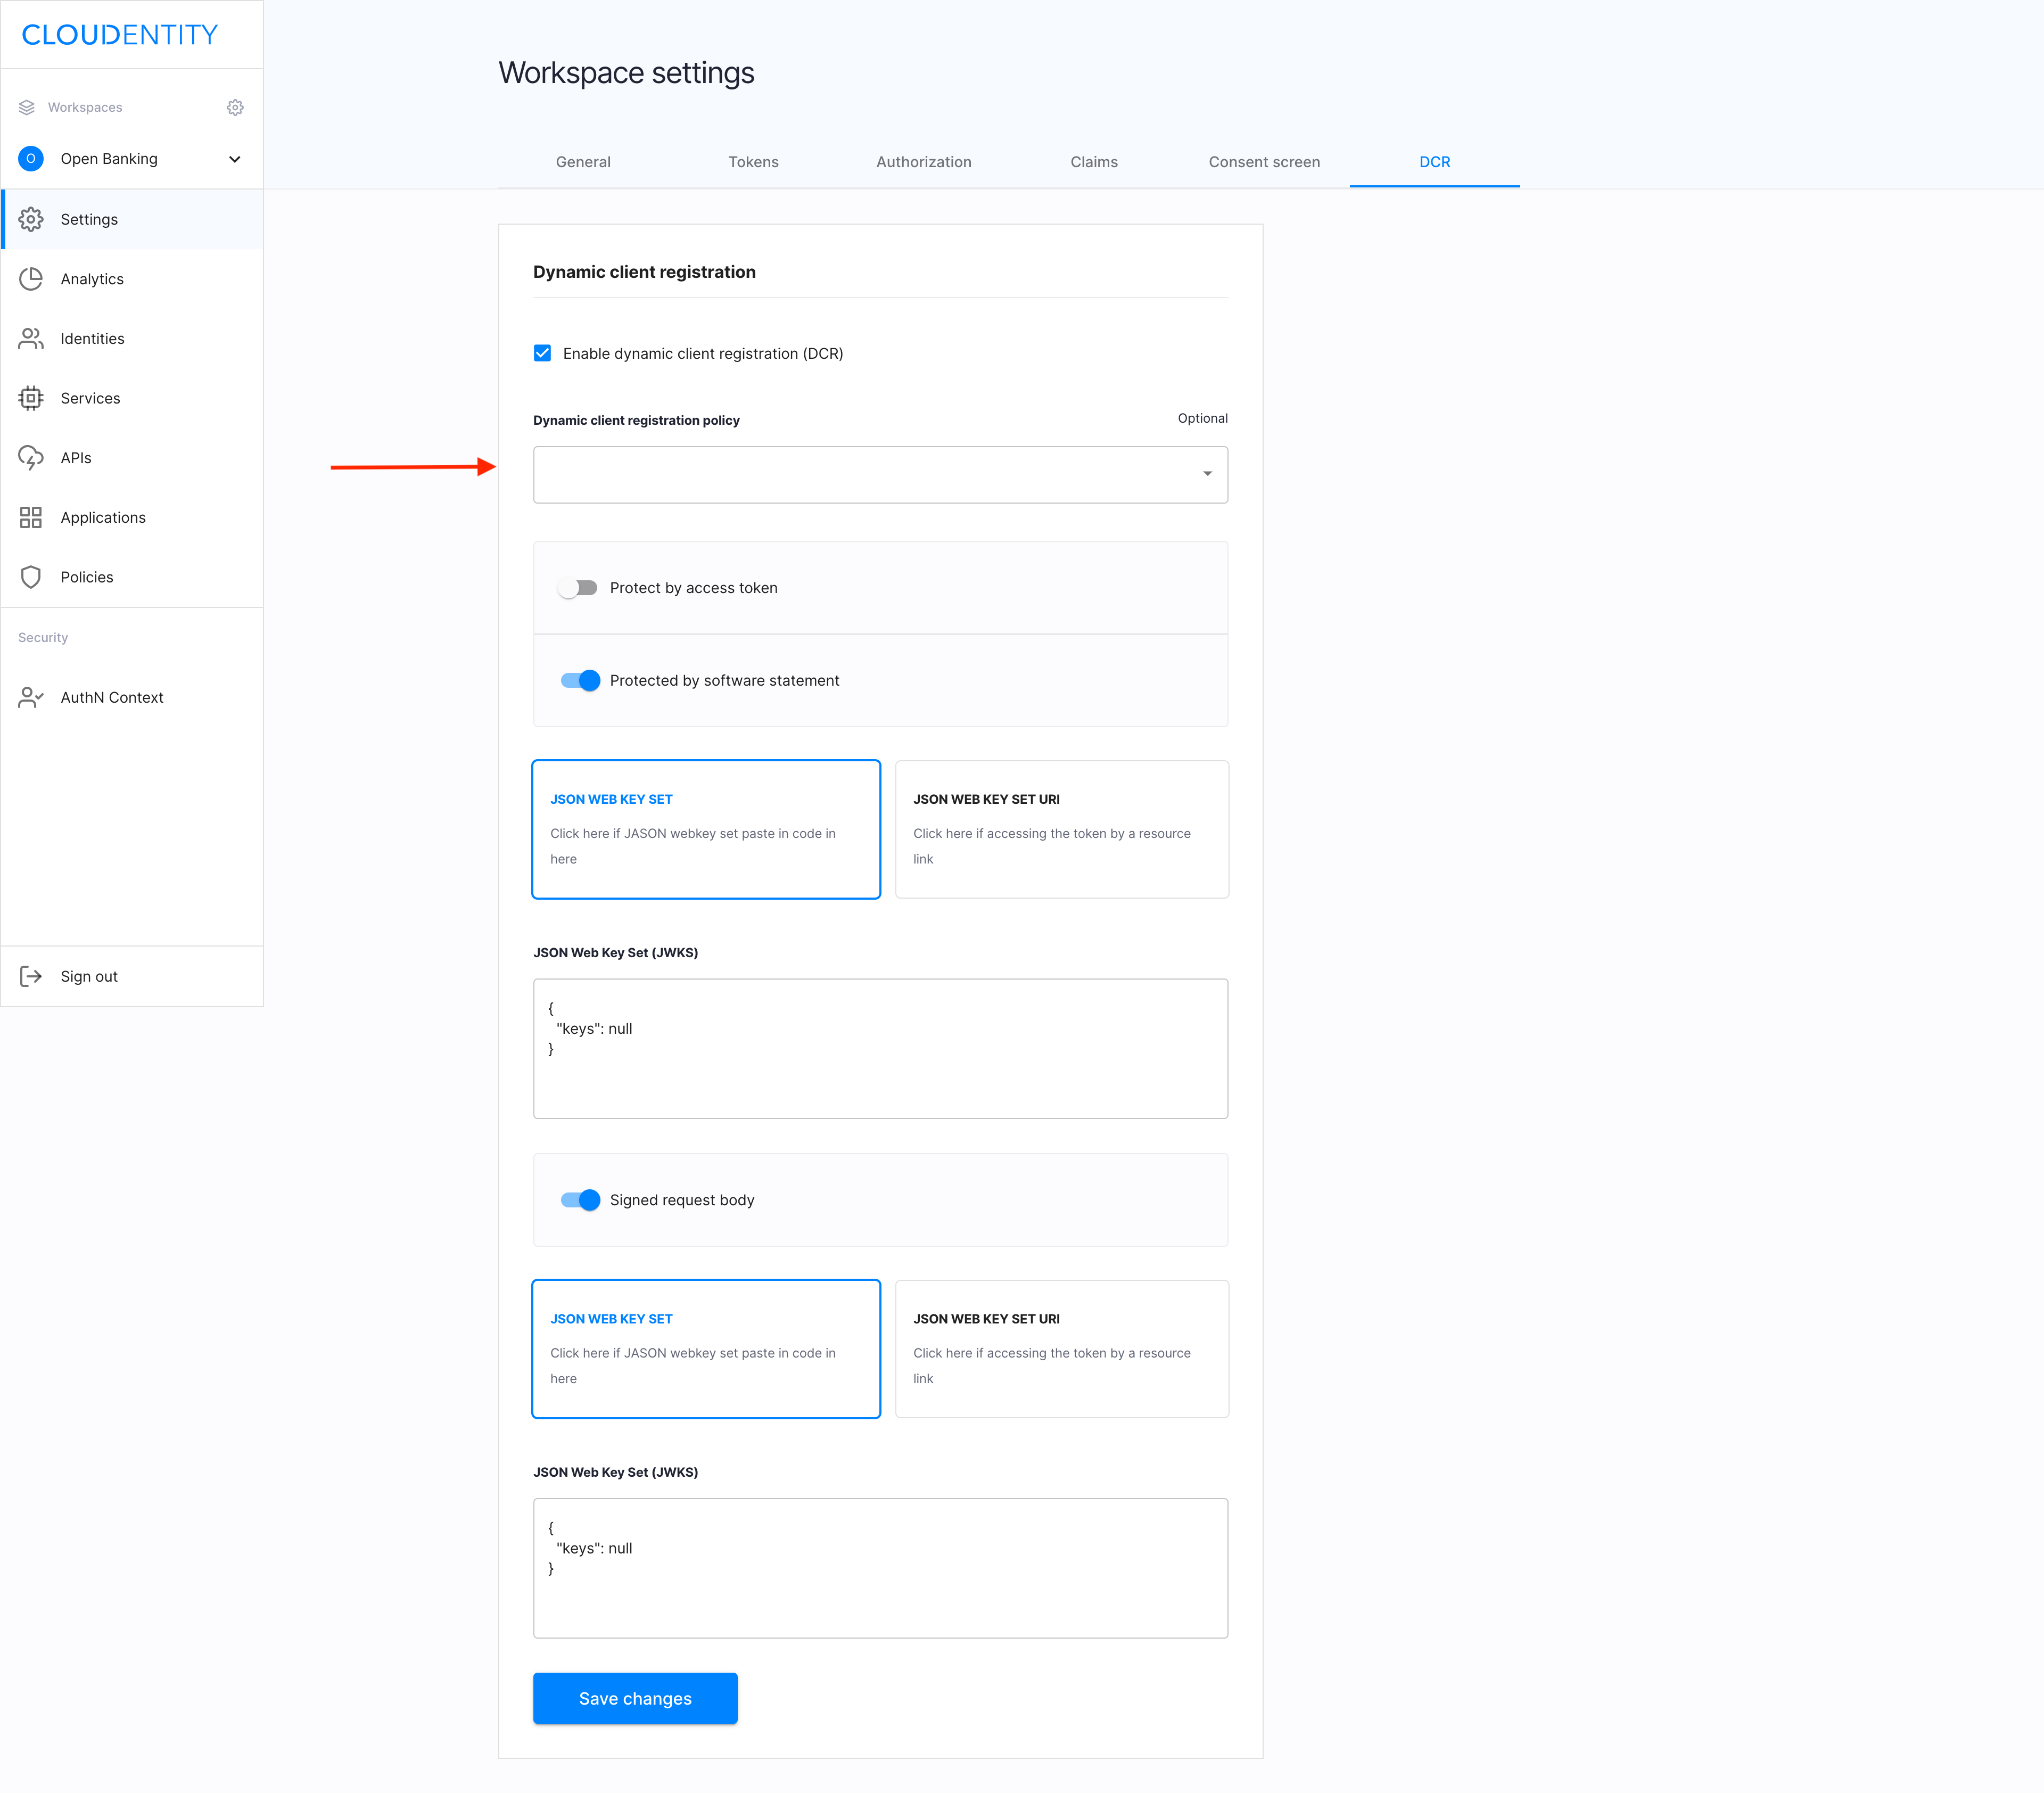
DCR settings
There are a few ways to protect the registration endpoint:
- Define Dynamic client registration policy.
You can define a policy to be evaluated when a token registration endpoint is called.
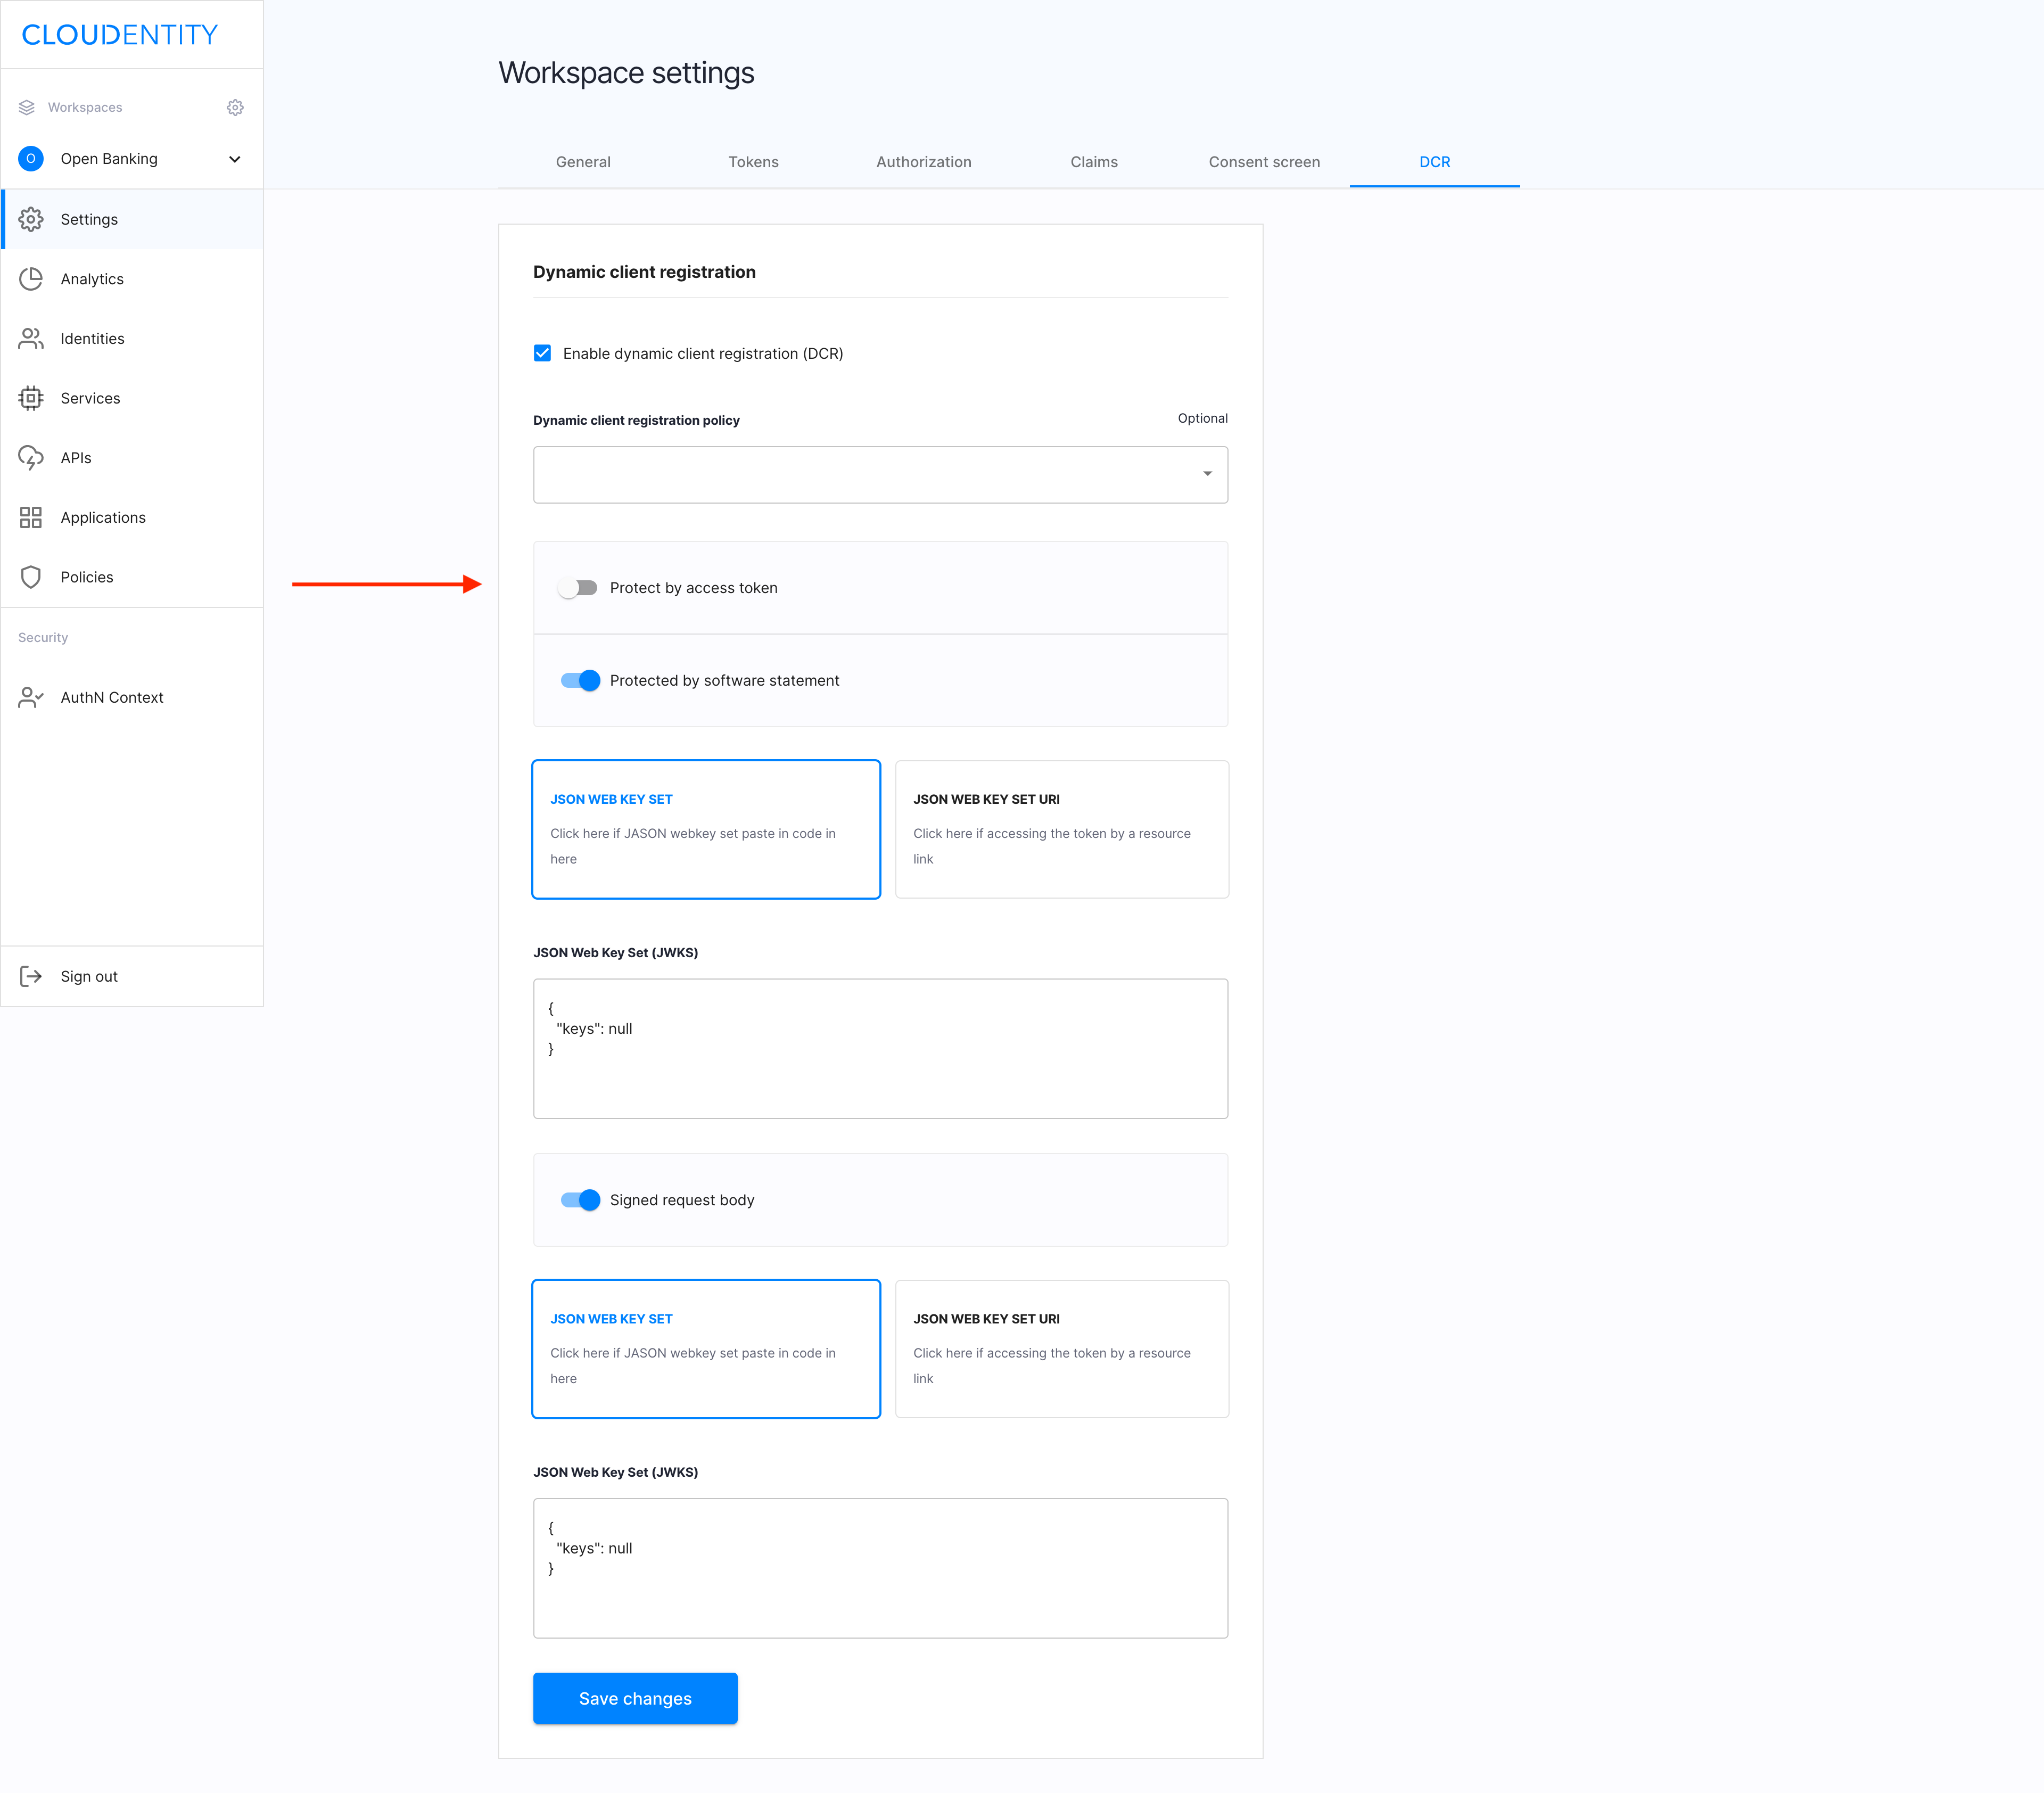
- Enable Protect by access token.
With Protect by access token enabled, the registration endpoint requires an access token with the
dcr_registerscope granted. To issue the access token, you need a separate client with the client credentials grant type. Upon successful registration, the access token is terminated.
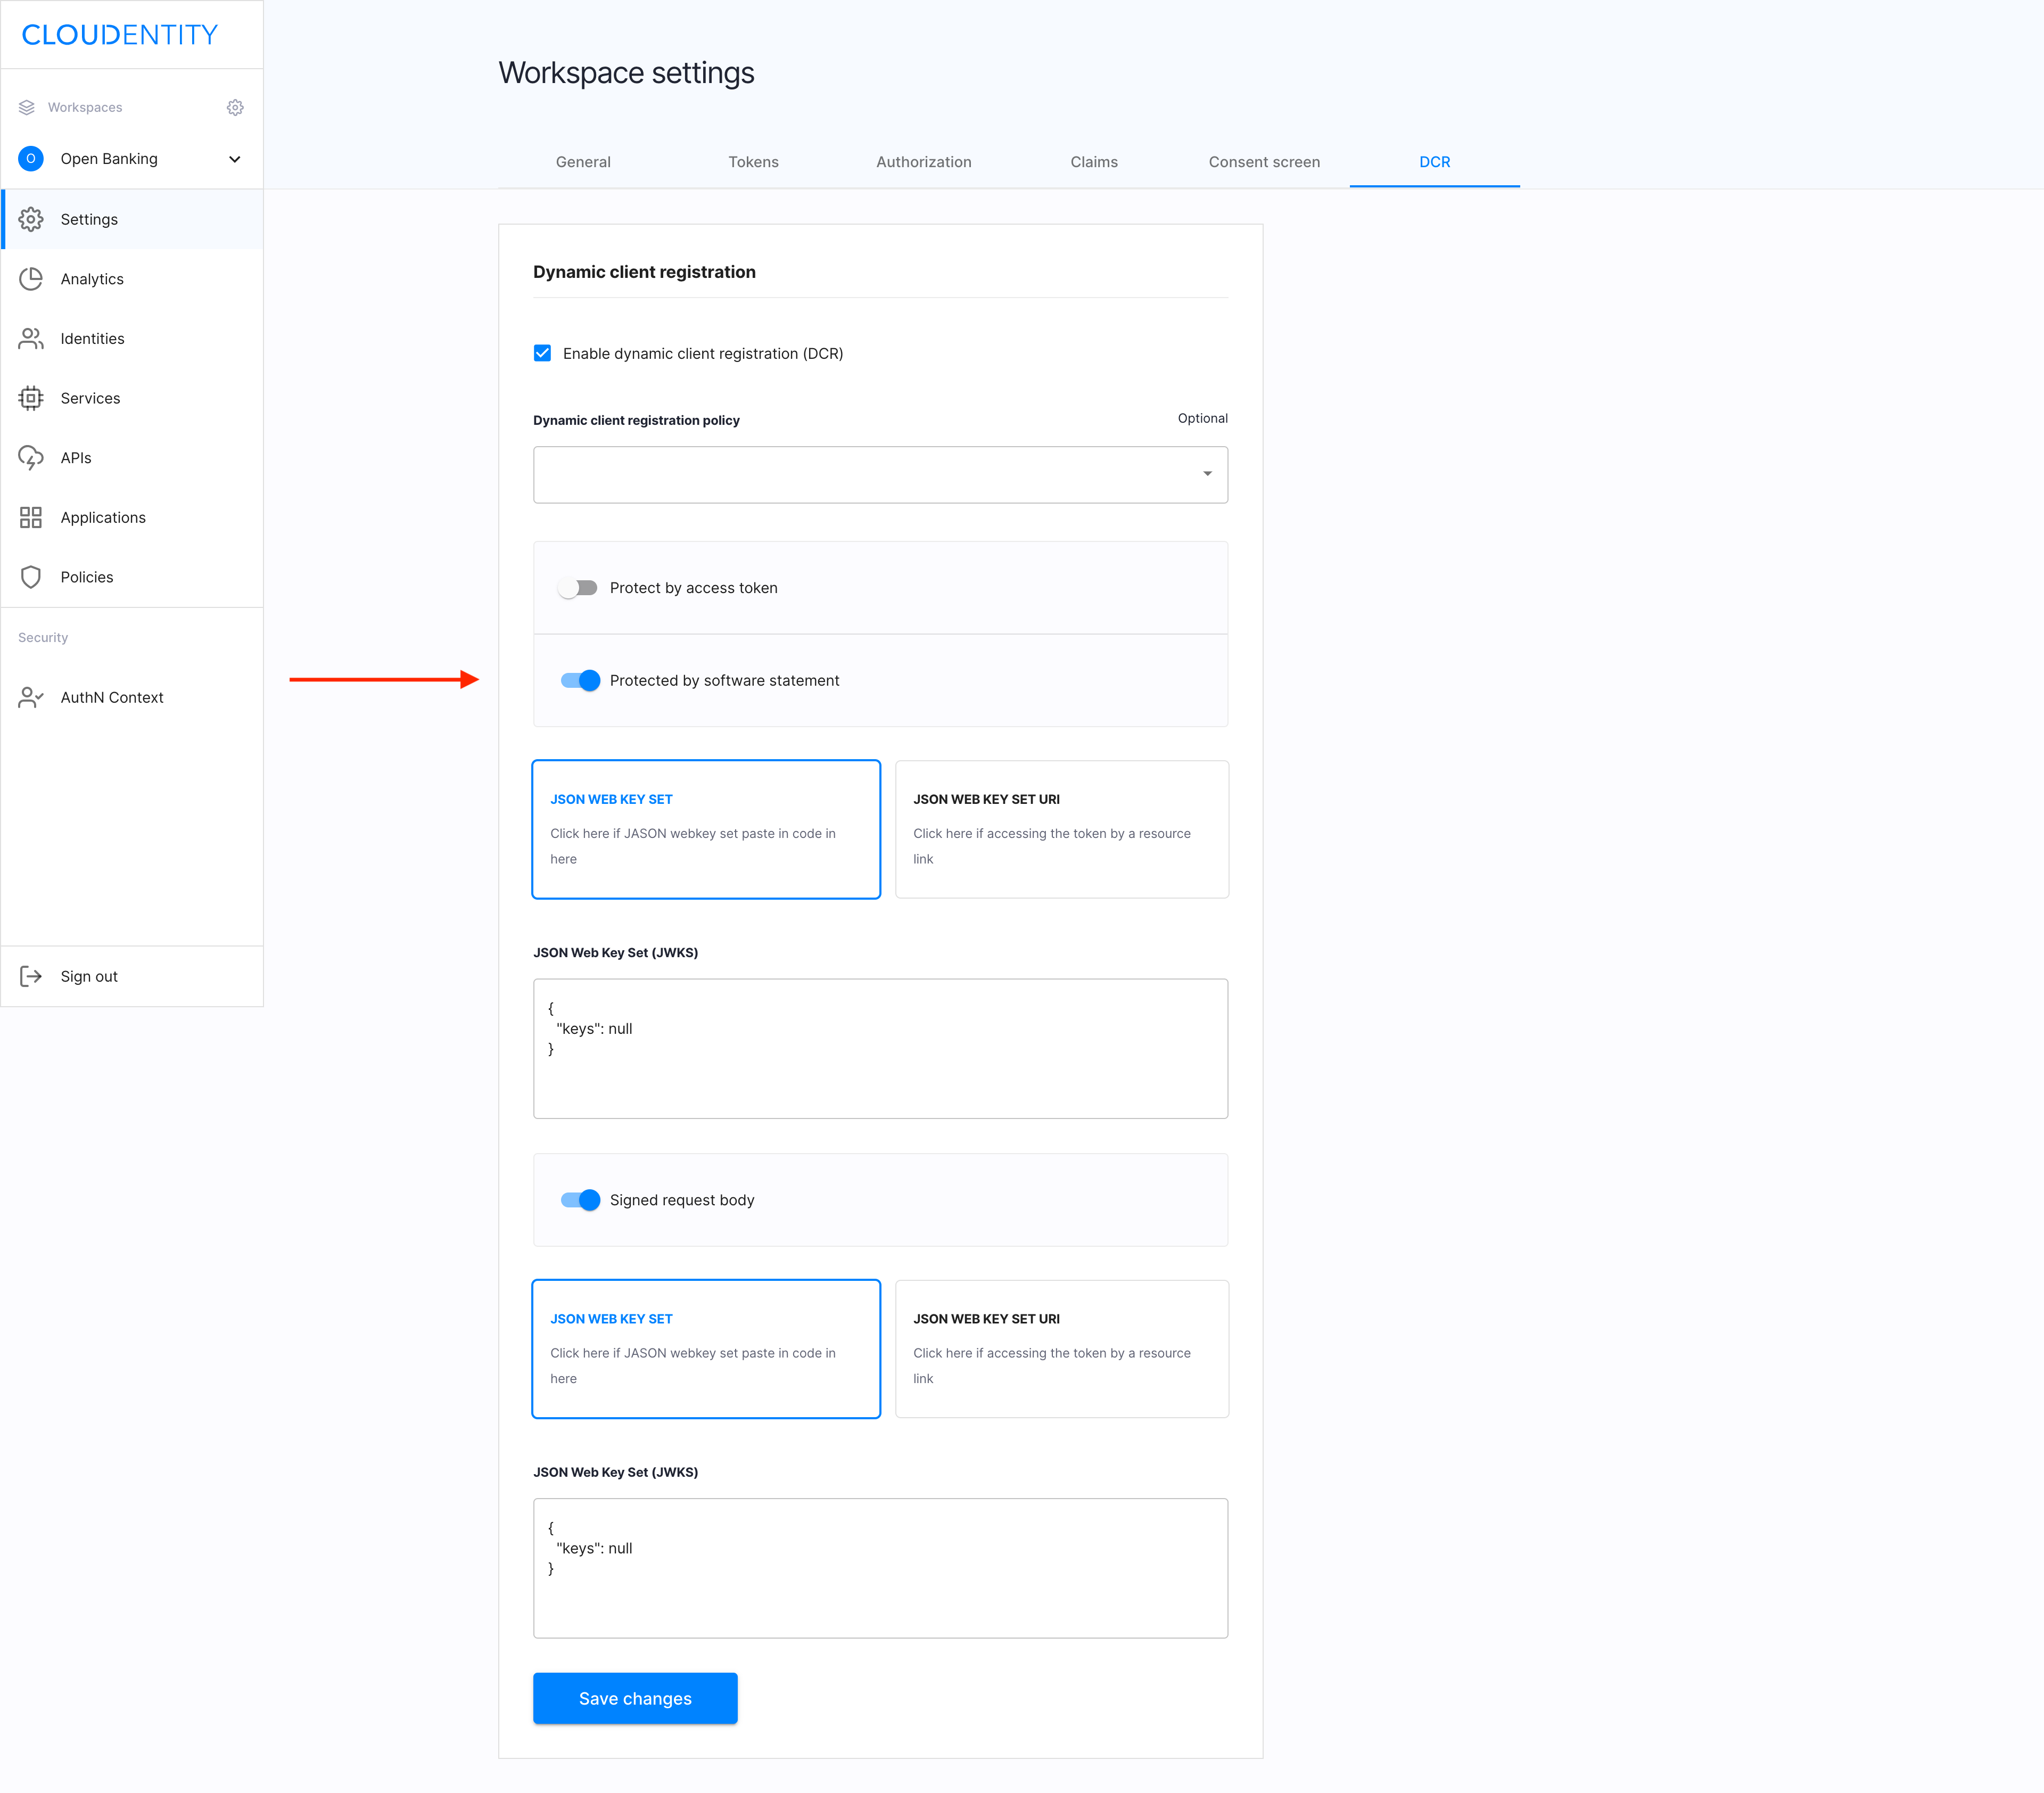
- Enable Protected by software statement.
With Protected by software statement enabled, the registration endpoint requires the
software_statementattribute in the body. The software statement is JWT usually signed by Open Banking Directory and containing an additional information on your client. You need to configure public keys (via JSON Web Key Set or URI) to be used for verifying a provided software statement.
- Enable Signed request body.
With Signed request body enabled, the registration endpoint requires a signed request body. You need to configure public keys (via JSON Web Key Set or URI) to be used for verifying singed registration requests.
The signed request body and the software statement are enforced by OpenBanking specifications and it’s recommended to keep them enabled.
Result
You’ve successfully enabled DCR in your workspace.
Register a client
To create a DCR application, you need to acquire a registration endpoint and call this endpoint to register your application.
-
In your terminal, call
.well-known, for example, by executingcurl <https://authorization.cloudentity.com:8443/default/obuk/.well-known/openid-configuration>Result
You are returned a JSON file including your registration endpoint, for example
"registration_endpoint": "https://authorization.cloudentity.com:8443/default/obuk/openbankinguk/dcr/v3.2/register"Note
-
The registration endpoint URL depends on the workspace profile. Make sure that your workspace uses the OpenBanking profile.
-
ACP implements DCR in version 3.2.
-
-
In the terminal, execute a curl command including the returned registration endpoint data and the request body.
Example
curl -v -k -X POST https://authorization.cloudentity.com:8443/default/obuk/openbankinguk/dcr/v3.2/register -H "content-type: application/jose" -d 'REQUEST_BODY'Note
-
If Protected by access token is enabled in DCR workspace settings, the Authorization Bearer header is required to call this endpoint.
-
REQUEST_BODY is a signed JWT. For required claims, see specification Dynamic Client Registration v3.2.
Decoded REQUEST_BODY payload
{
    "iss":"iss123",
    "aud":"aud123",
    "exp":1599357843,
    "iat":1519357843,
    "jti":"7aac9164-eeac-47d6-8042-9a24610a984e",
    "grant_types":[
        "authorization_code",
        "client_credentials"
    ],
    "application_type":"web",
    "redirect_uris":[
        "https://example.com/callback"
    ],
    "token_endpoint_auth_method":"tls_client_auth",
    "tls_client_auth_dn":"CN=cid1.authorization.cloudentity.com,OU=Authorization,O=Cloudentity,L=Seattle,ST=Washinghton,C=US",
    "id_token_signed_response_alg":"PS256",
    "scope":"openid accounts",
    "request_object_signing_alg":"PS256",
    "software_statement":"SOFTWARE_STATEMENT"
}
Note
-
Register your client with
client_credentialsas one ofgrant_typesso that you can manage it after the registration. -
SOFTWARE_STATEMENT is a signed JWT.
Sample response
{
    "client_id": "buvn05busbftqfiocc4",
    "scopes": [
      "openid",
      "accounts"
    ],
    "grant_types":[
        "authorization_code",
        "client_credentials"
    ],
    "application_type":"web",
    "redirect_uris":[
        "https://example.com/callback"
    ],
    "token_endpoint_auth_method":"tls_client_auth",
    "tls_client_auth_dn":"CN=cid1.authorization.cloudentity.com,OU=Authorization,O=Cloudentity,L=Seattle,ST=Washinghton,C=US",
    "id_token_signed_response_alg":"PS256",
    "scope":"openid accounts",
    "request_object_signing_alg":"PS256"
}
Result
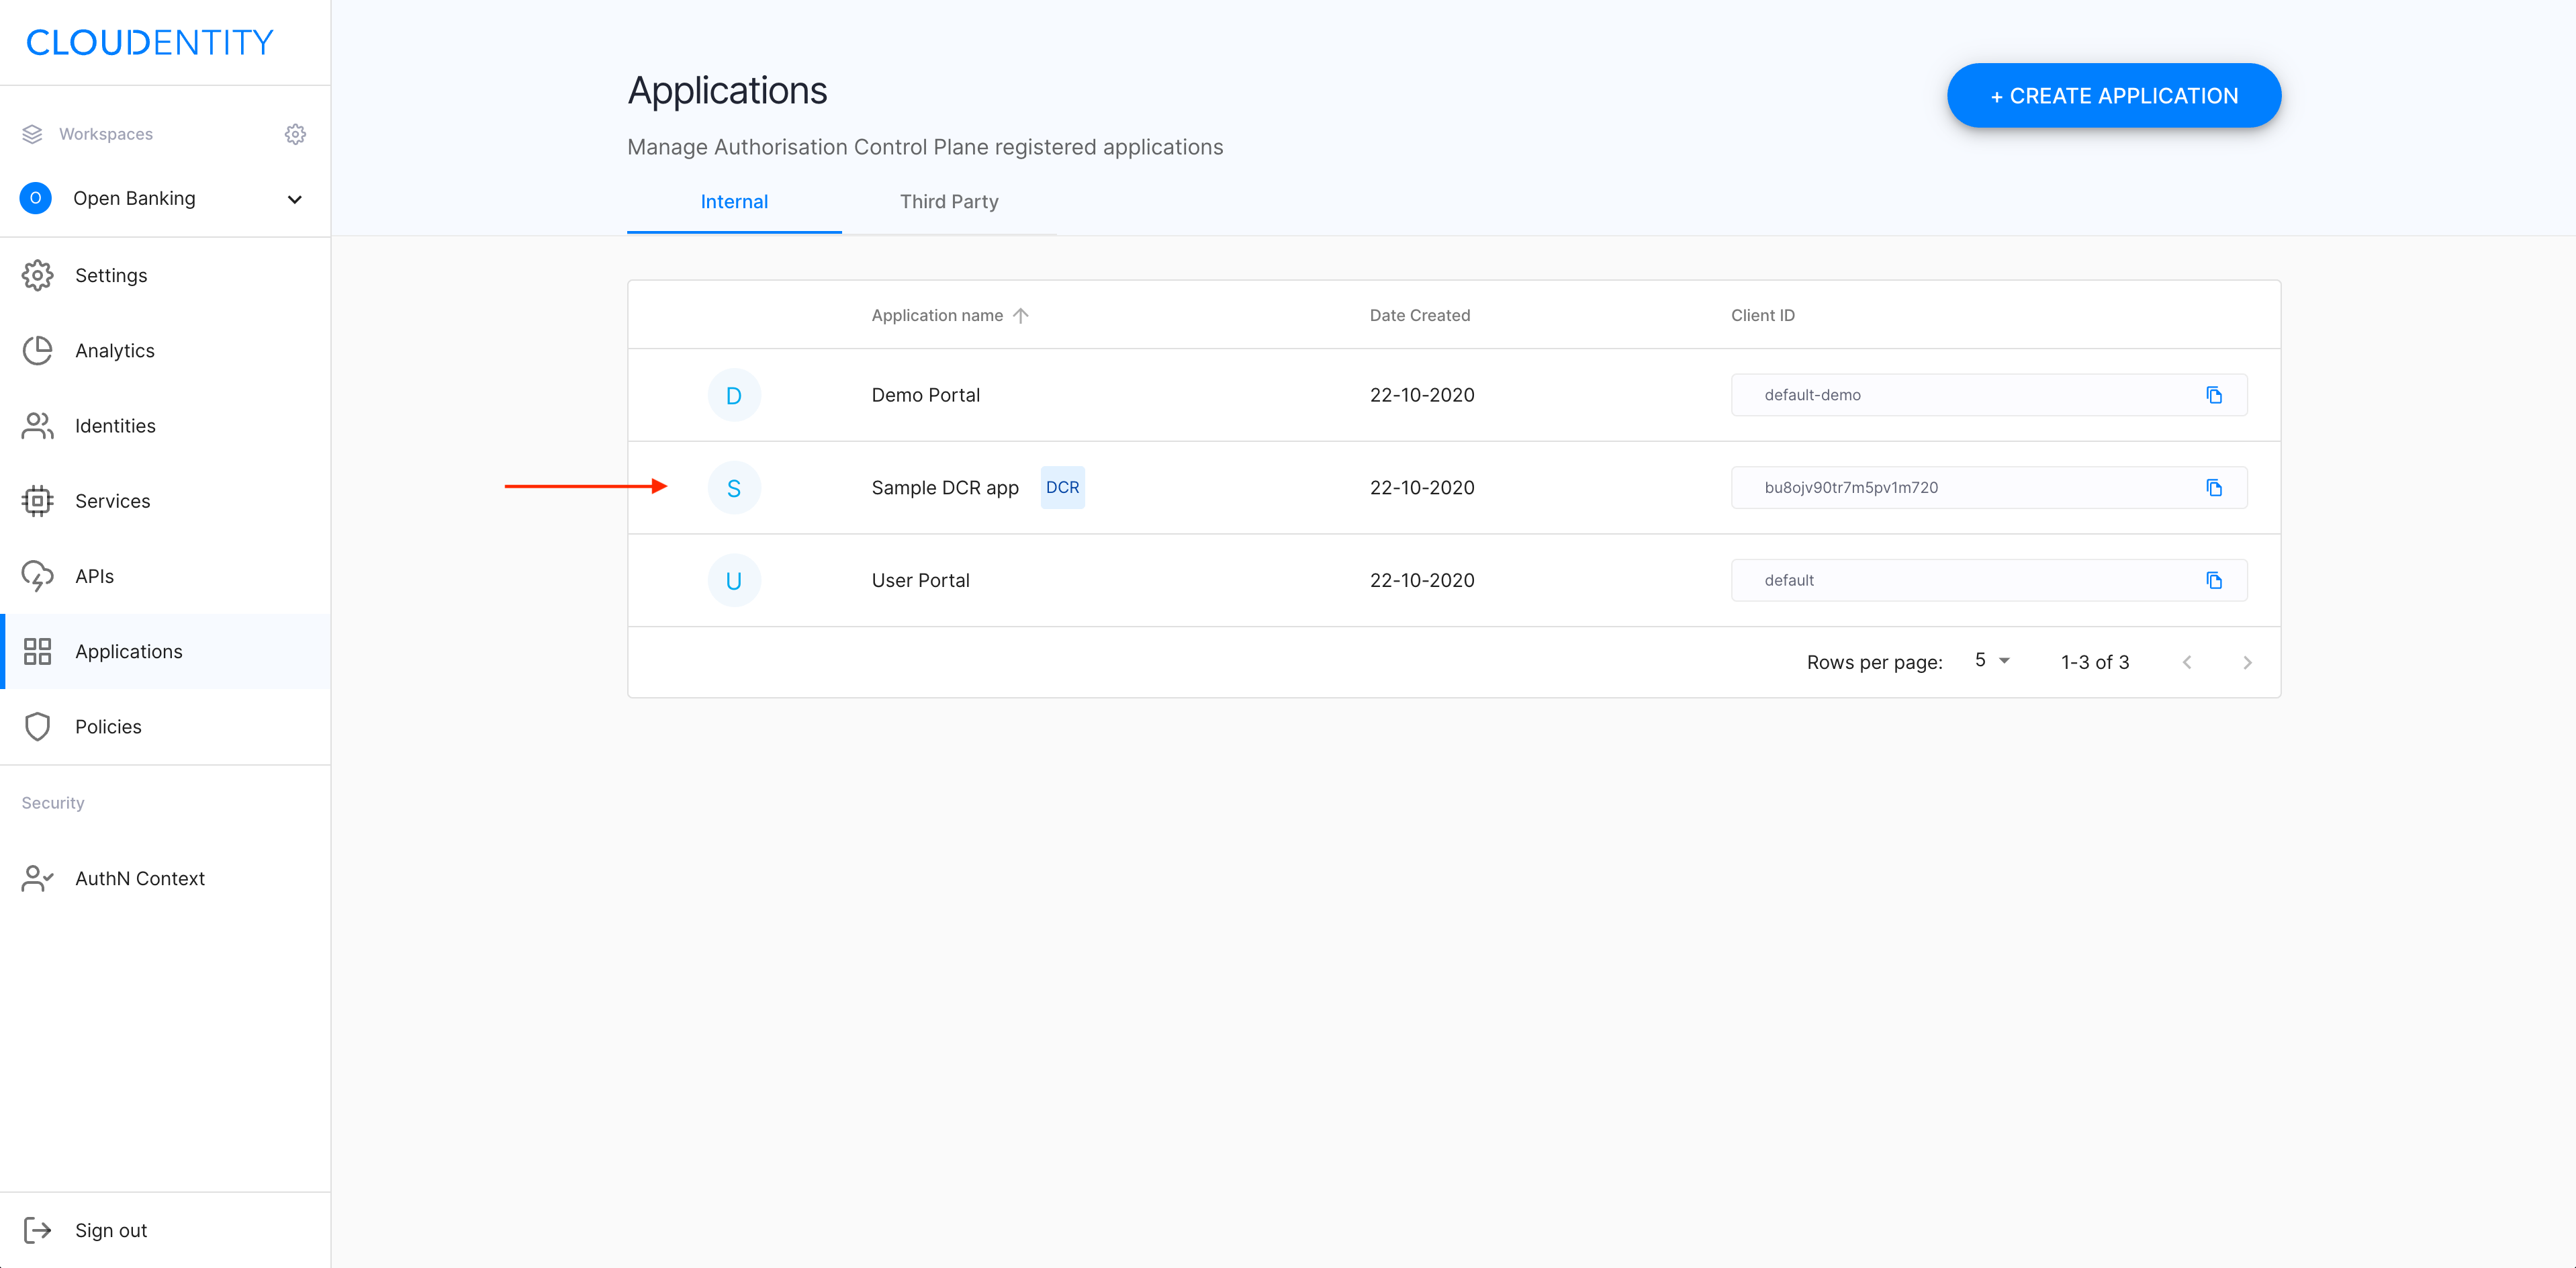
Your DCR application has been created and is ready to be used. For ACP administrators, the new application is visible in the Applications view of the ACP portal with label DCR.
-
Manage the client
-
To get, modify, or delete a registered client, you need to call an appropriate endpoint with
client_idin the path. -
To get an access token, the registered client needs to
- Call the token endpoint using the client credentials flow (no scope required)
- Send the token as the Authorization Bearer header.
Sample GET request
curl -v -k -X GET https://authorization.cloudentity.com:8443/default/obuk/openbankinguk/dcr/v3.2/register/buvn05busbftqfiocc4 -H "Authorization: Bearer cc-token"
Sample response
{
    "client_id": "buvn05busbftqfiocc4",
    "scopes": [
        "openid",
        "accounts"
    ],
    "grant_types":[
        "authorization_code",
        "client_credentials"
    ],
    "application_type":"web",
    "redirect_uris":[
        "https://example.com/callback"
    ],
    "token_endpoint_auth_method":"tls_client_auth",
    "tls_client_auth_dn":"CN=cid1.authorization.cloudentity.com,OU=Authorization,O=Cloudentity,L=Seattle,ST=Washinghton,C=US",
    "id_token_signed_response_alg":"PS256",
    "scope":"openid accounts",
    "request_object_signing_alg":"PS256"
}