Connecting Azure B2C IDP
Instructions on how to configure an Azure B2C as IDP
Azure Active Directory B2C (Azure AD B2C) is an identity management solution that provides business-to-customer identity as a service. For more information, see Azure Active Directory B2C documentation.
Prerequisites
- You have a Microsoft Azure account.
- You are permitted to access your organization in Azure AD B2C.
- You have at least one user flow defined in Azure AD B2C.
Connect Azure B2C IDP
Basic configuration
-
Navigate to the ACP administrator portal in your browser.
-
Enter your credentials in the login page.
-
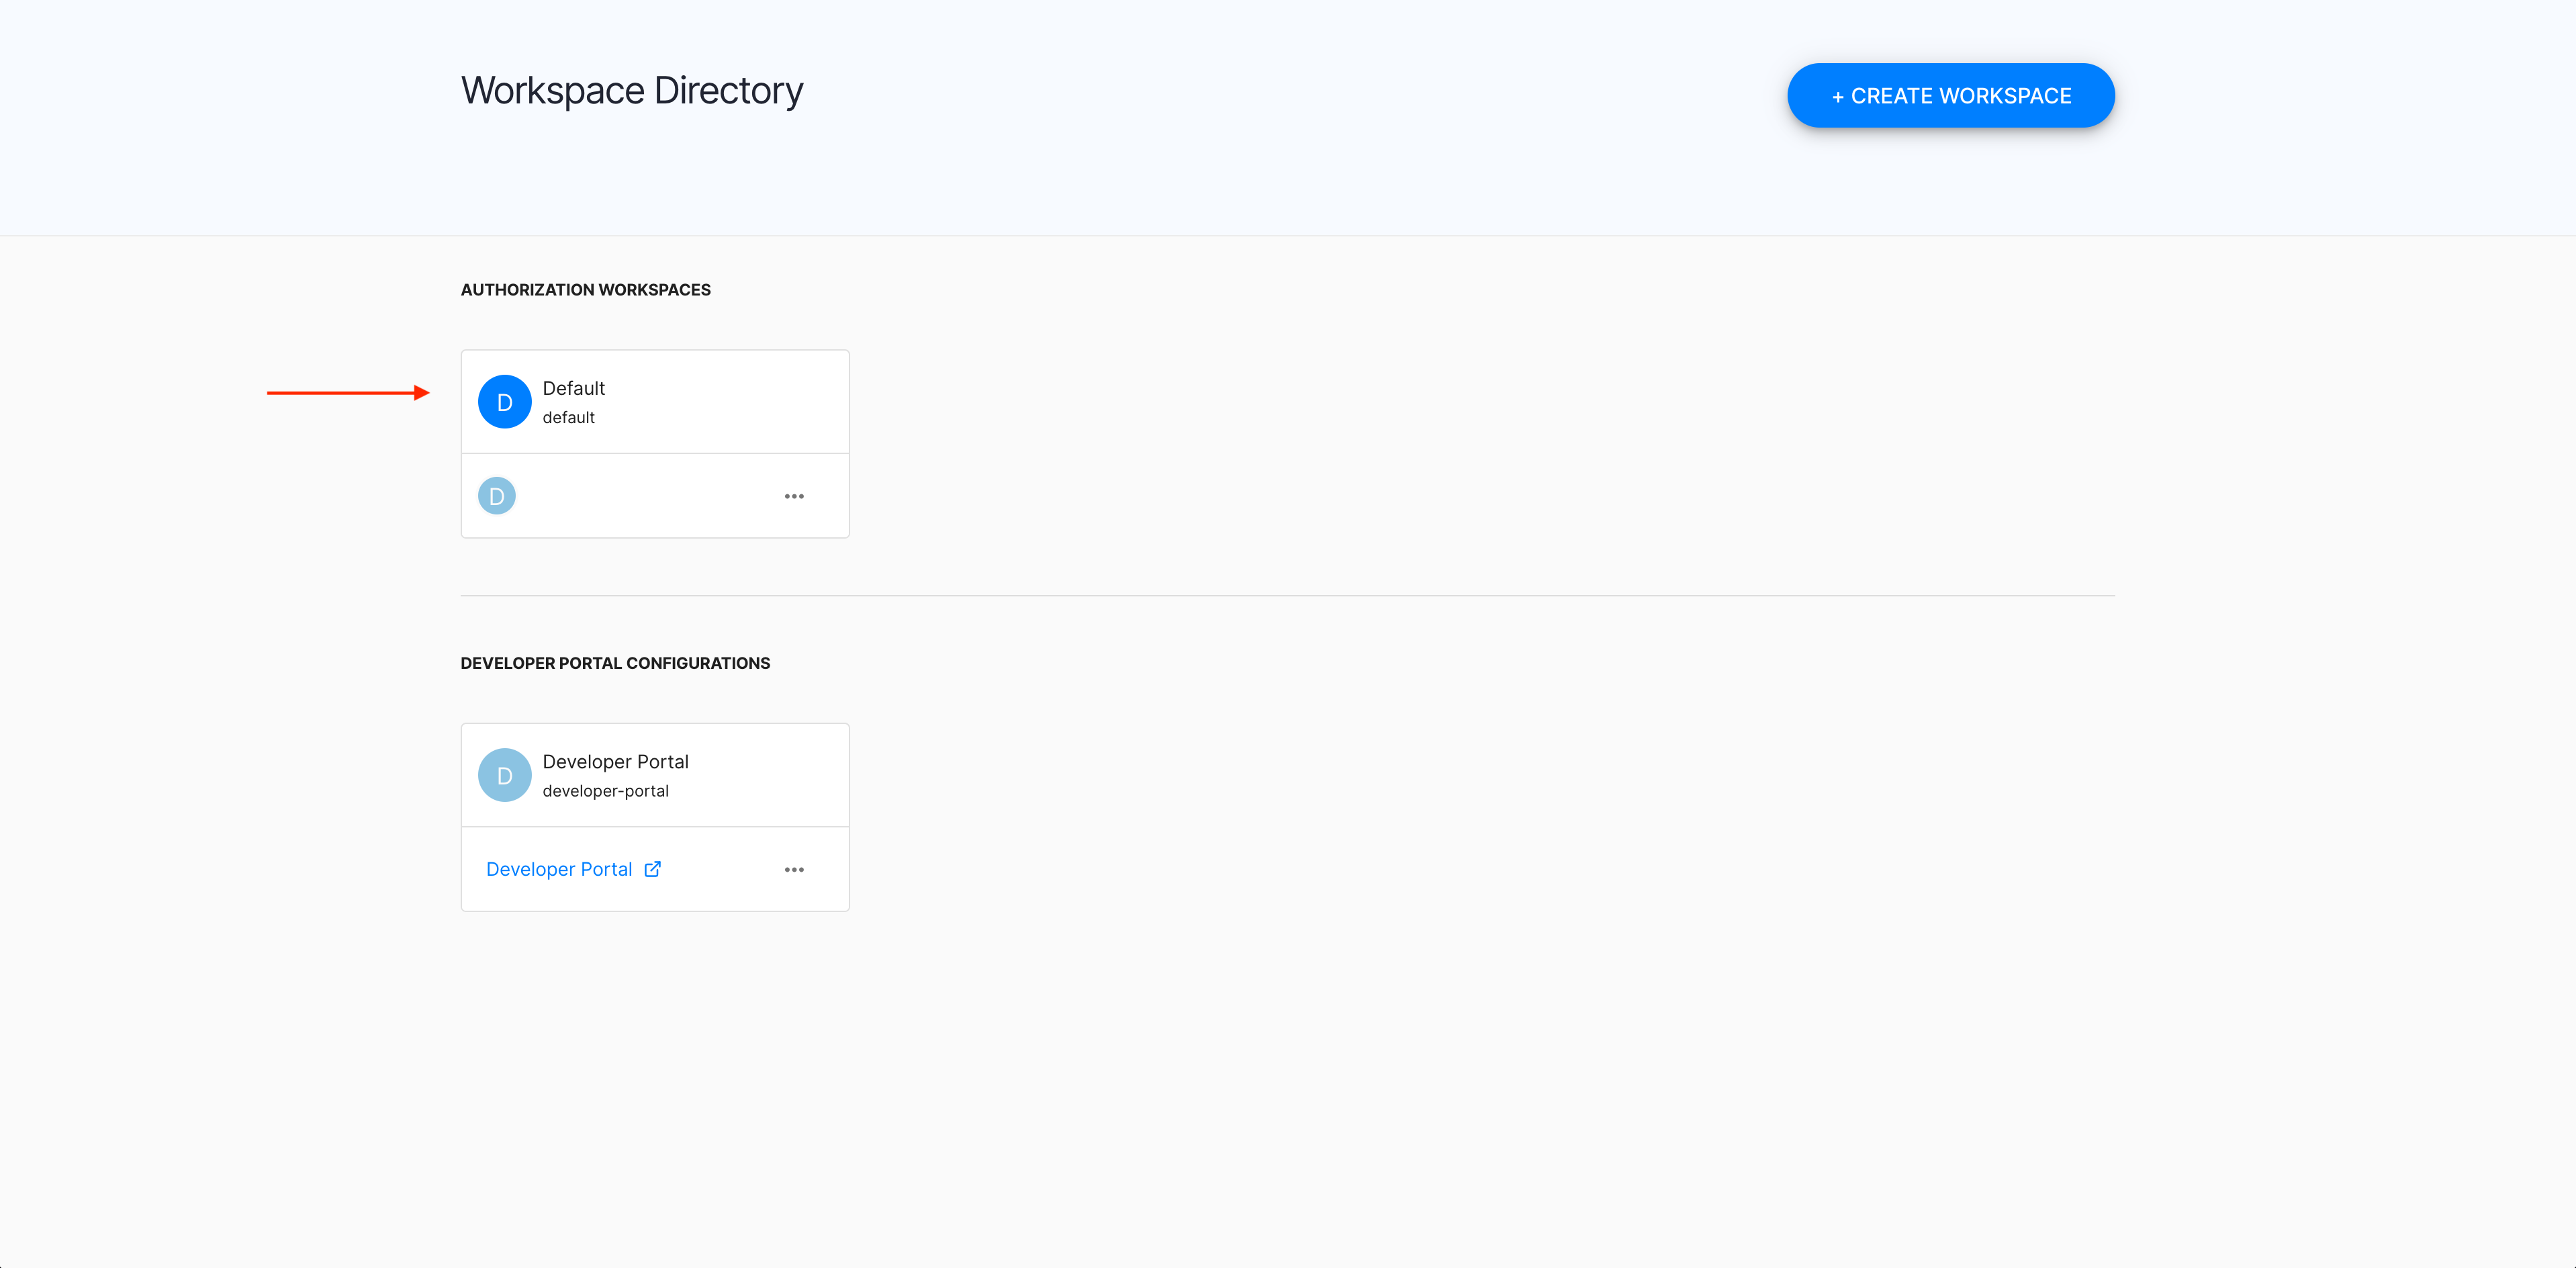
In the Workspace Directory, select the workspace that you want to enter.
-
In your workspace landing page, select ADD IDENTITIES to add a new connection.
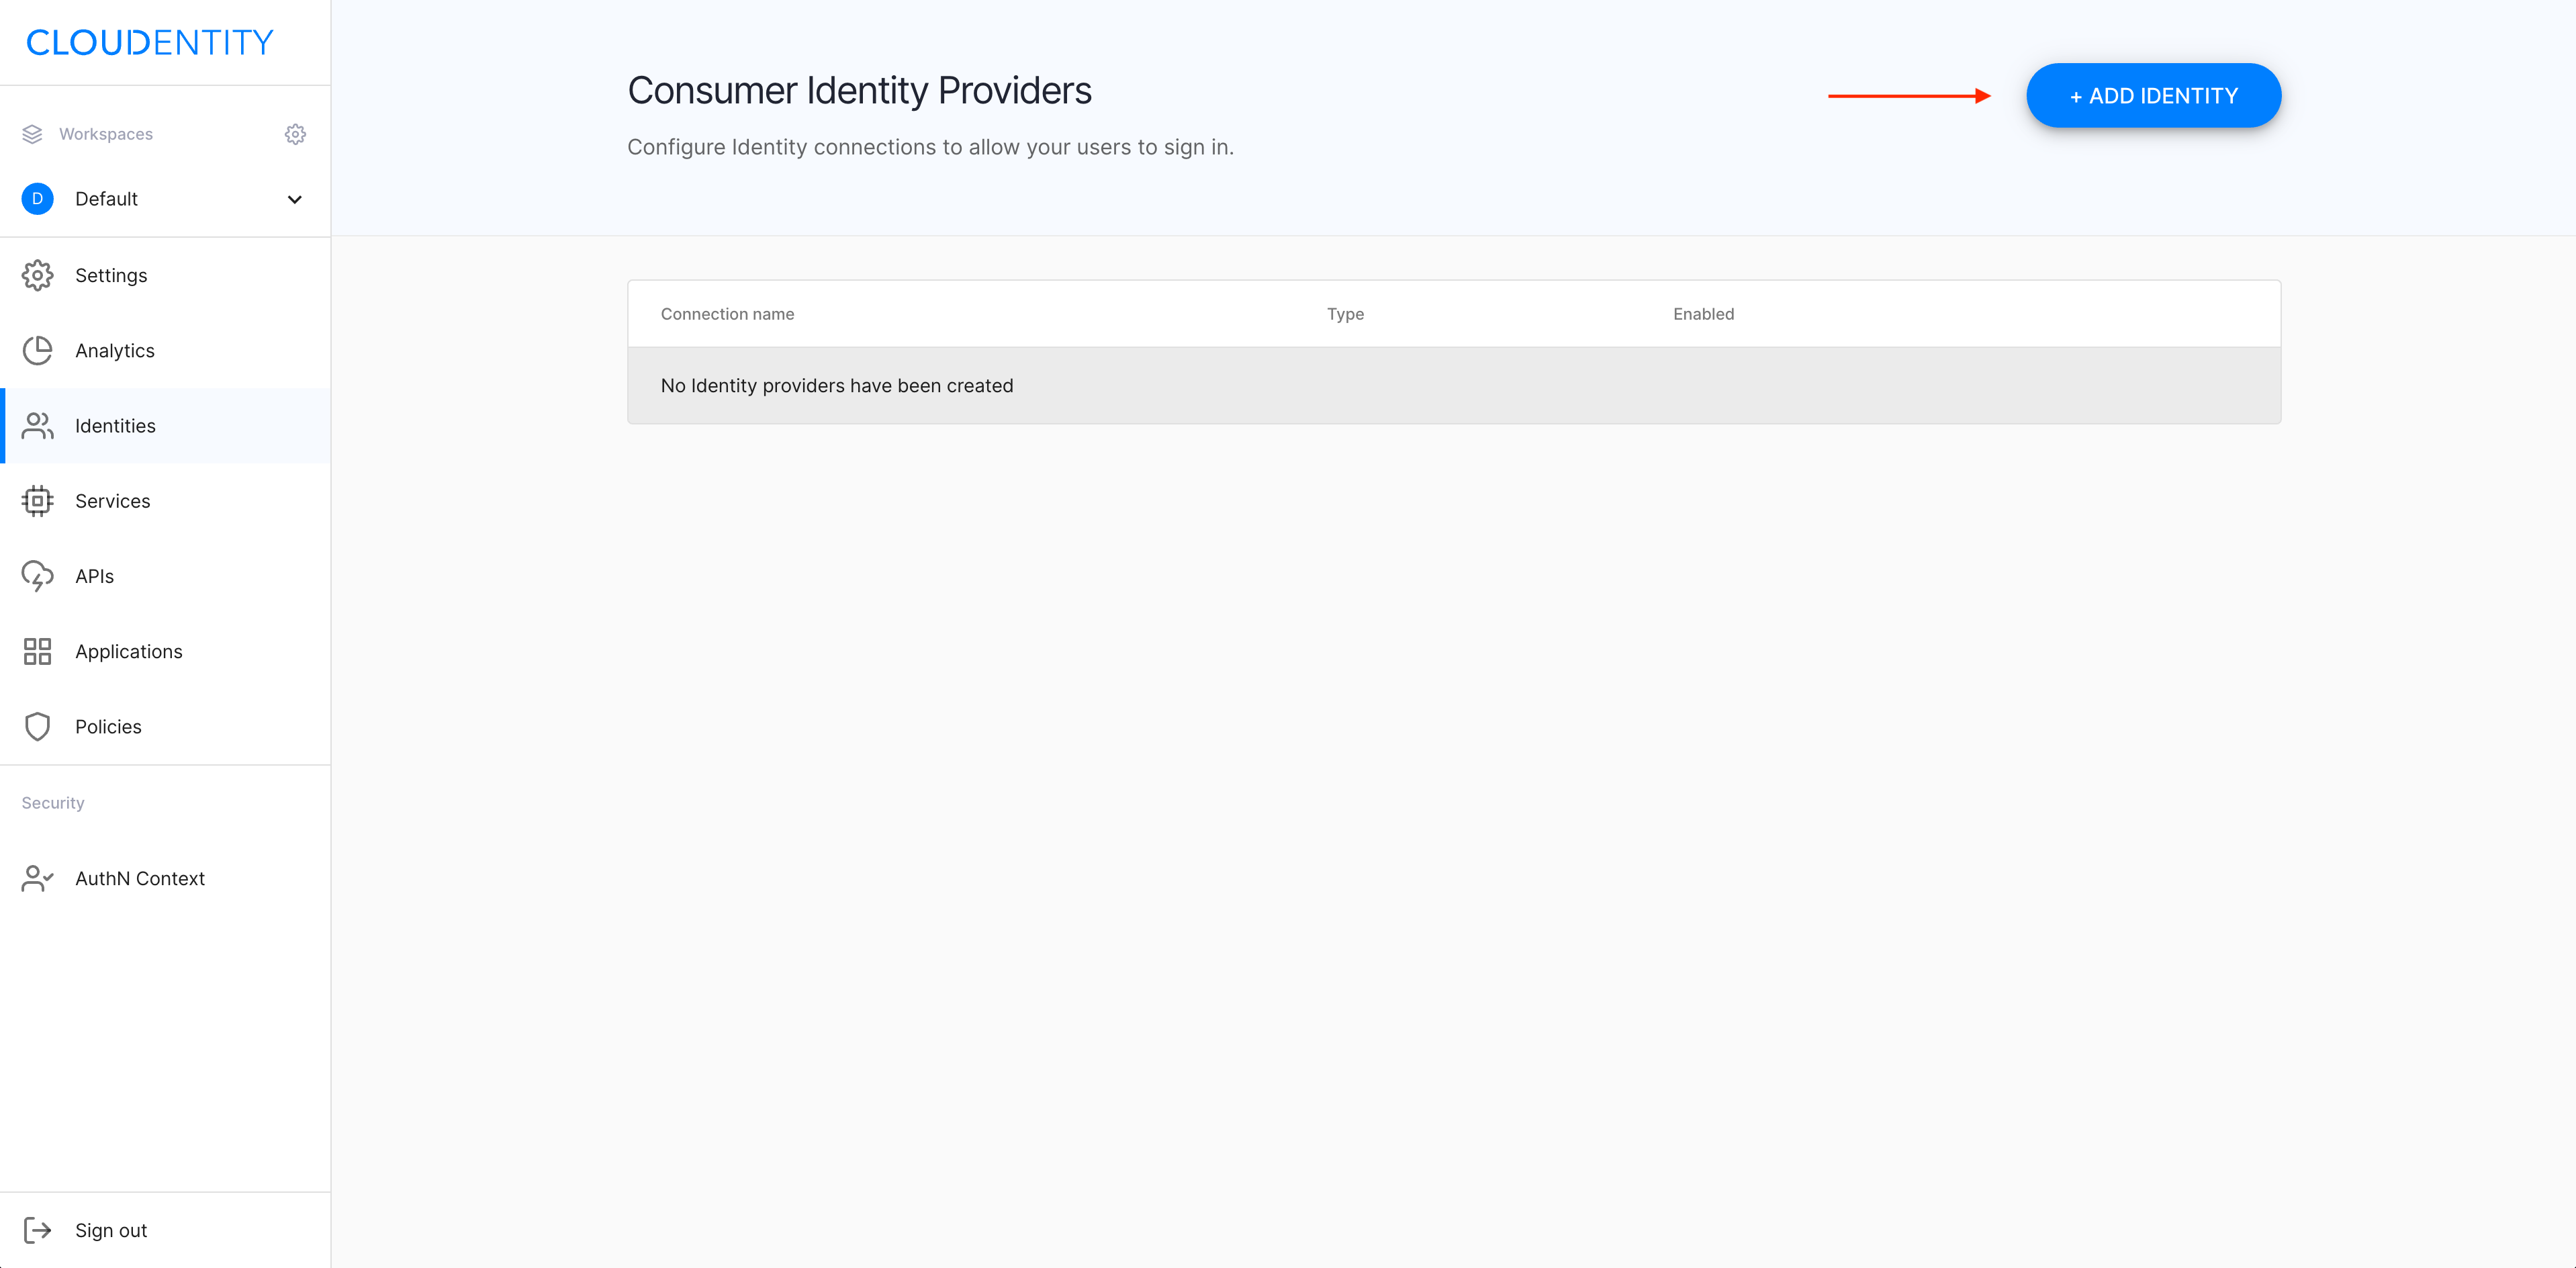
-
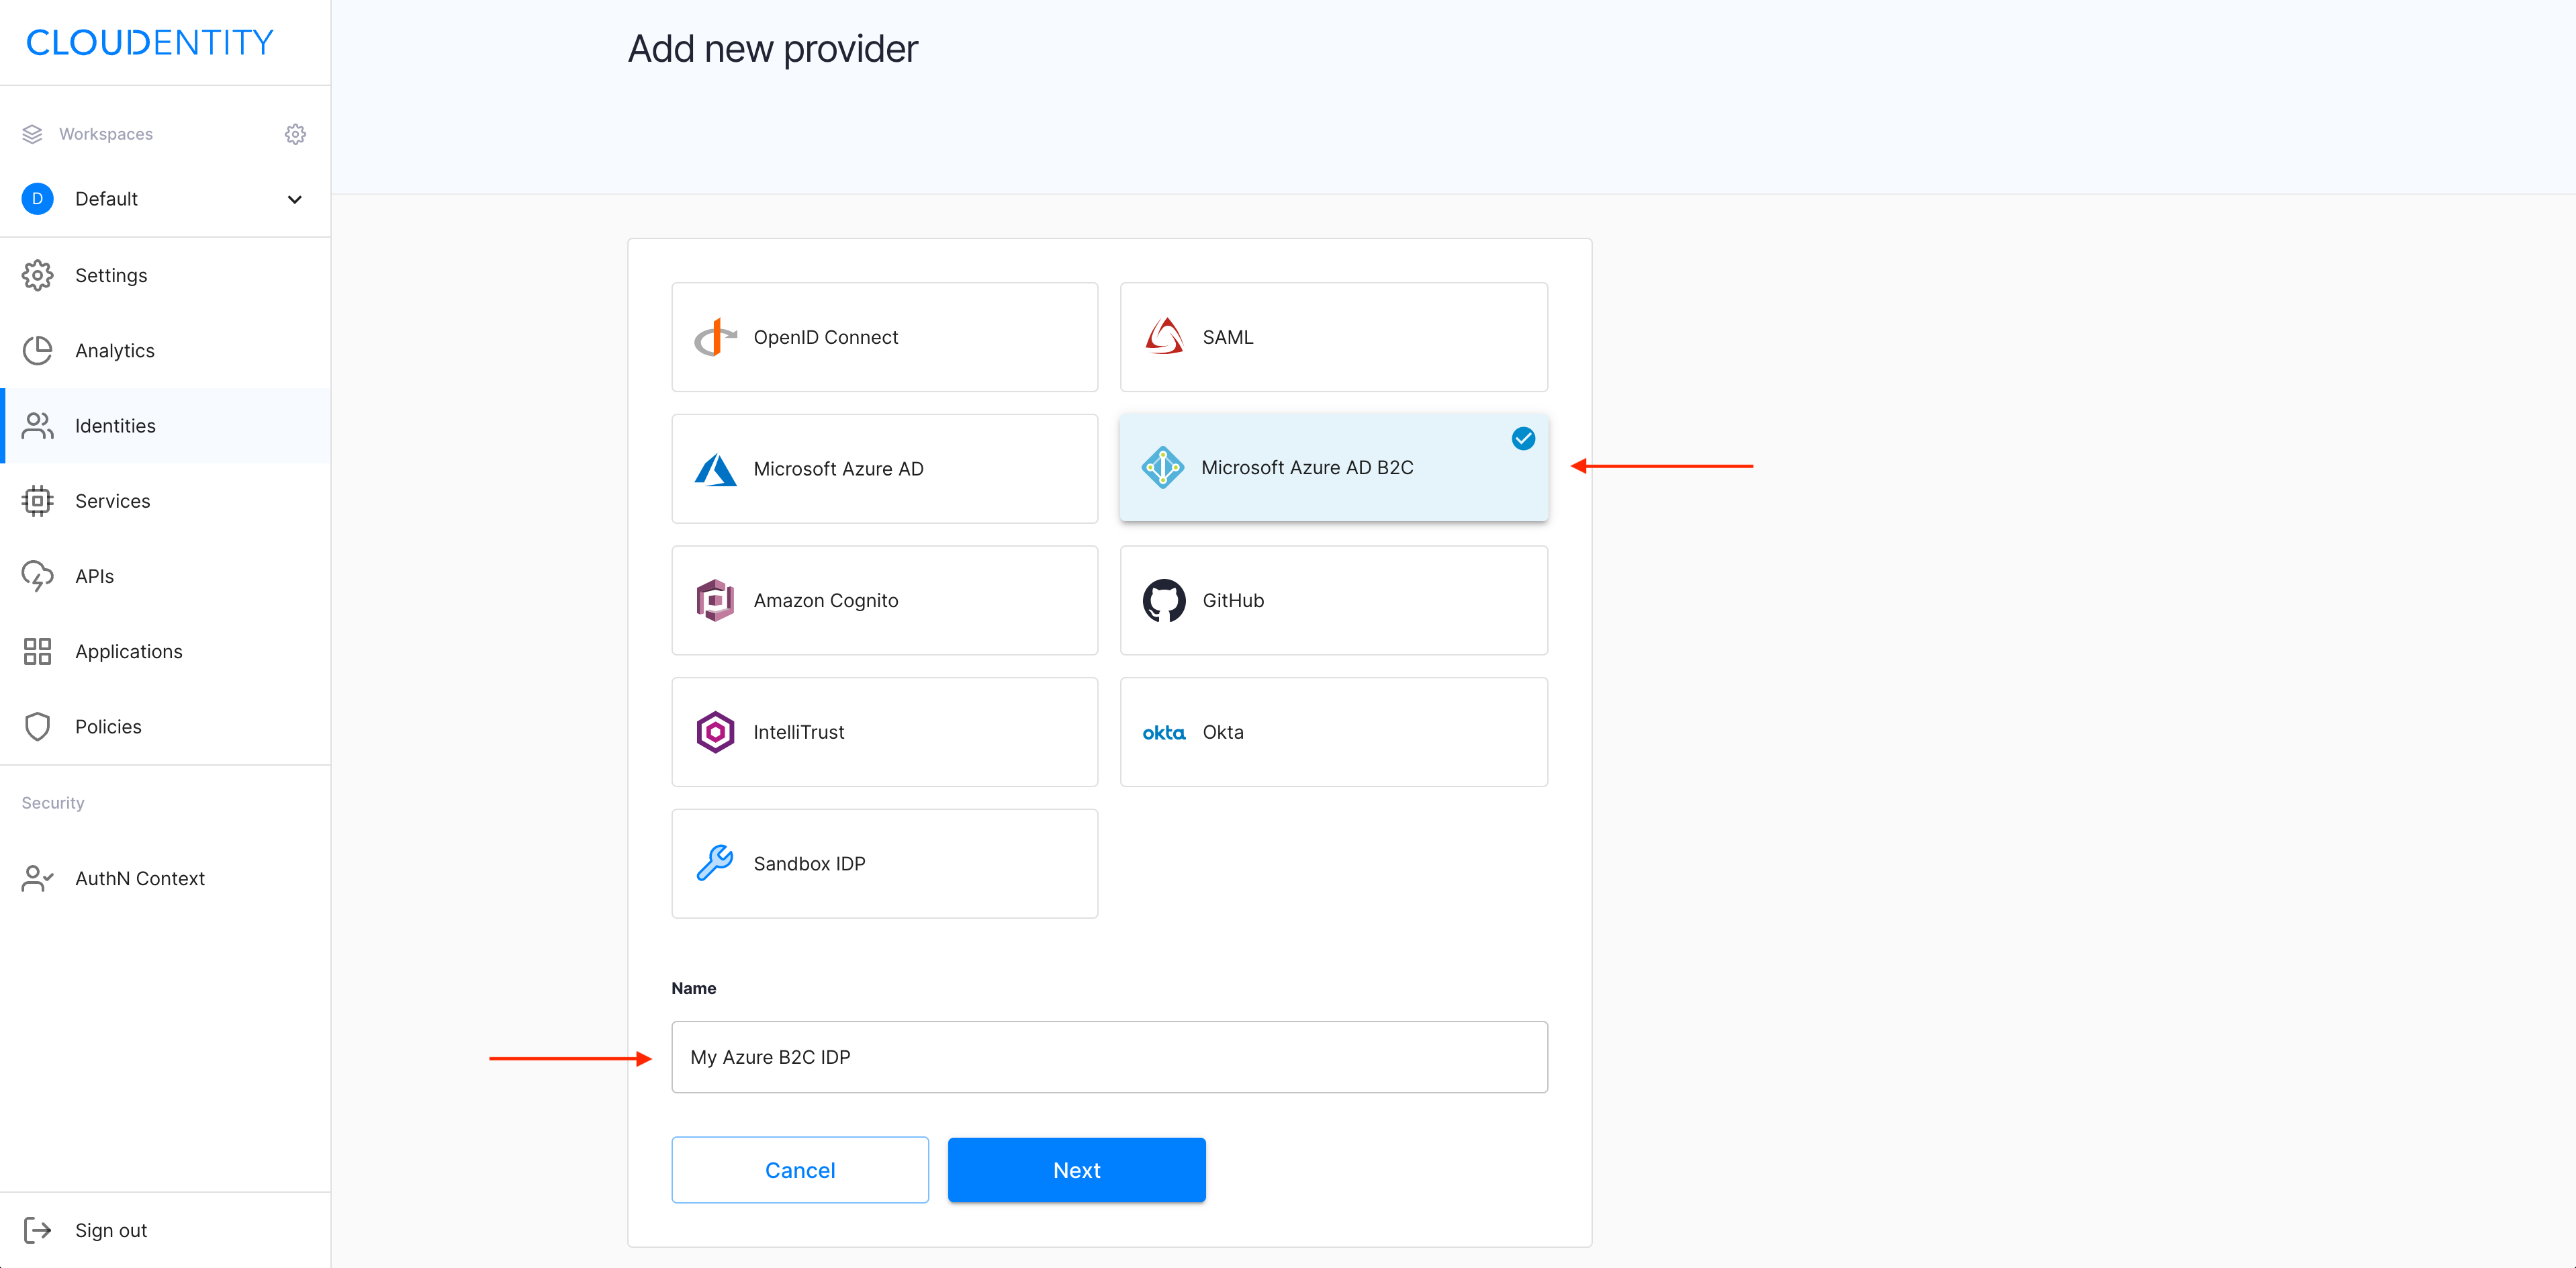
In the Add new provider view, select Microsoft Azure AD B2C from the list of the predefined IDP templates, enter the name for your new IDP, and click Next.
Result
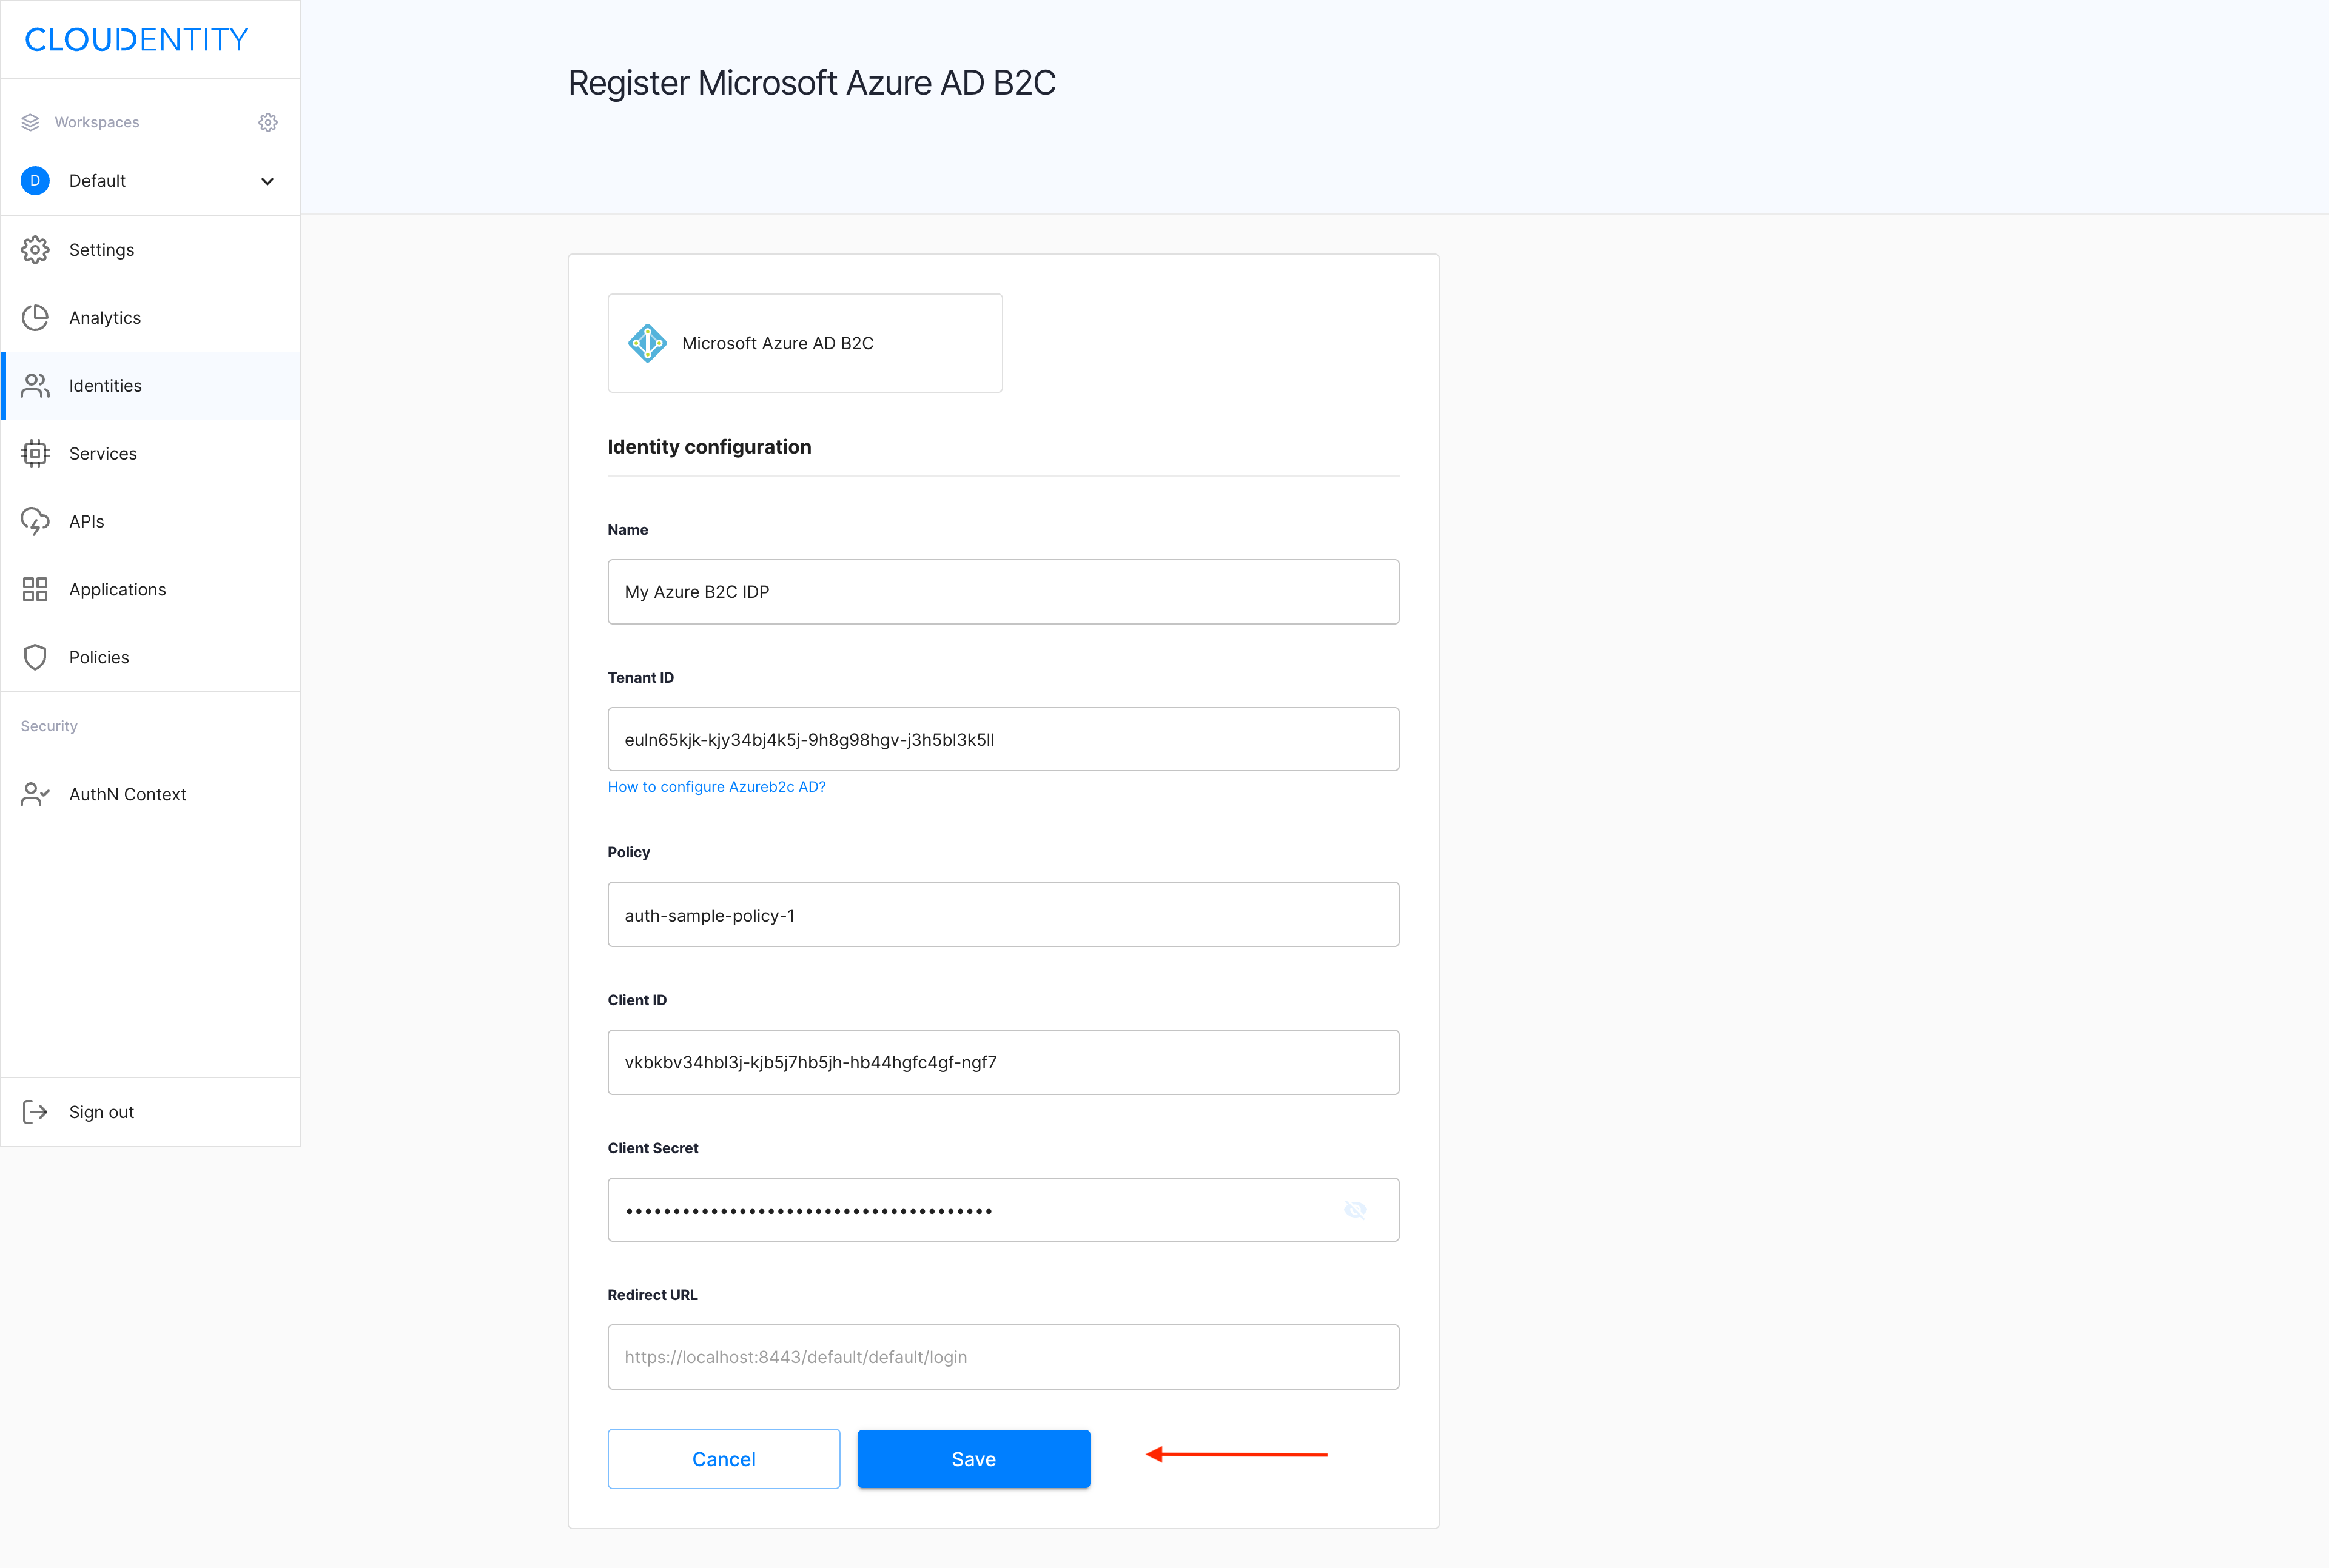
The Register Microsoft Azure AD B2C view shows blanks for details on your Azure IDP.

Note
Copy the Redirect URL provided in the Register Microsoft Azure AD B2C view. You’re going to need it for further configuration.
-
To fill in Register Microsoft Azure AD B2C, now jump to Configure Azure AD B2C for the data required:
- Tenant ID
- Policy
- Client ID
- Client secret.
-
Back in the Register Microsoft Azure AD B2C view, with all the fields completed, select Save.
Result
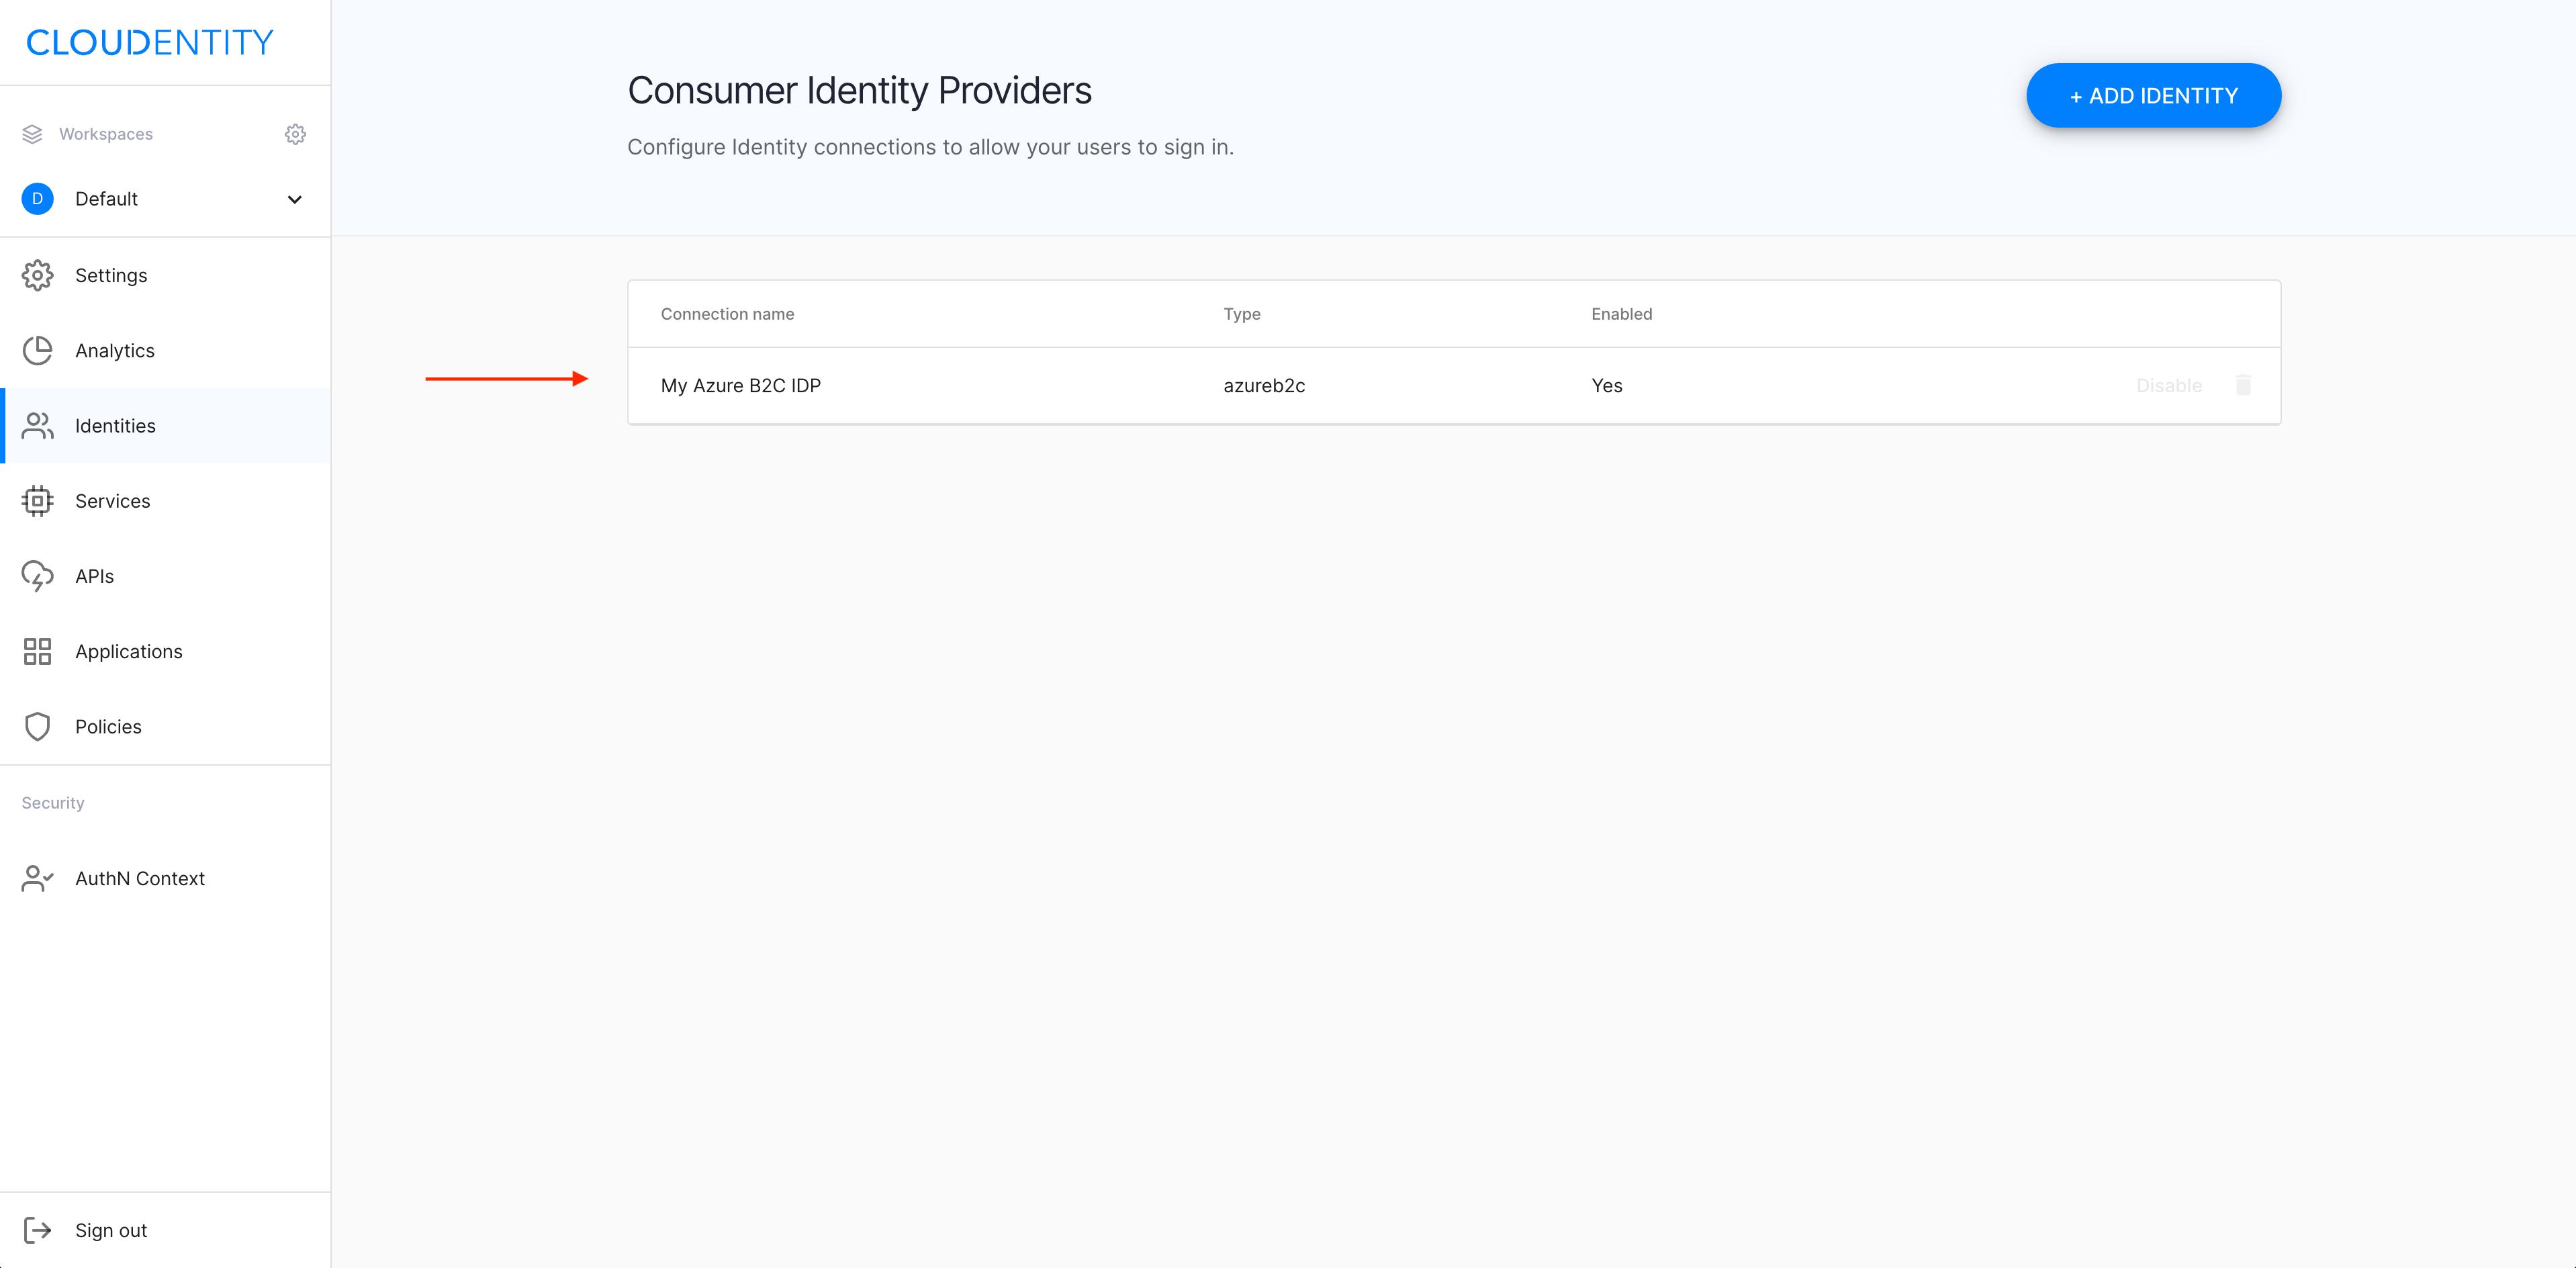
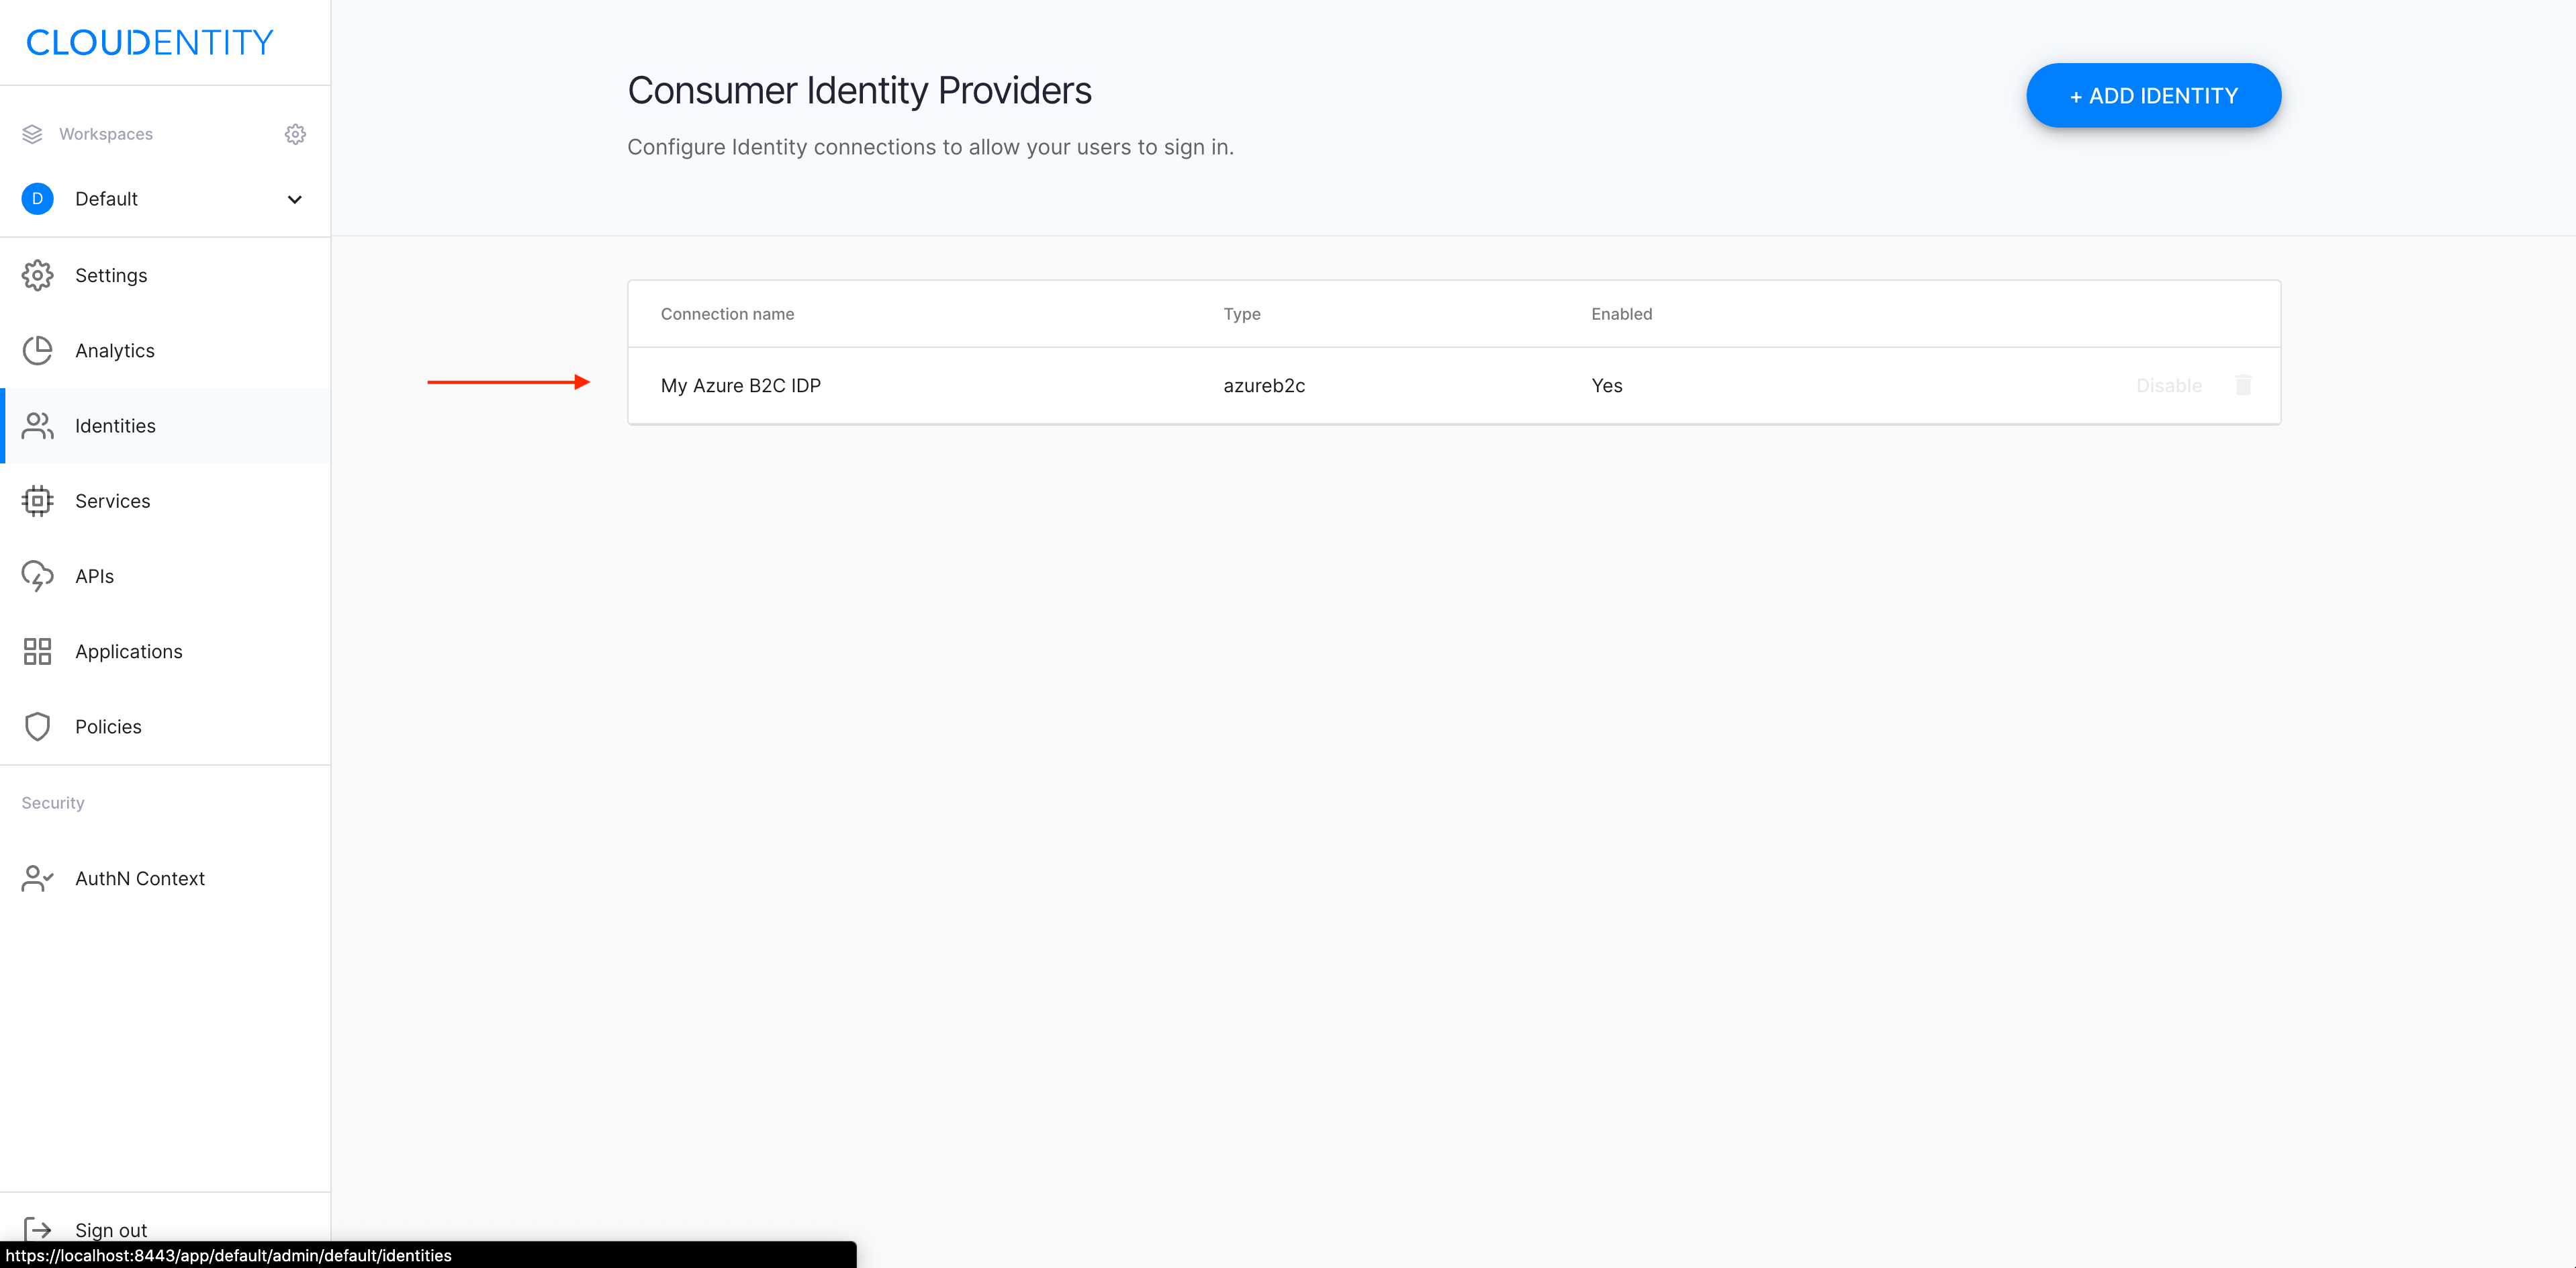
Your new IDP gets previewed in the Consumer Identity Providers view.
Advanced settings
-
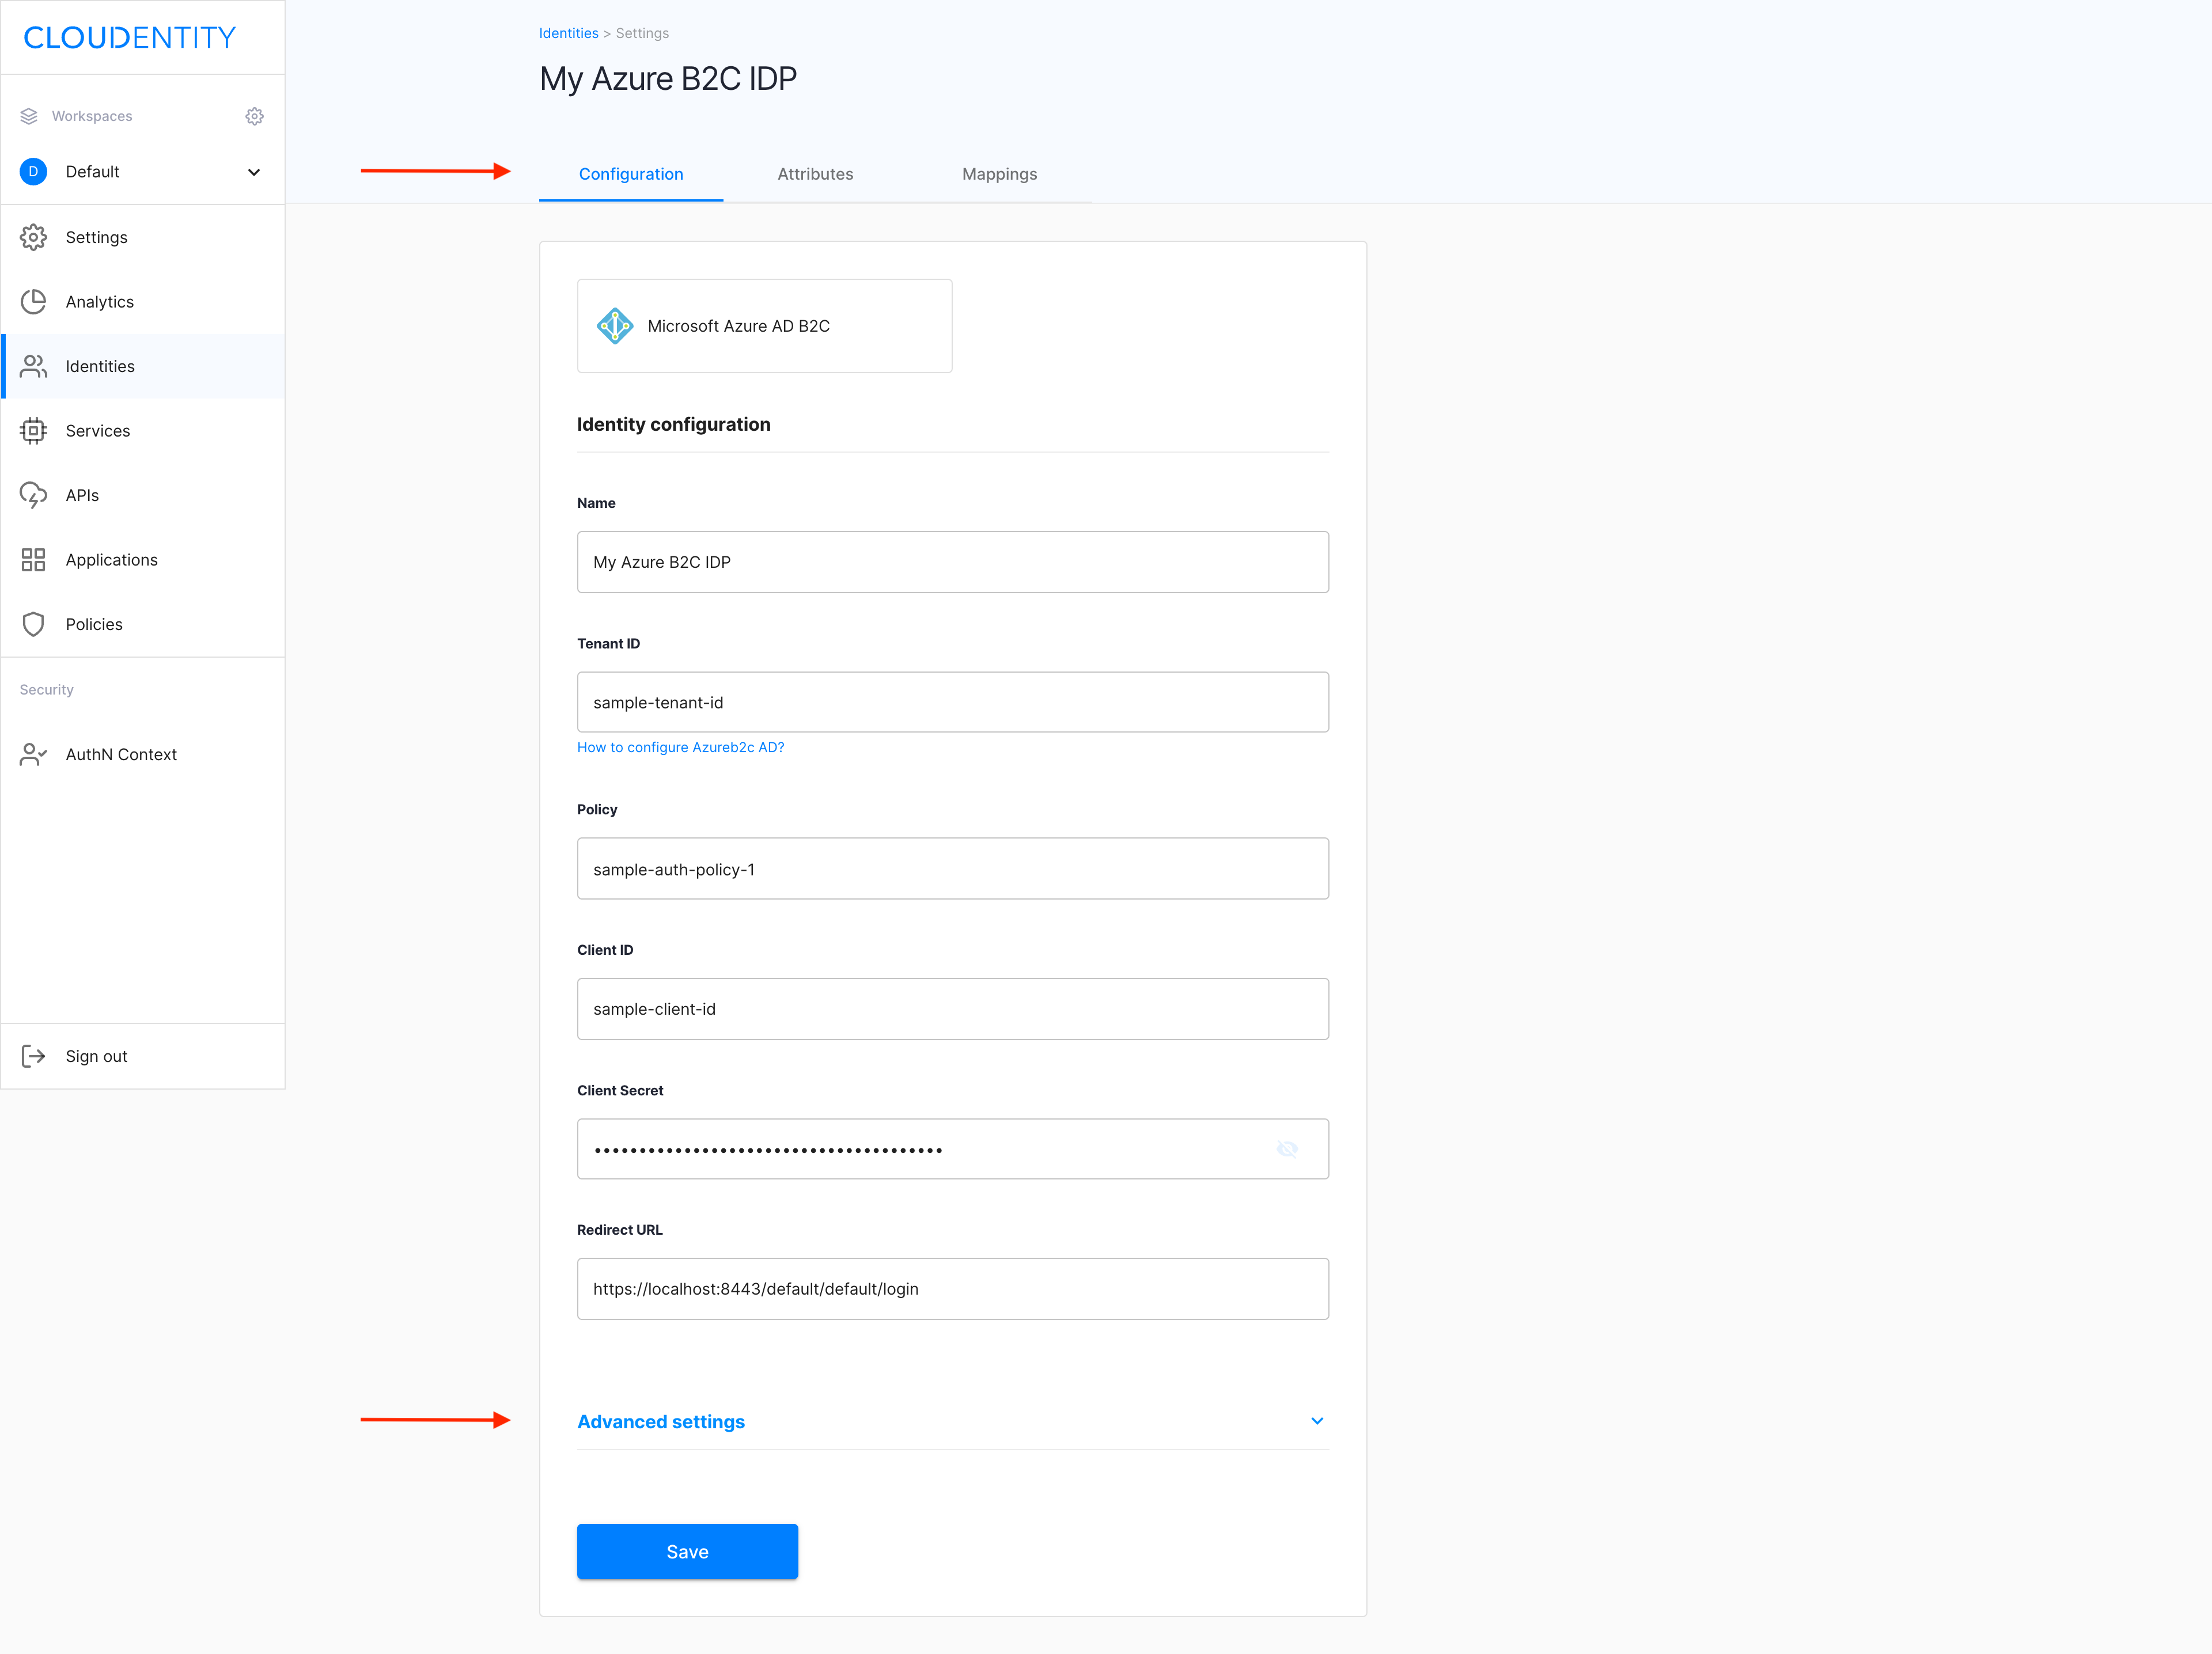
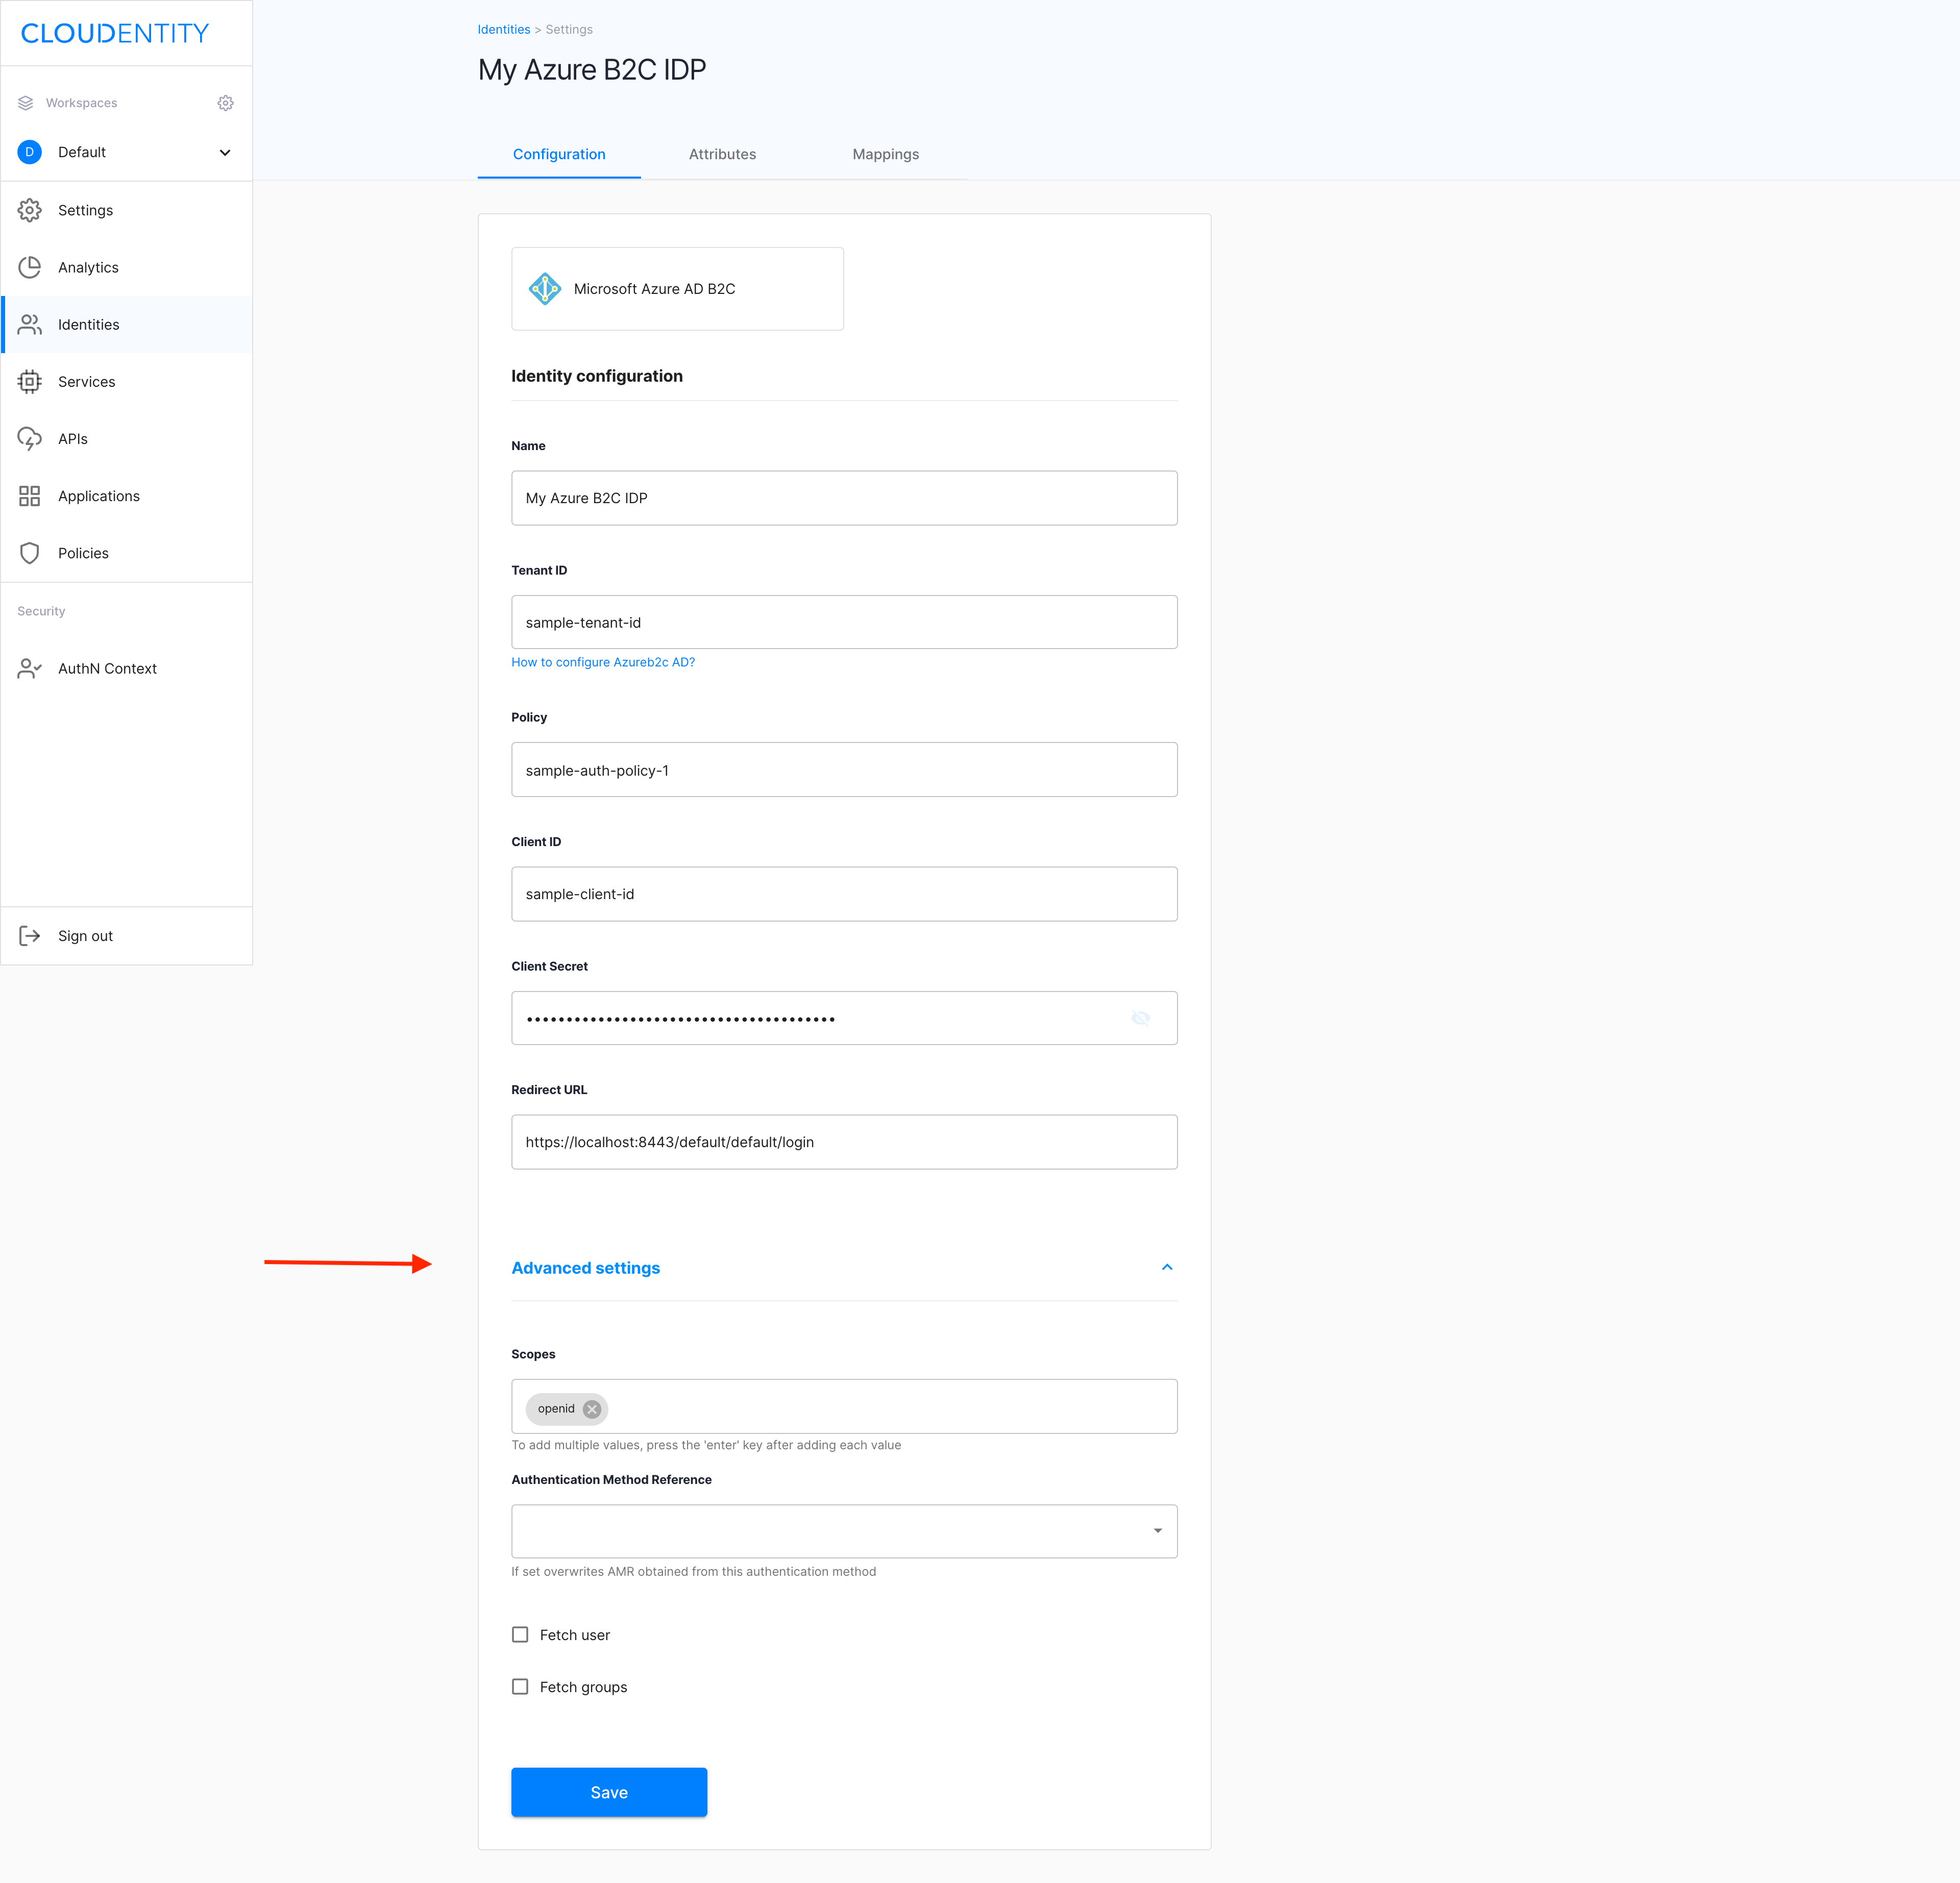
Select your new IDP from the Consumer Identity Providers view and make sure you’re in the CONFIGURATION tab.
-
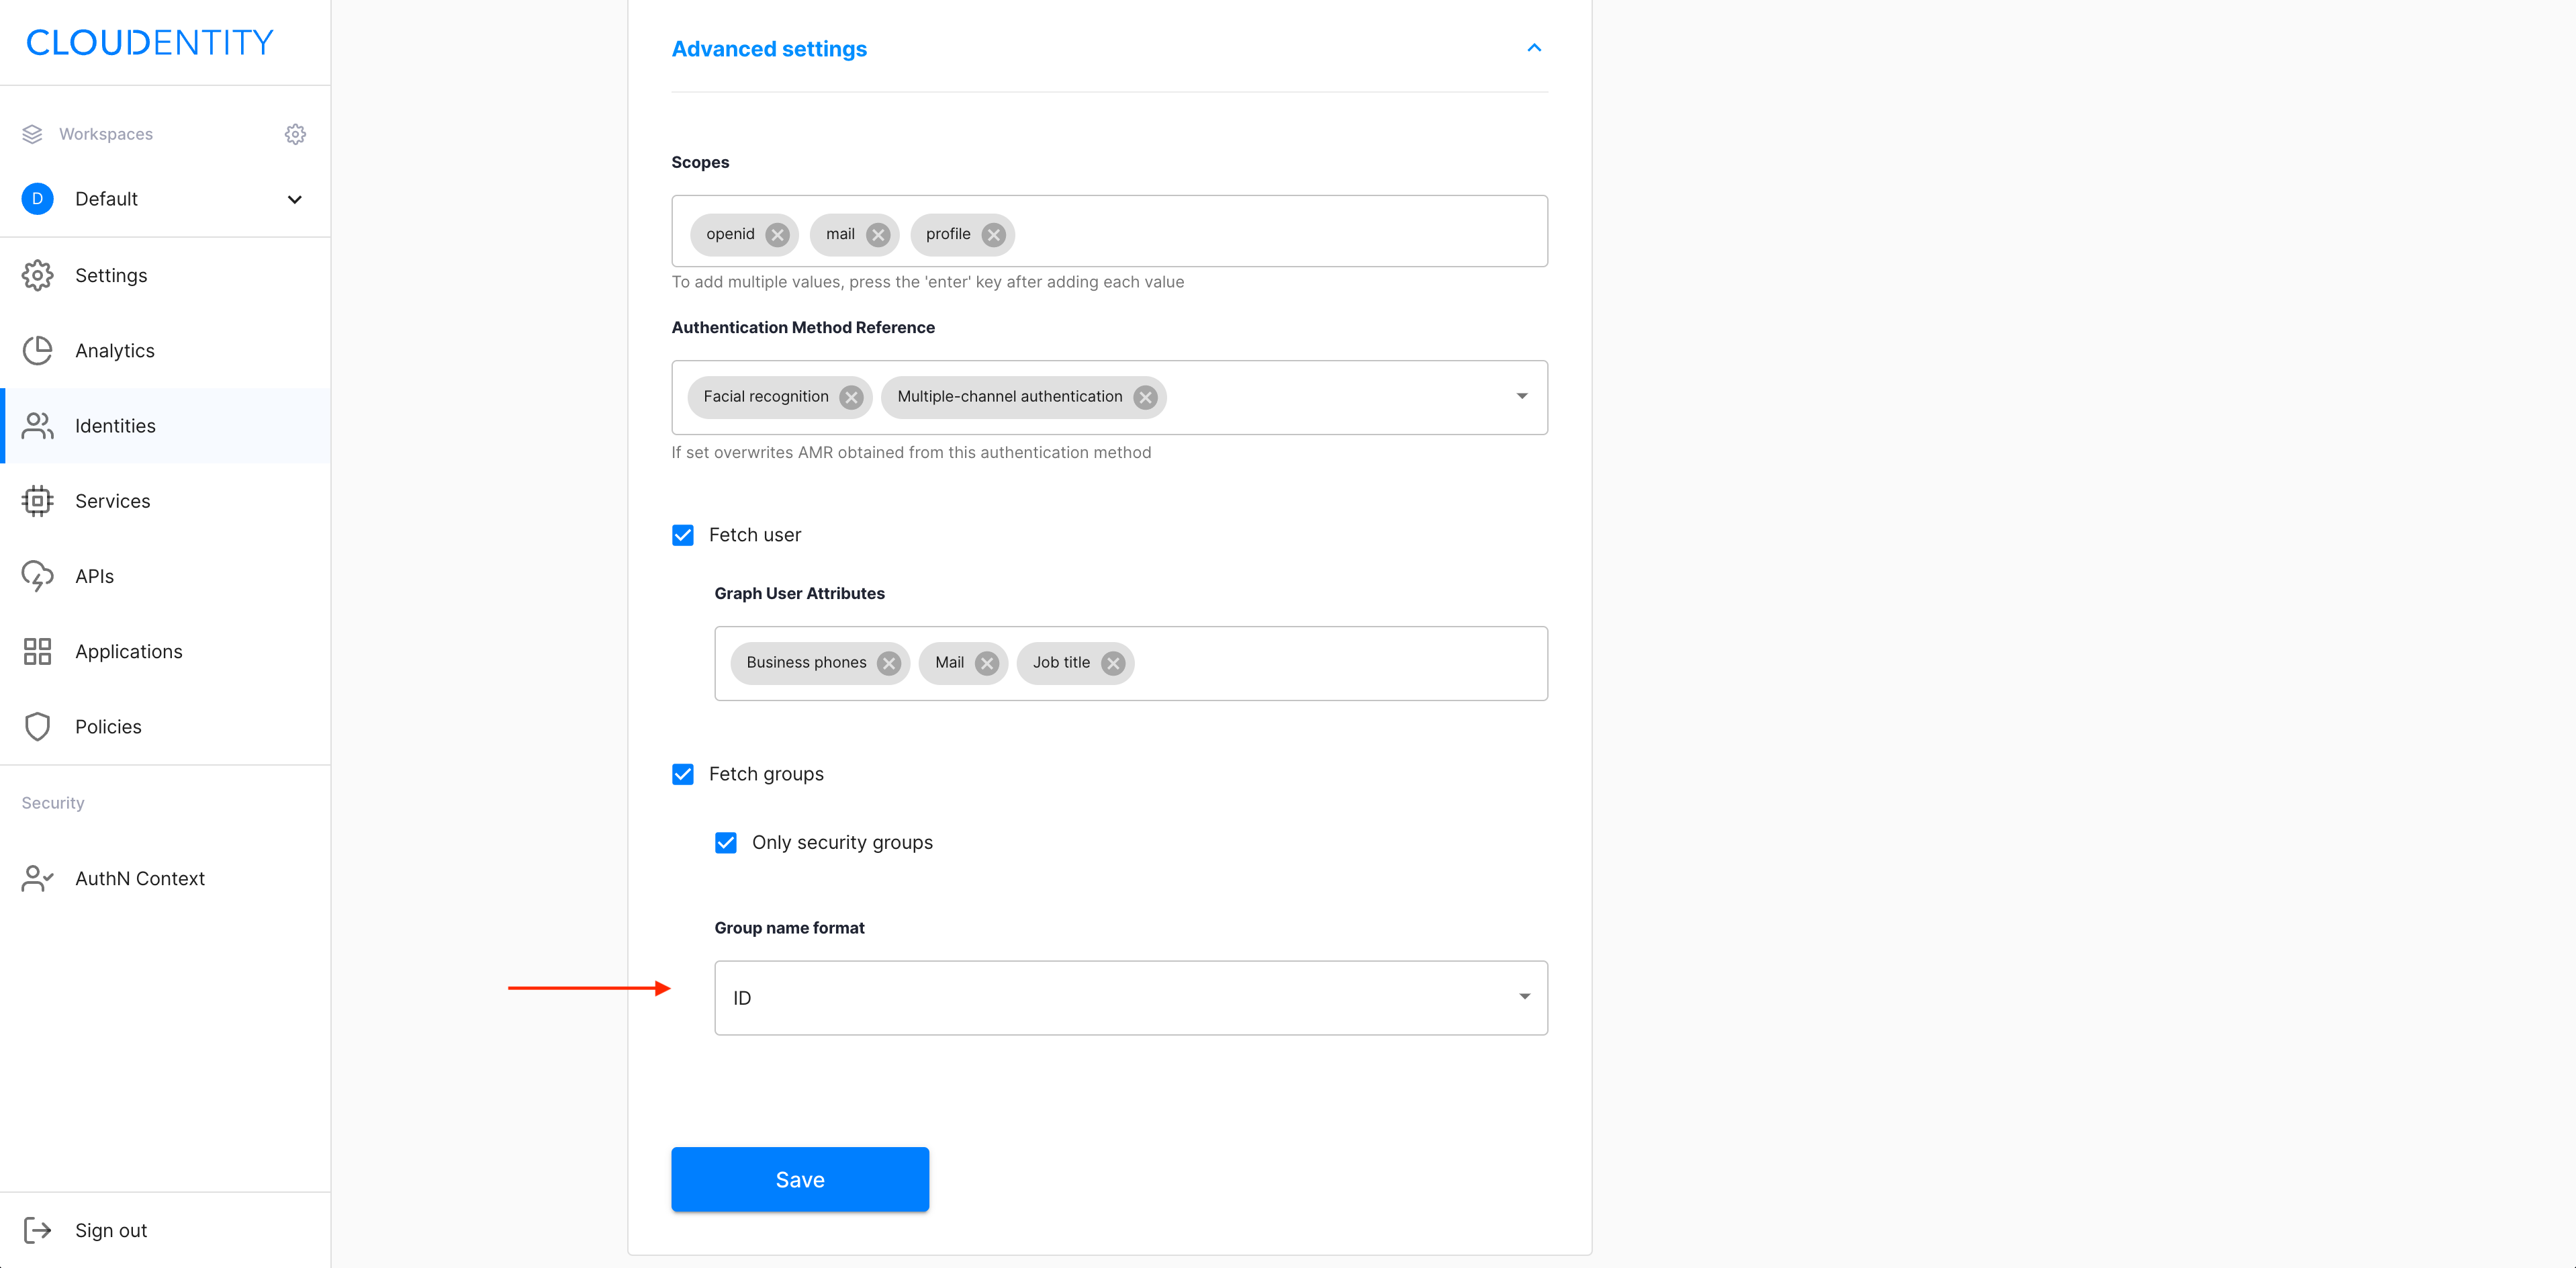
Select Advanced settings, which unfolds additional configuration options.
Result
-
Add more scopes by entering their values into the Scopes field.

-
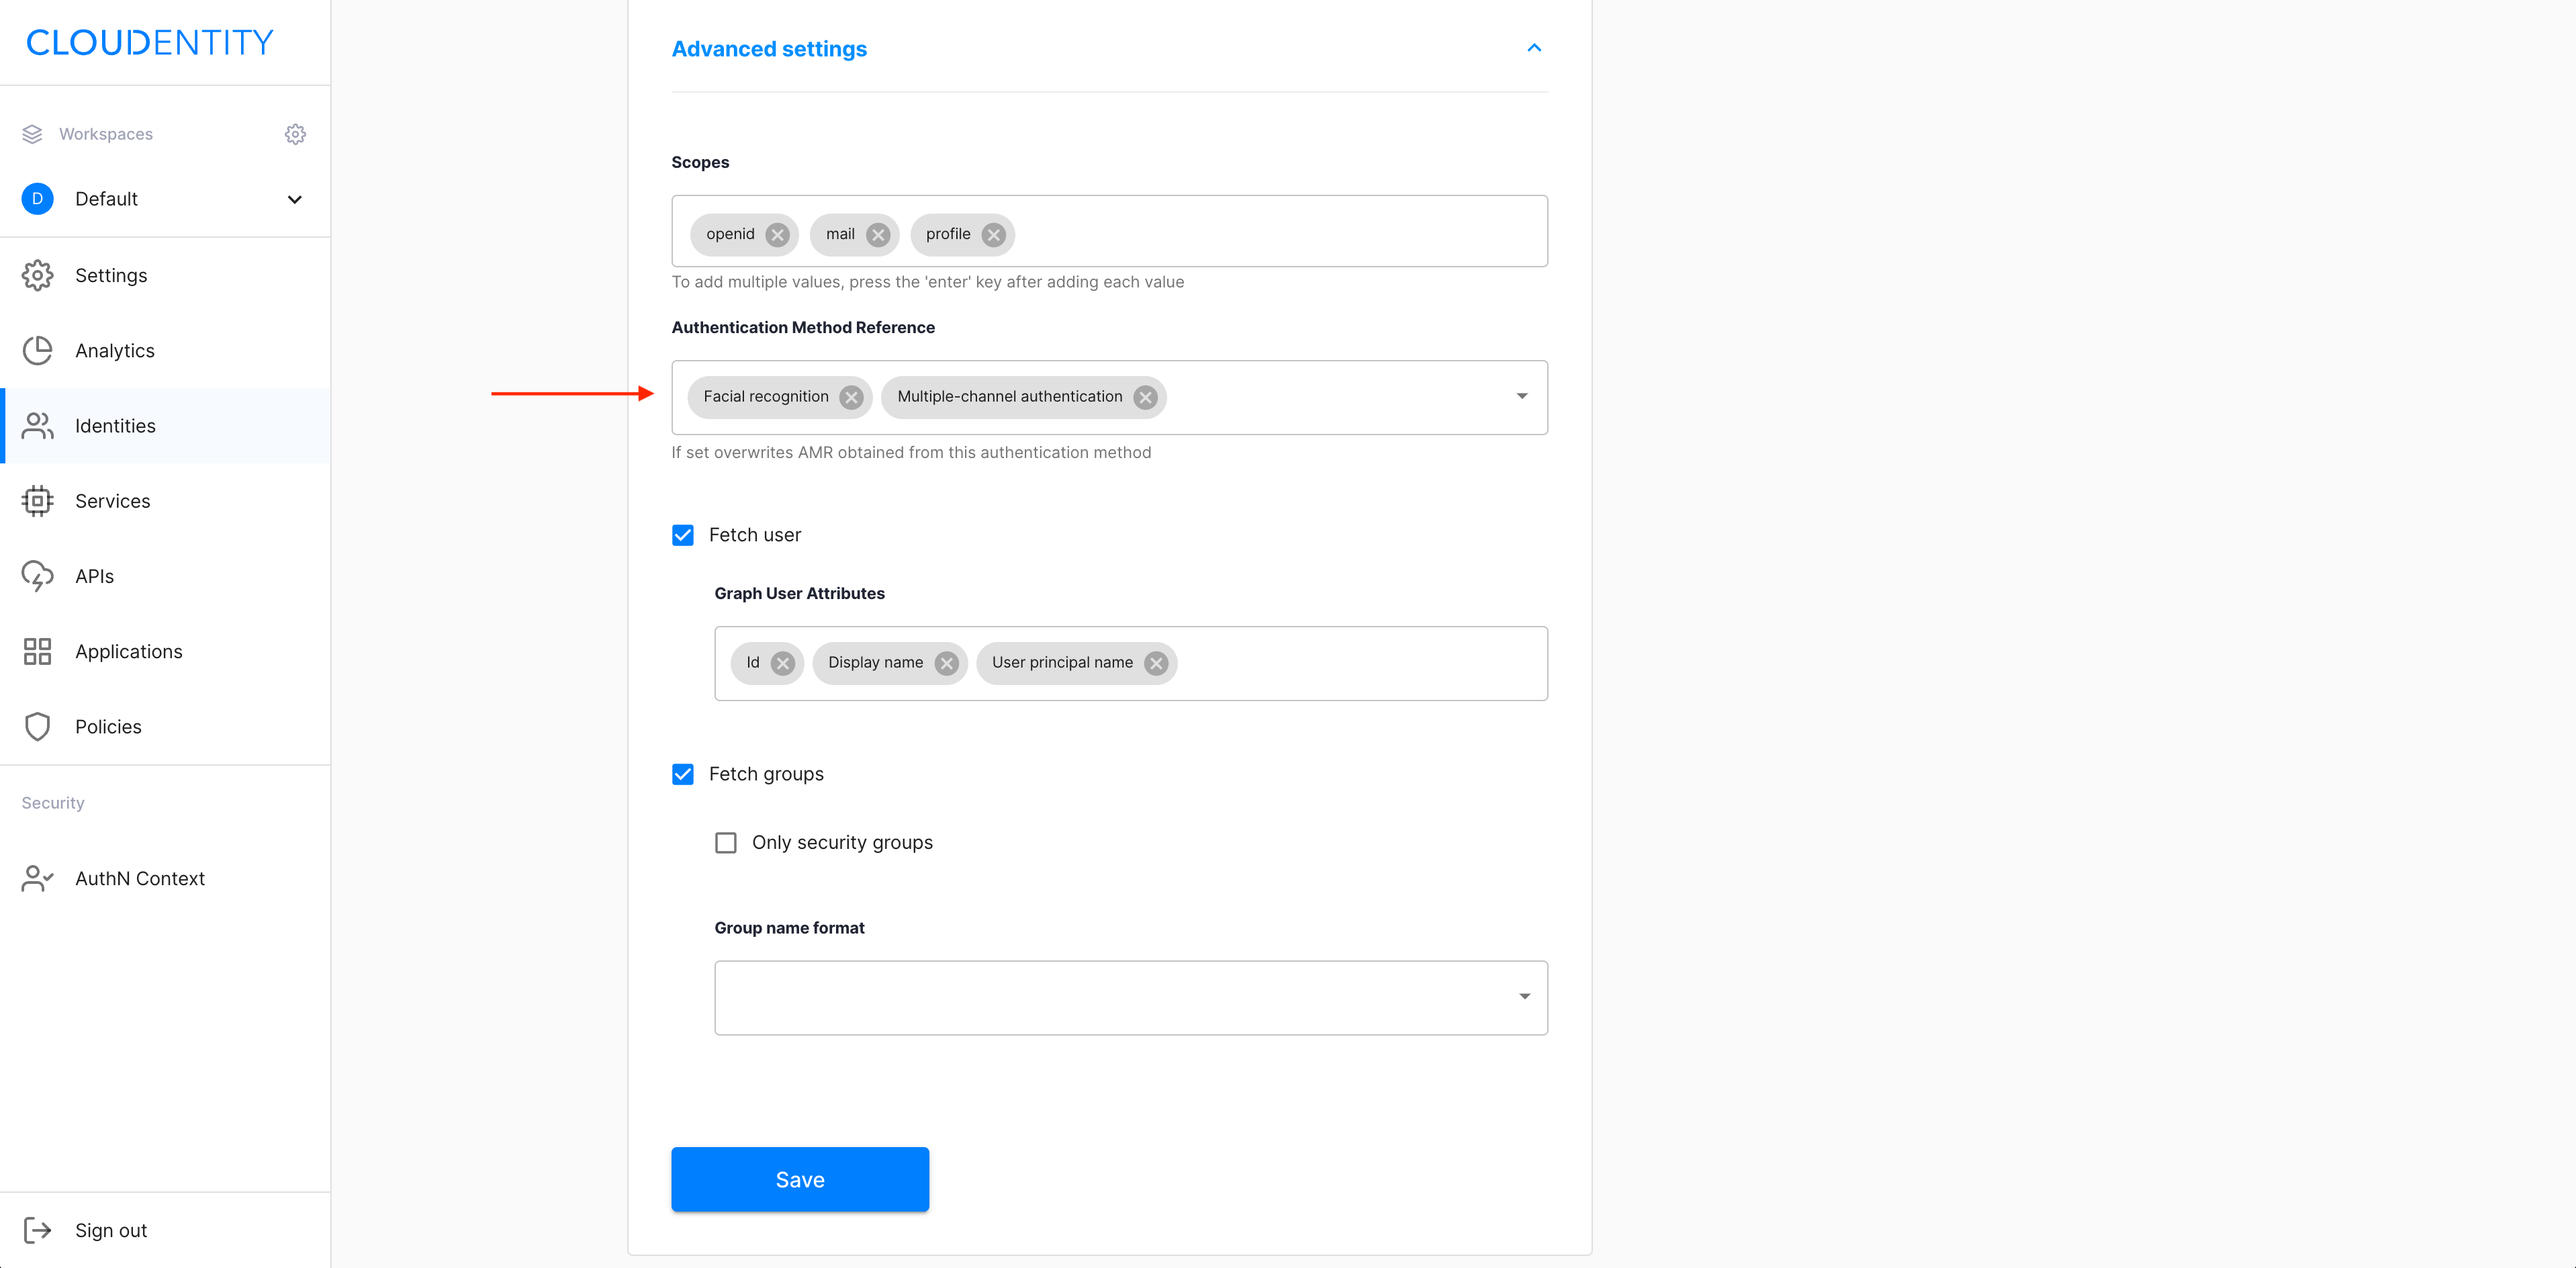
Specify Authentication Method Reference by selecting it from the dropdown menu.
-
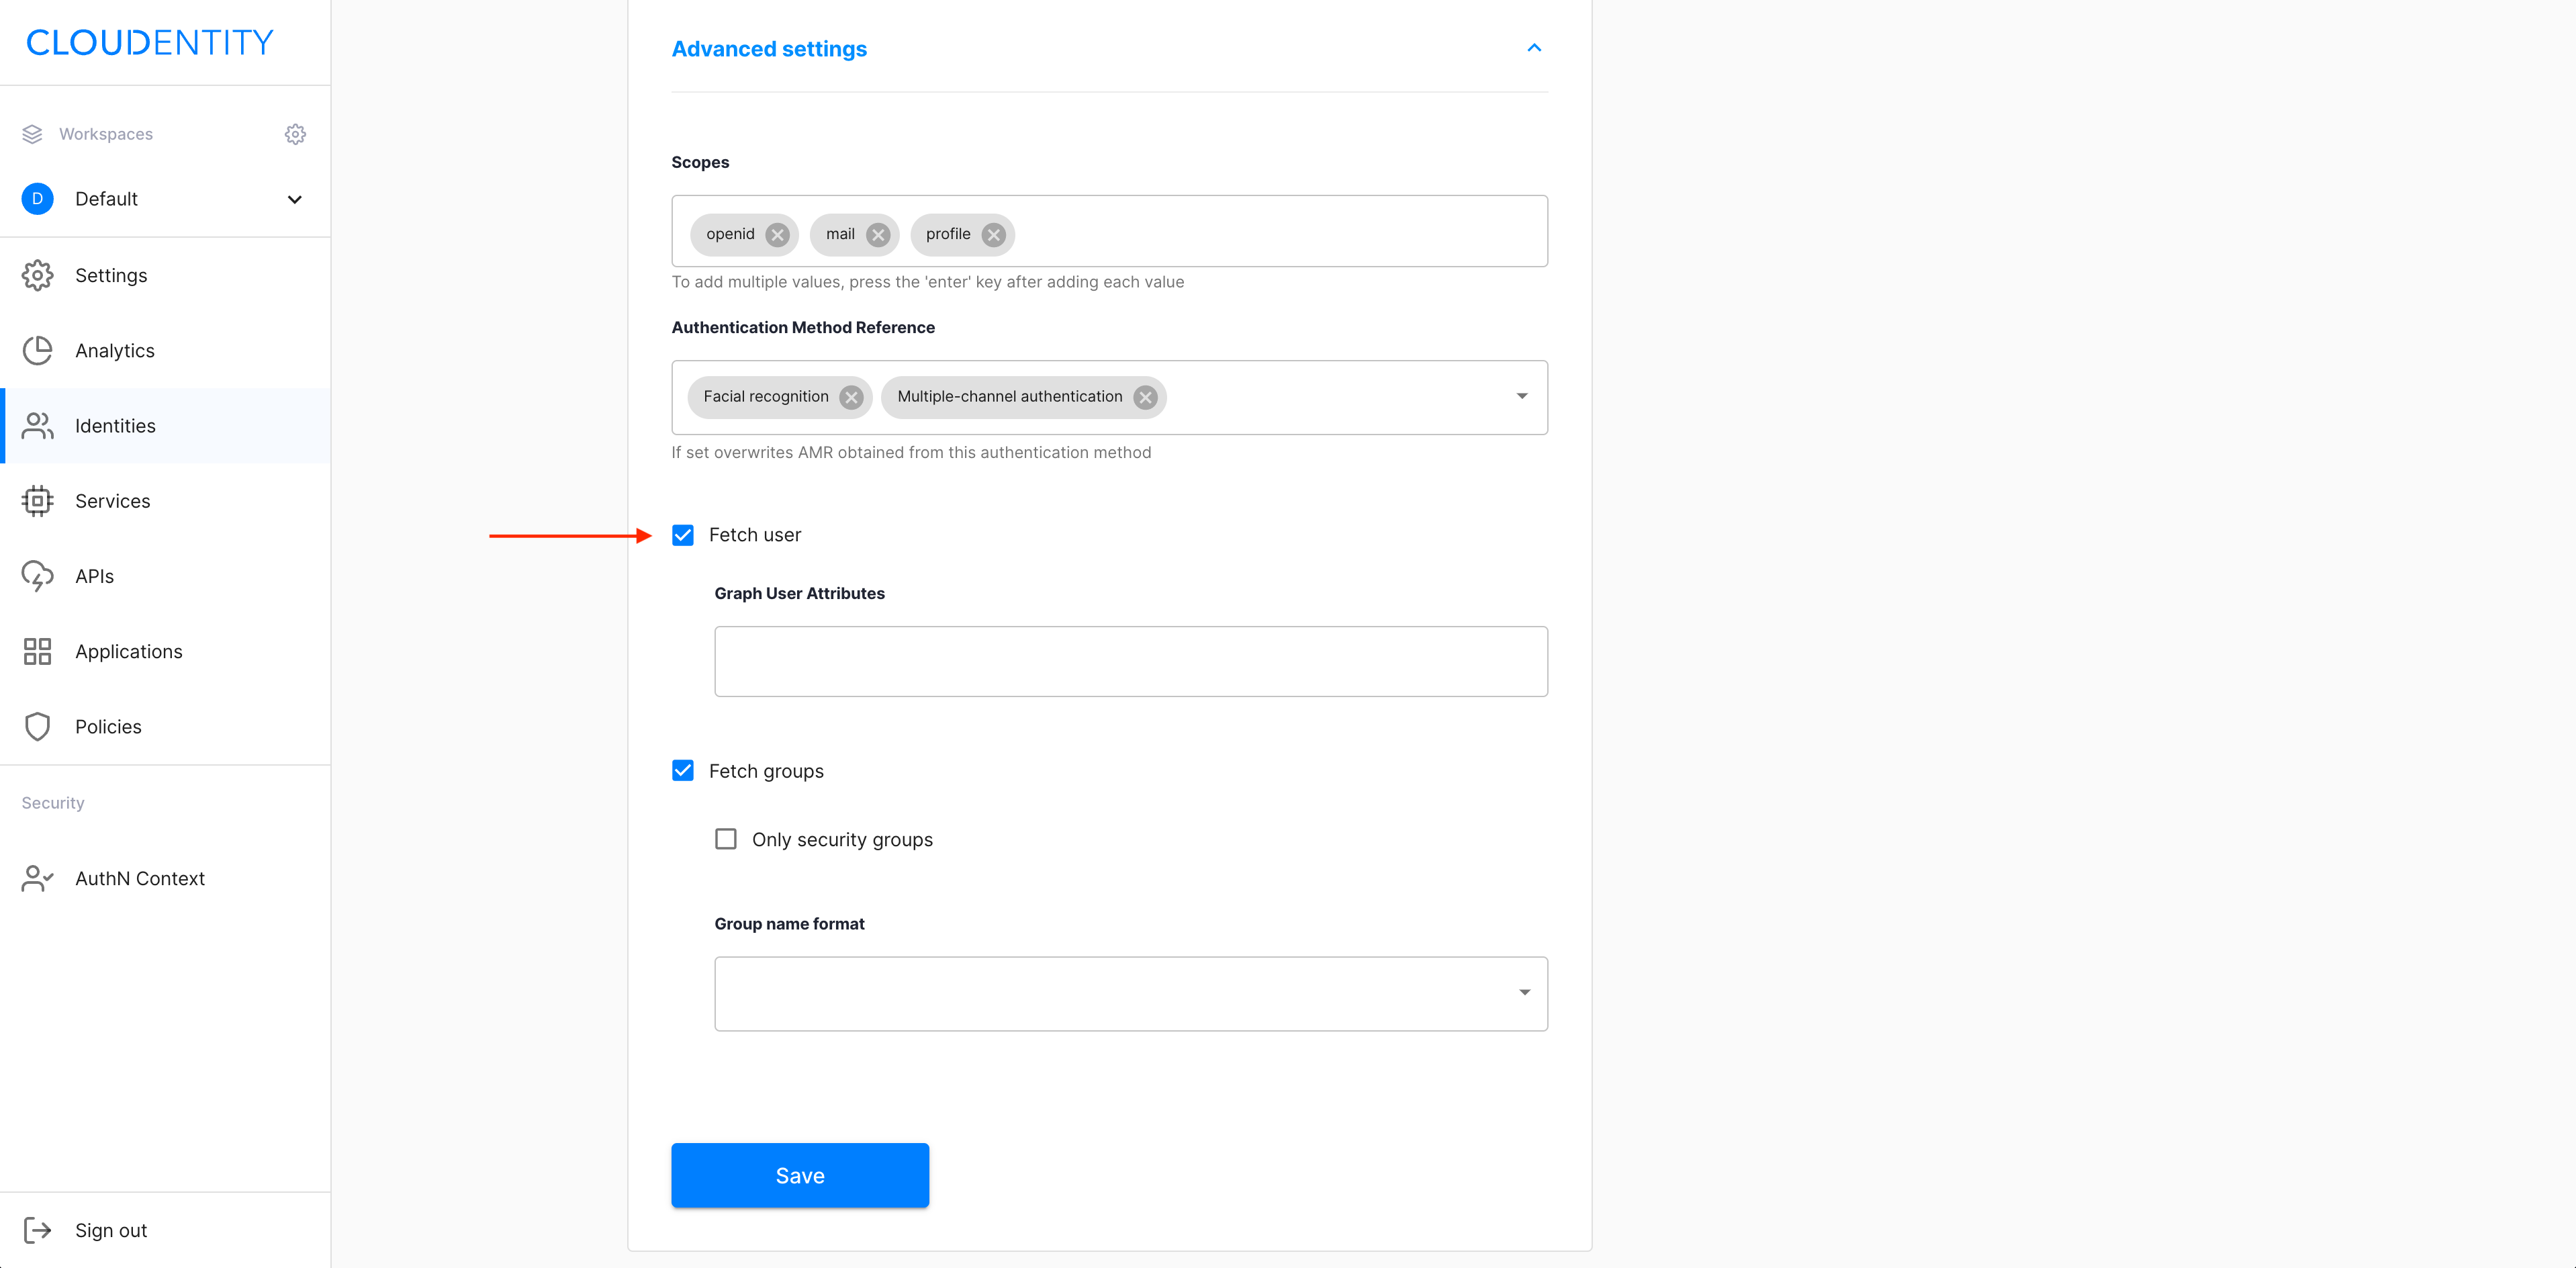
Enable Fetch user for collecting user data from the Microsoft Graph API.
-
Select the Fetch user checkbox.
-
Use the Graph User Attributes dropdown menu for specifying the attributes.

This option is restricted.
You can use Fetch user only if you are entitled to call the Microsoft Graph API.
-
-
Enable Fetch groups for collecting the groups that you belong to from the Azure portal.
-
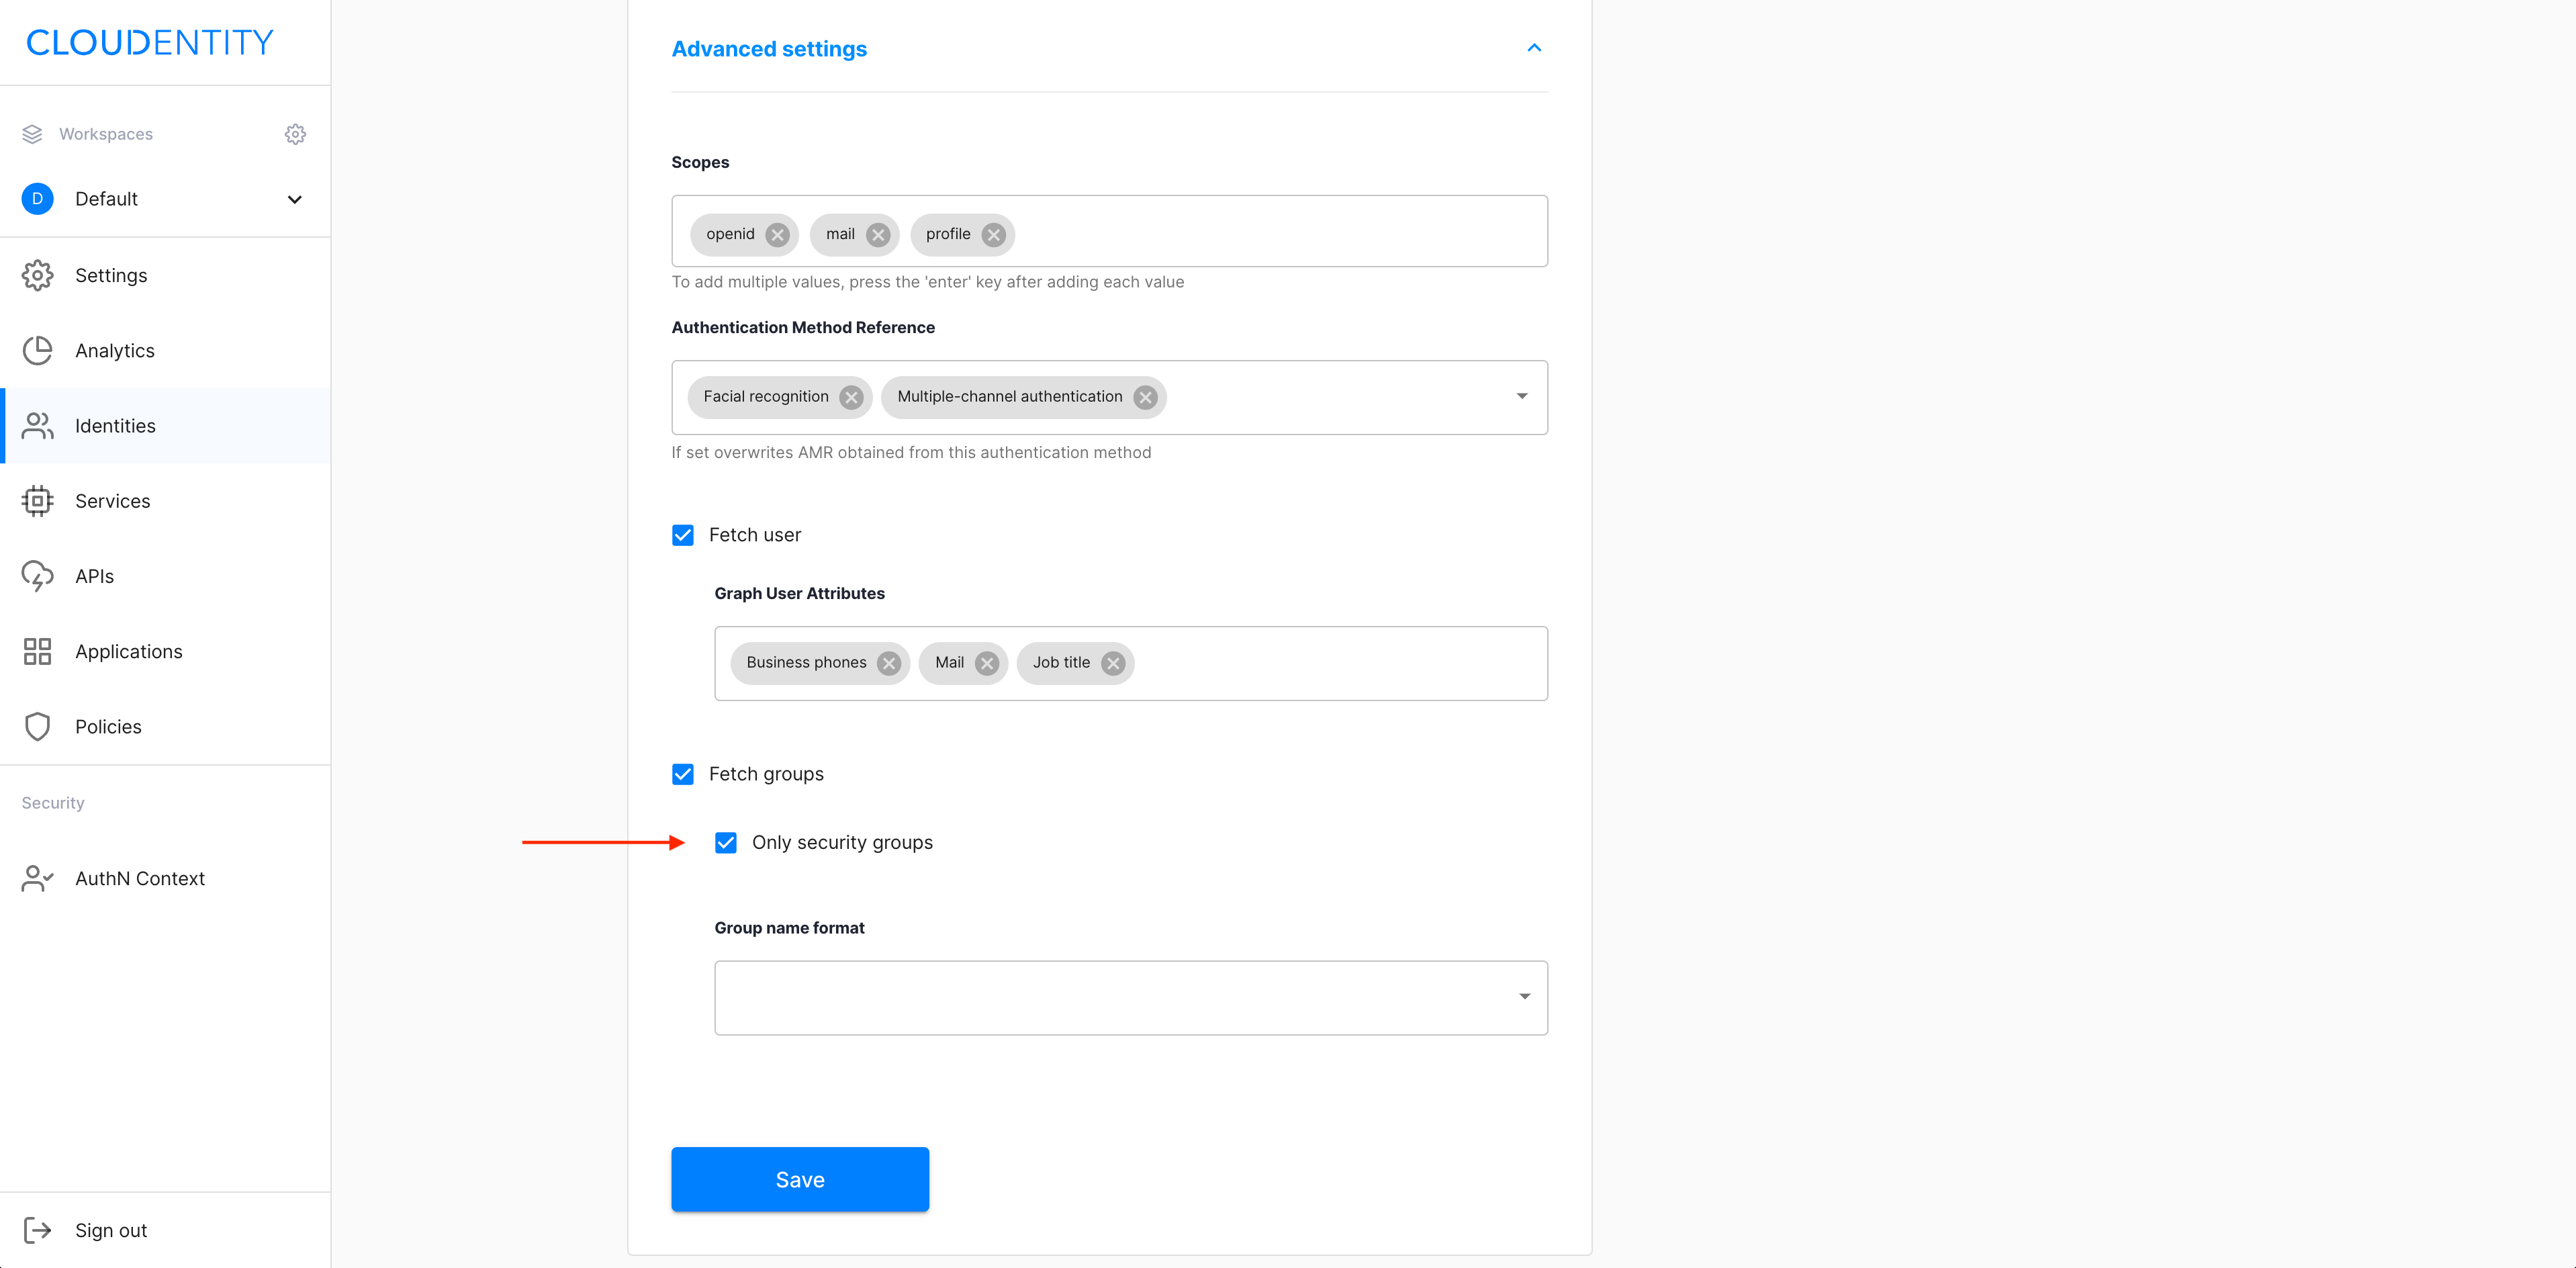
Select the Fetch groups checkbox.

-
Select the Only security groups checkbox if you need to collect security groups only.
-
Specify Group name format by selecting it from the dropdown menu.
-
-
Select Save to complete the setup of your new IDP.
Result
Your new IDP connection is configured and visible on the list of available IDP connections.
Enable the stateful authorization
This step is optional.
To have the user’s data cached in ACP and avoid re-authenticating within one use’s session, follow the instruction in Enable the stateful authZ in ACP.
Configure Azure AD B2C
-
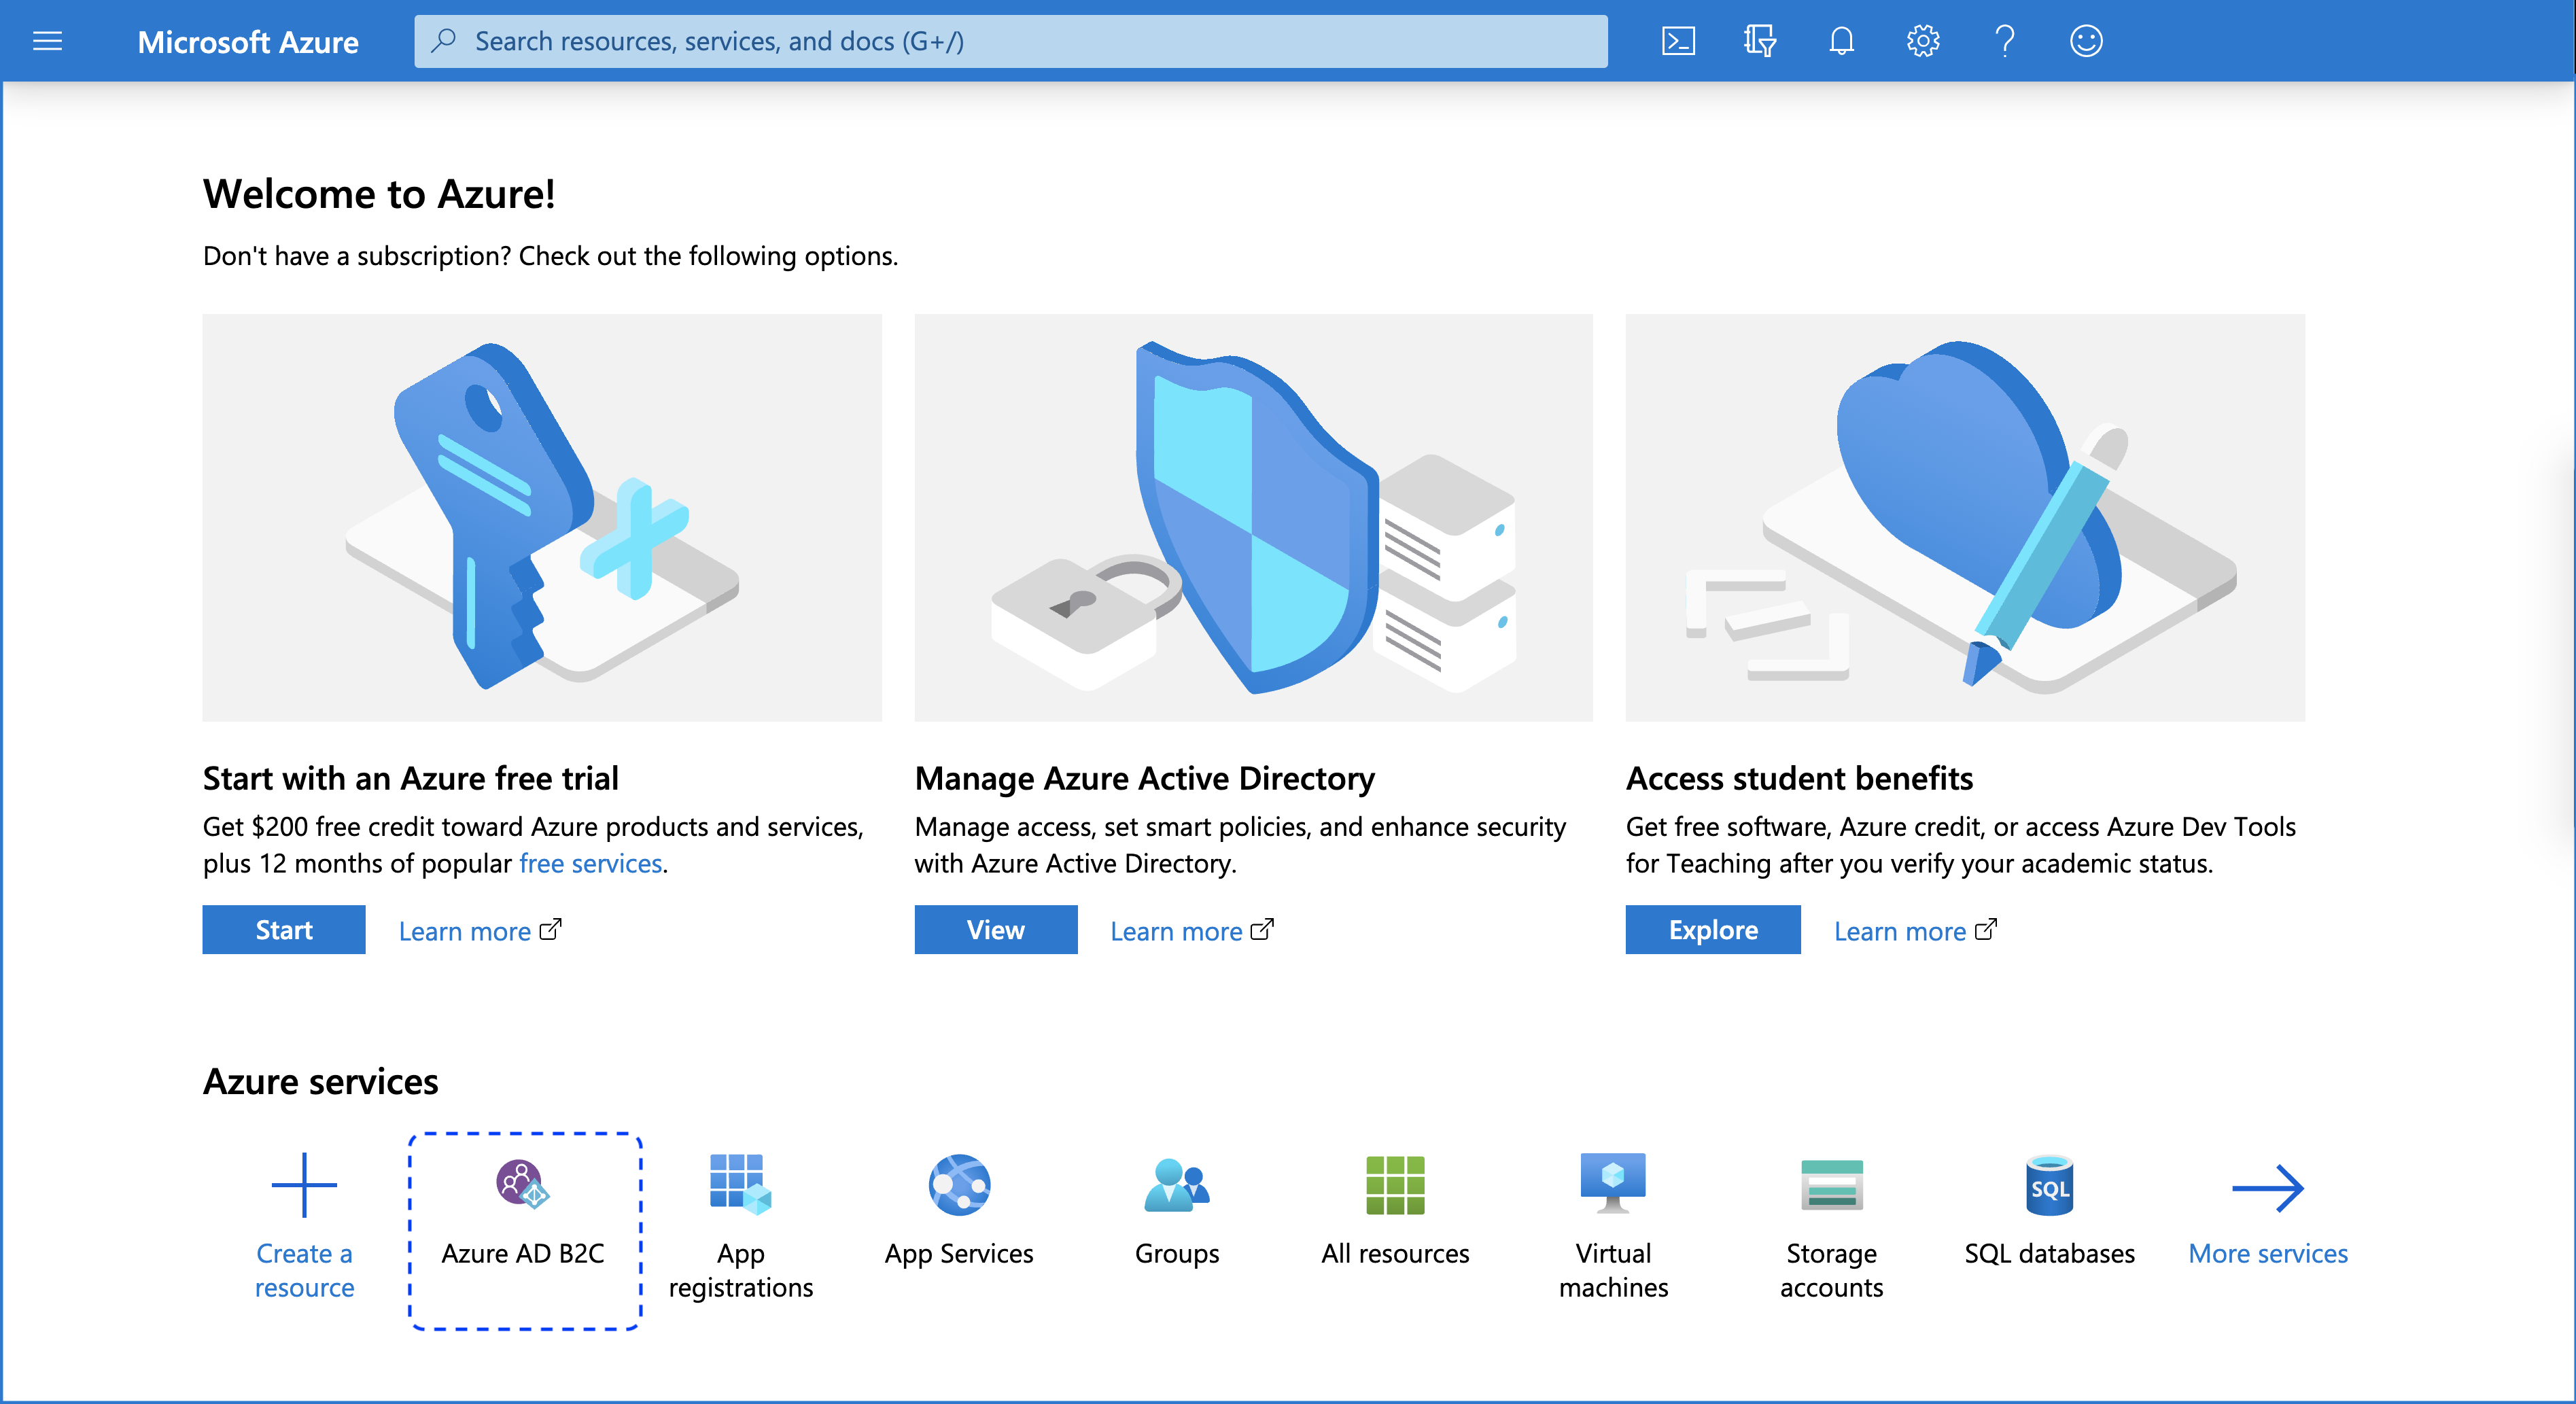
Log in to Microsoft Azure and select Azure AD B2C from the Azure services section.
Note
Your Azure tenant has to be an Azure AD B2C tenant.
Result
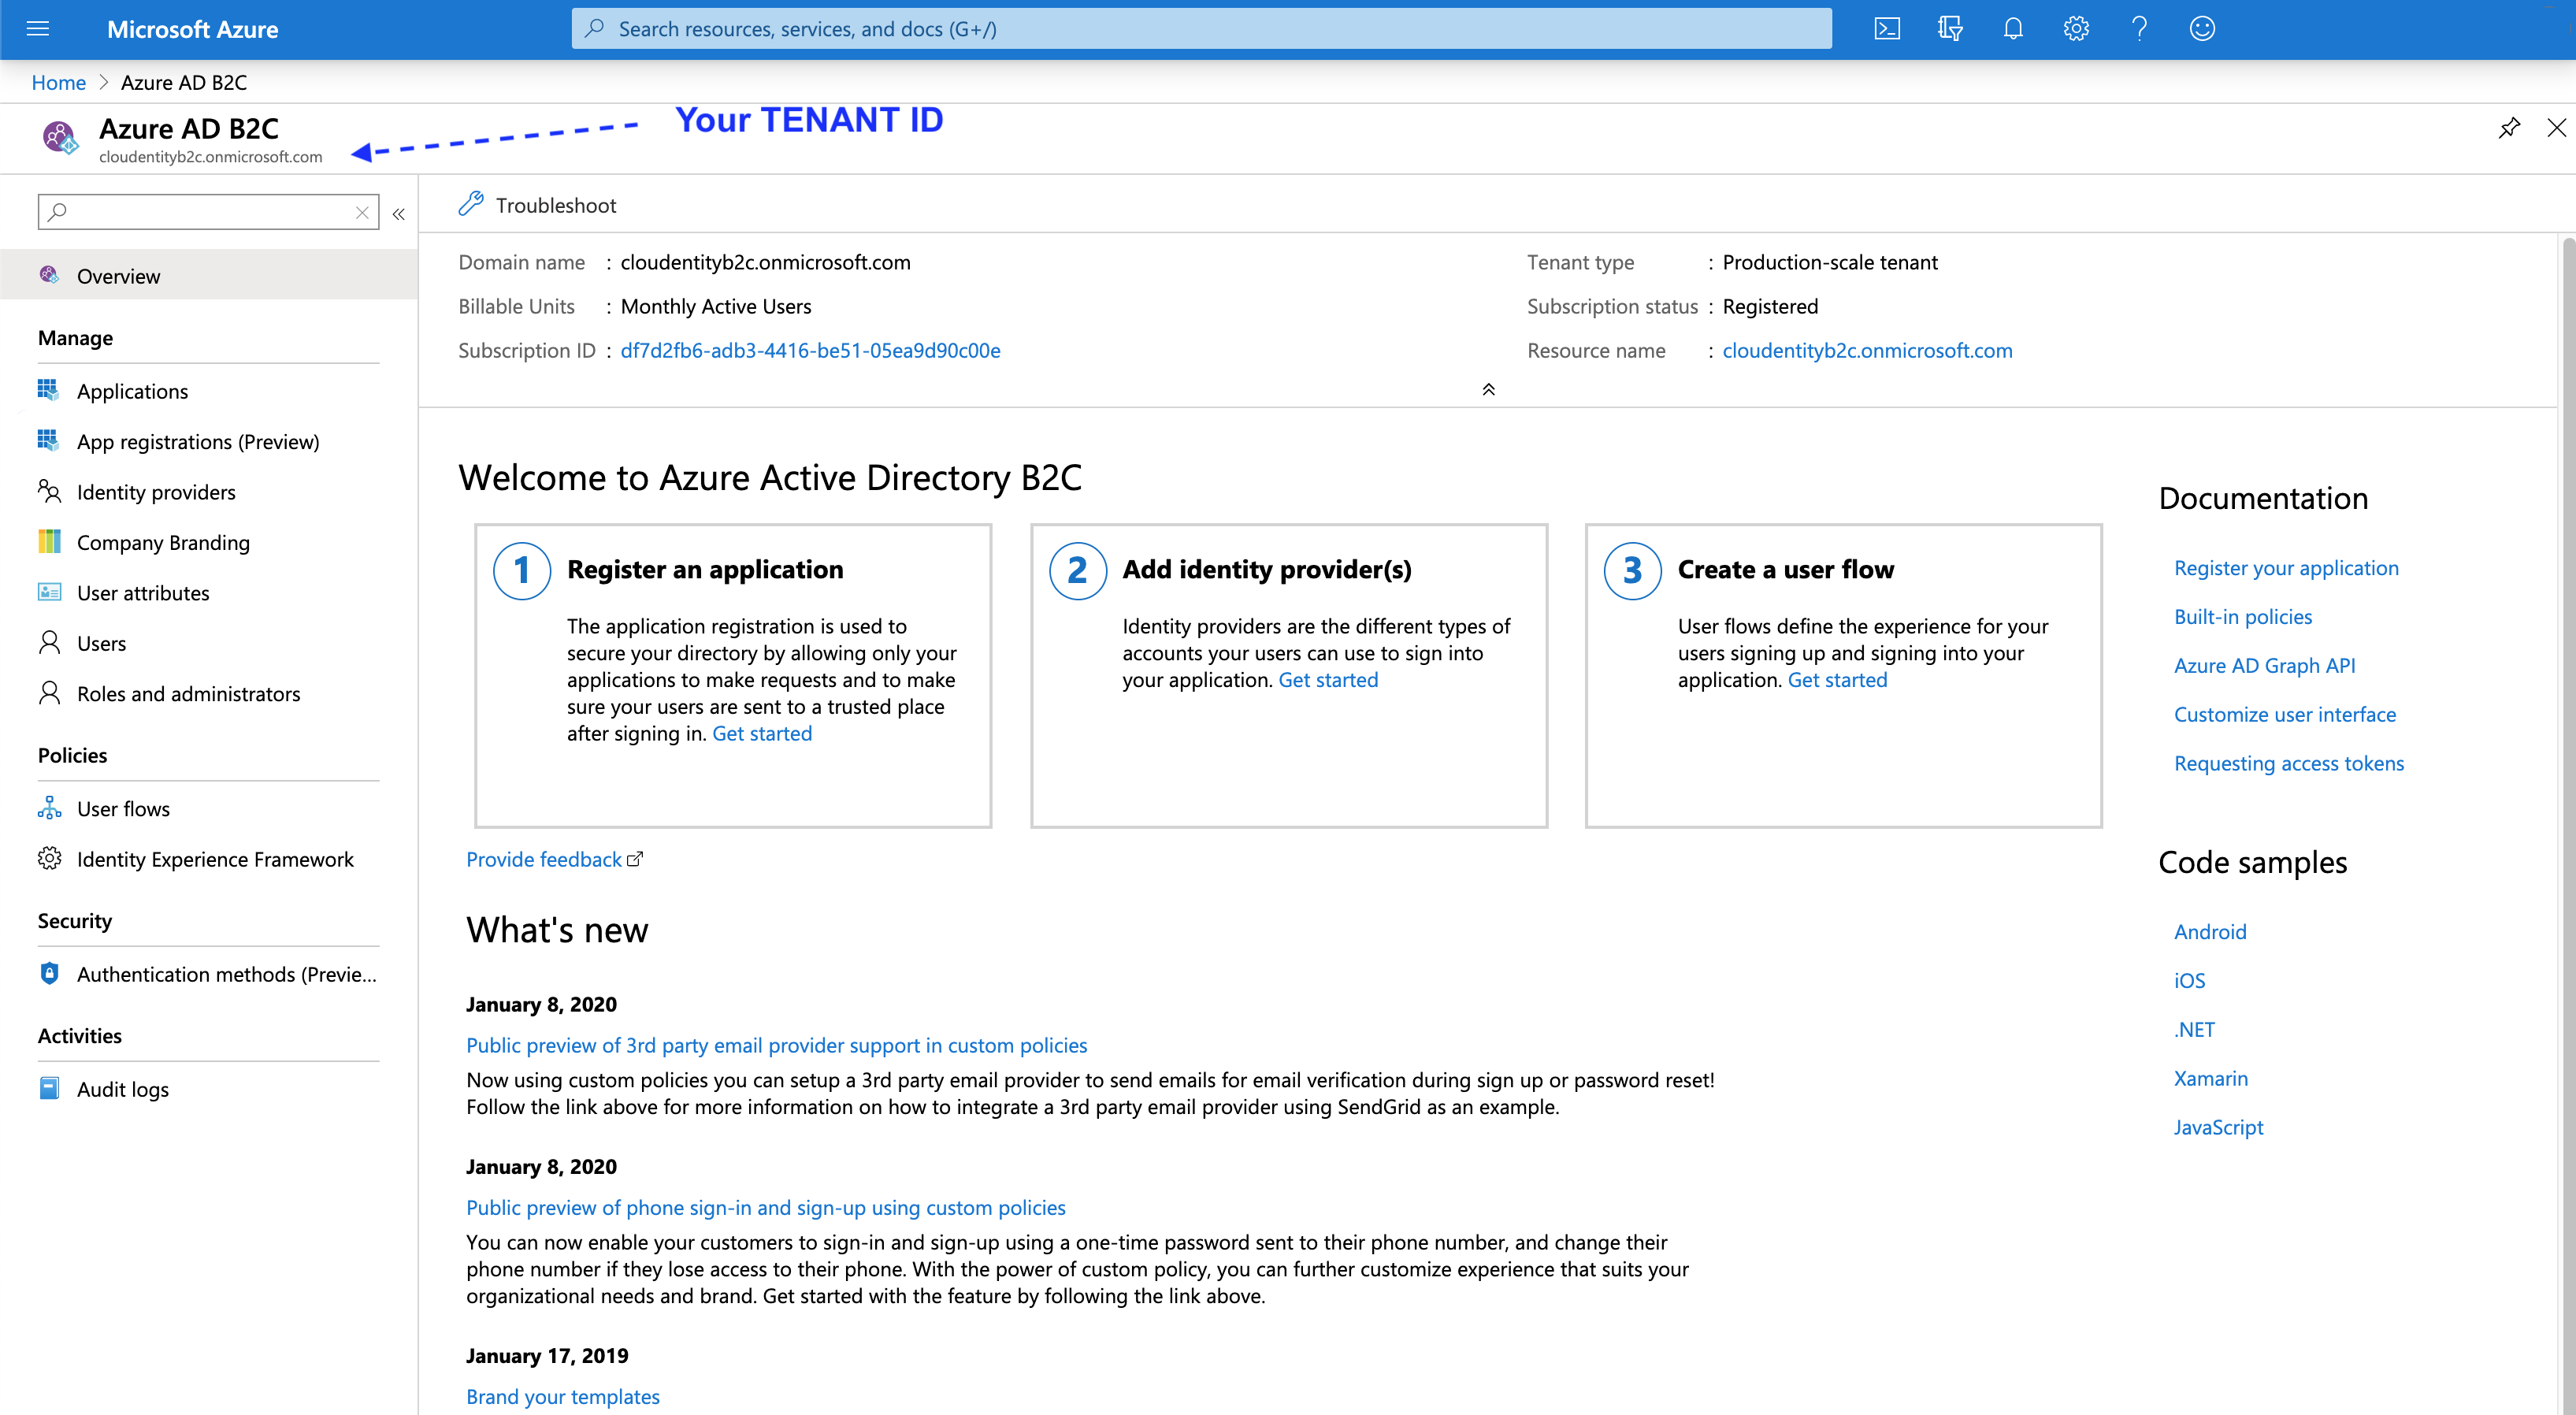
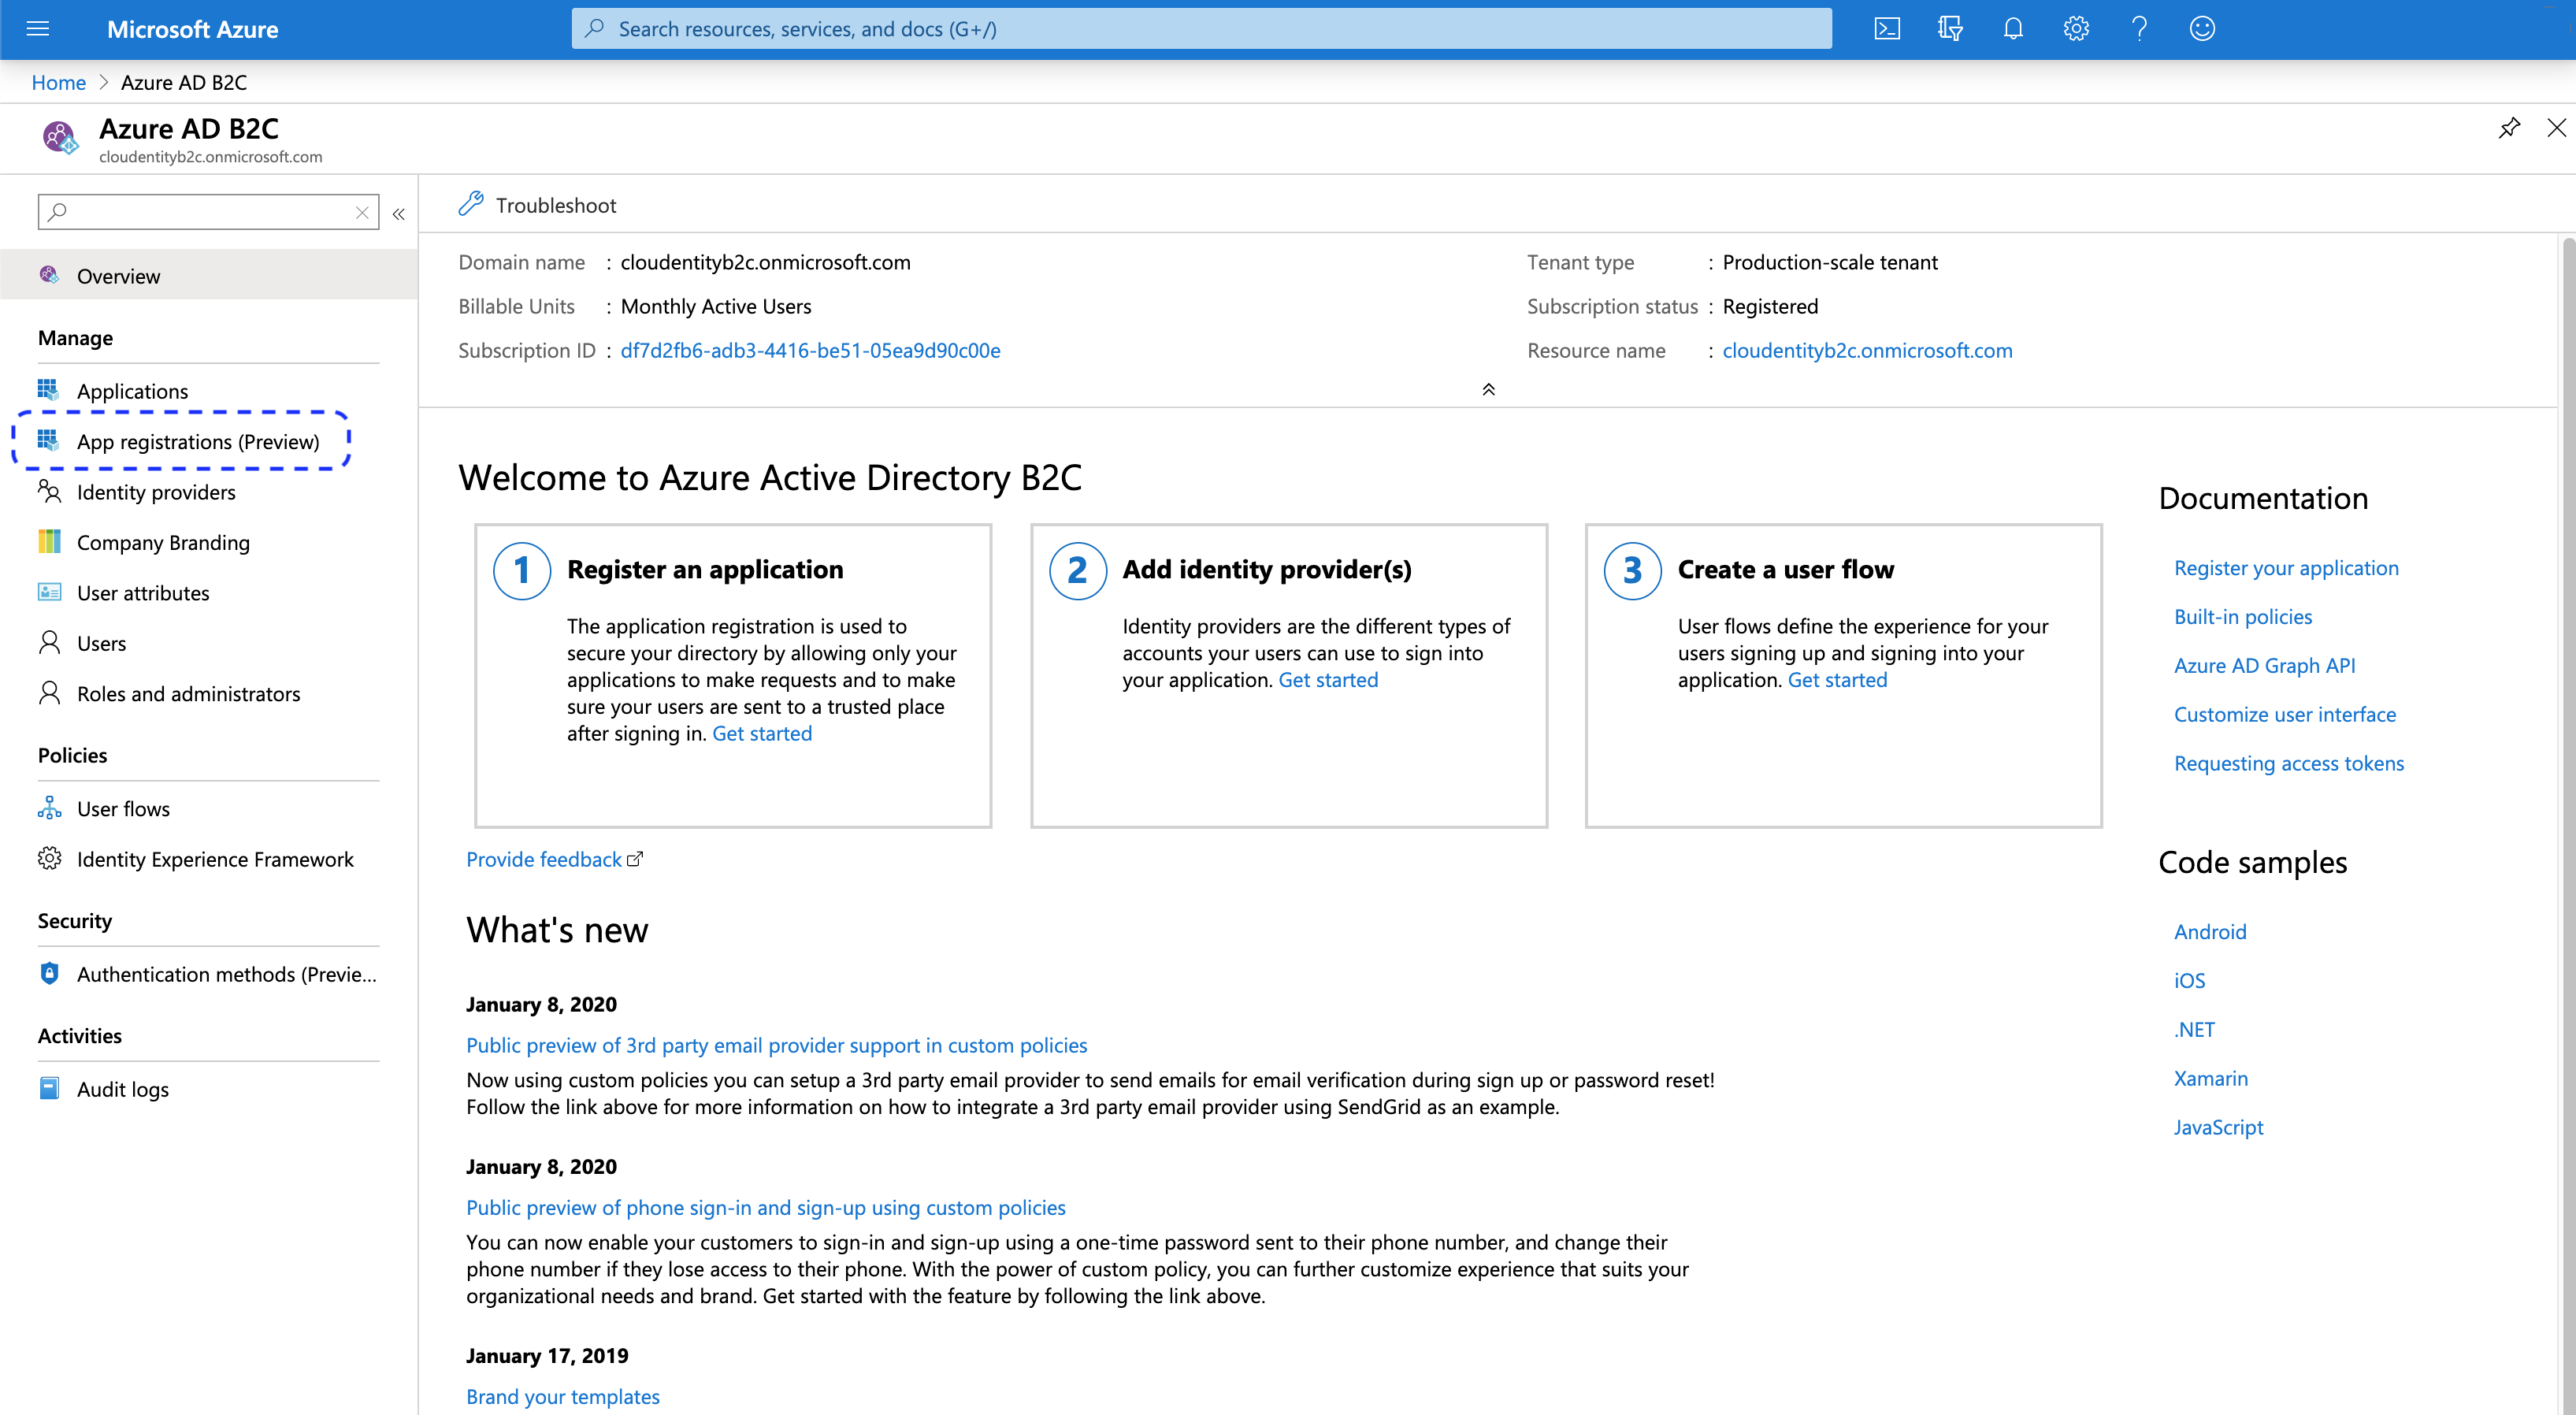
The Azure Active Directory B2C welcome page opens.
Note
At this point you can copy Tenant ID from the top left corner in your Azure AD B2C and enter its value into the Register Microsoft Azure AD B2C form in the ACP administrator portal (see step 6 in Connect Azure B2C IDP).
-
Select App registrations (Preview) from the sidebar.
-
Select New registration from the top menu bar.

-
In the Register an application view
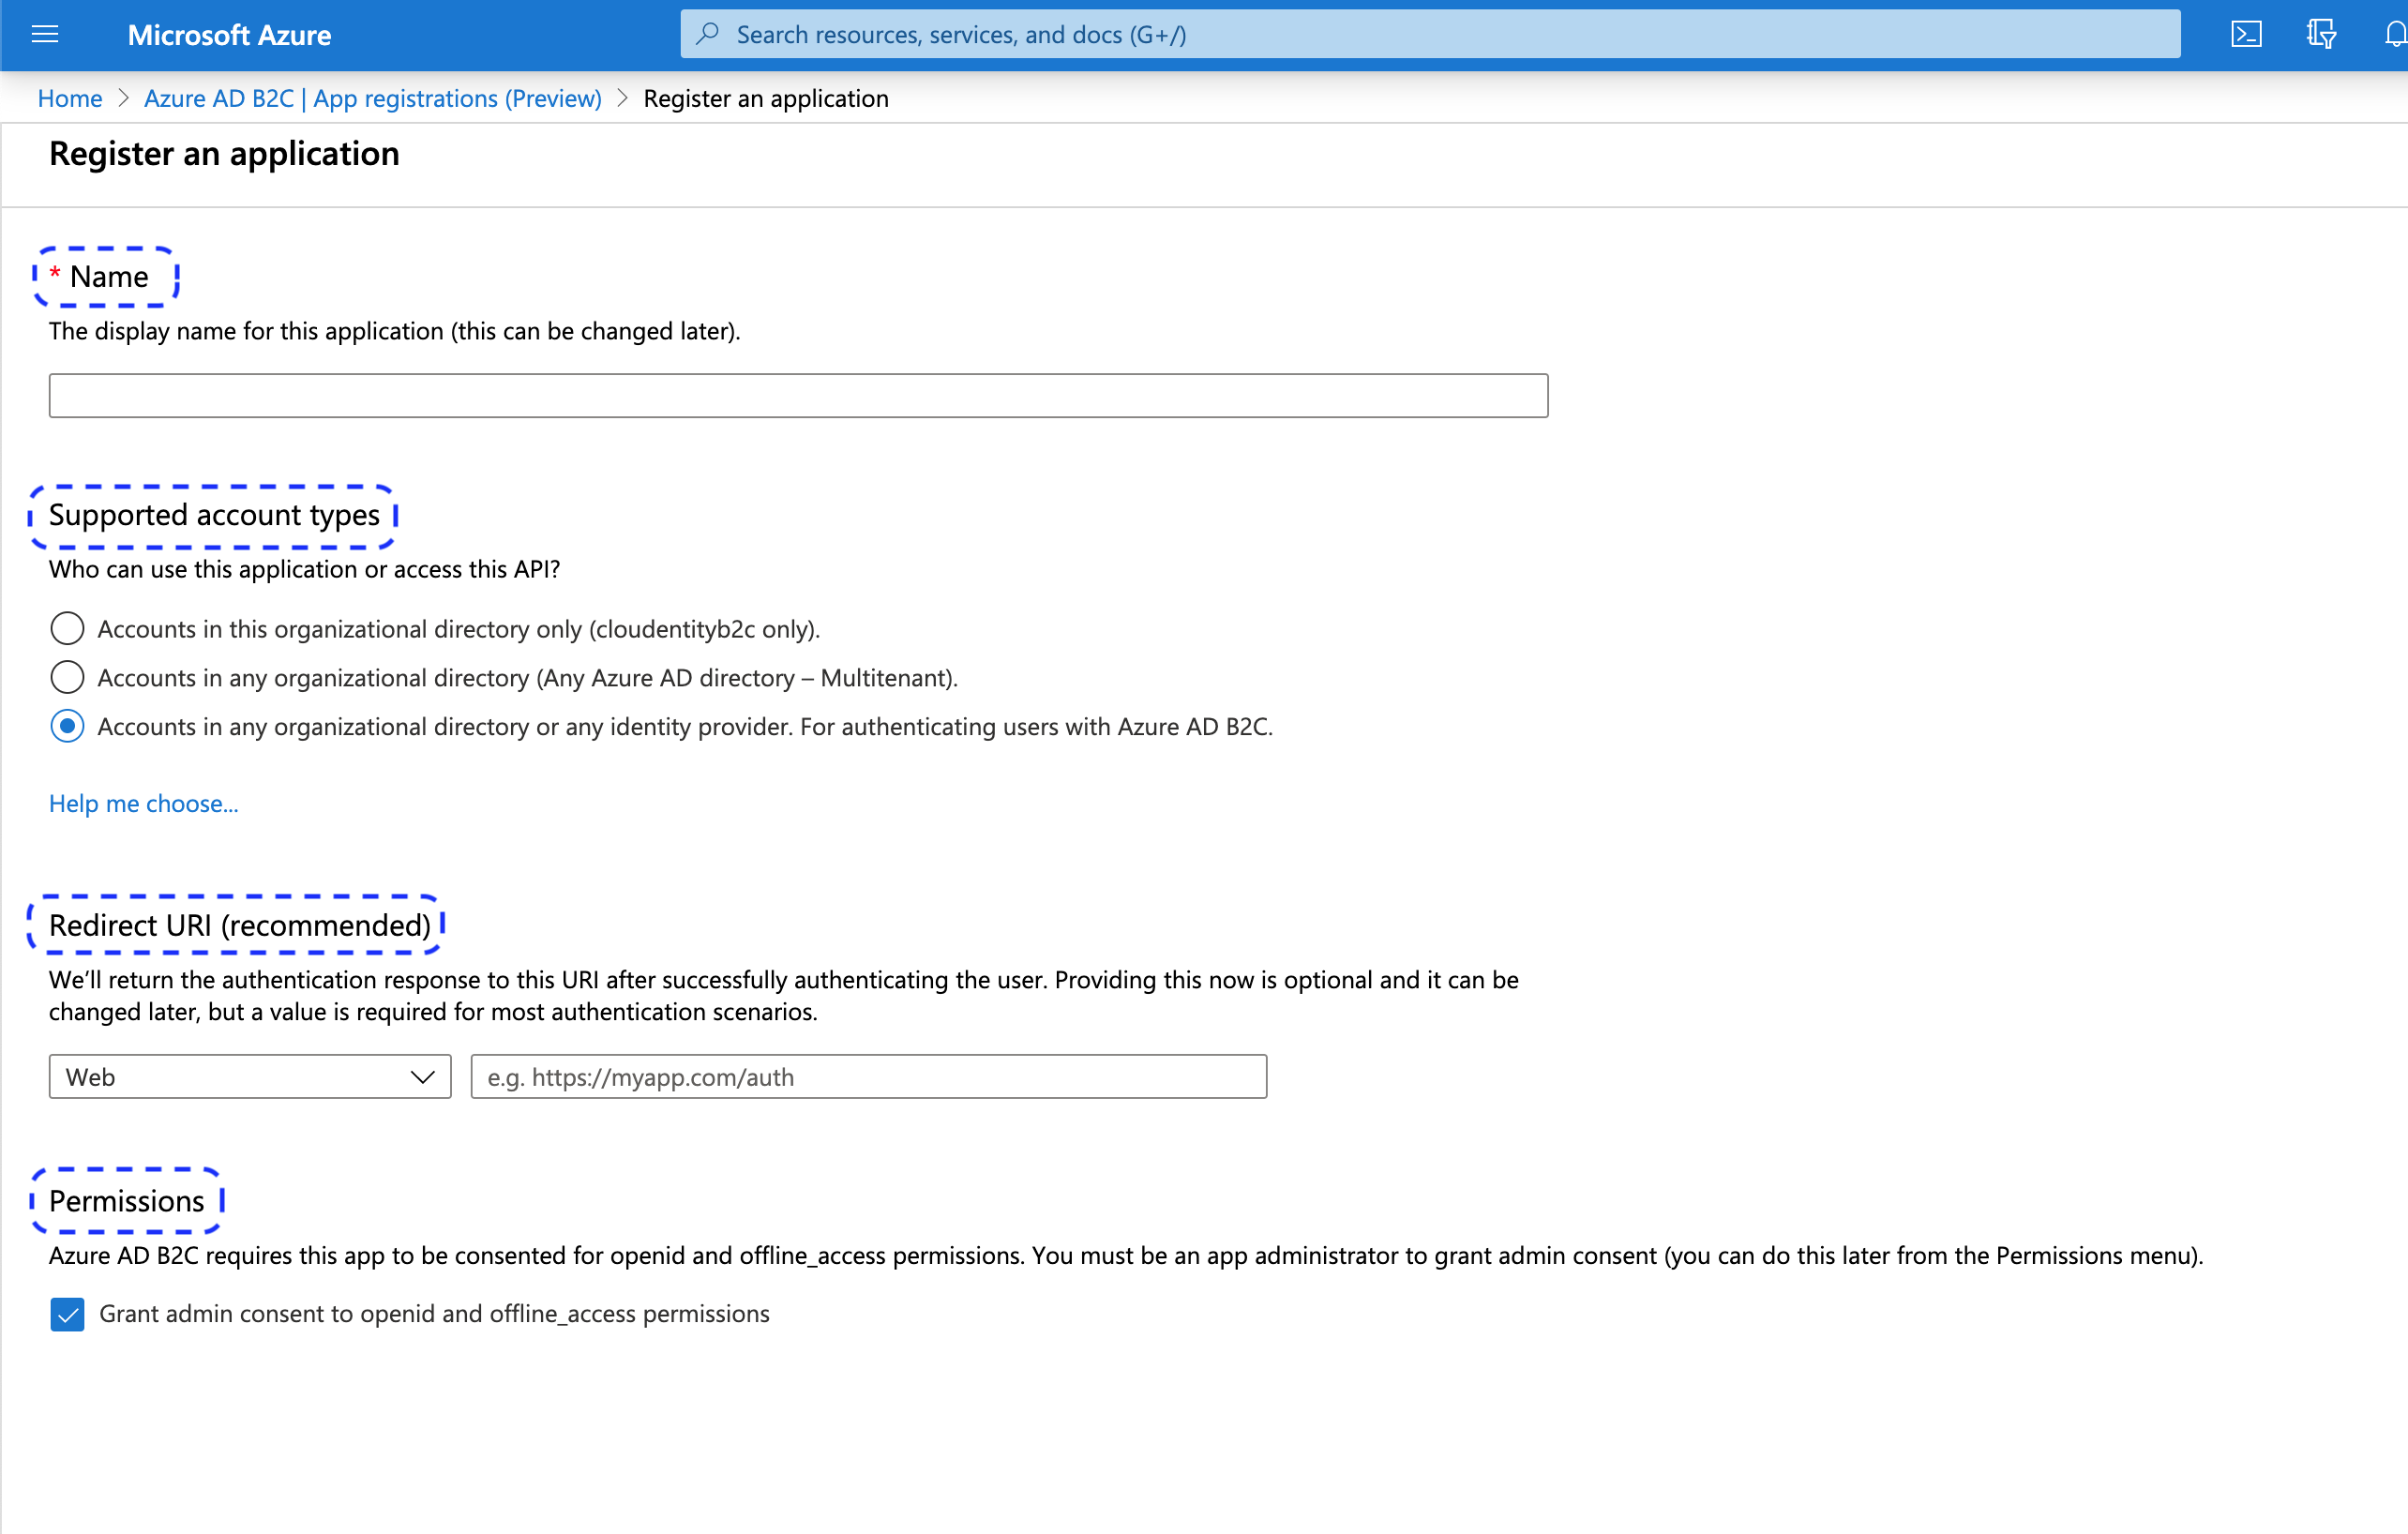
-
Provide a name for your application.
-
Select a supported account type of your preference.
-
For the redirect URL, set the type to Web and enter the redirect URL generated in the ACP administrator portal while adding your new identity provider (see step 6 in Connect Azure B2C IDP).
-
In the Permissions section, enable option Grant admin consent to openid and offline_access permissions.
-
Select Register.
Result
The newly-registered application view opens.
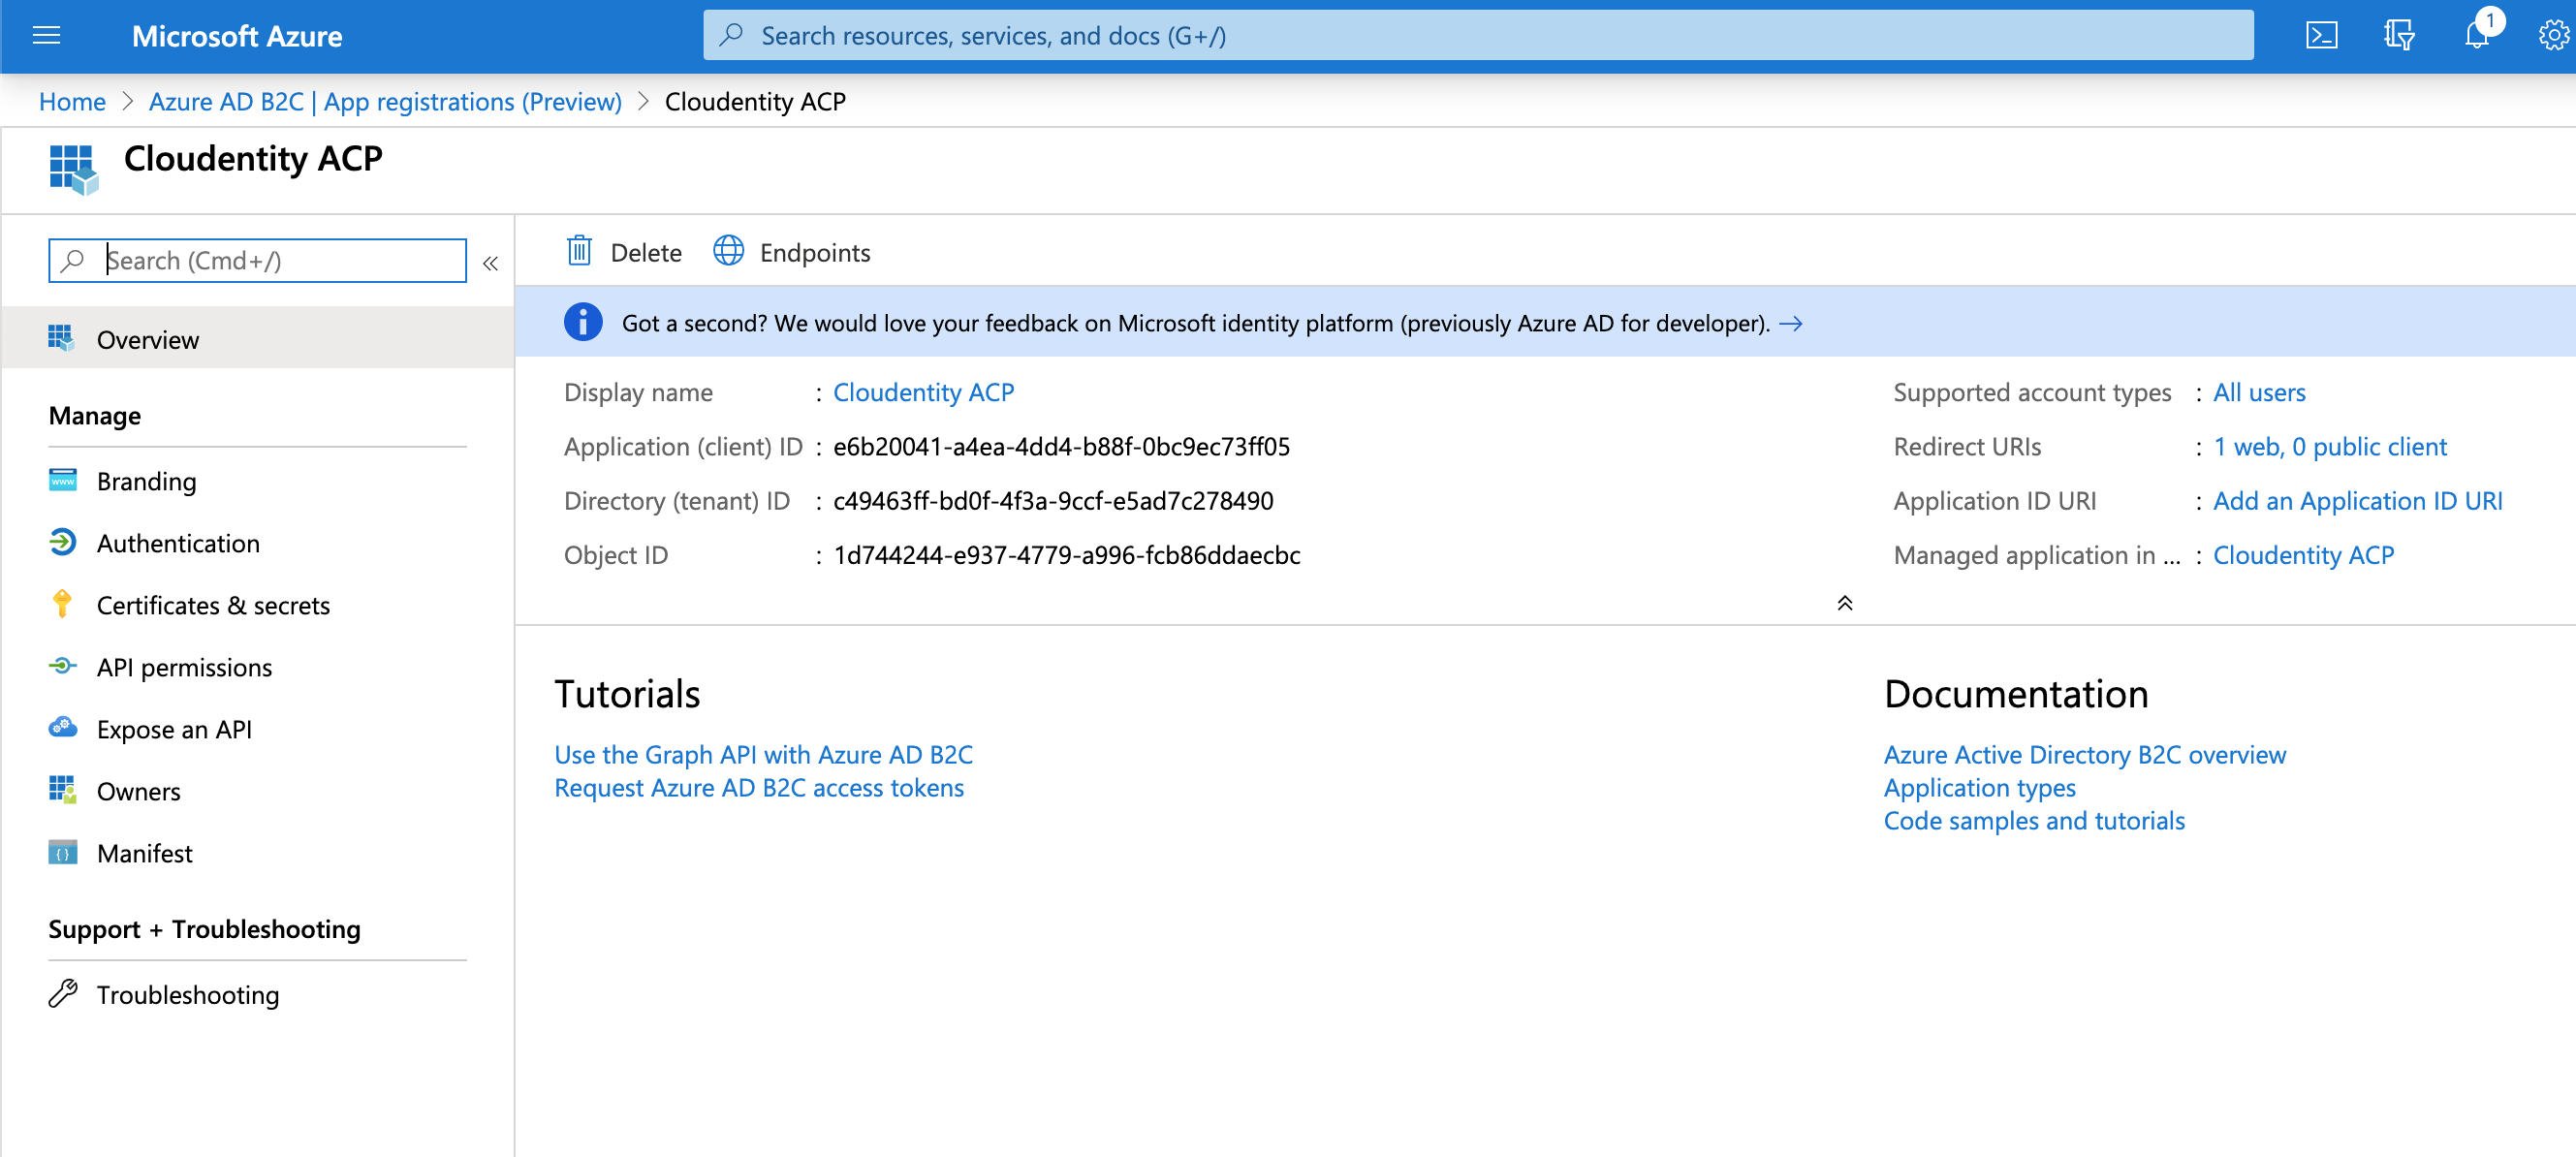
Note
At this point you can copy Application ID in your Azure AD B2C and enter its value into the Register Microsoft Azure AD B2C form in the ACP administrator portal (see step 6 in Connect Azure B2C IDP). Azure Application ID corresponds to ACP Client ID.
-
-
Back in the Azure portal, select Certificates & secrets from the application sidebar and click on New client secret to create a secret for your application.
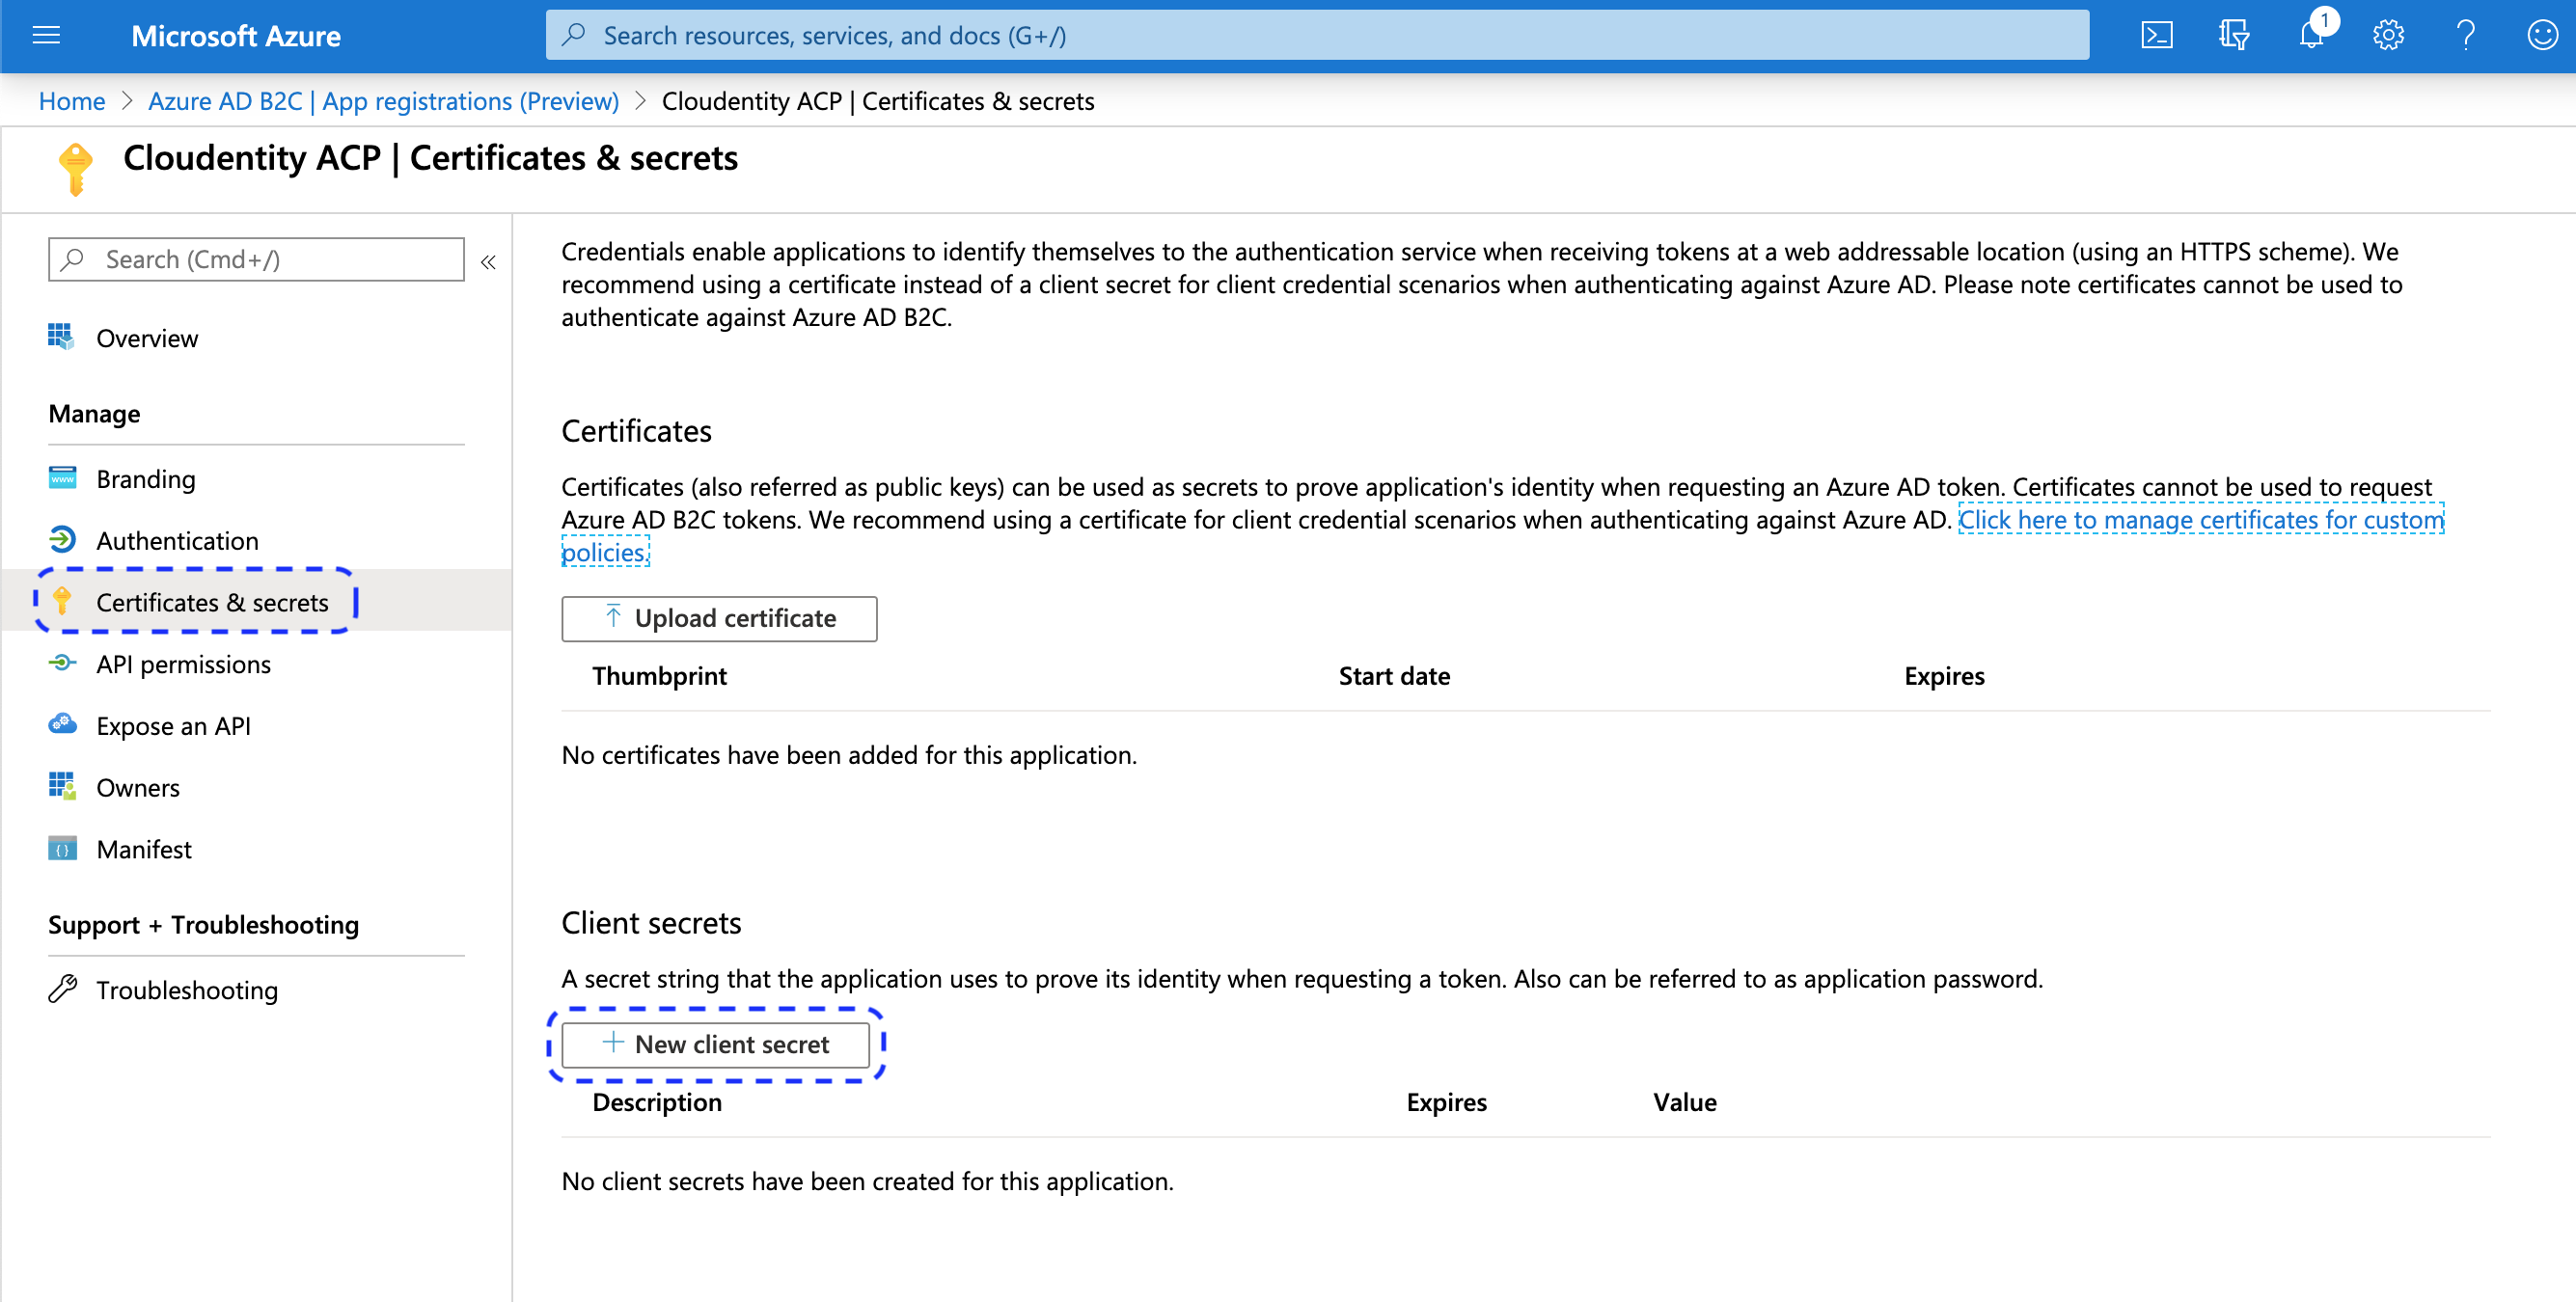
Result
Your newly-created secret is available.

Note
At this point you can copy the generated Client secret from Azure AD B2C and enter its value into the Register Microsoft Azure AD B2C form in the ACP administrator portal (see step 6 in Connect Azure B2C IDP).
-
Go back to the main Azure AD B2C page and select User flows from the application sidebar and decide what user flow you want the users to go through in Azure B2C when requesting a token through ACP.
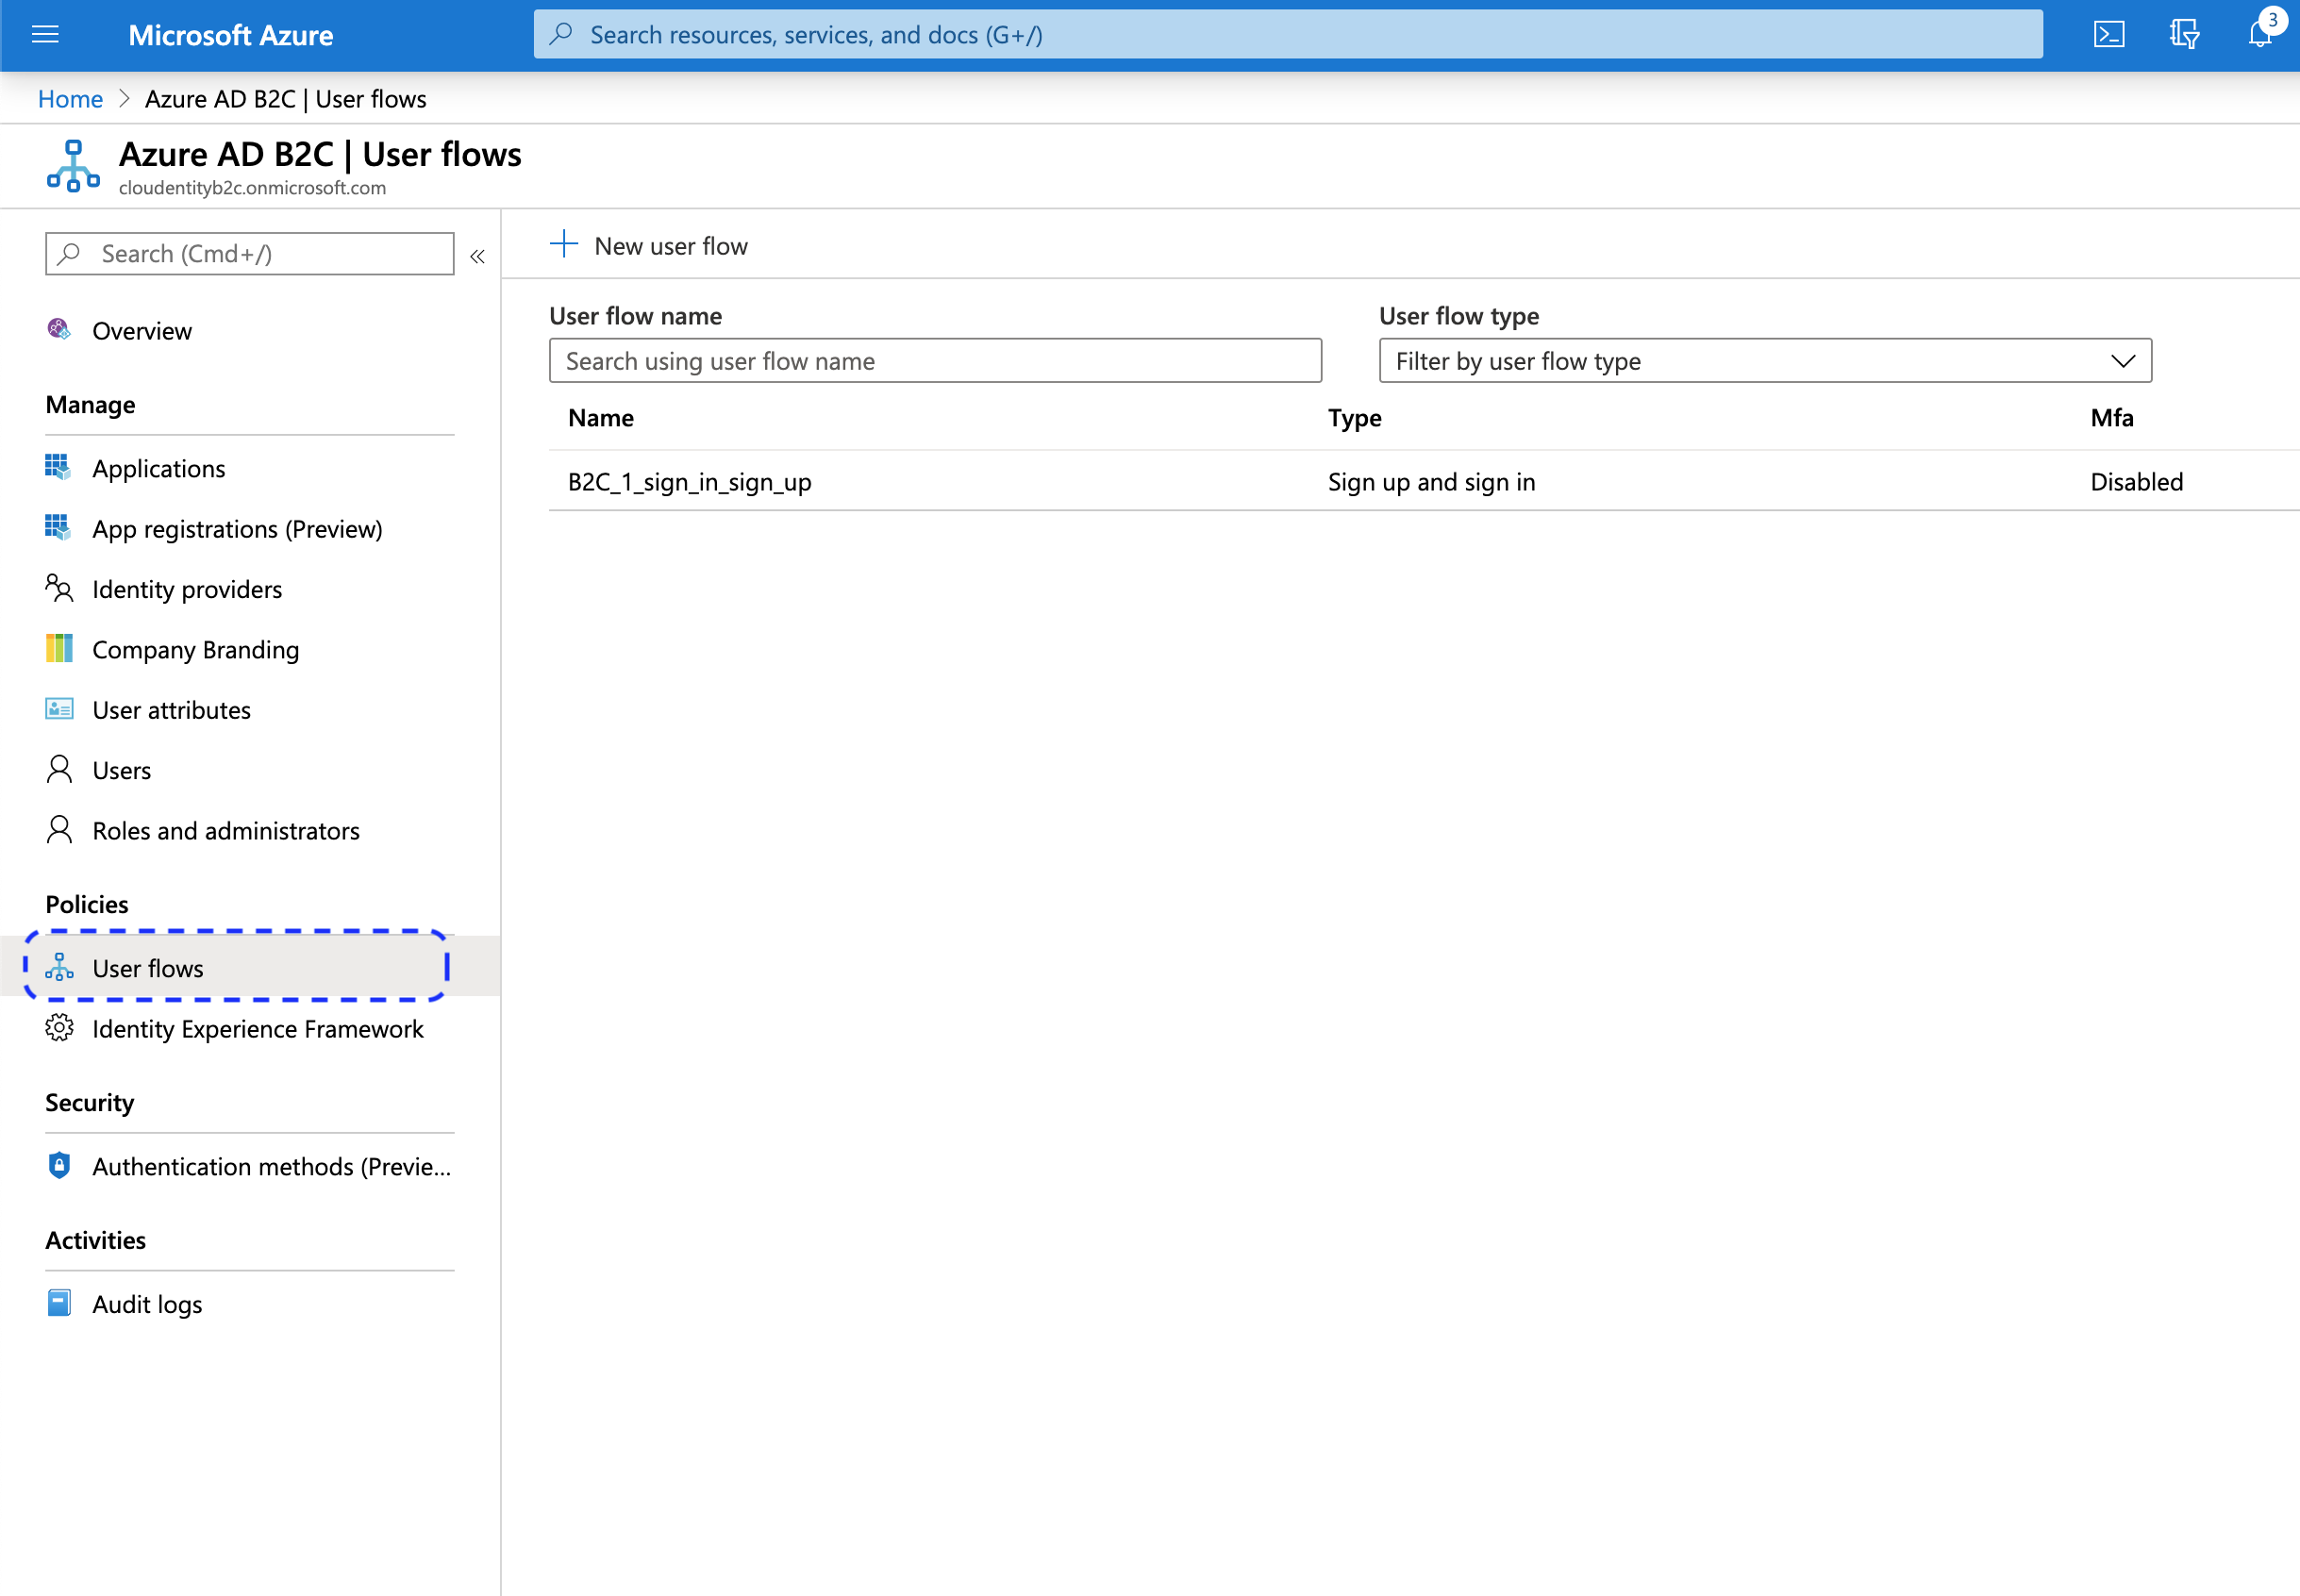
Note
You can use an existing user flow or define a new one for that purpose.
-
Copy the name of the flow and paste it as Policy into the Register Microsoft Azure AD B2C form in the ACP administrator portal (see step 6 in Connect Azure B2C IDP).
-
Optionally, get back to your newly registered application to add API permissions if you want to enable the Get user and Fetch groups options in the ACP portal for your ACP Azure B2C IDP (see step 9.2 in Connect Azure B2C IDP).
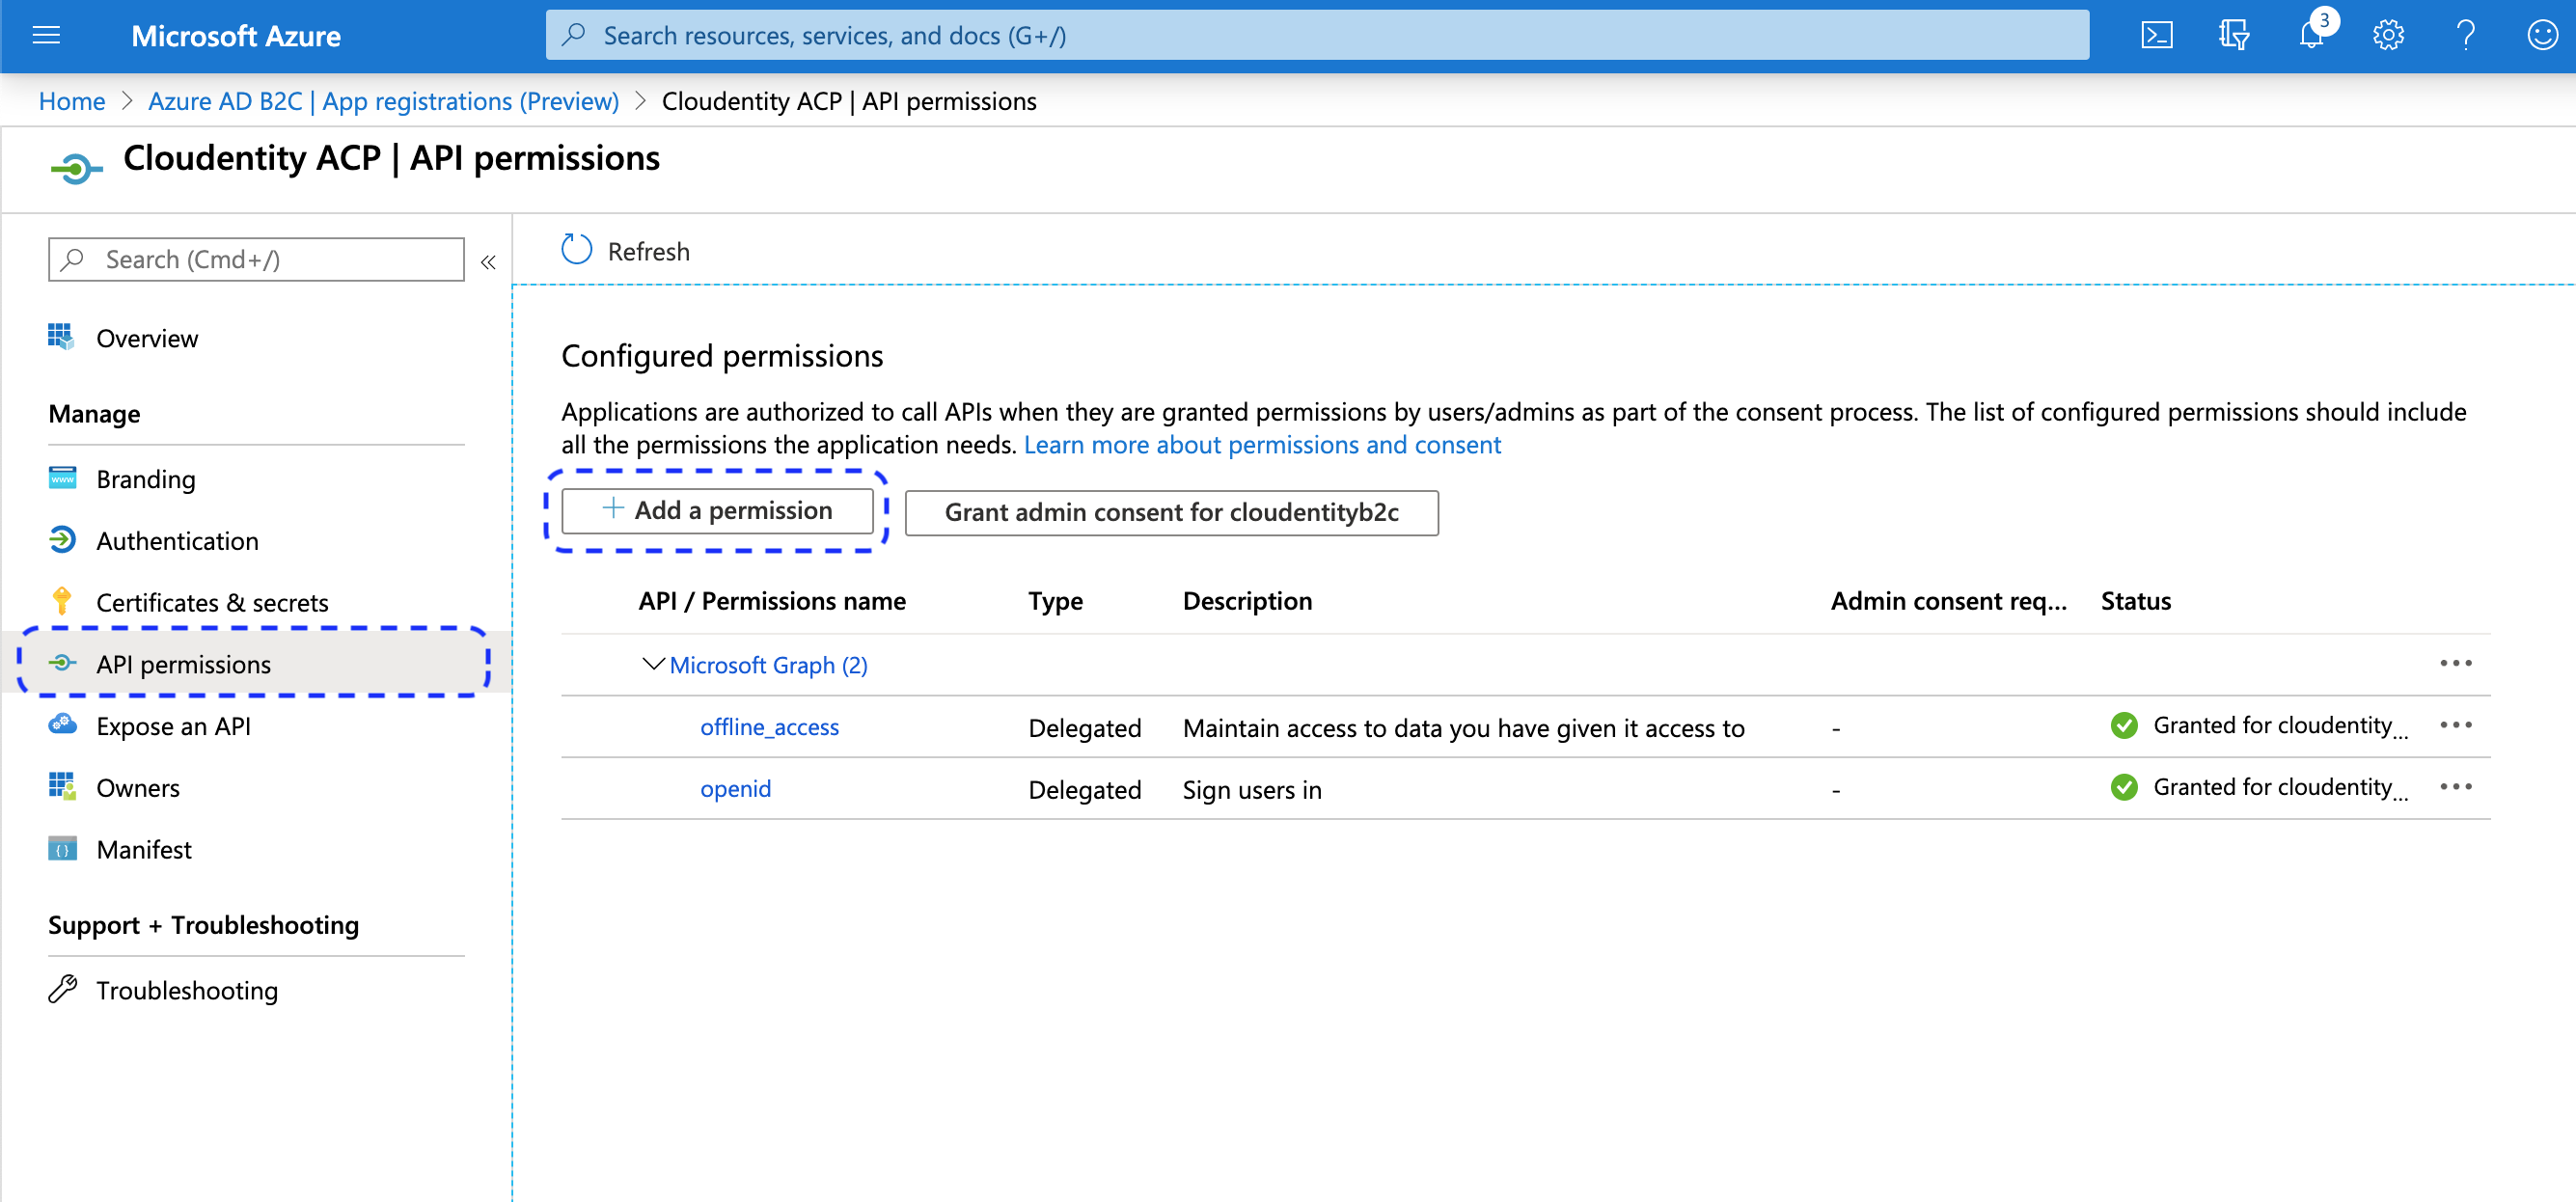
-
Select API permissions from the application sidebar and click on Add a permission in the displayed view.
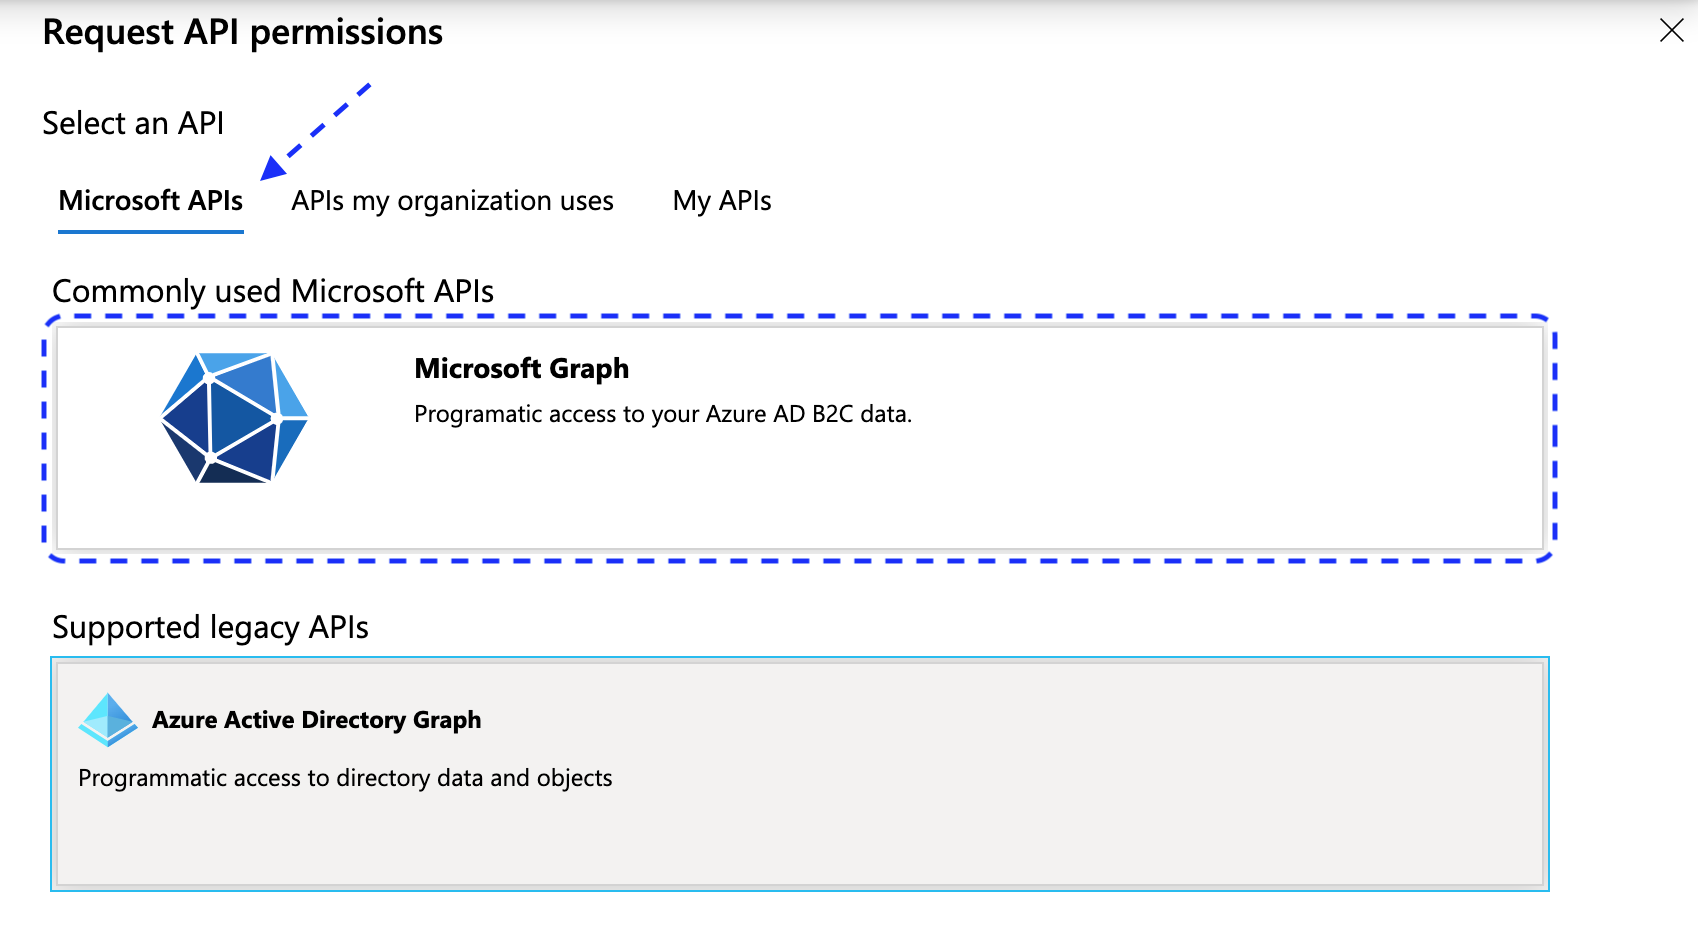
-
In the Request API permissions view, go to the Microsoft APIs tab and select Microsoft Graph.
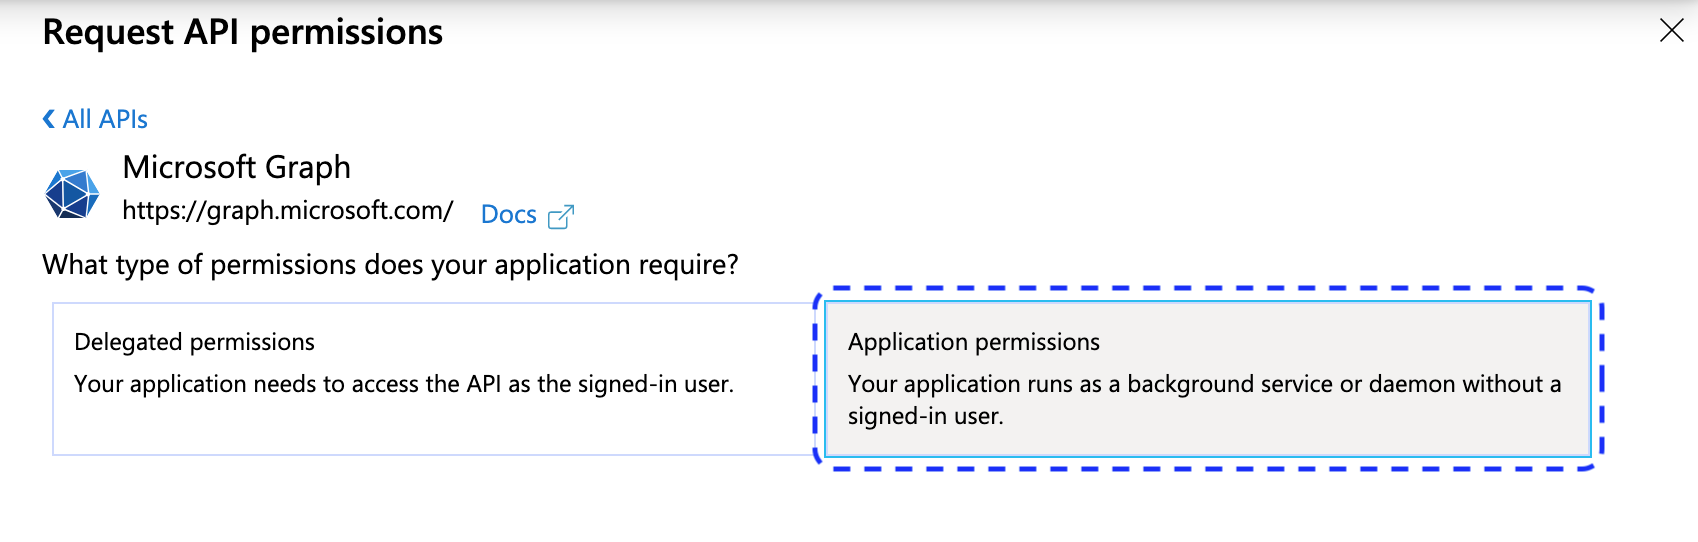
-
Select Application permissions.
-
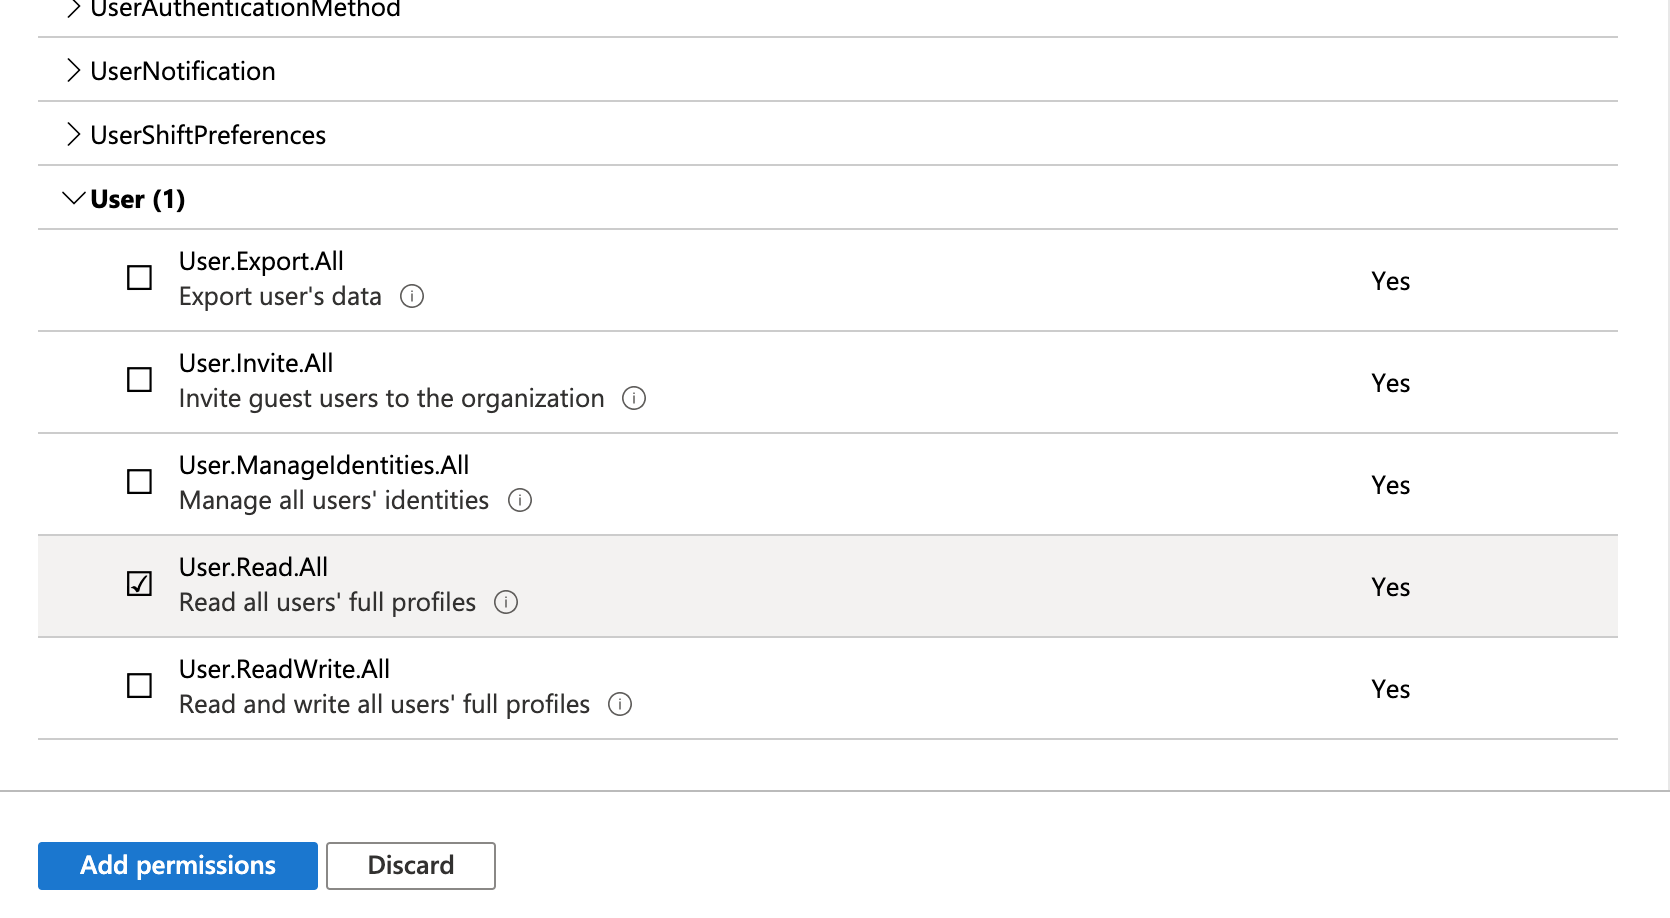
On the list of permissions
-
Expand User and select User.Read.All to enable the Get user function.
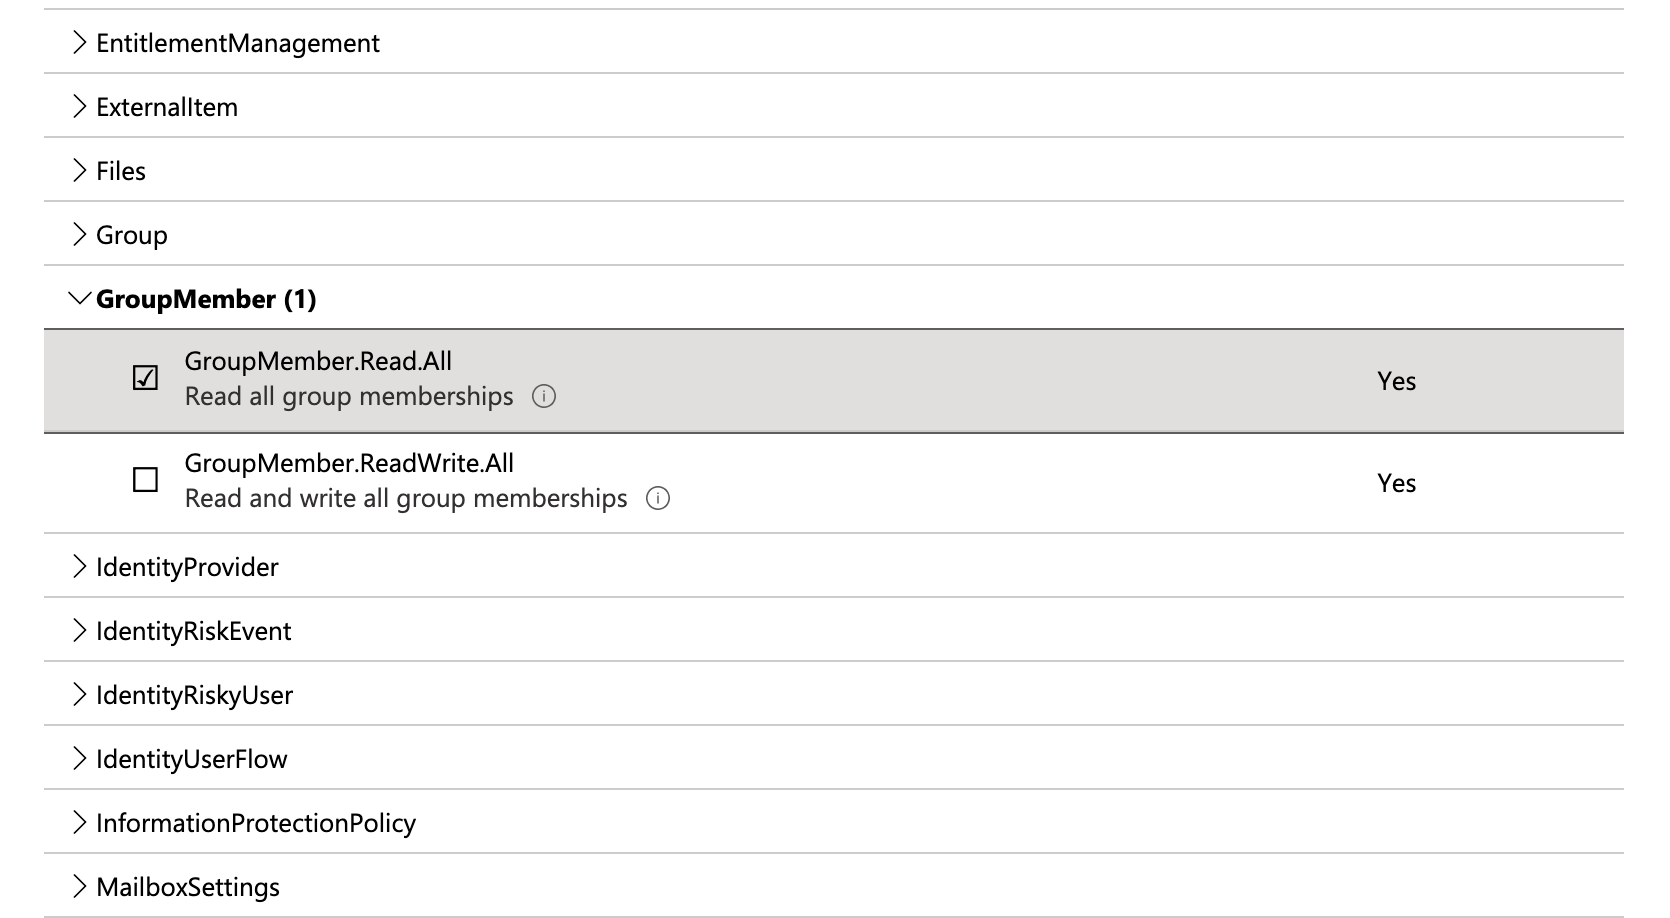
-
Expand GroupMember and select GroupMember.Read.All to enable the Fetch groups function.
-
-
Select Add permissions.
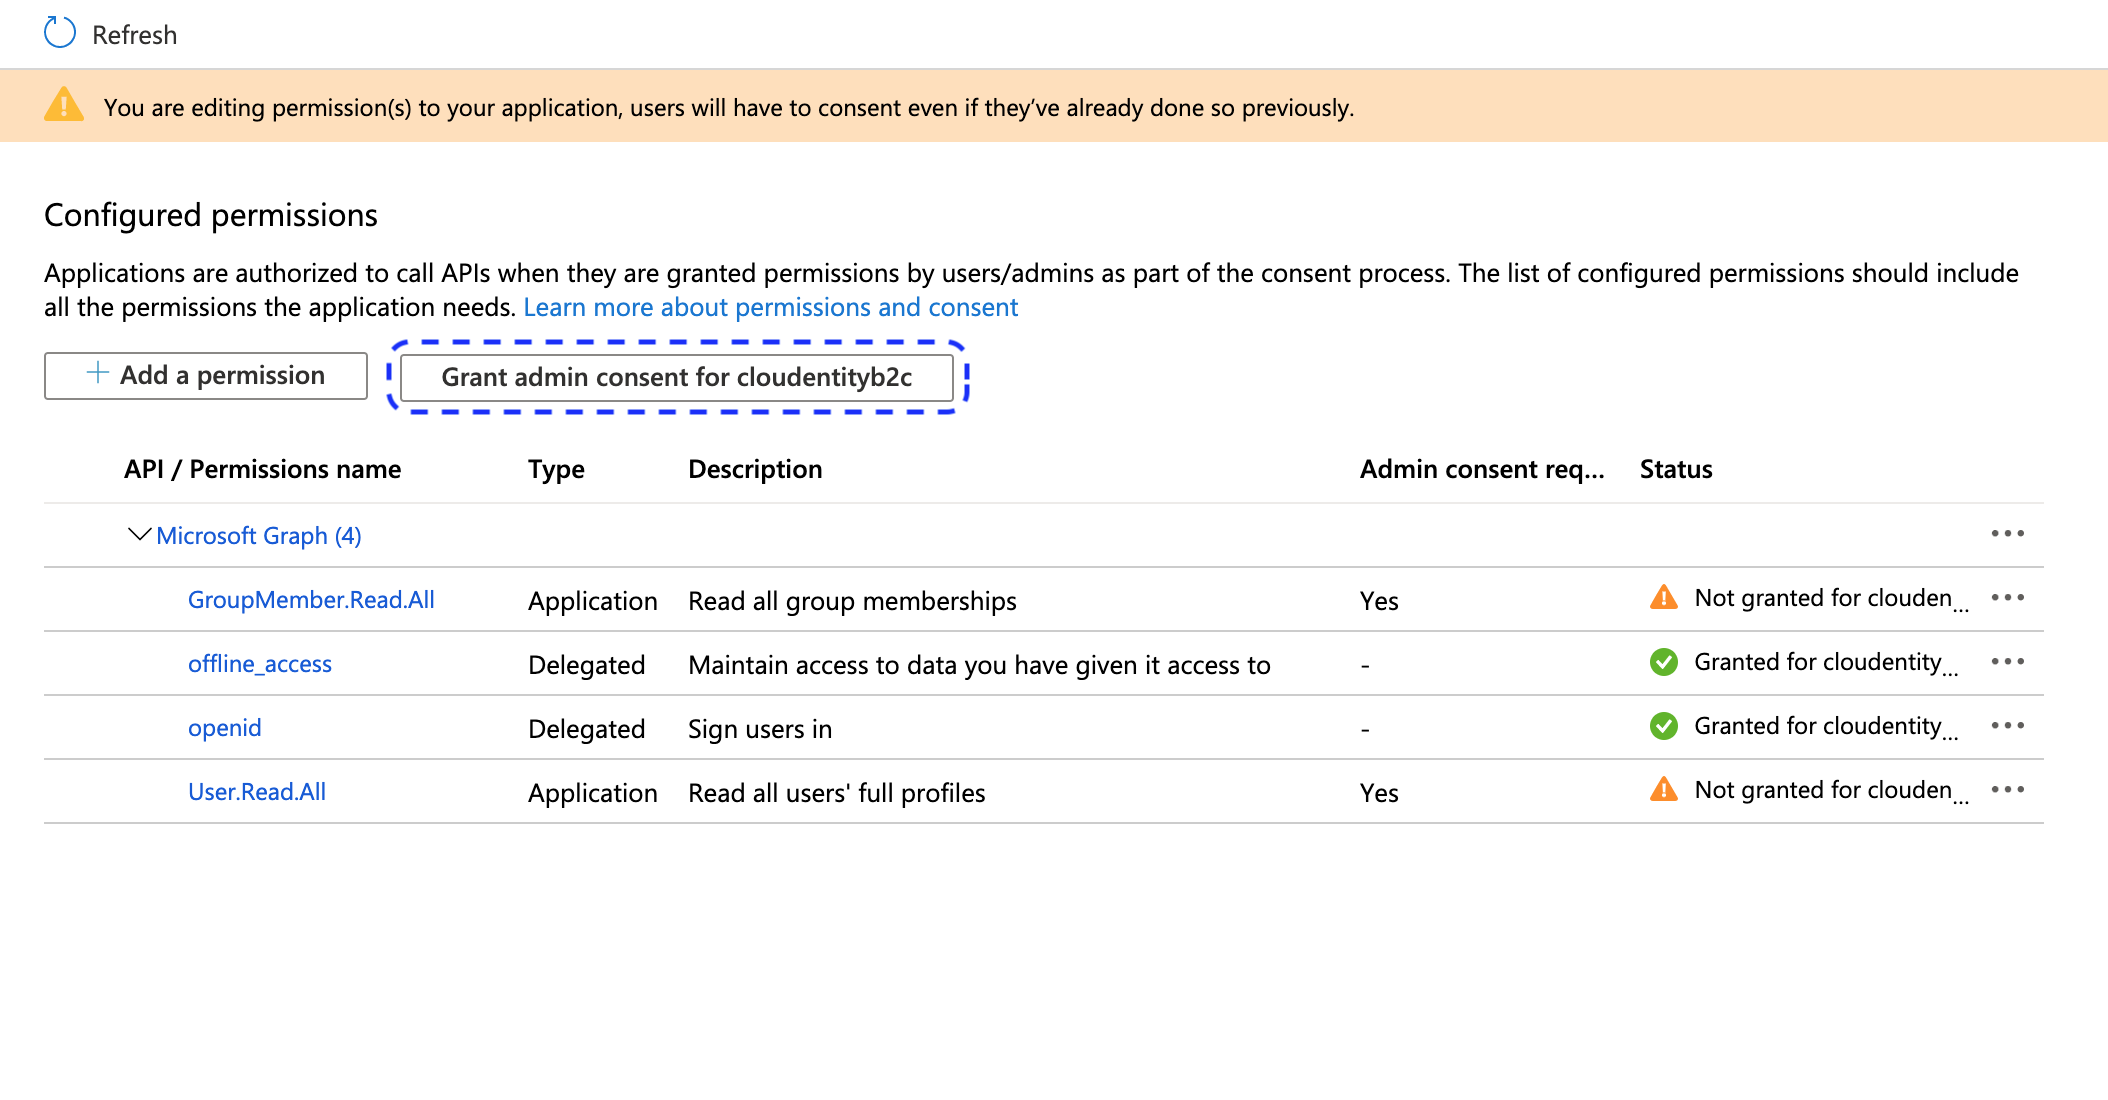
Result
The permission is visible in the Configured permissions view.
-
To enable your new permission, your administrator needs to select Grant admin consent in the Configured permissions view.
-
User’s test
Purpose
Test your new IDP as a user
Prerequisite
Your provider is configured as a user-authentication method by your administrator.
Test
-
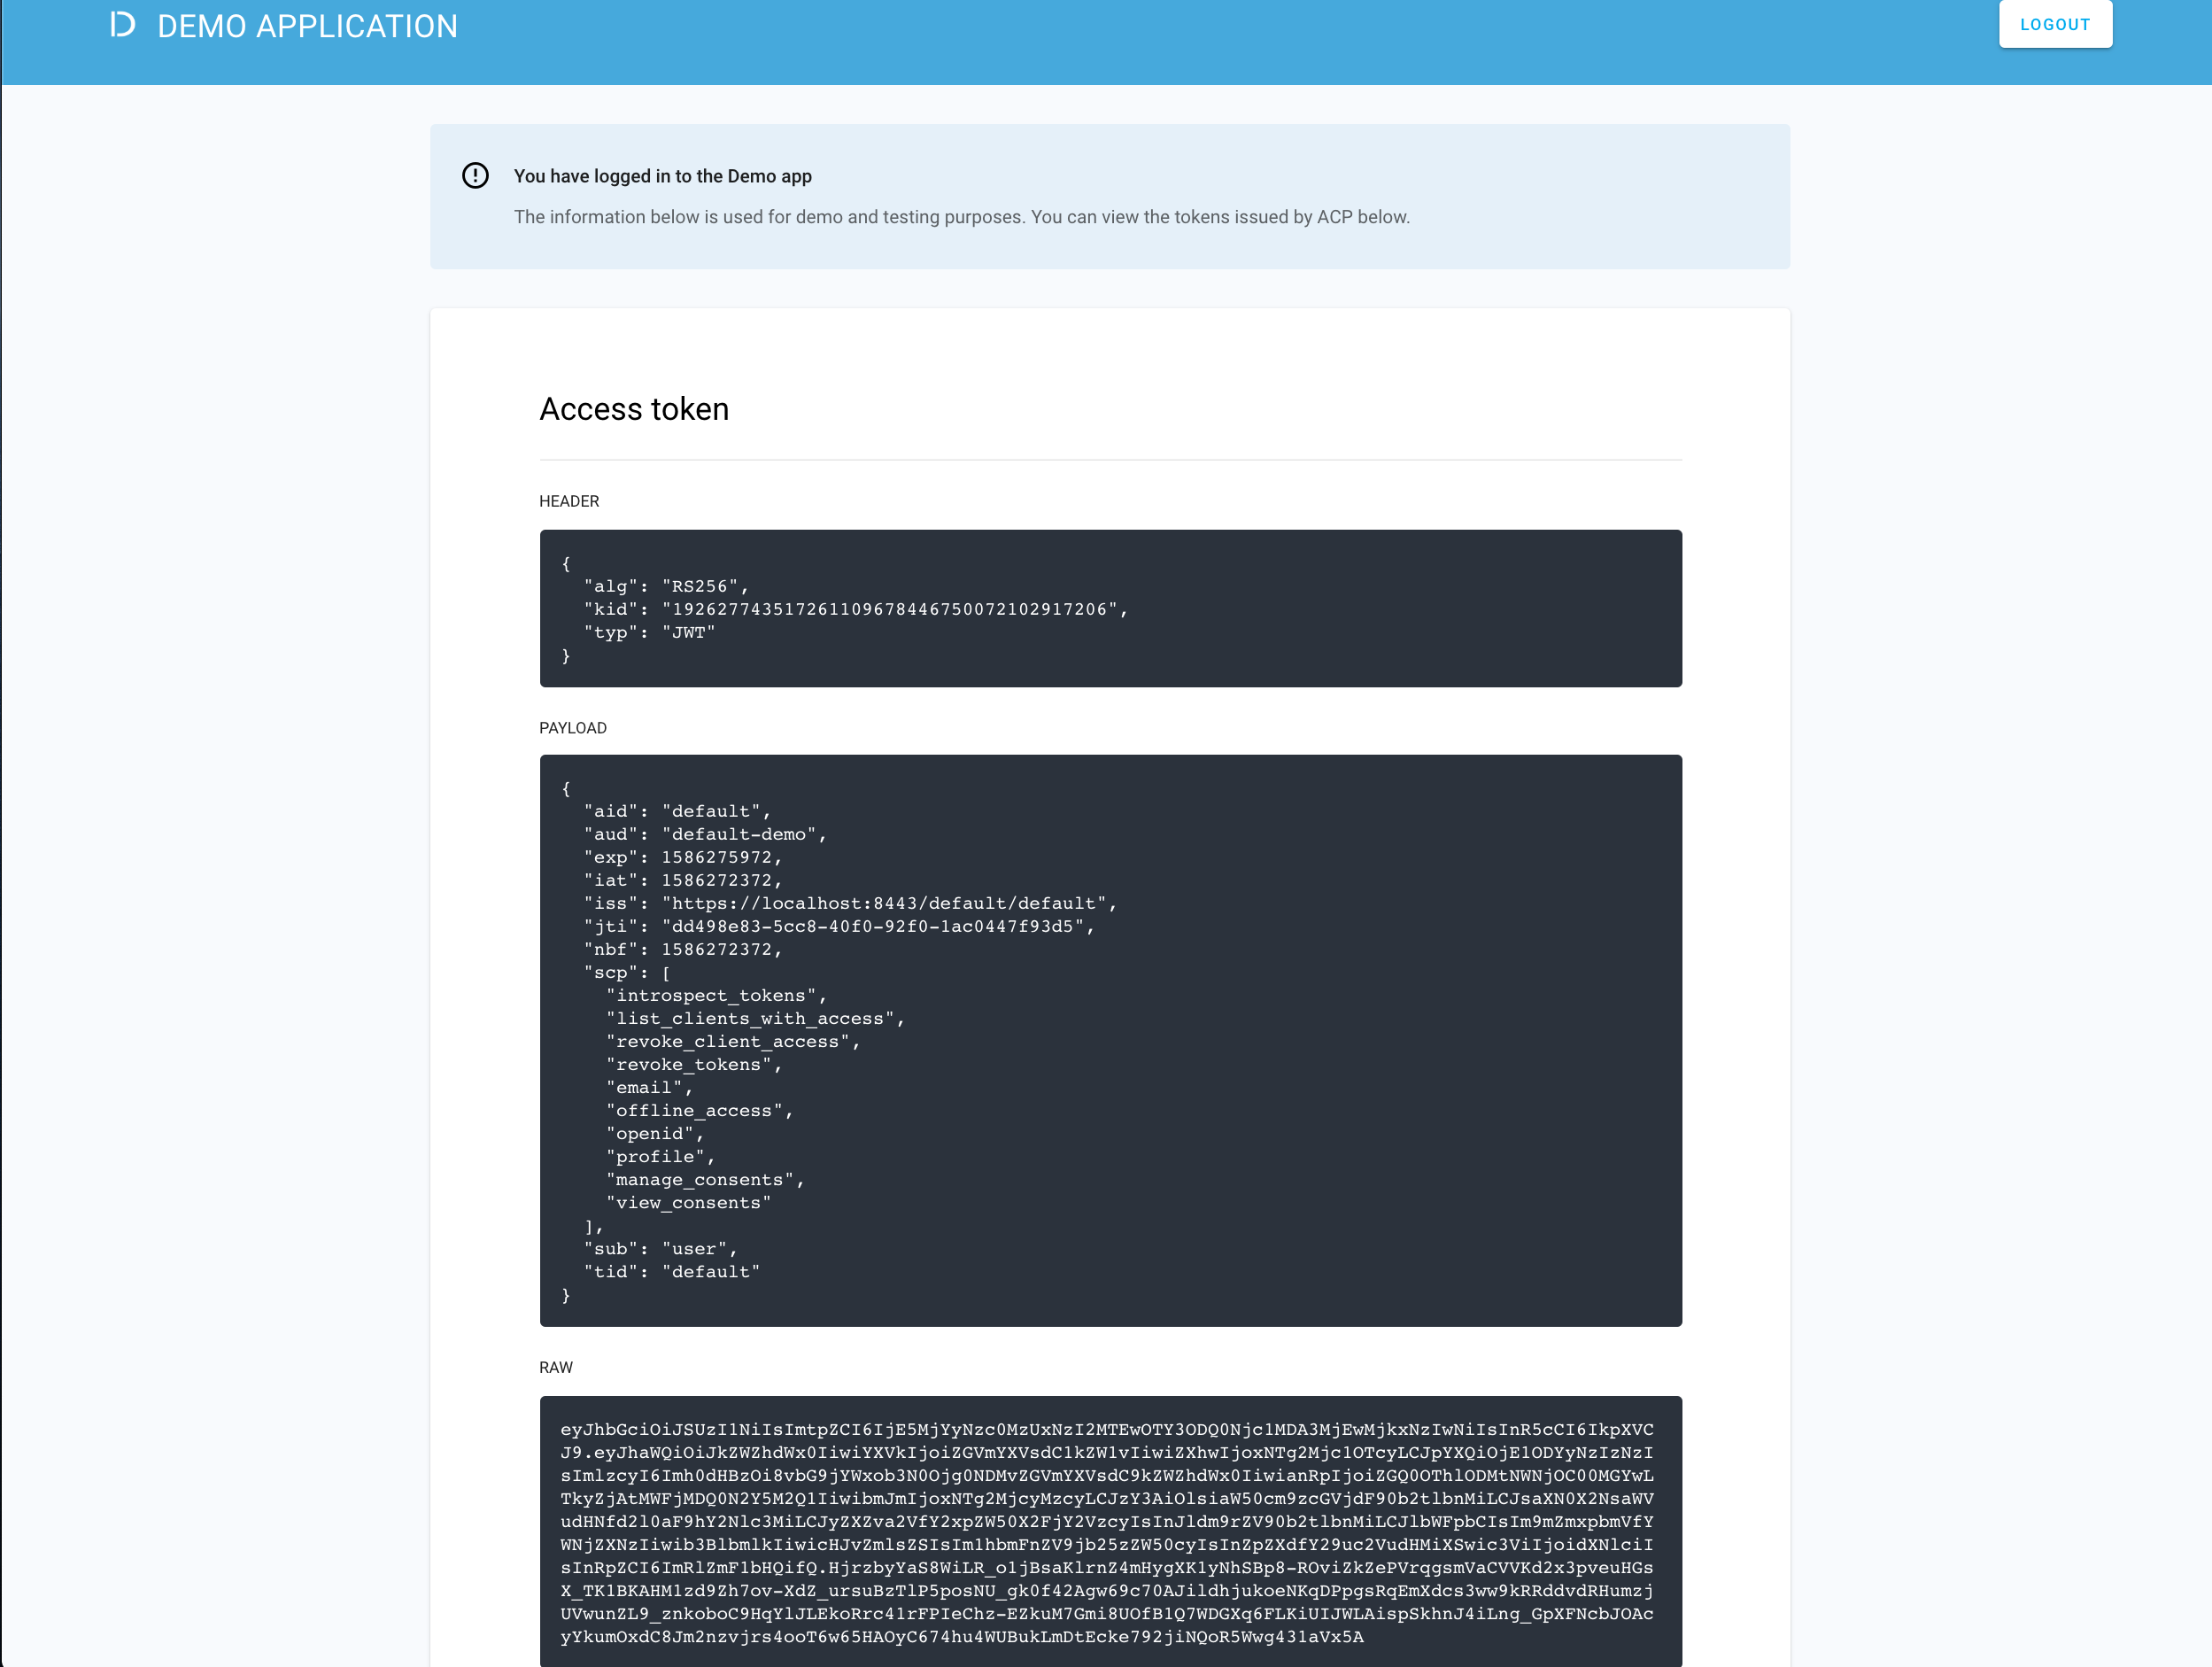
Go to https://localhost:8443/default/default/demo and select LOG IN TO DEMO APP.
-
Select your configured IDP (if you have multiple ones) and, next, authenticate in IDP.
Result
ACP displays the consent page that lists data scopes to be shared with the application. When you proceed to the application (ALLOW ACCESS), the PII data coming from IDP is delivered through the access token and the ID token generated by ACP.
Read more
For information on granting and managing ACP consents, see ACP OAuth consents.
Developer’s test
Purpose
Test your new IDP as a developer
Prerequisite
Your provider is configured as a developer-authentication method by your administrator. To register your IDP for the developer, follow instructions in Connect Azure B2C IDP, this time selecting the Developer workspace in step 3.
Test
-
Go to https://localhost:8443/app/default/developer to access the ACP developer portal.
-
Log in to your account by entering your login credentials and selecting LOG IN.
Result
You are logged in to the ACP developer portal with the newly-configured IDP.