ACP administrator portal description
Learn how the ACP administrator portal offers all the features needed for operating ACP as an administrator.
Portal overview
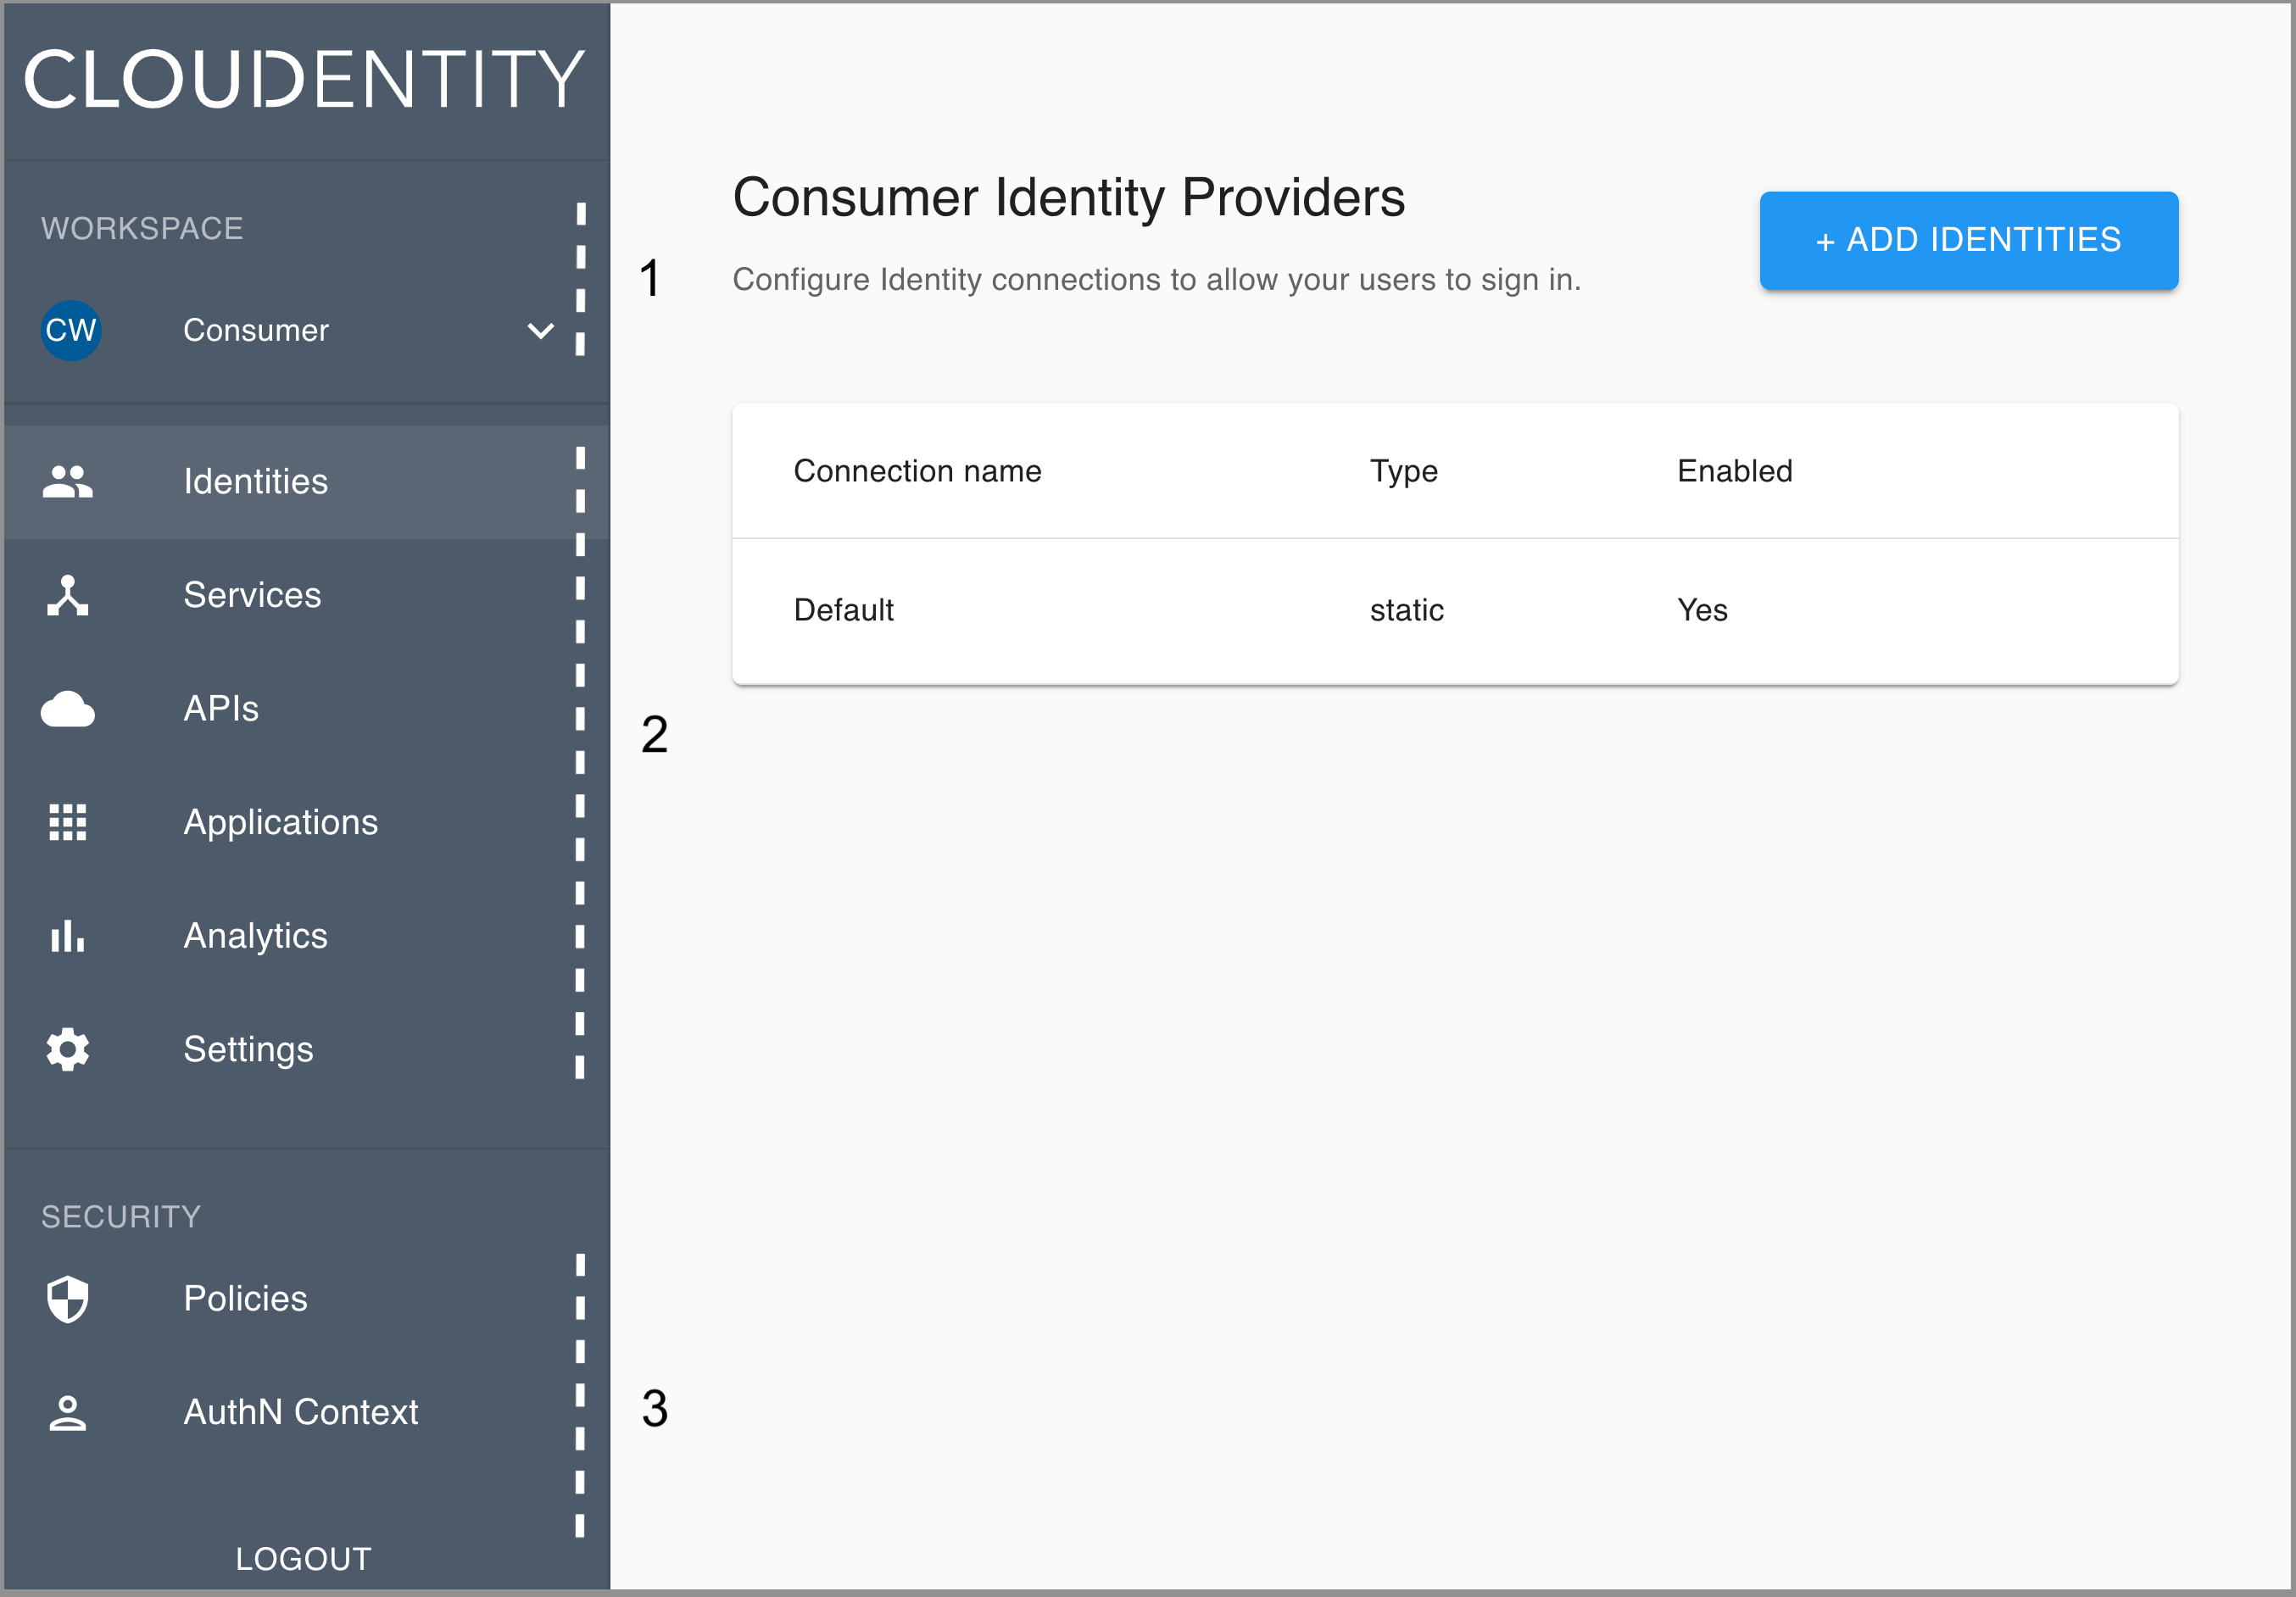
After logging in to the ACP administrator portal with your credentials, the ACP Admin portal landing page opens. The page includes two major areas: the sidebar and the central pane.
Left-side vertical menu (sidebar)
-
Enables you to access all the admin features quickly and easily.
-
Includes three areas:
- Workspace switch (1)
- Workspace-dependant features (2)
- Workspace-agnostic features (3).
Central pane
Shows views for features that you select from the sidebar and allows you to operate the features with a user-friendly interface.
Sidebar features
Workspace
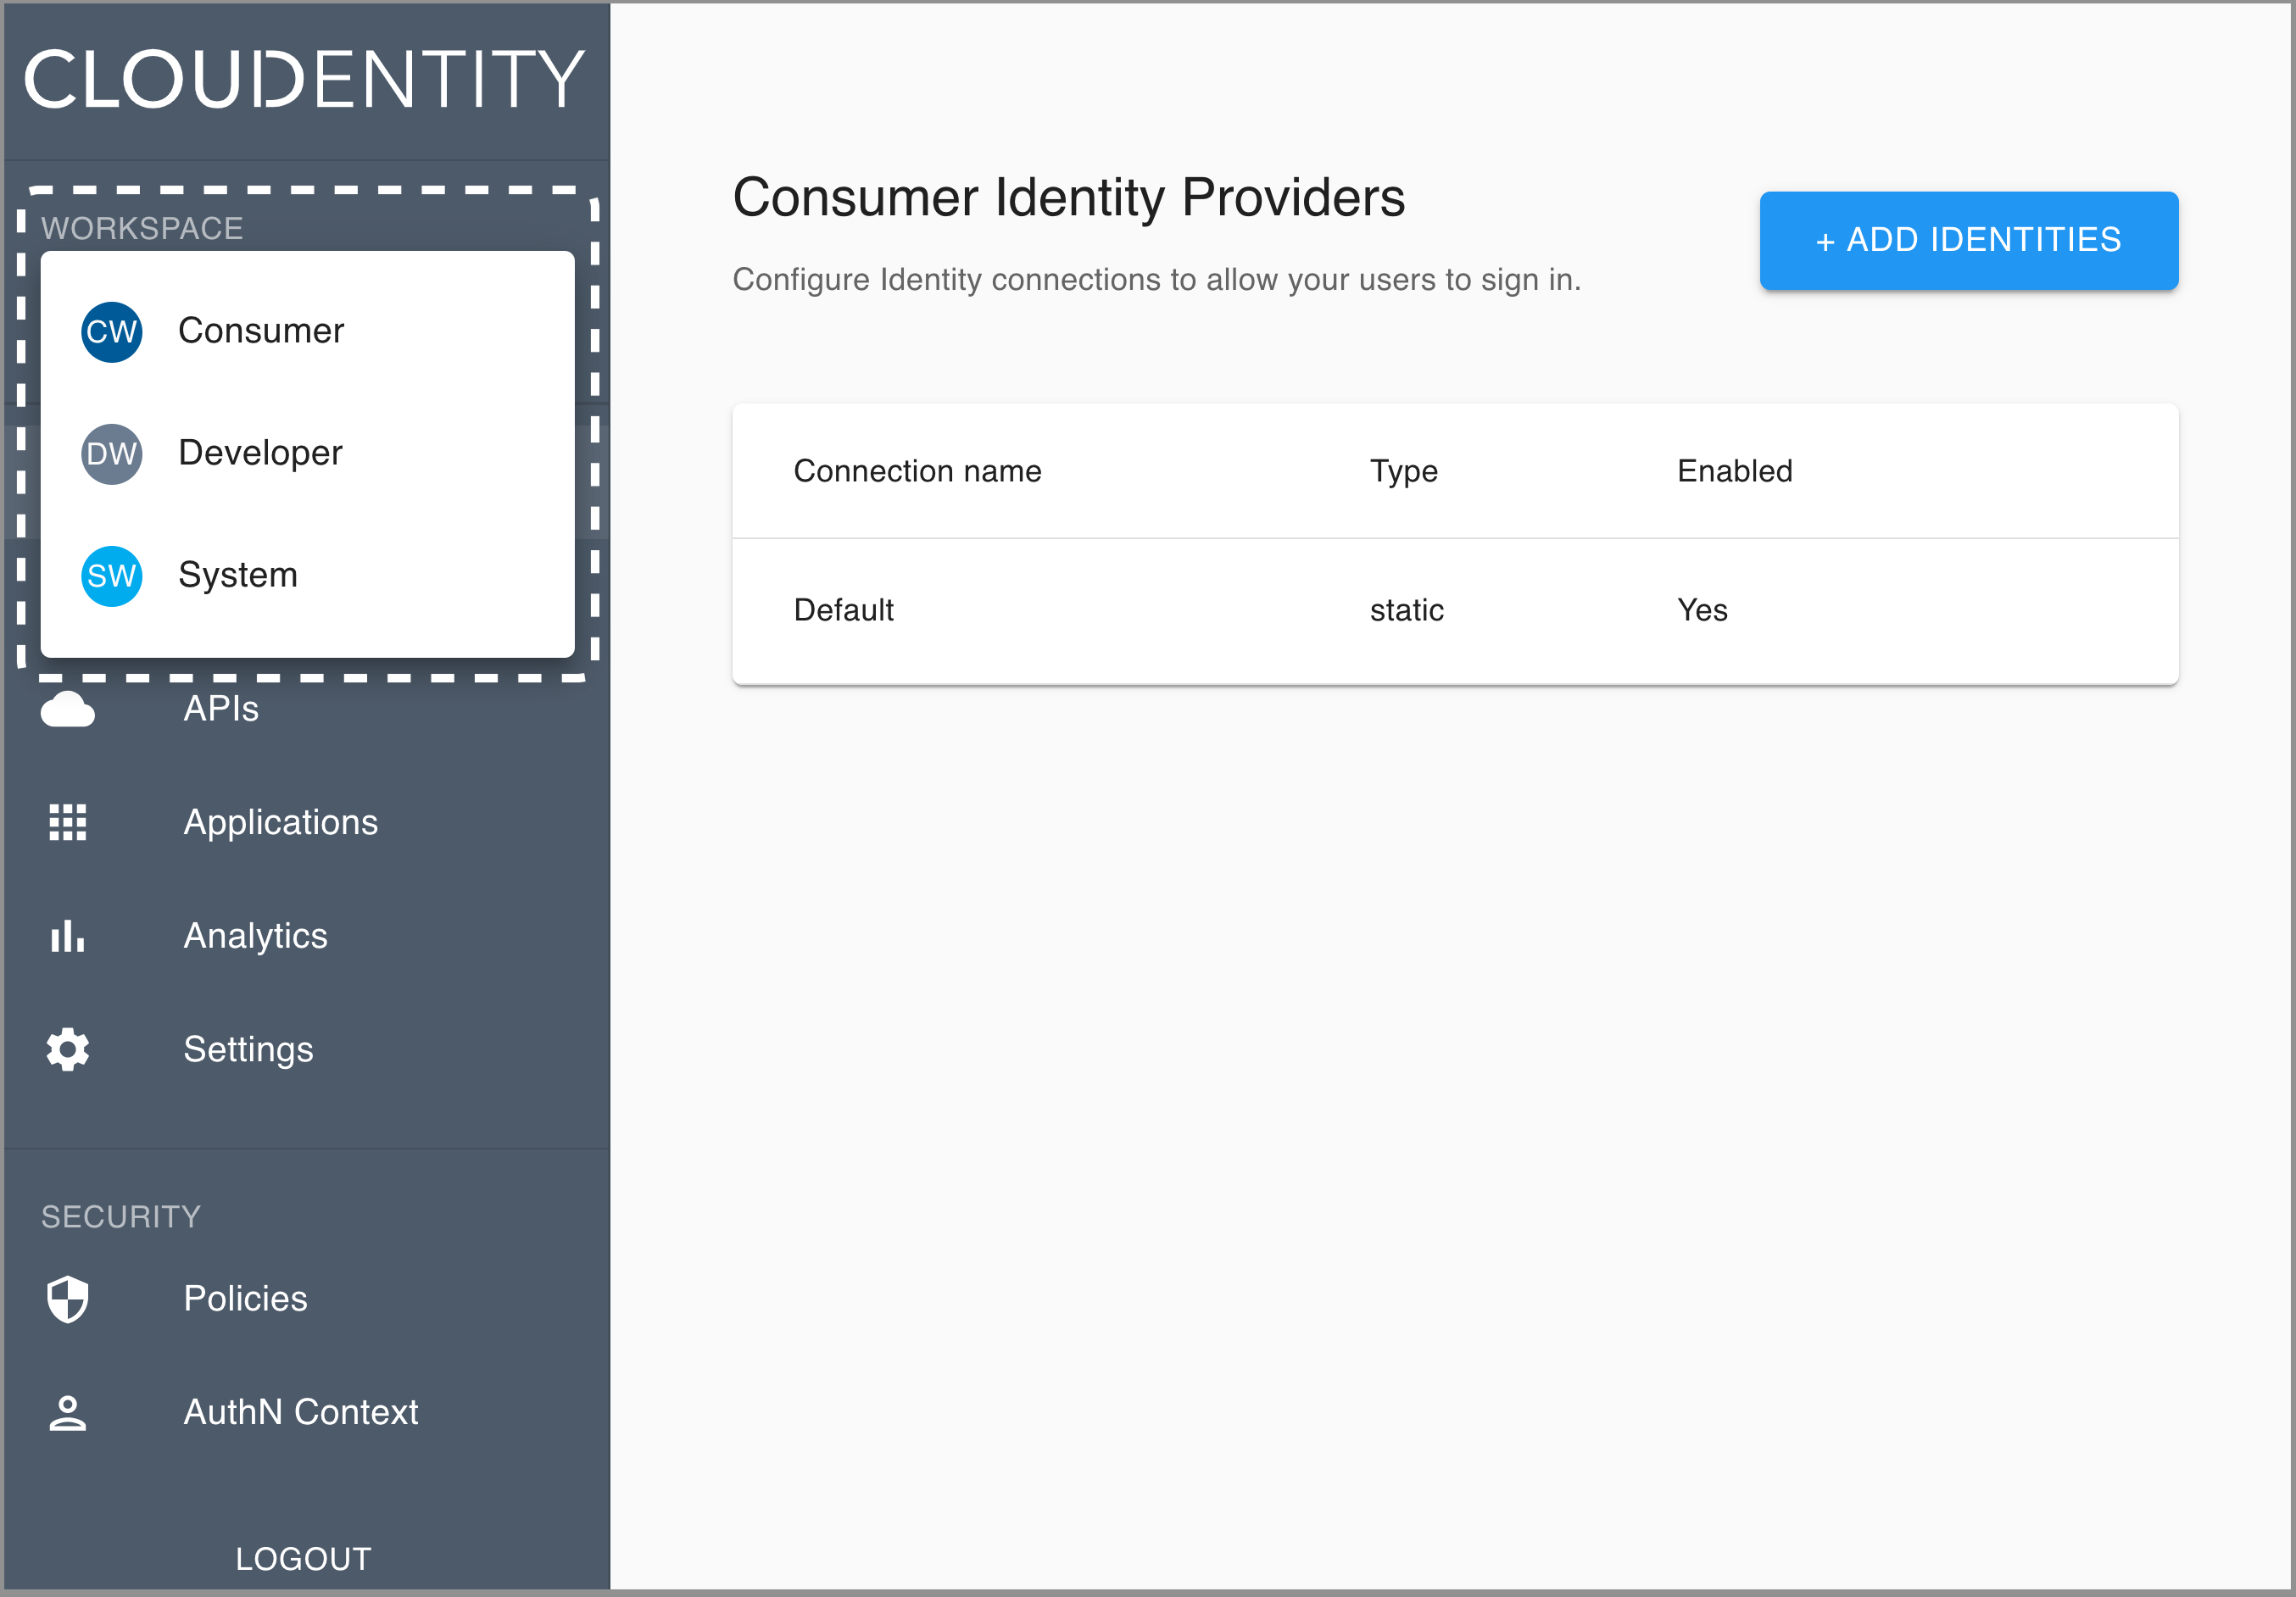
Switch between System, Developer, and Consumer to enter respective workspaces in the ACP administrator portal.
See related articles
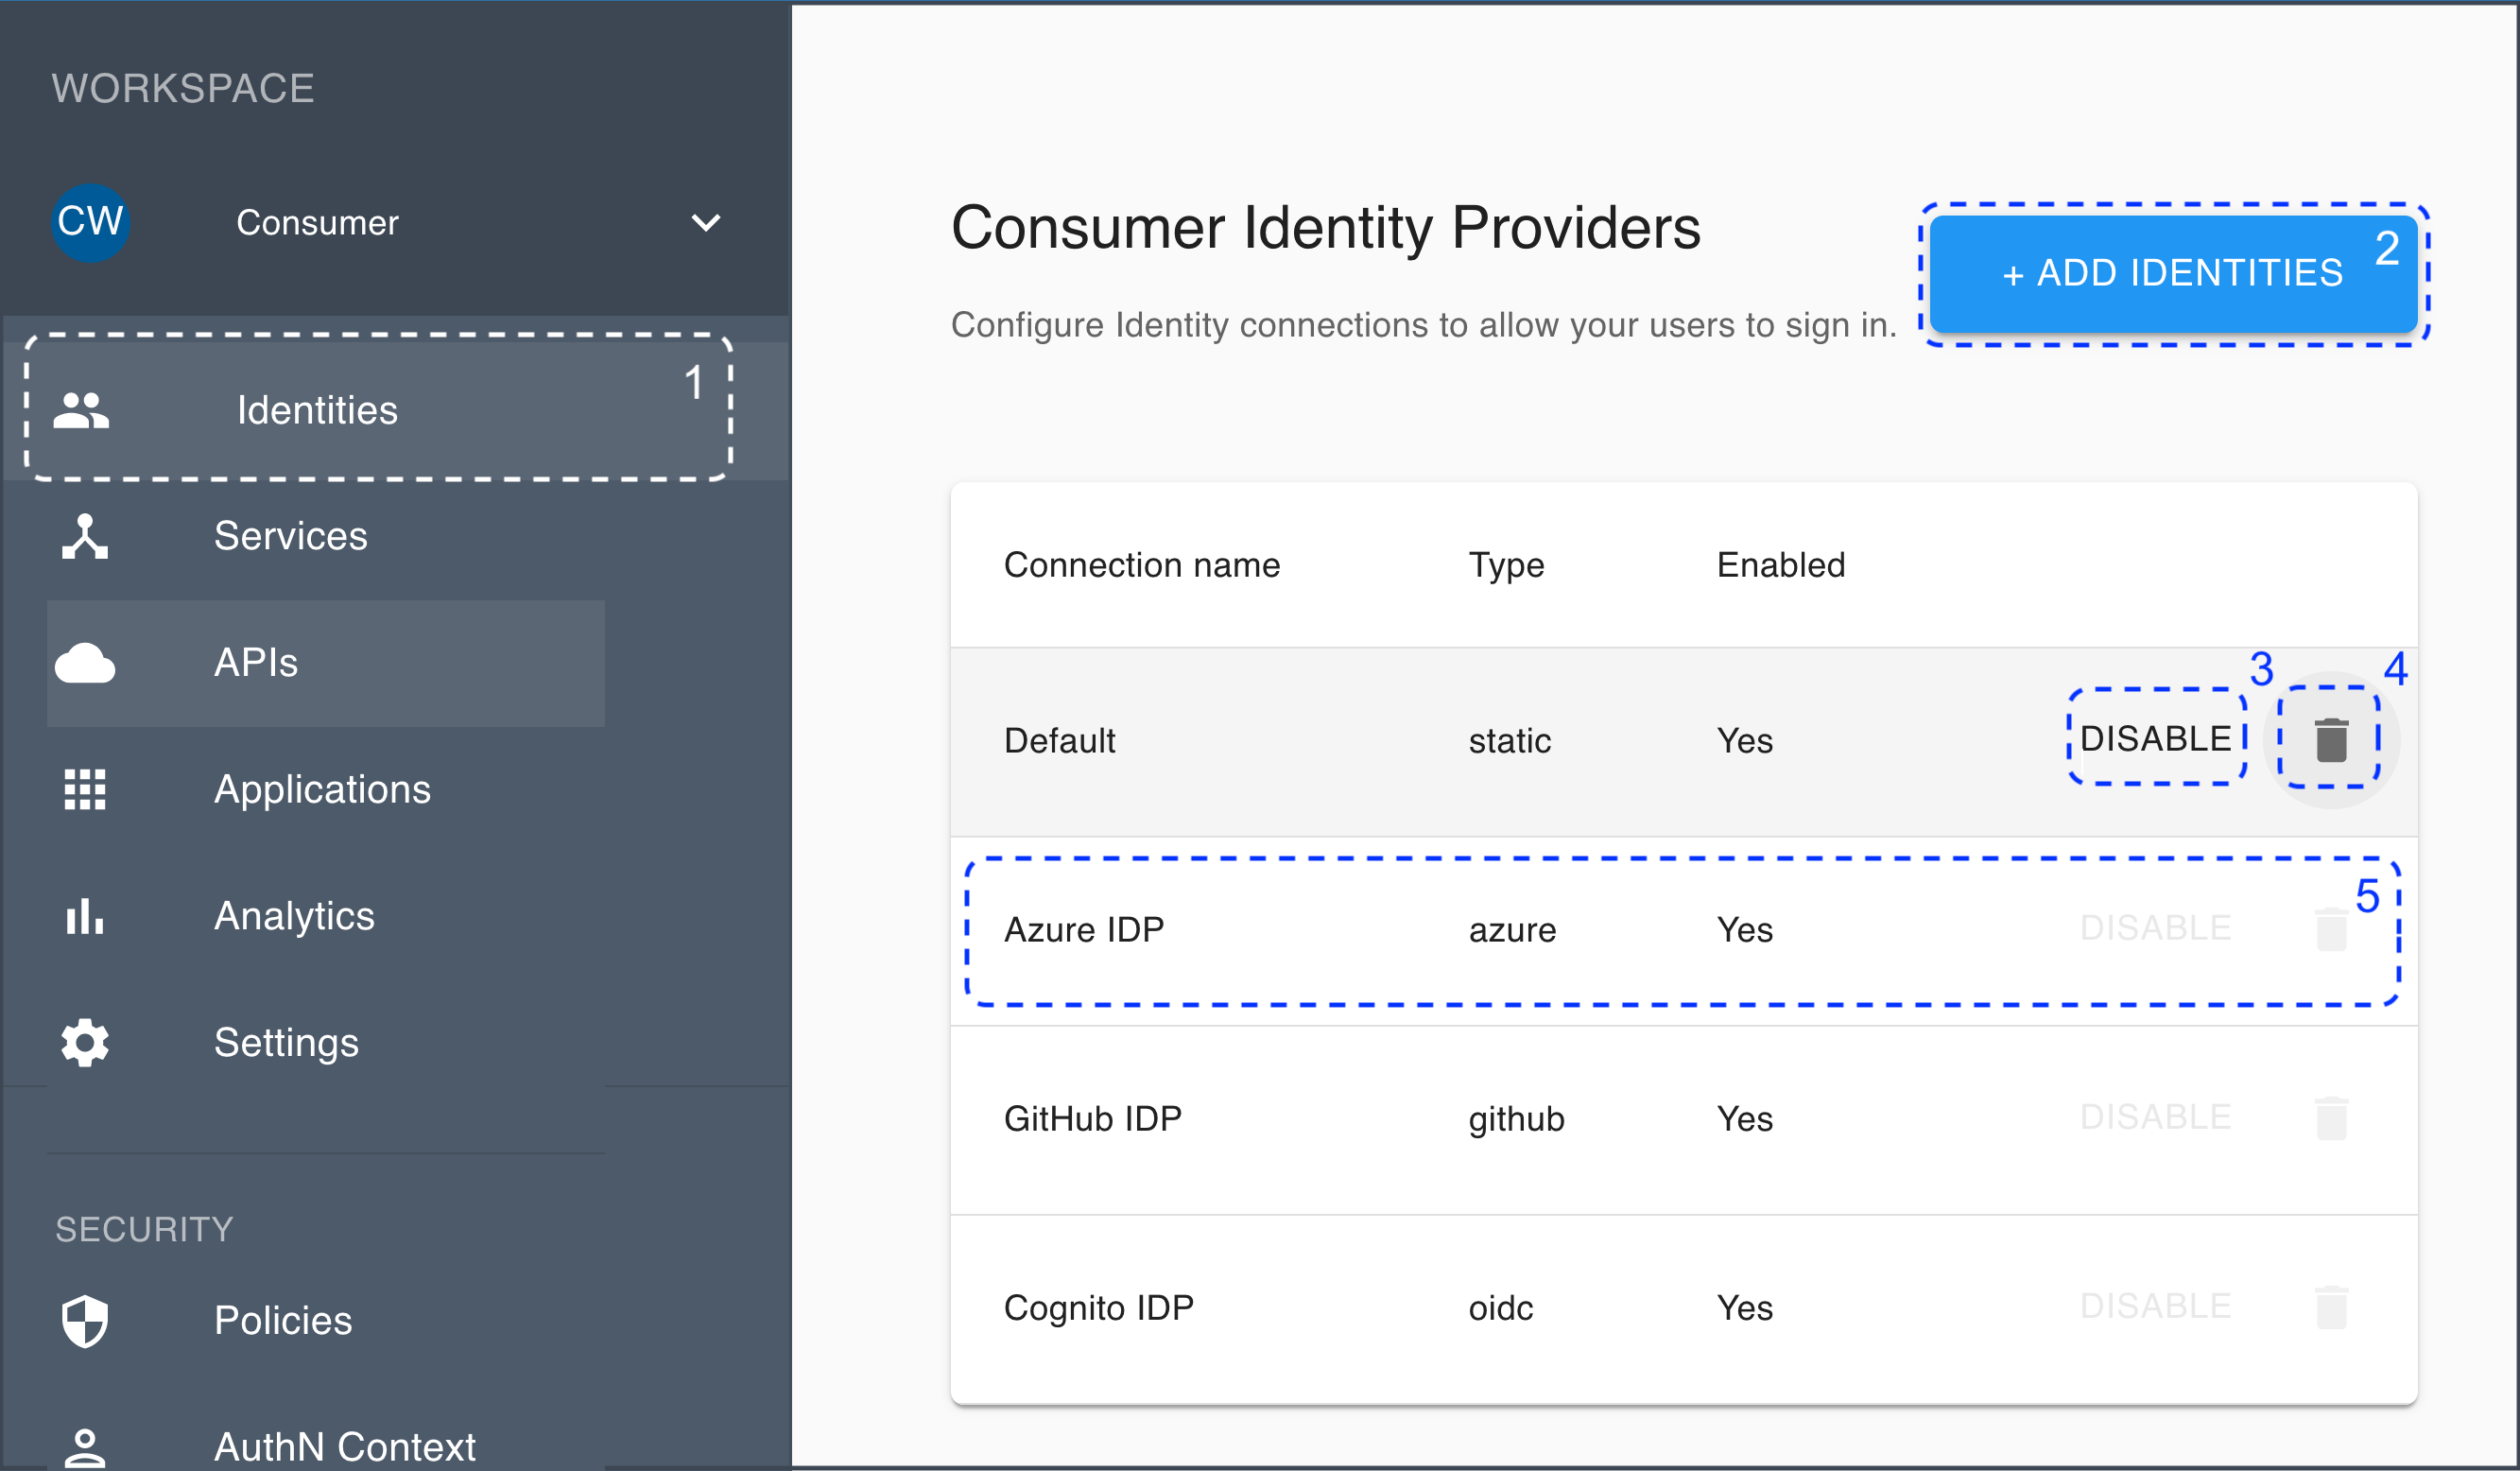
Identities
-
Preview the list of your identity connections by selecting Identities from the sidebar.
-
Add new identity providers (IDPs) by selecting ADD IDENTITIES.
-
Disable an IDP by selecting DISABLE.
-
Remove an IDP with the trash can icon.
-
Configure your existing IDPs by selecting a particular IDP.
See related articles
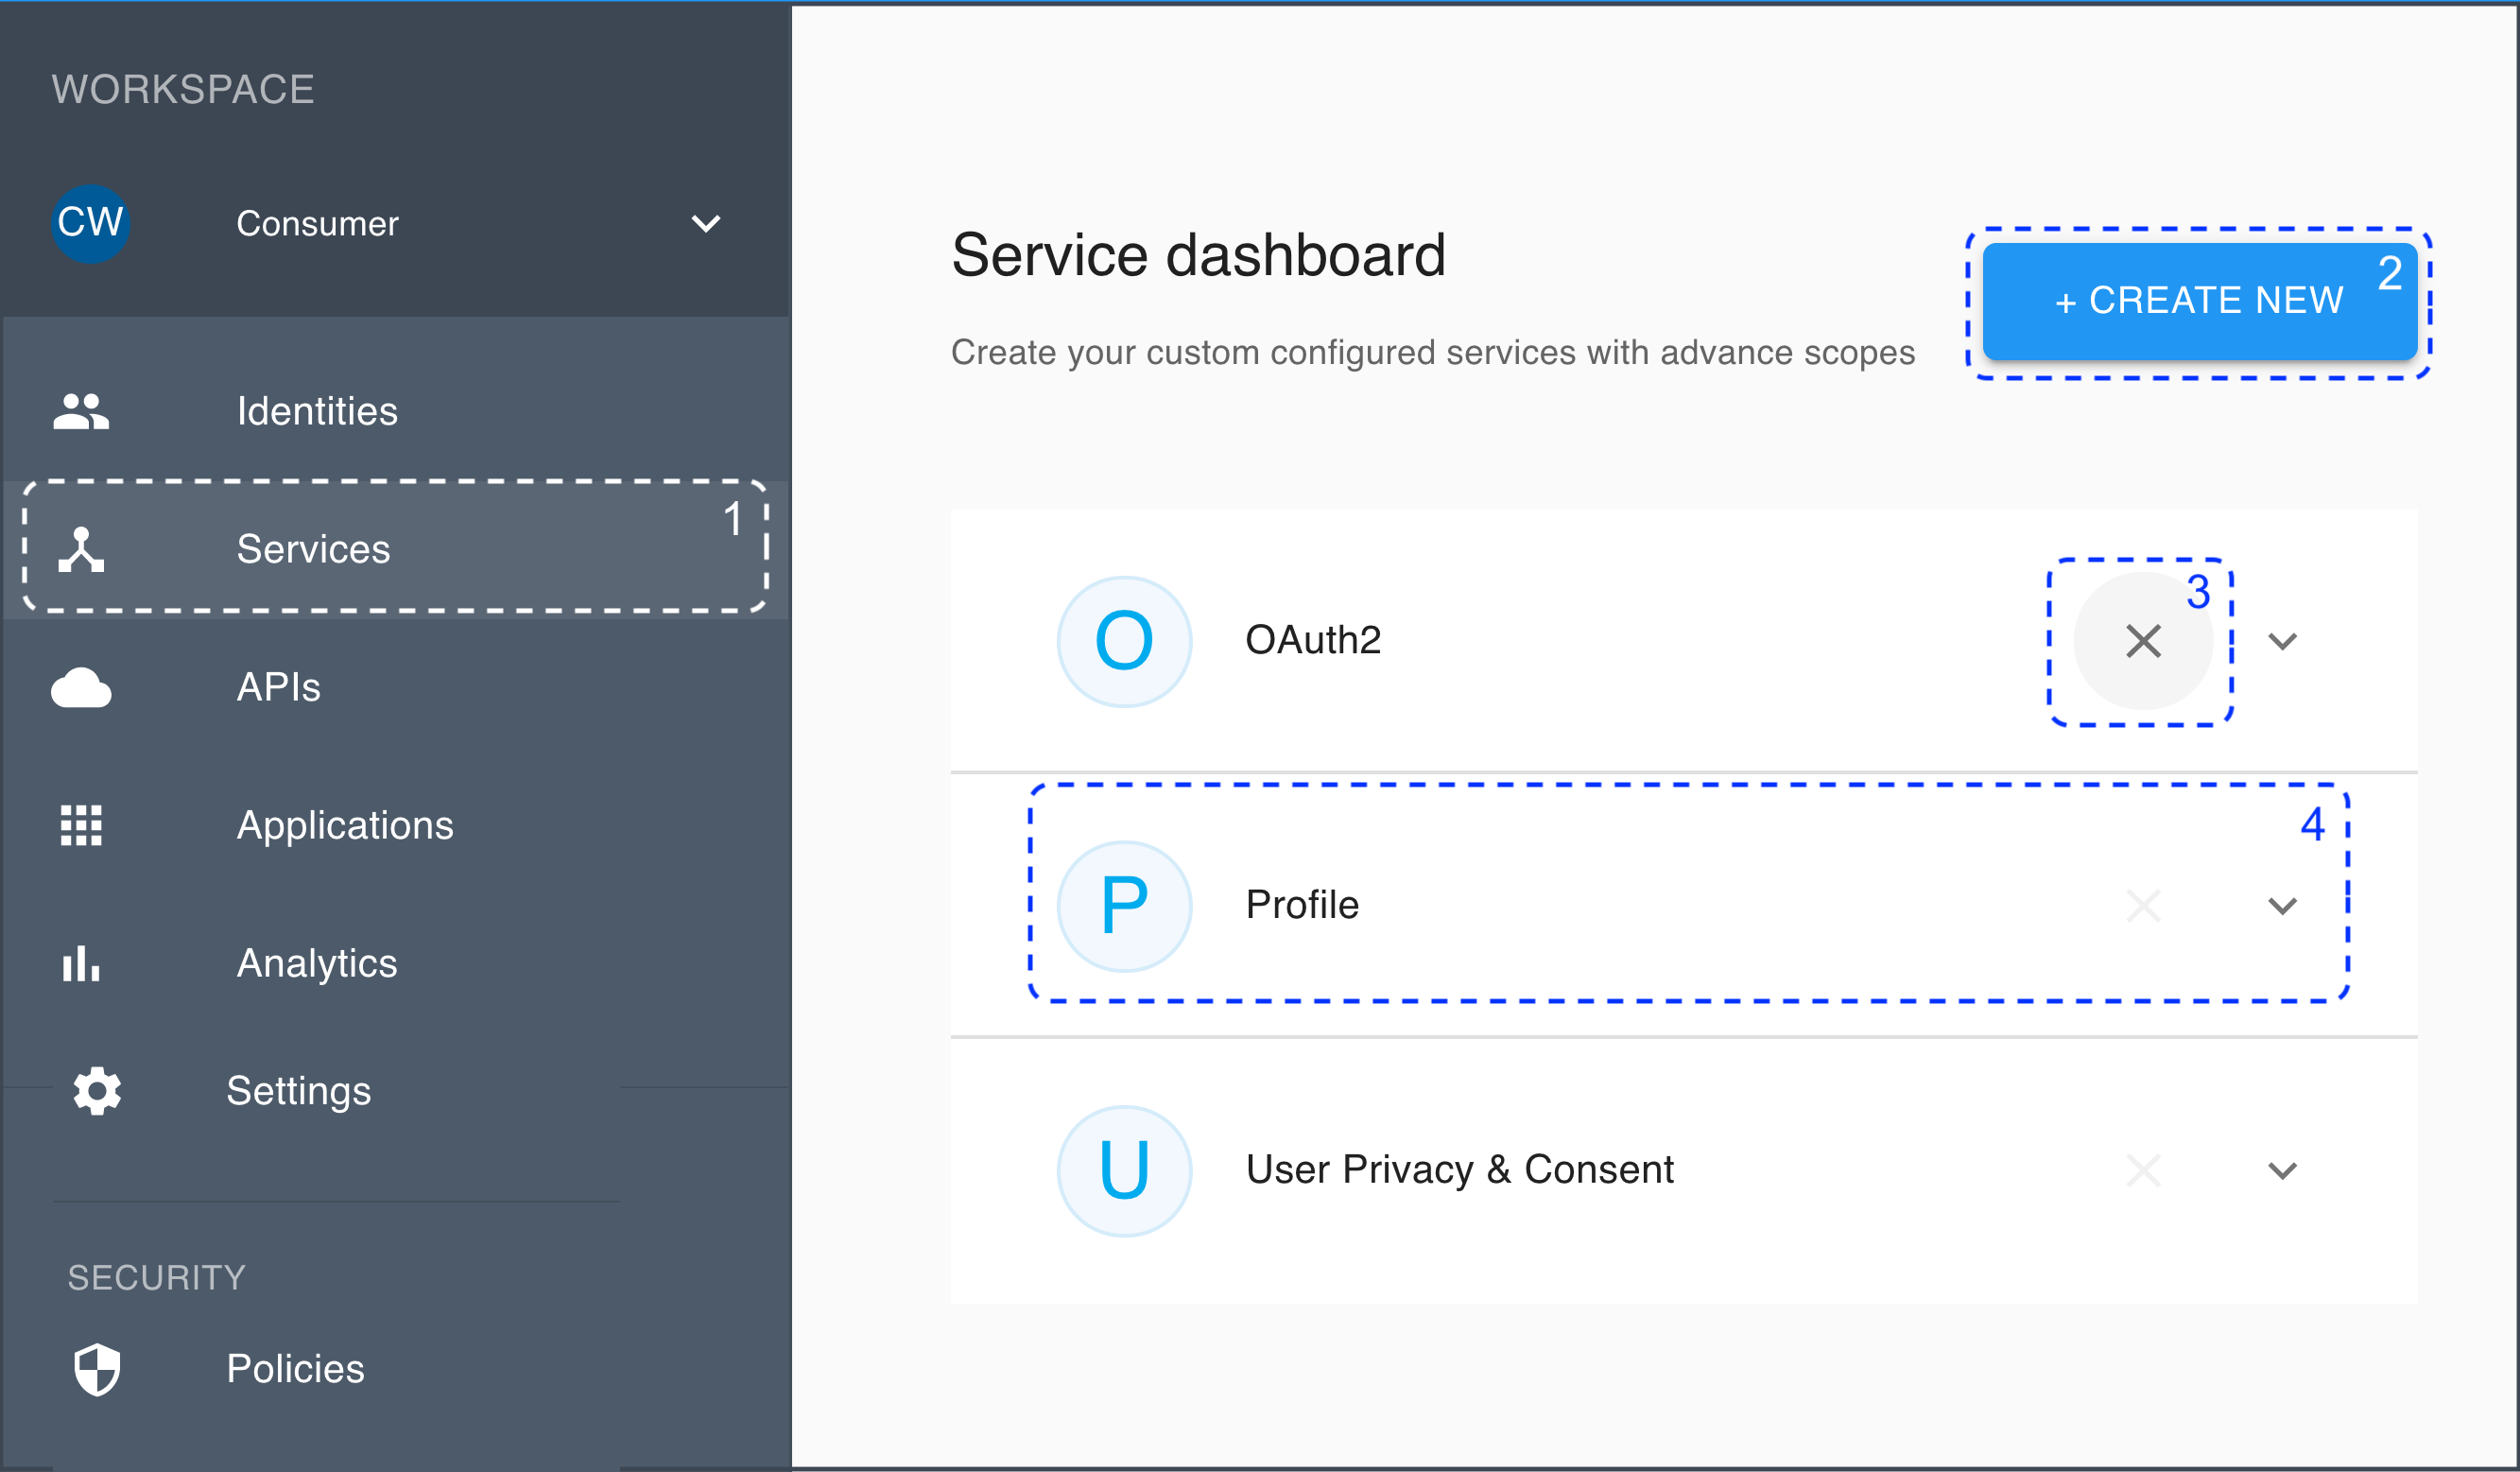
Services
-
Preview the list of your services by selecting Services from the sidebar.
-
Add new services by selecting CREATE NEW.
-
Remove an existing service by selecting the X icon.
-
Configure an existing service by selecting it from the list.

-
Remove an existing scope by selecting the X icon.
-
Edit an existing scope by selecting the pencil icon.
-
Add a new scope by selecting ADD SCOPE.
-
See related articles
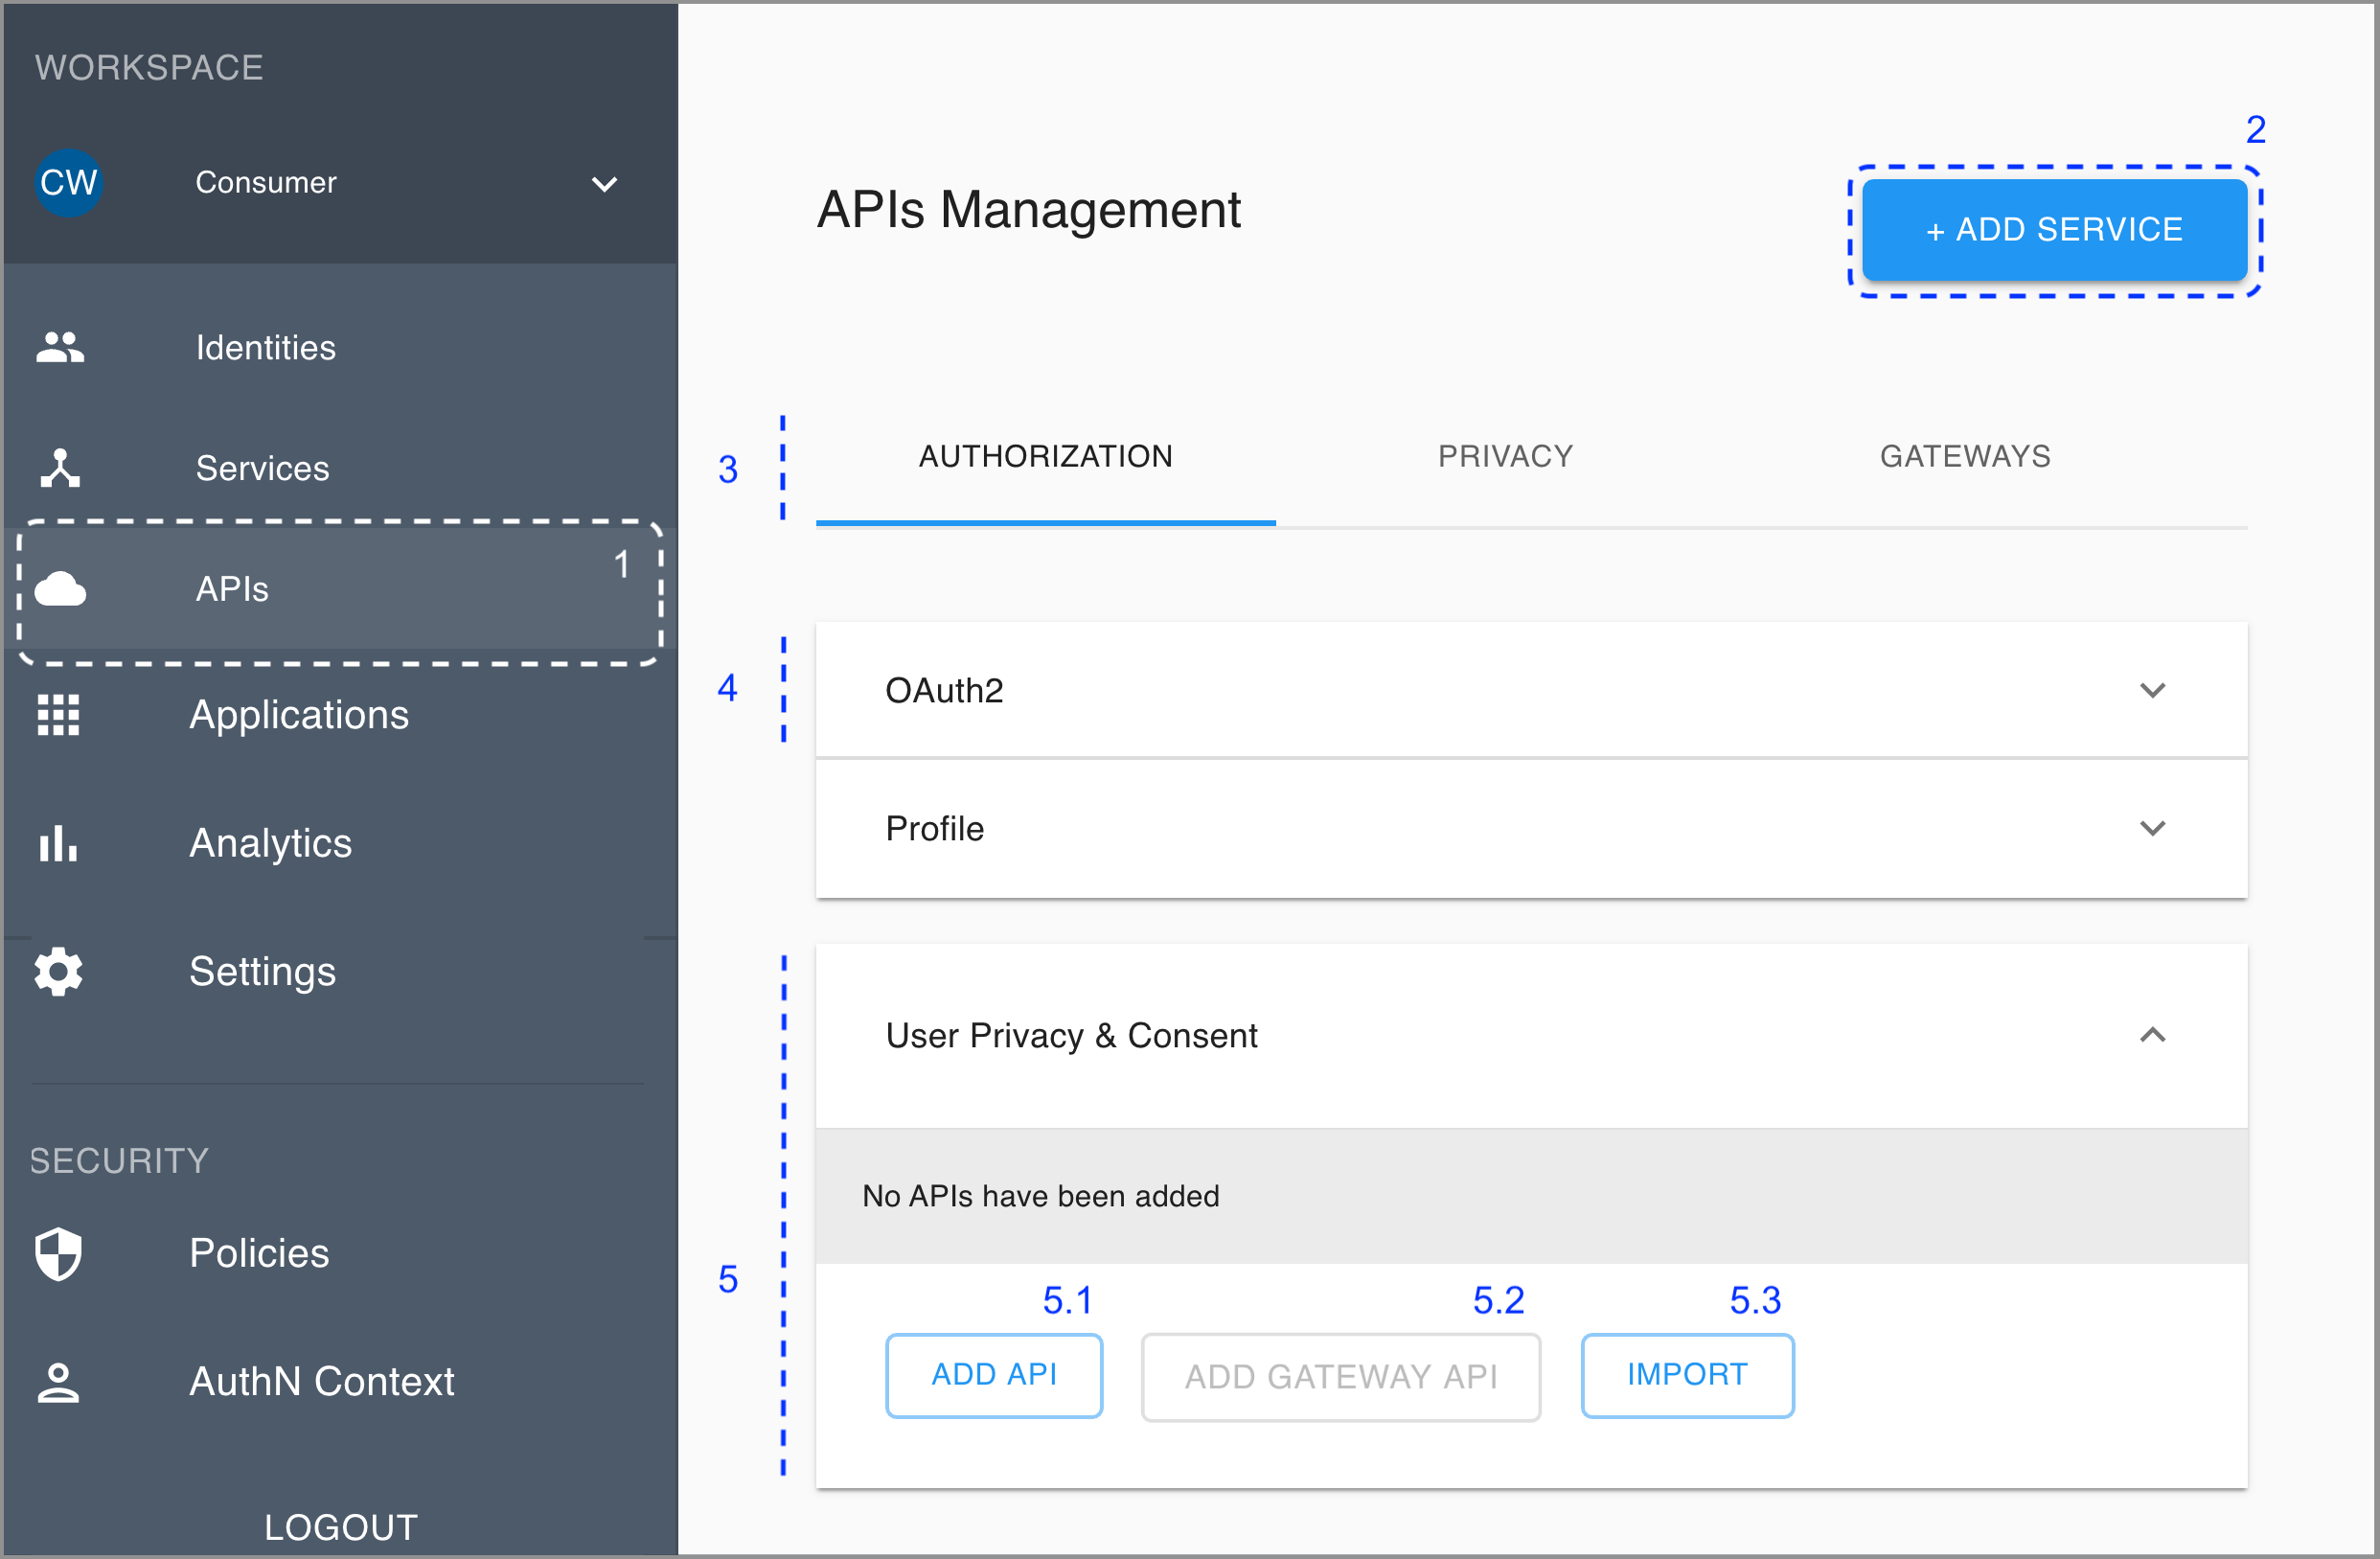
APIs
-
Open the APIs Management view by selecting APIs from the sidebar.
-
If needed, add new services by selecting ADD SERVICE.
-
Enter the APIs Management subviews by selecting the AUTHORIZATION, PRIVACY, and GATEWAYS tabs.
-
Expand a service section by selecting the service from the list.
-
In the service expanded view, configure the service.
- Add APIs.
- Connect a gateway.
- Import APIs.
See related articles
Applications

-
Preview the list of your applications registered in ACP by selecting Applications from the sidebar.
-
If needed, add new applications by selecting CREATE NEW.
-
Open the Applications subviews, INTERNAL and THIRD PARTY, by selecting the respective tabs.
-
Sort your applications by their names, creation dates, or client IDs, in ascending or descending order.
-
Configure an existing application by selecting it from the list.
-
Use the pagination buttons to adjust the number of displayed apps and navigate through the list.
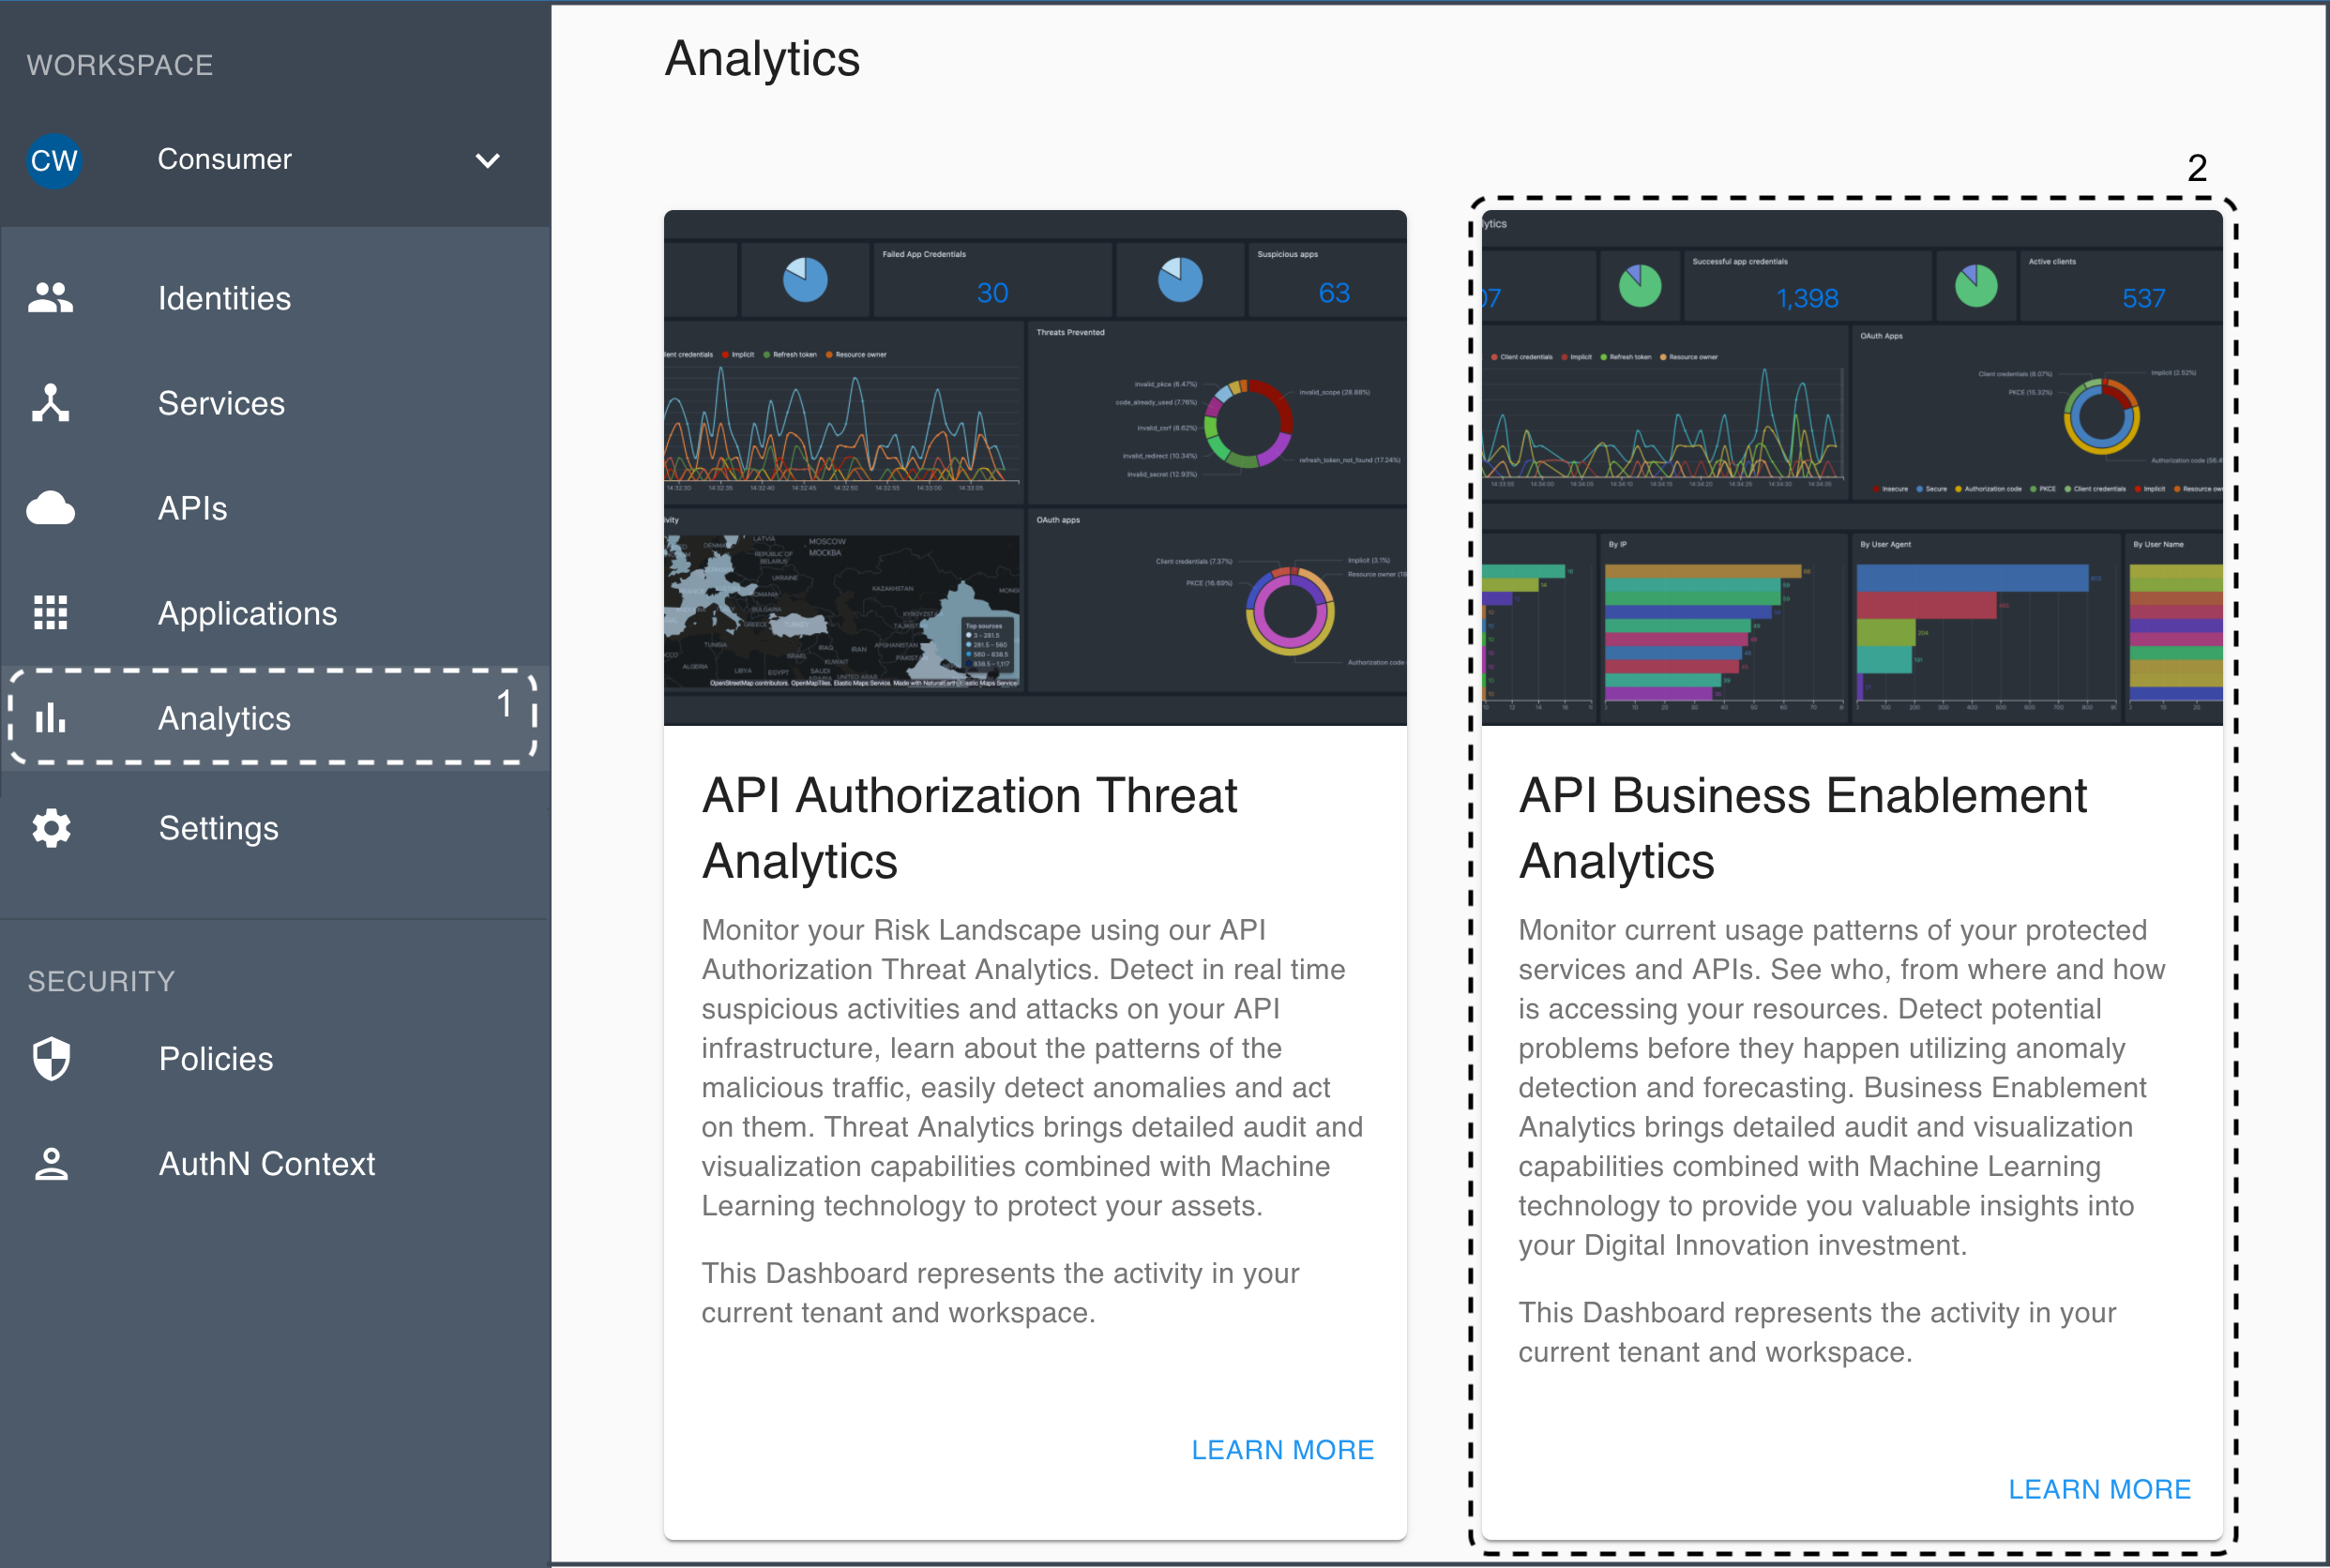
Analytics
-
Preview the list of analytics offered in ACP by selecting Analytics from the sidebar.
-
Open a desired analytics dashboard by selecting one of the analytics cards from the Analytics view.
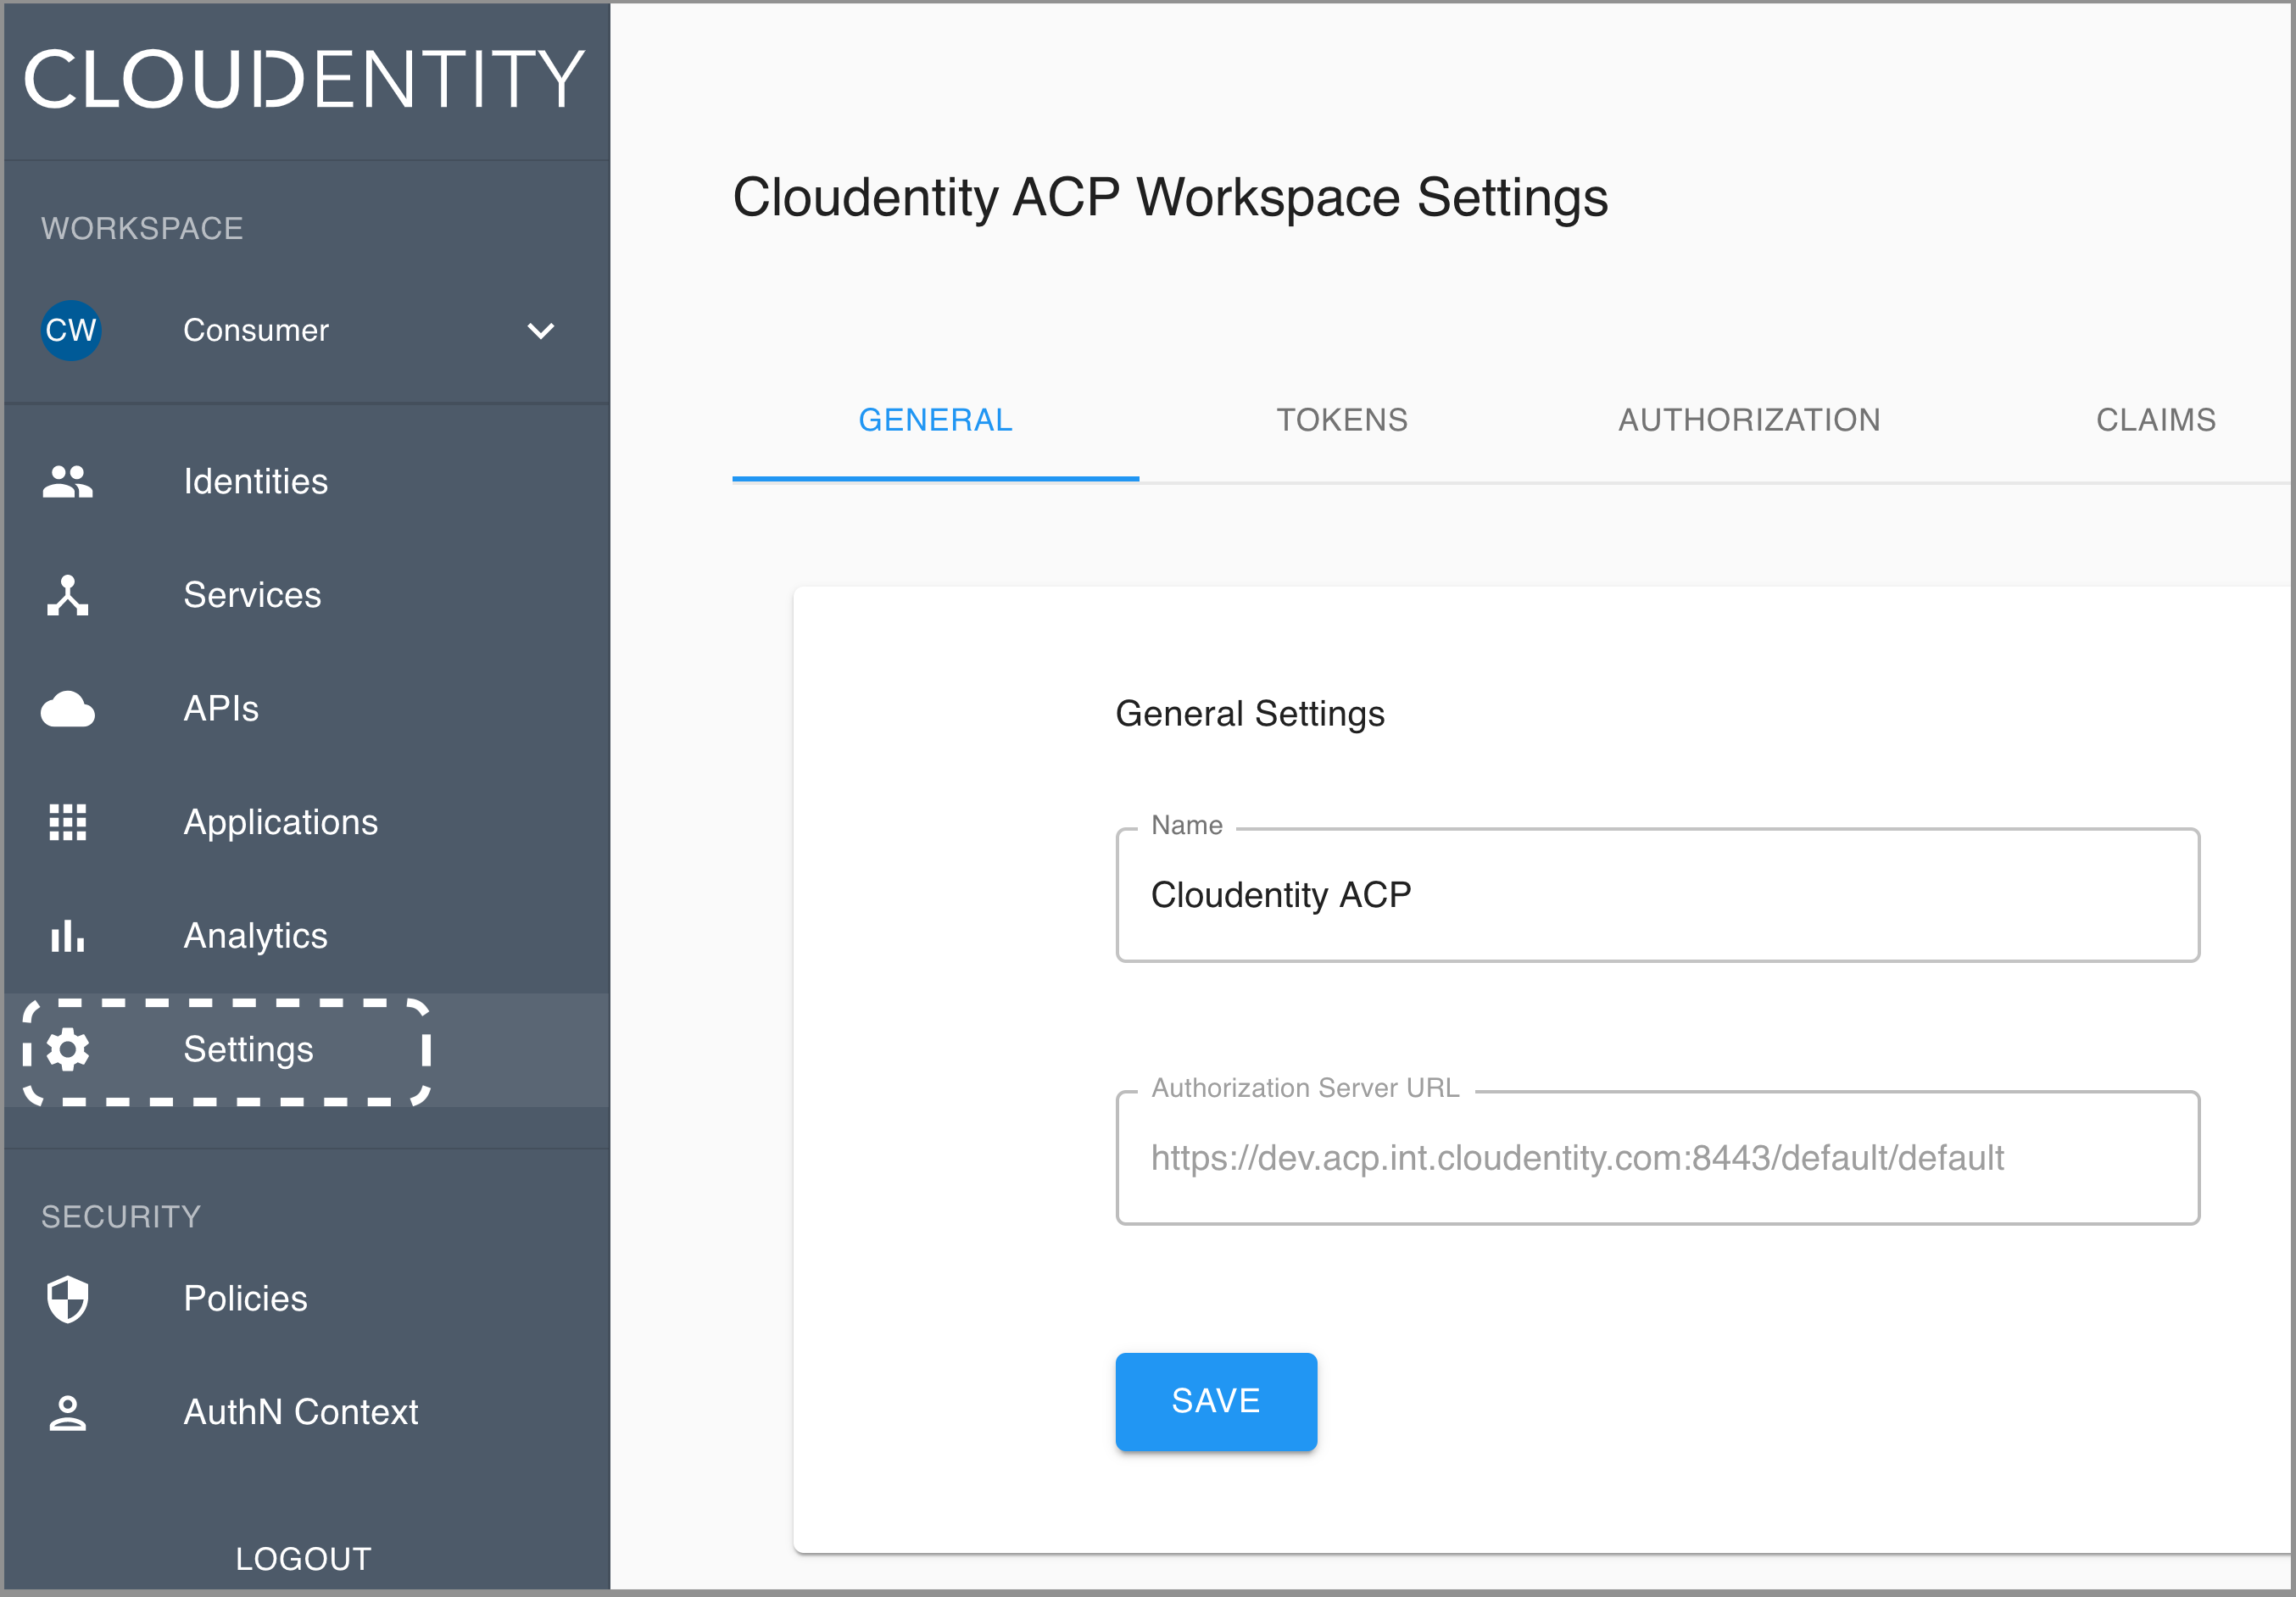
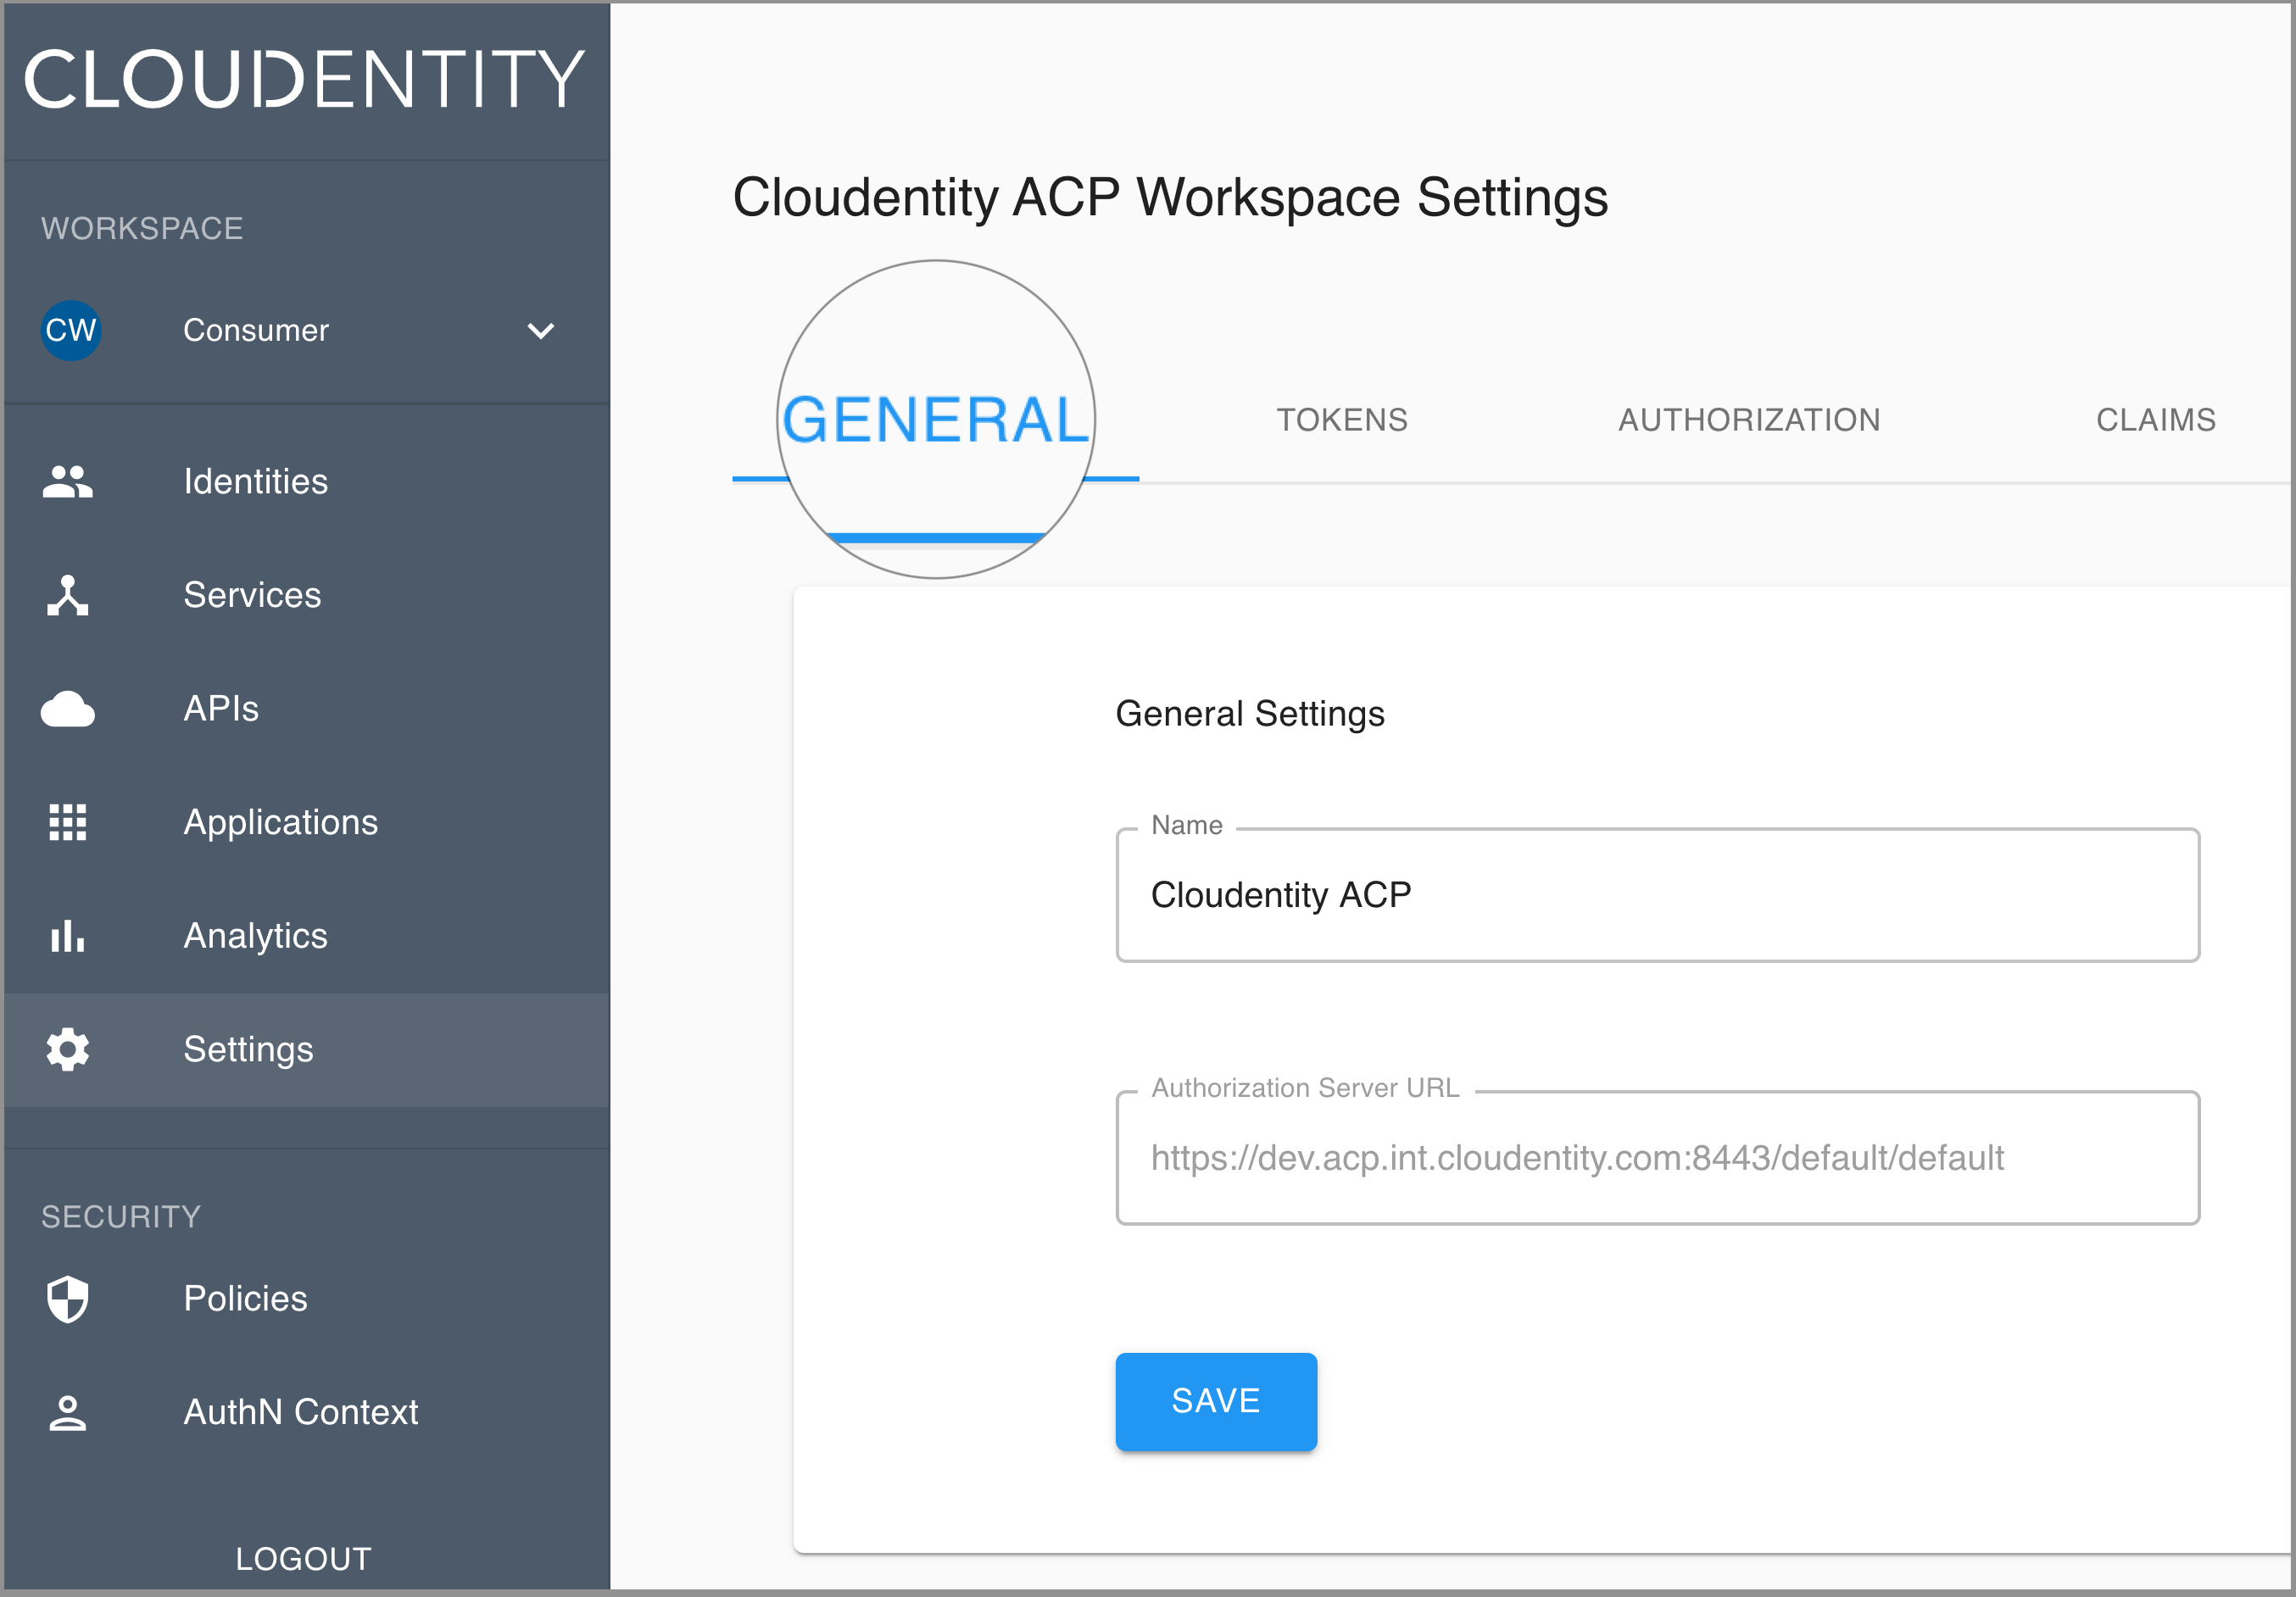
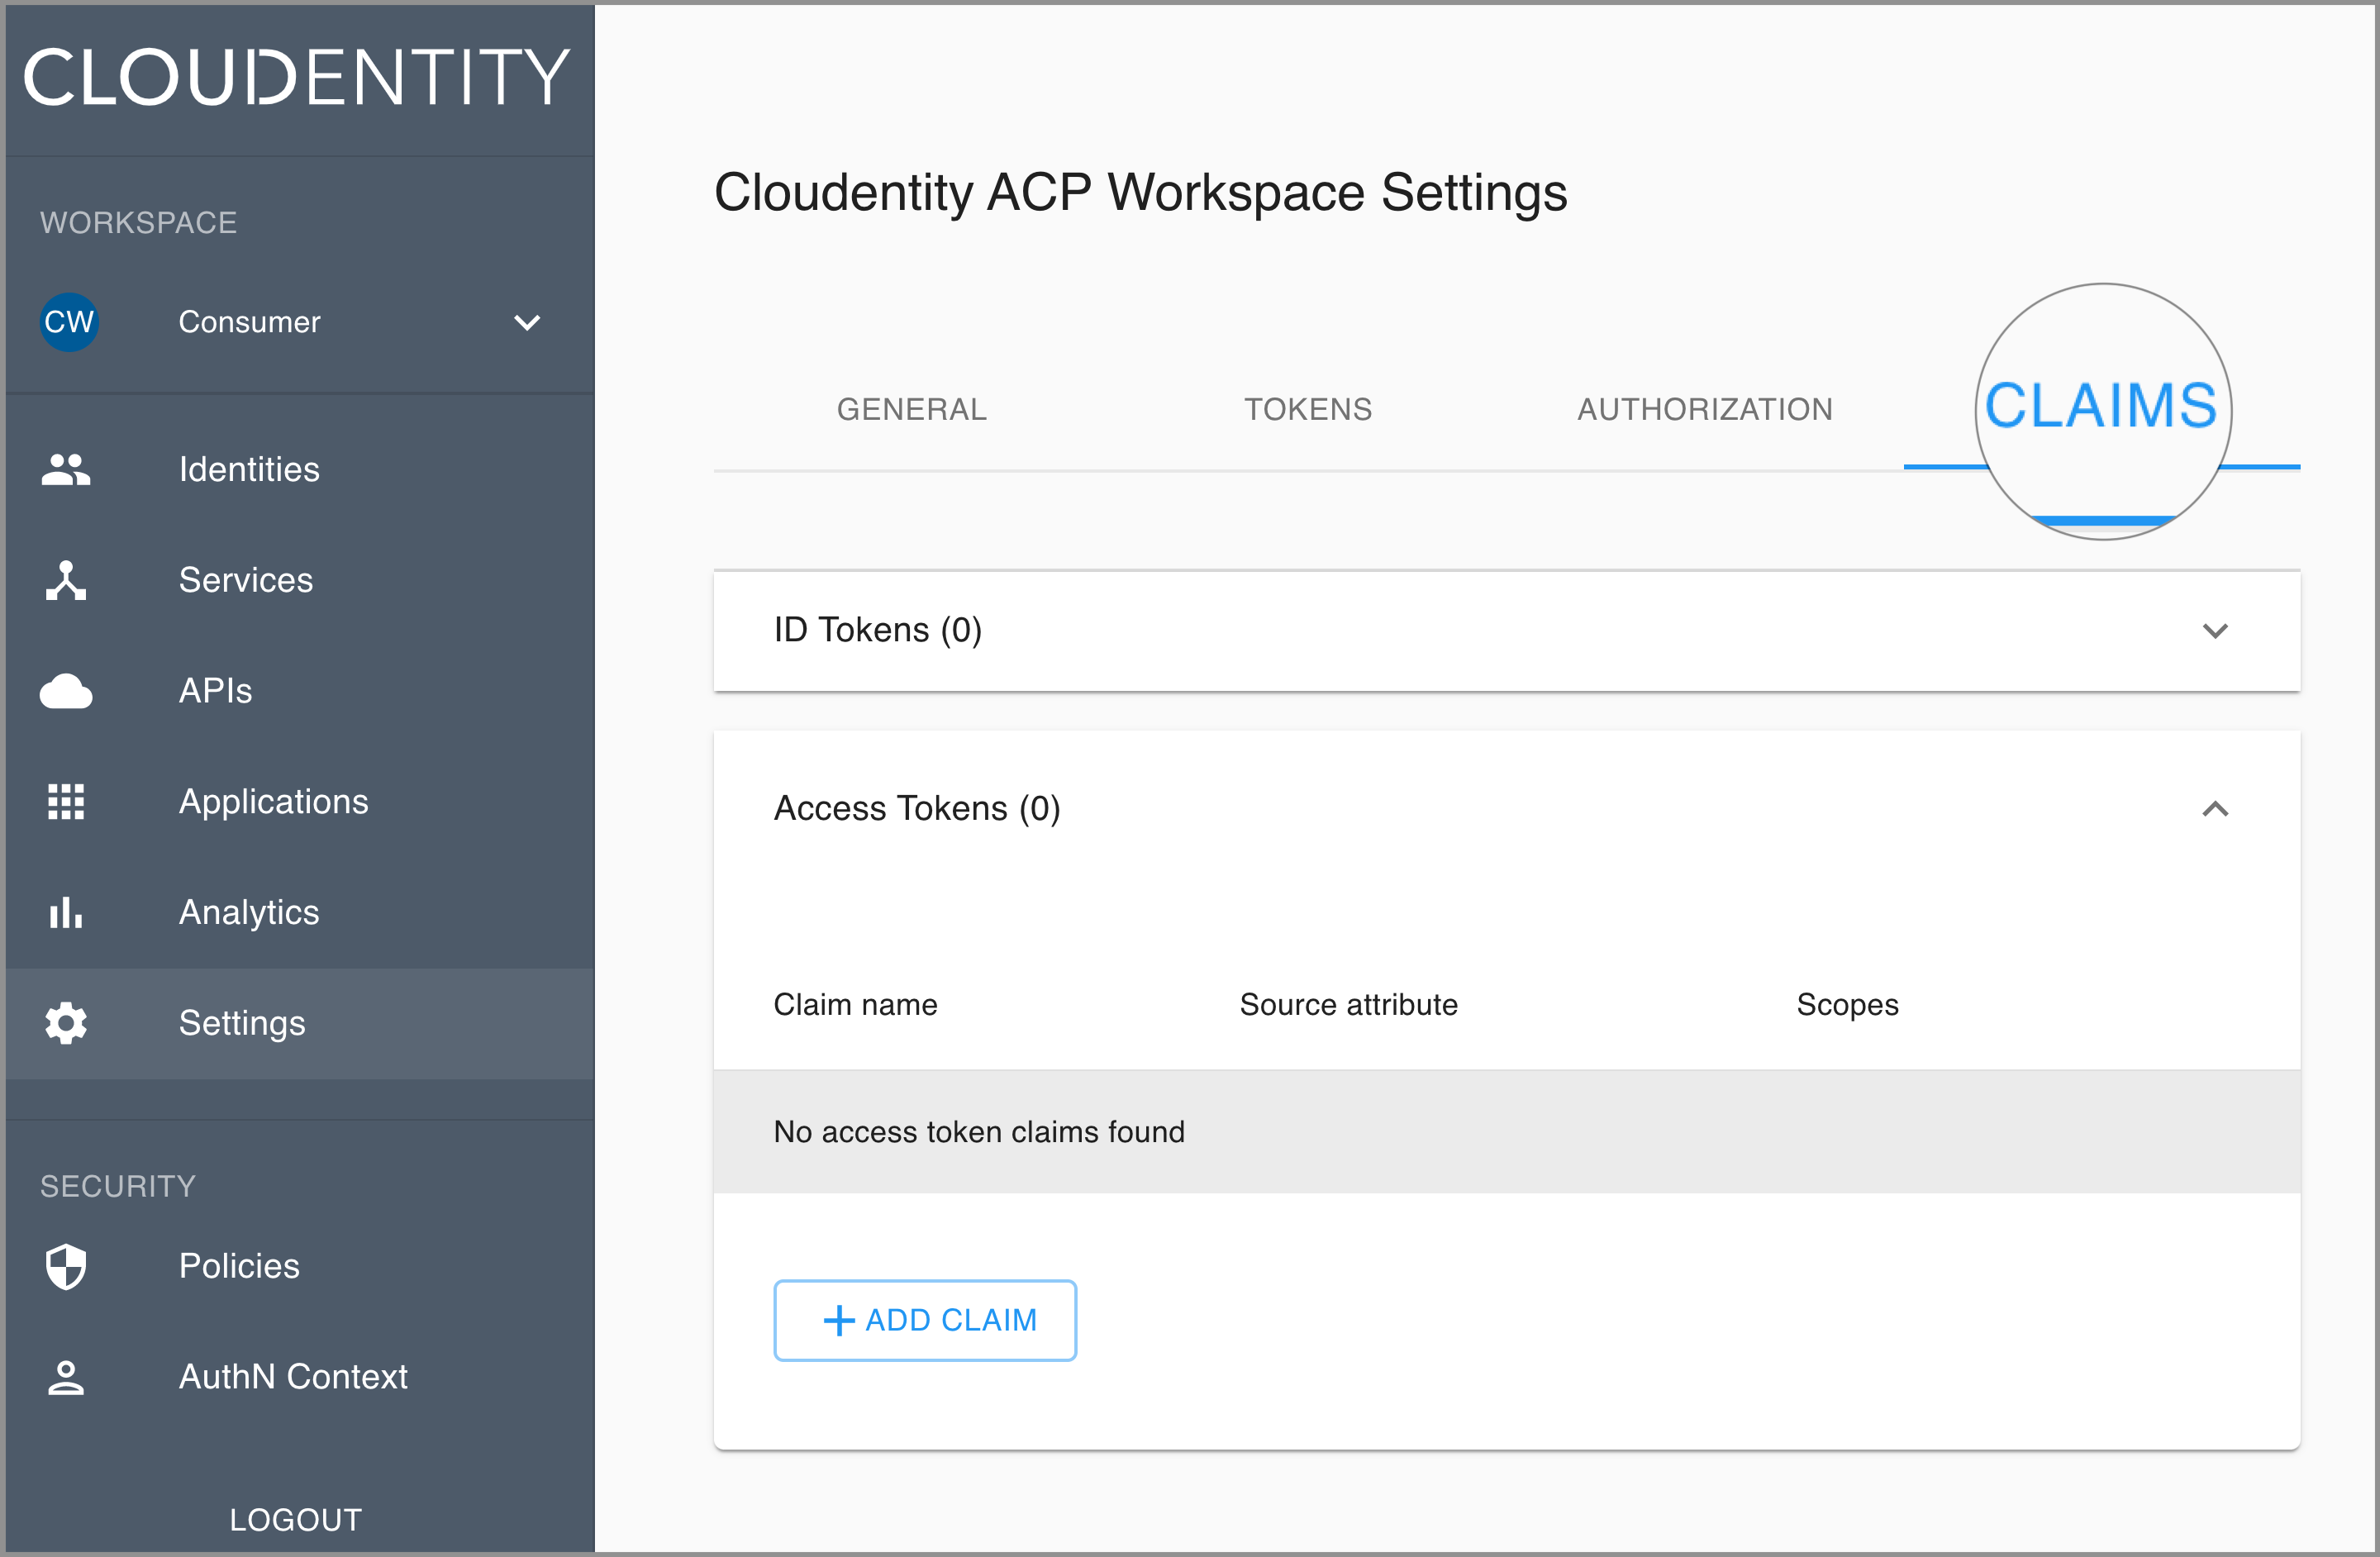
Settings
Go to Settings to explore four views for a selected workspace: GENERAL, TOKENS, AUTHORIZATION, and CLAIMS.
-
General view
-
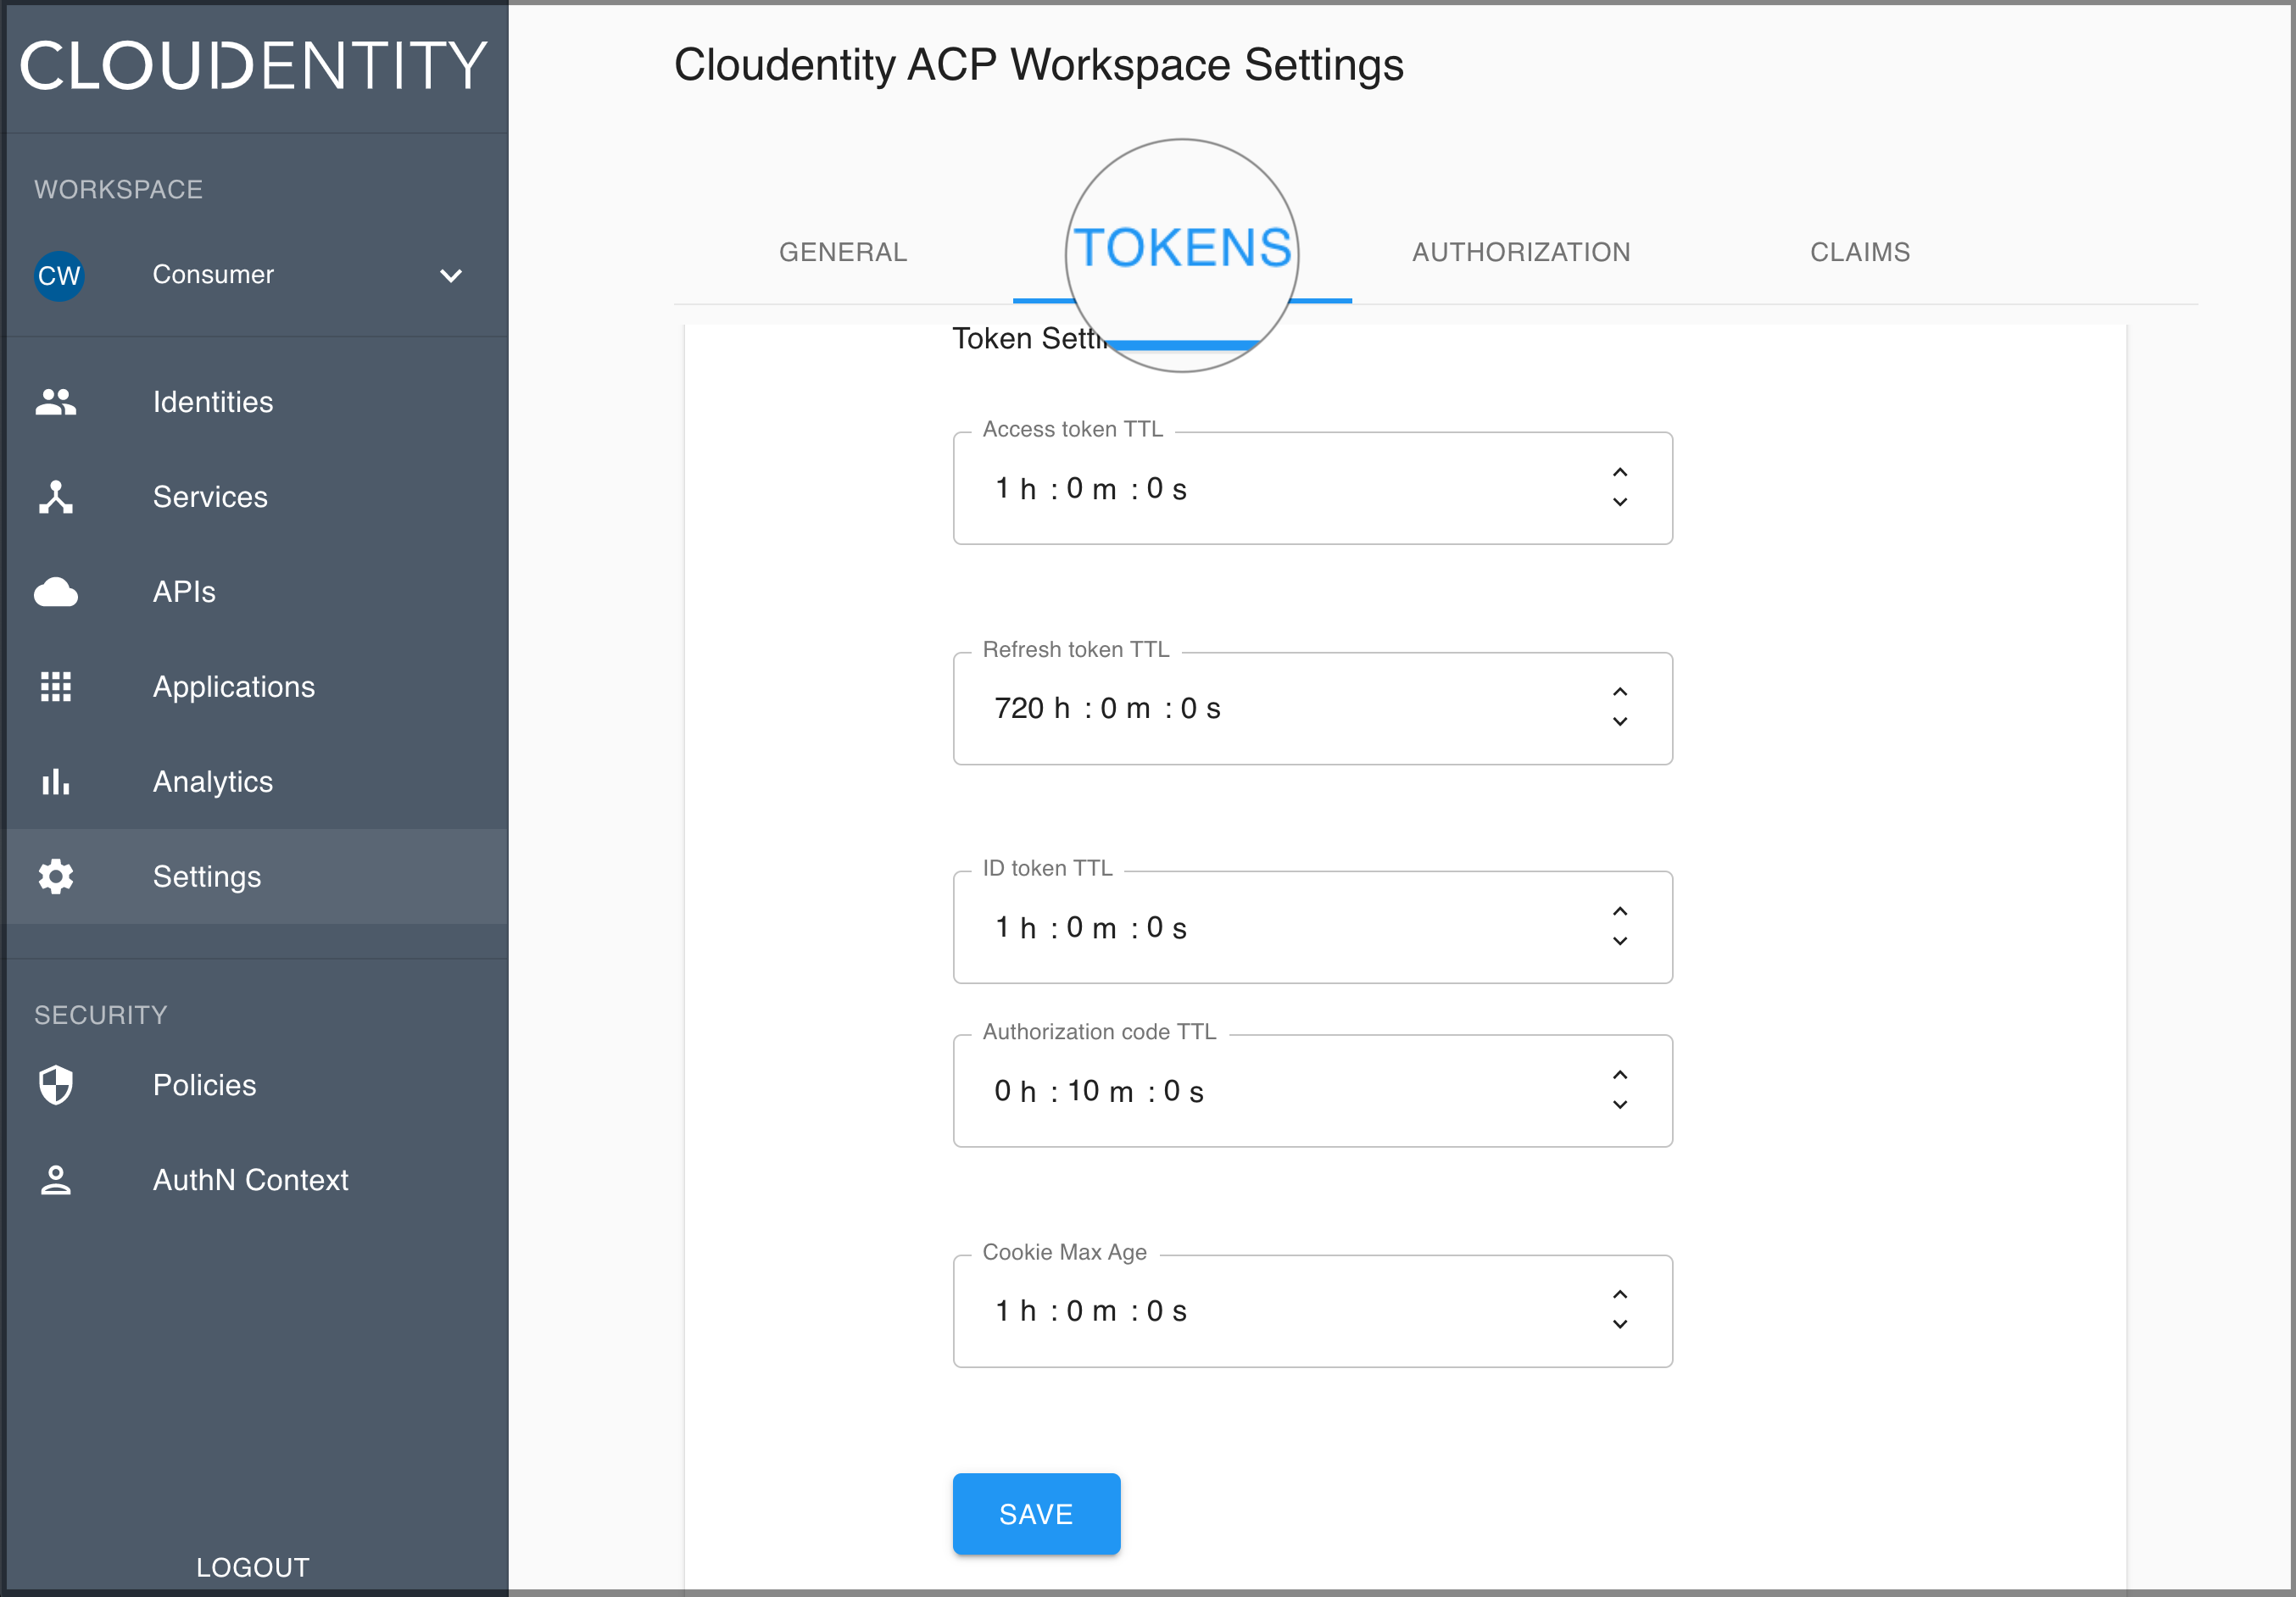
Tokens view
-
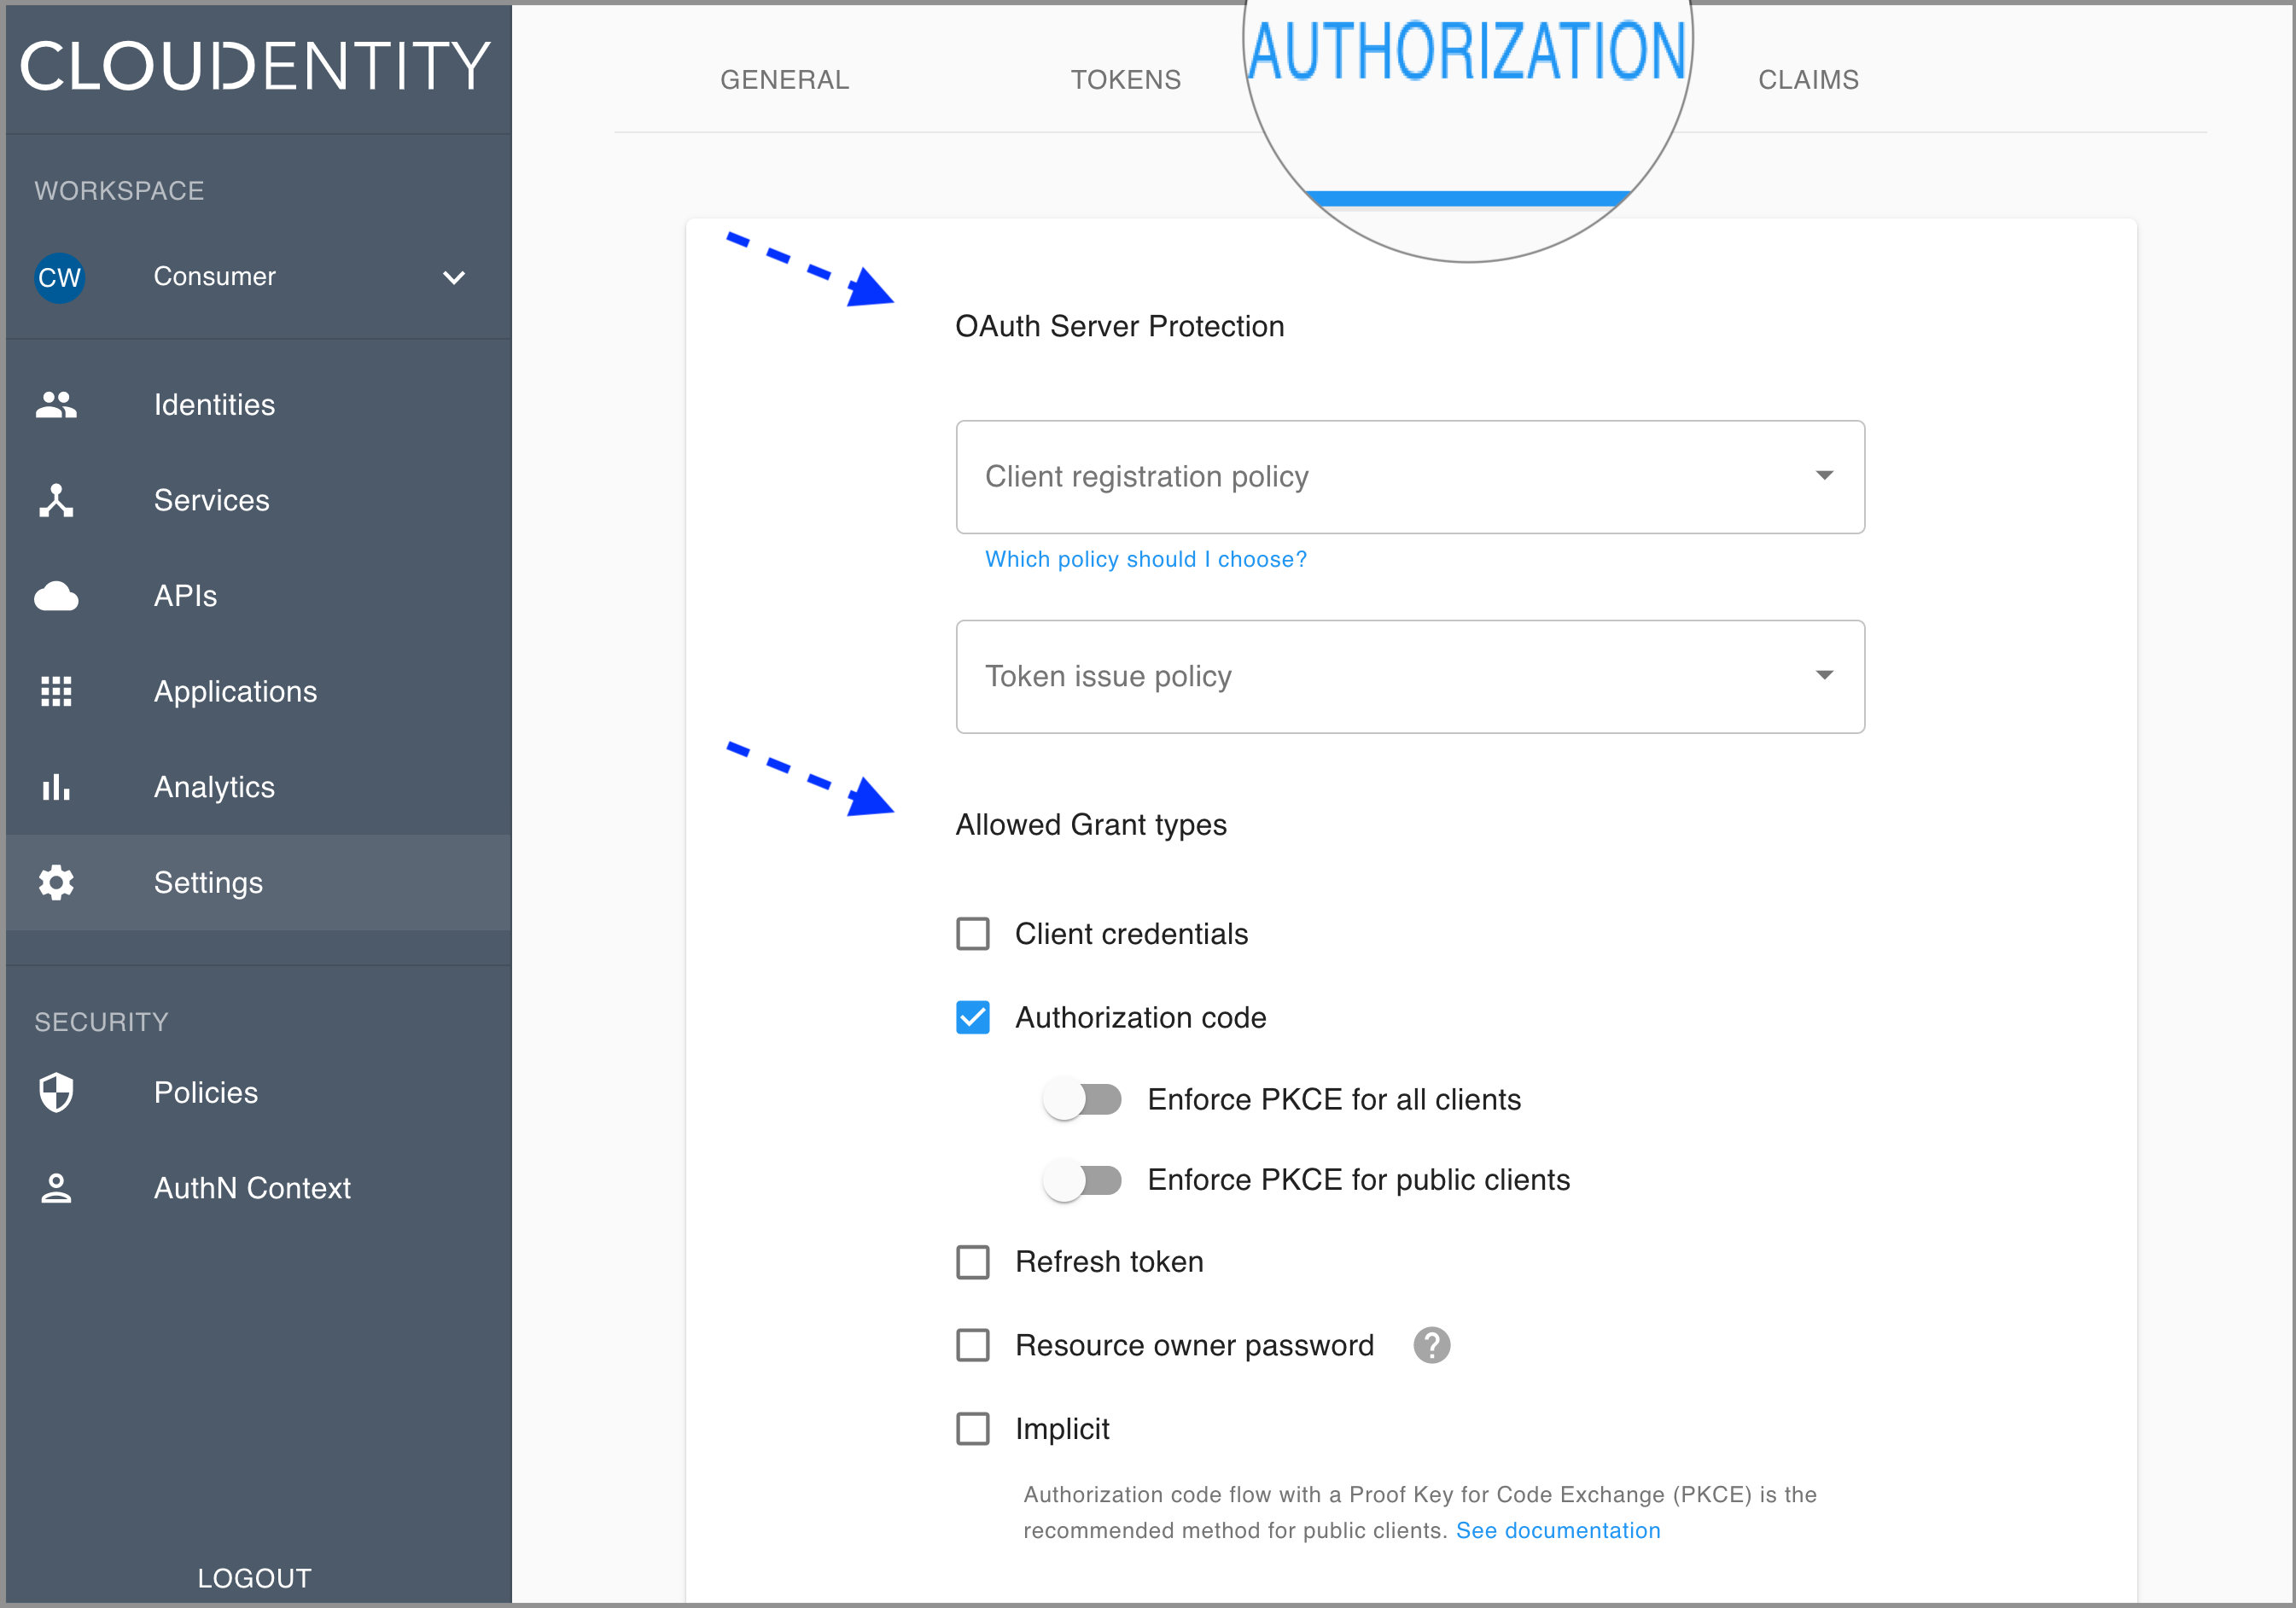
Authorization view
- OAuth Server Protection
- Allowed Grant types
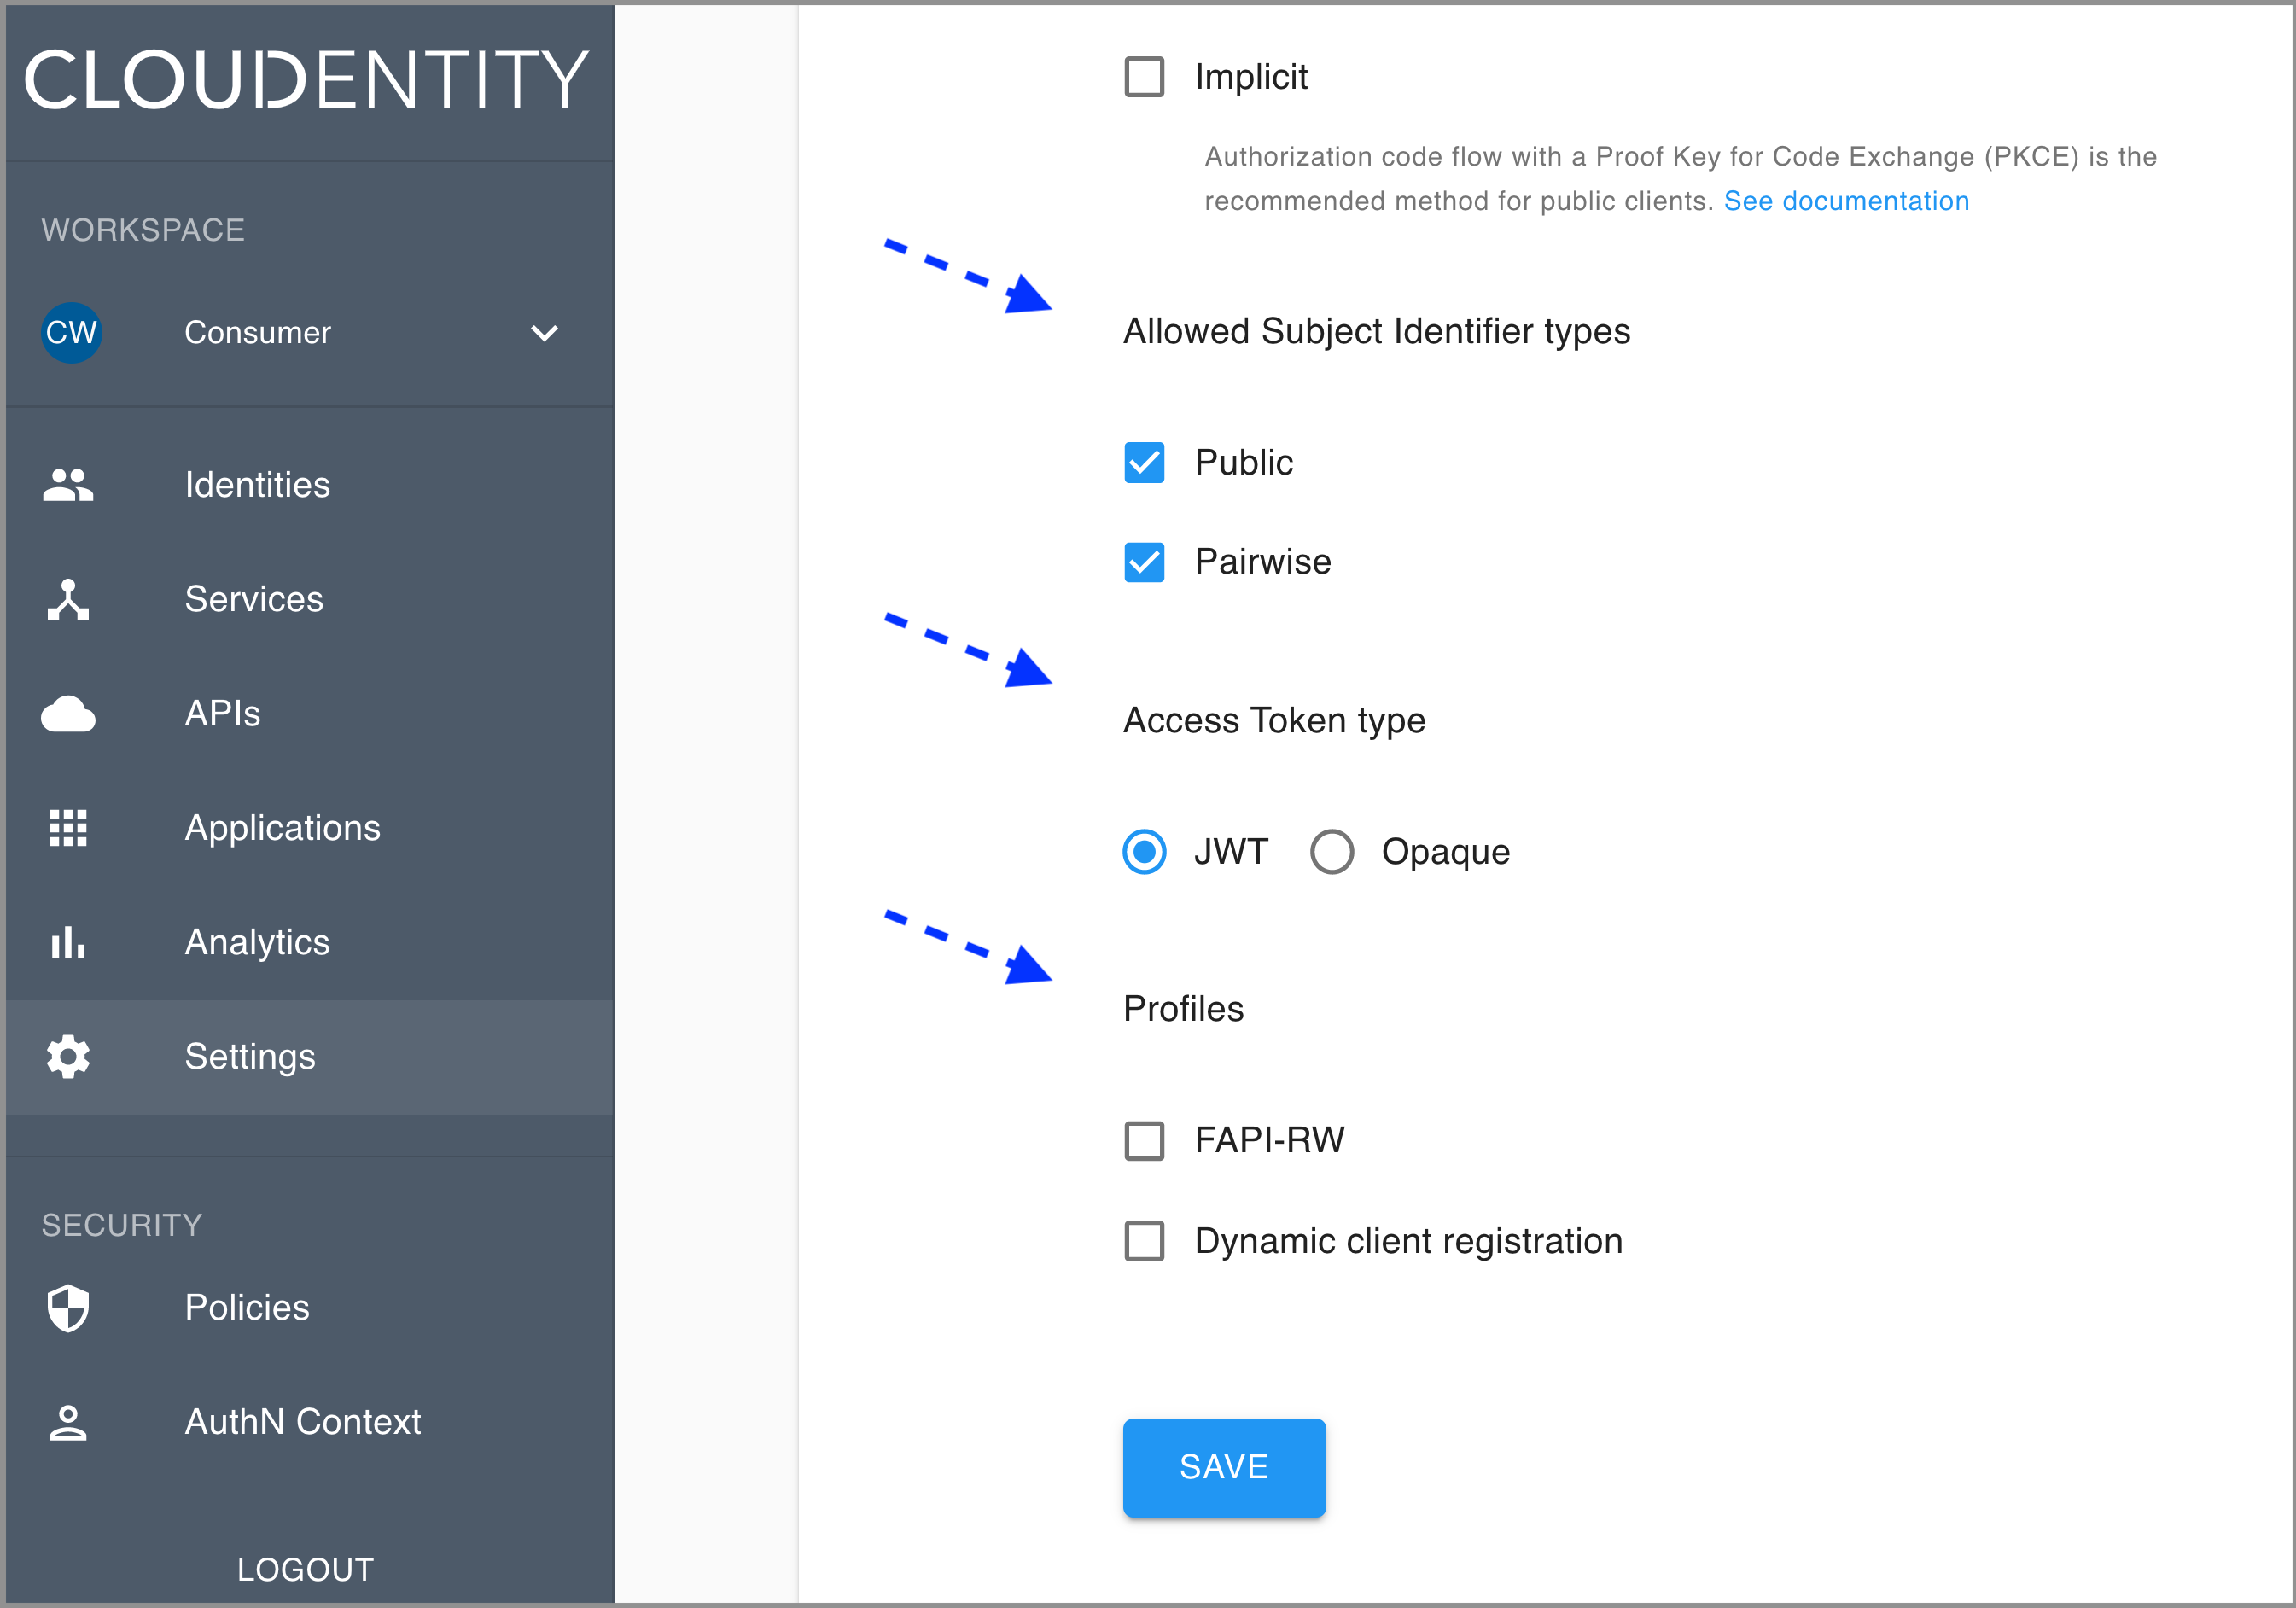
- Allowed Subject Identifier types
- Access Token type
- Profiles
-
Claims view
Policies
-
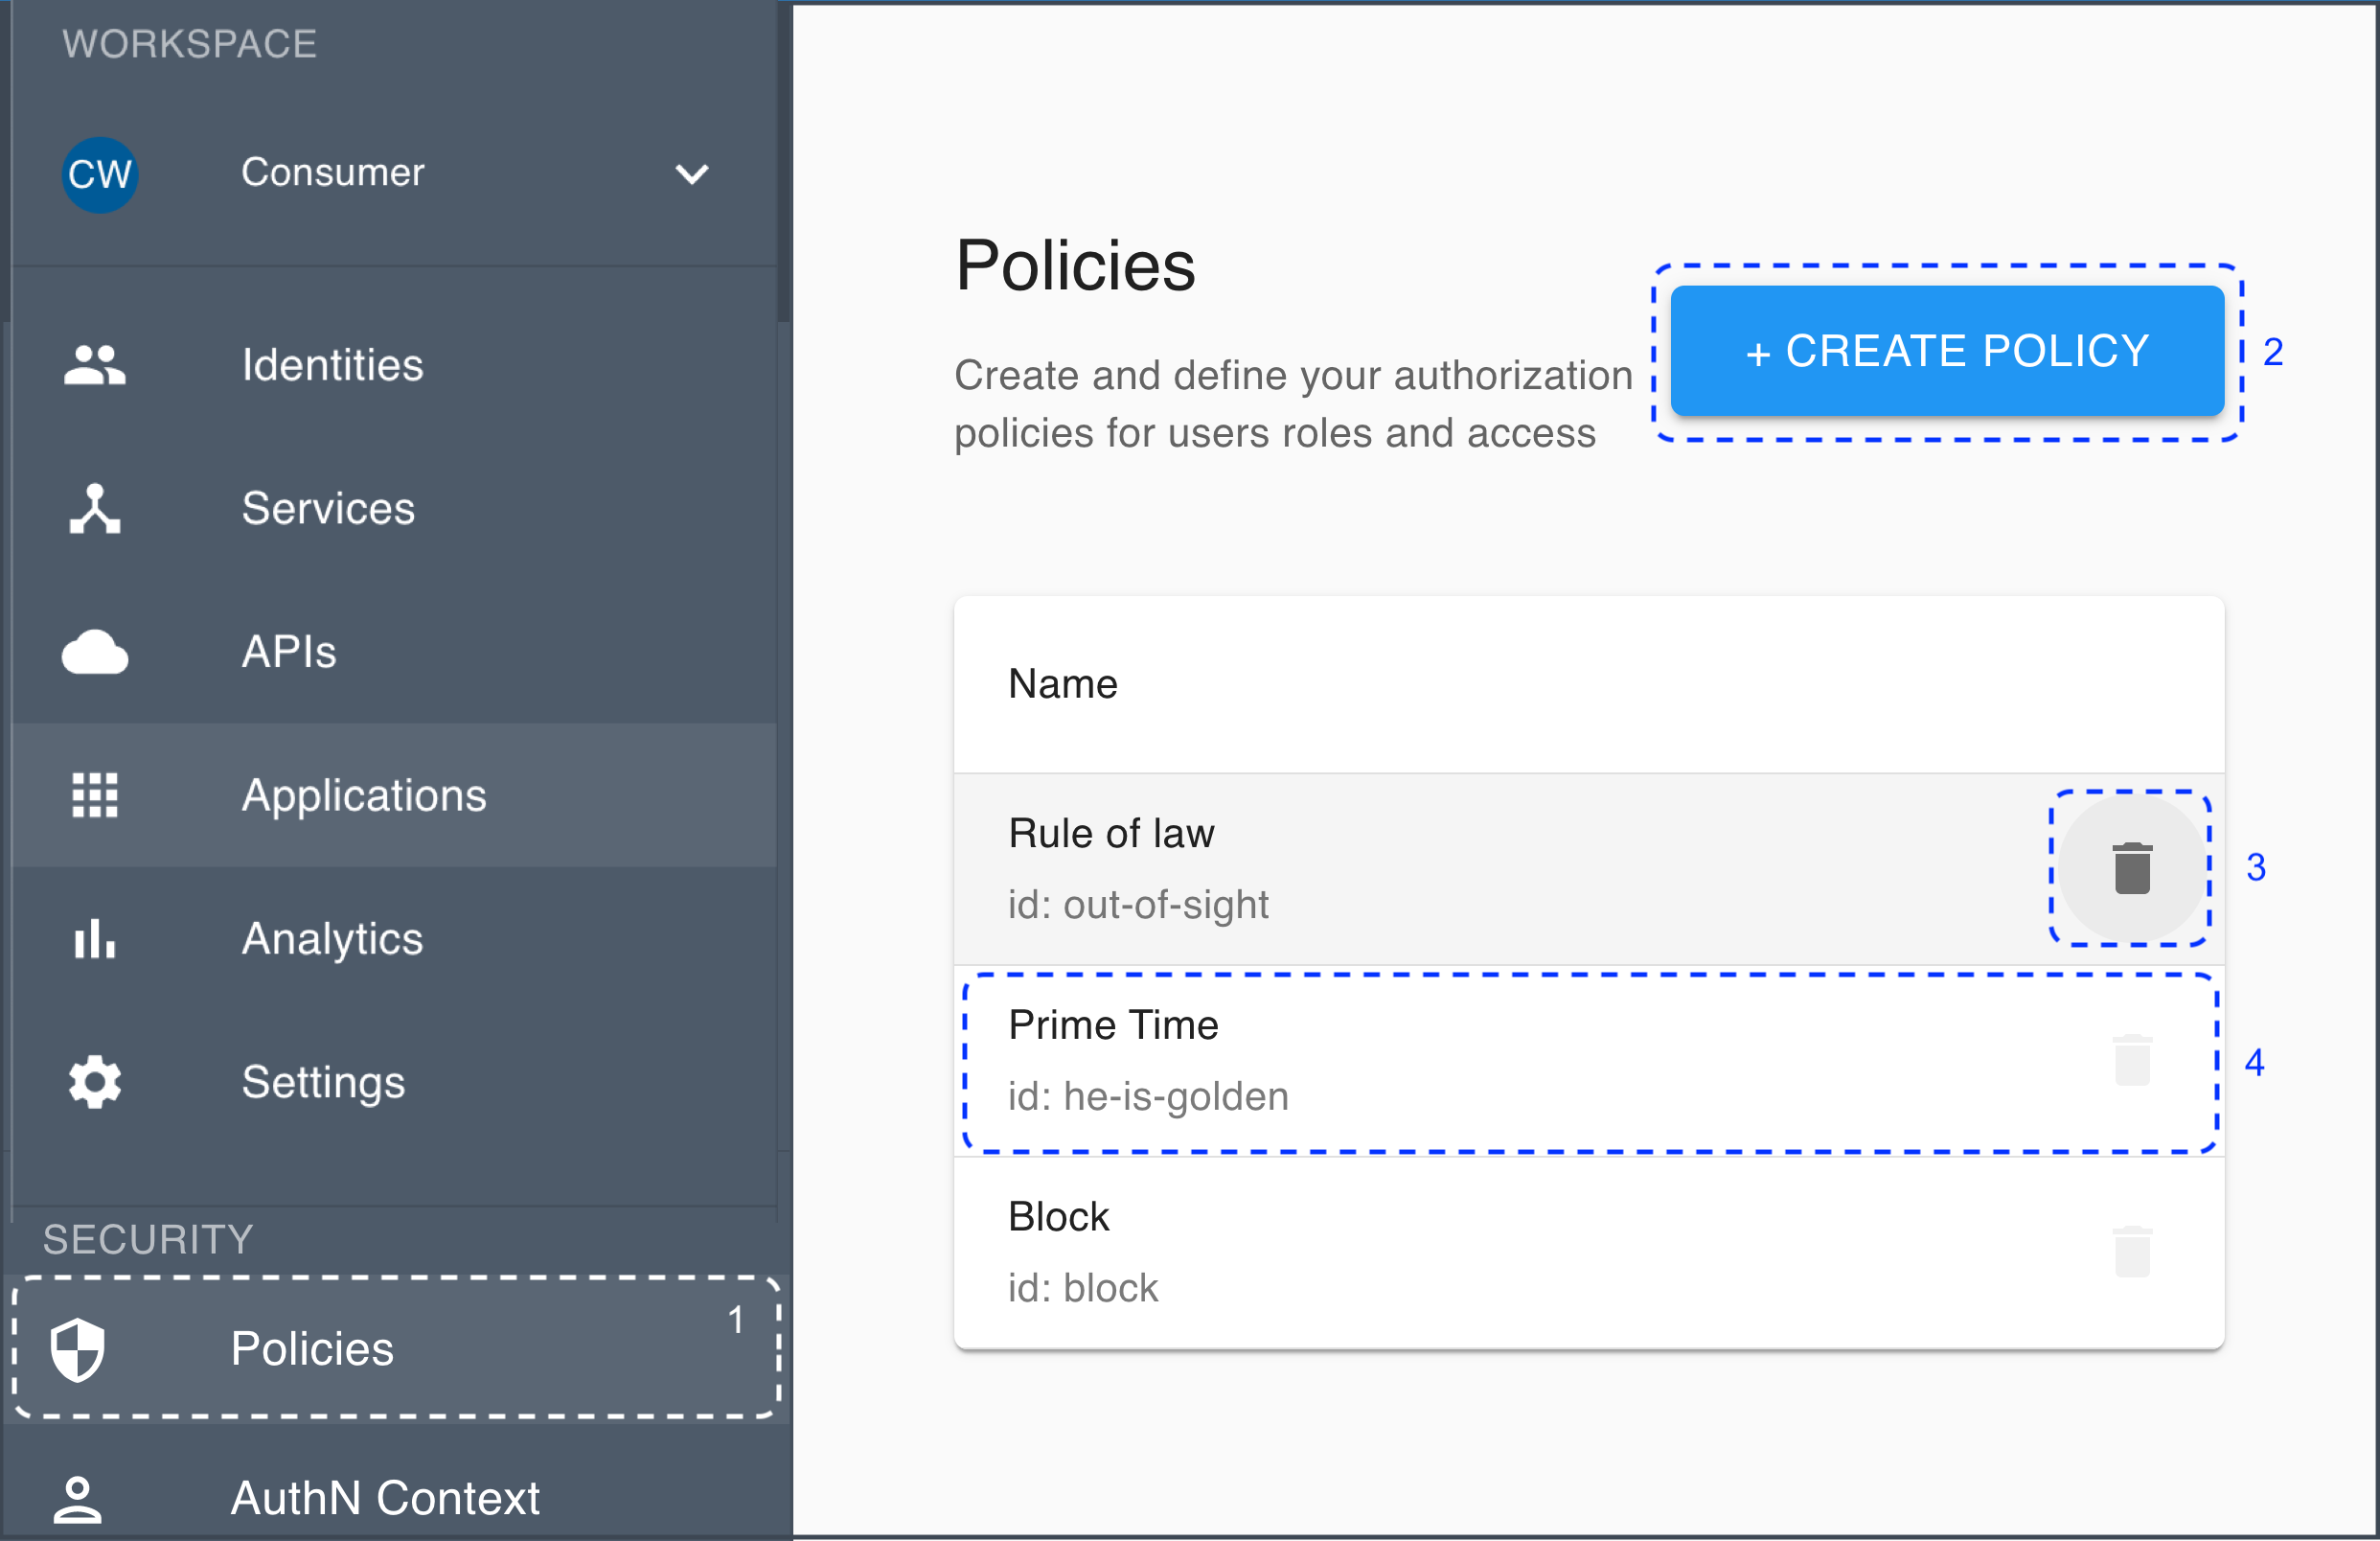
Preview the list of your policies by selecting Policies from the sidebar.
-
Add new policies by selecting CREATE POLICY.
-
Remove an existing policy by selecting the trash can icon.
-
Configure an existing policy by selecting it from the list.
See related articles
- Cloudentity ACP authorization policies
- Protecting scopes with access policies
- Creating a policy
- Restricting scope granters
- Restricting scope requestors
- Verifying a policy
- Protecting APIs with MicroPerimeter™ Custom Authorizer on AWS API gateway
- Protecting APIs on Pyron API gateway
- Protecting applications and APIs in ACP using Signal Sciences signals
AuthN Context
-
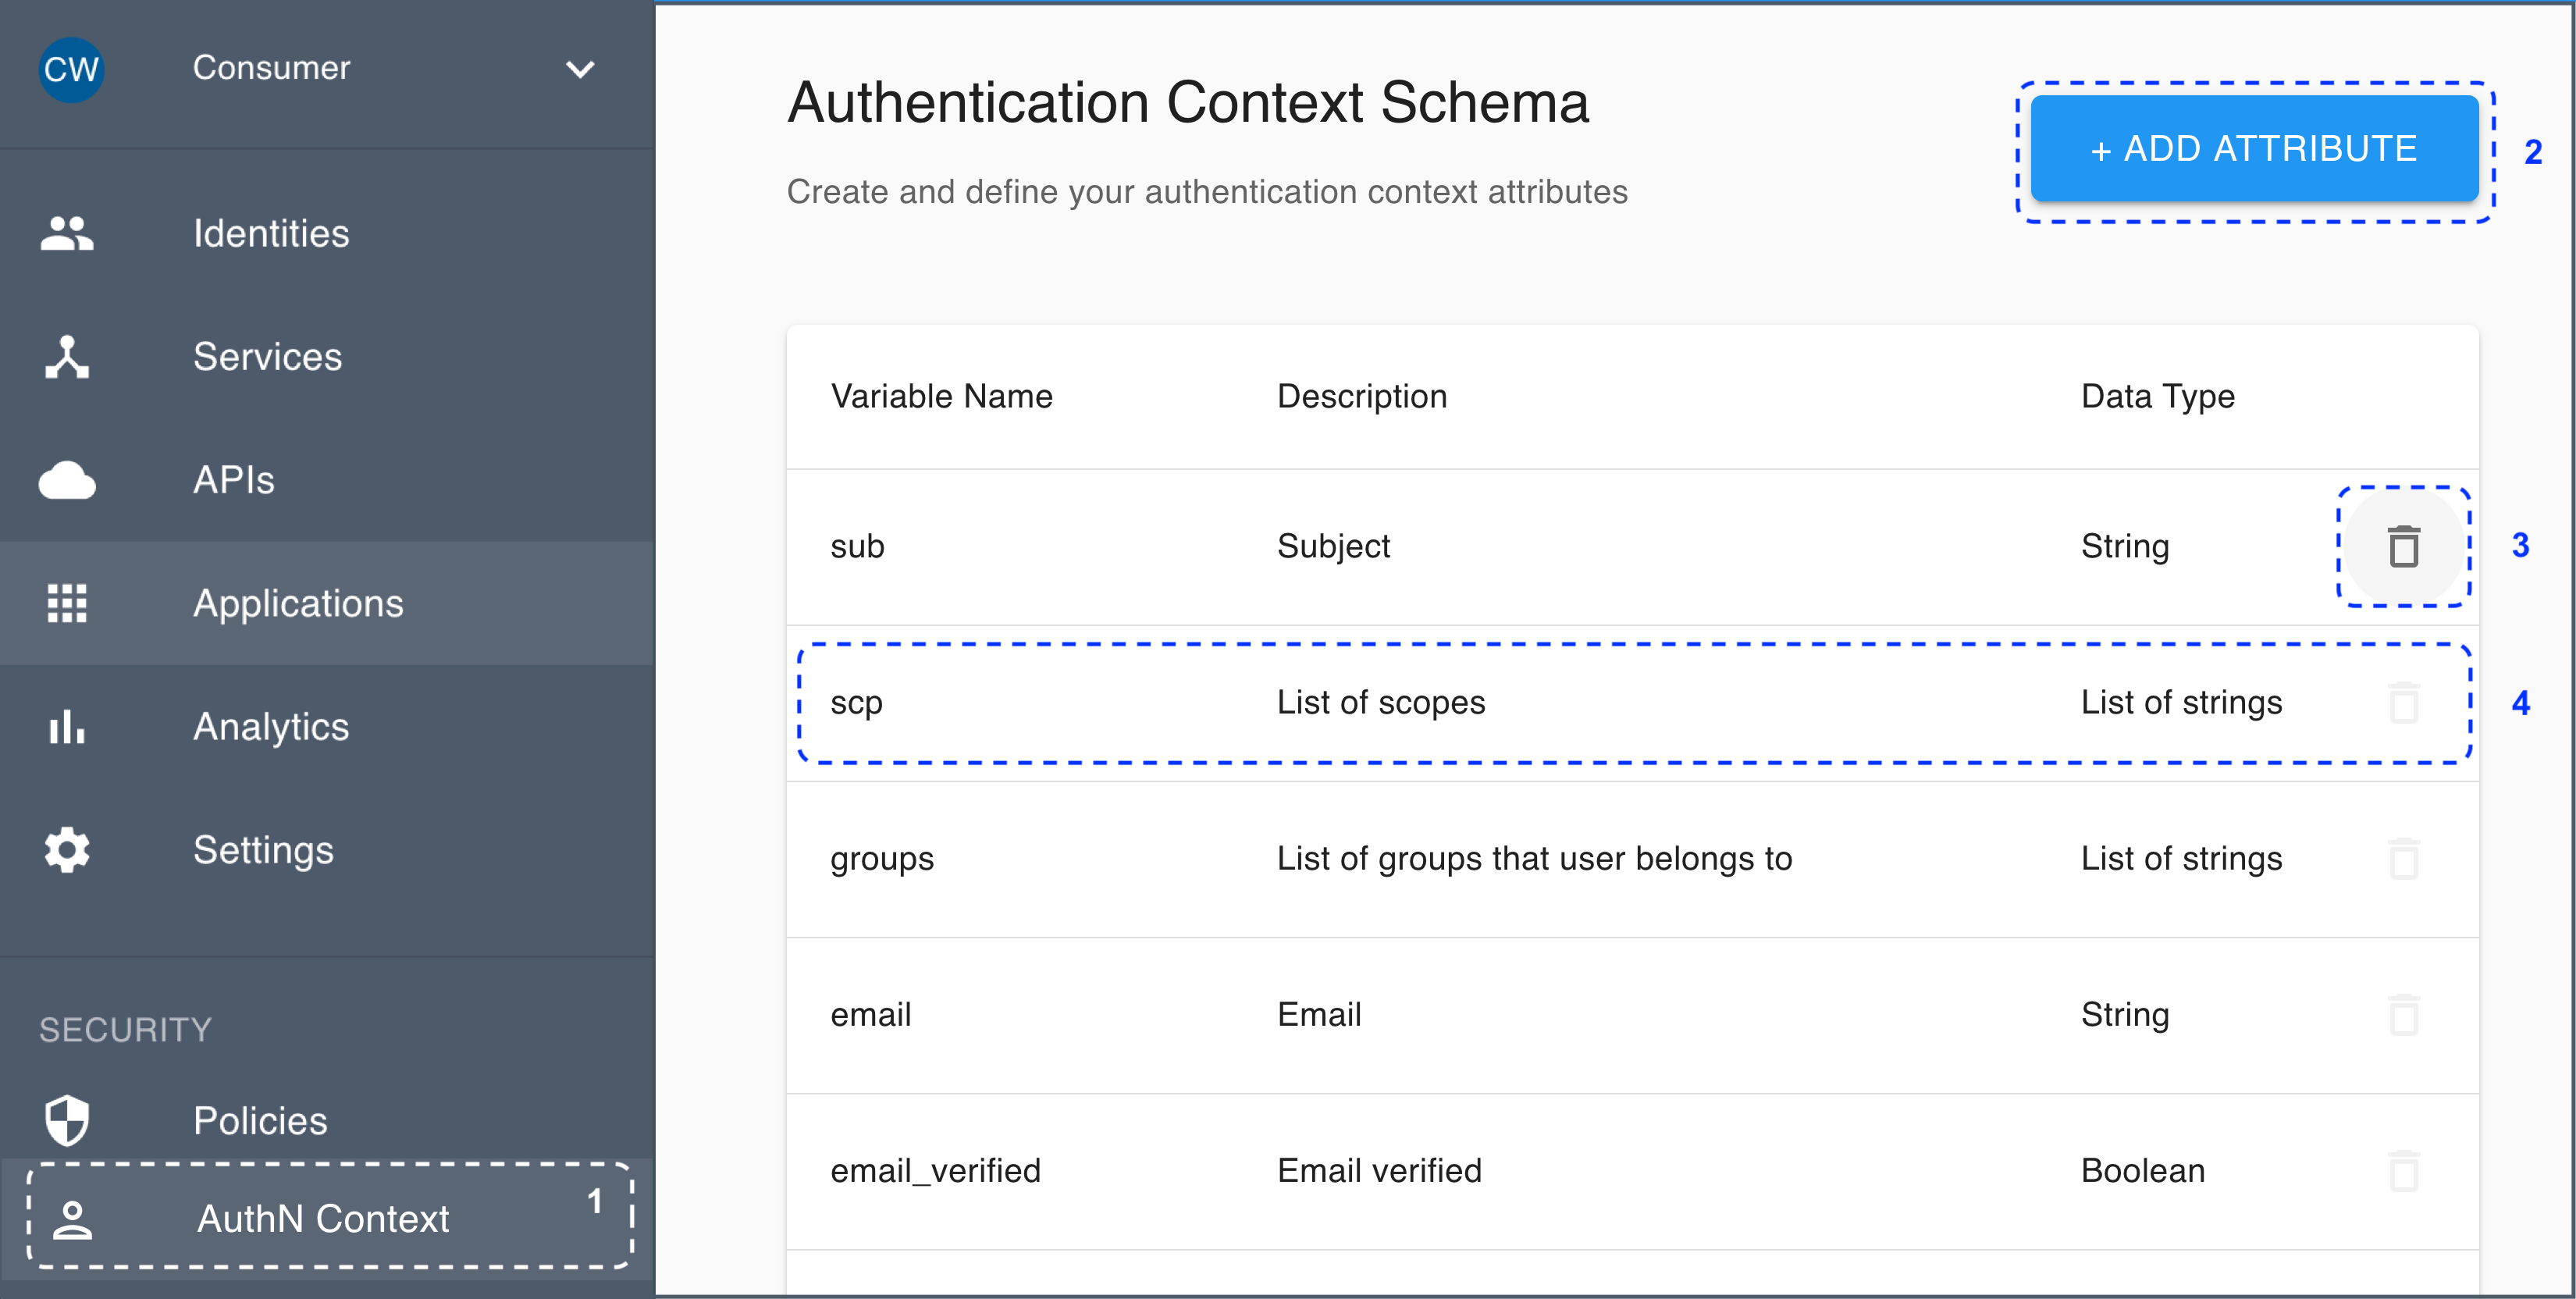
Preview the list of your authentication context attributes by selecting AuthN Context from the sidebar.
-
Add new attributes by selecting ADD ATTRIBUTE.
-
Remove an existing attribute by selecting the trash can icon.
-
Edit an existing attribute by selecting it from the list.
See related articles
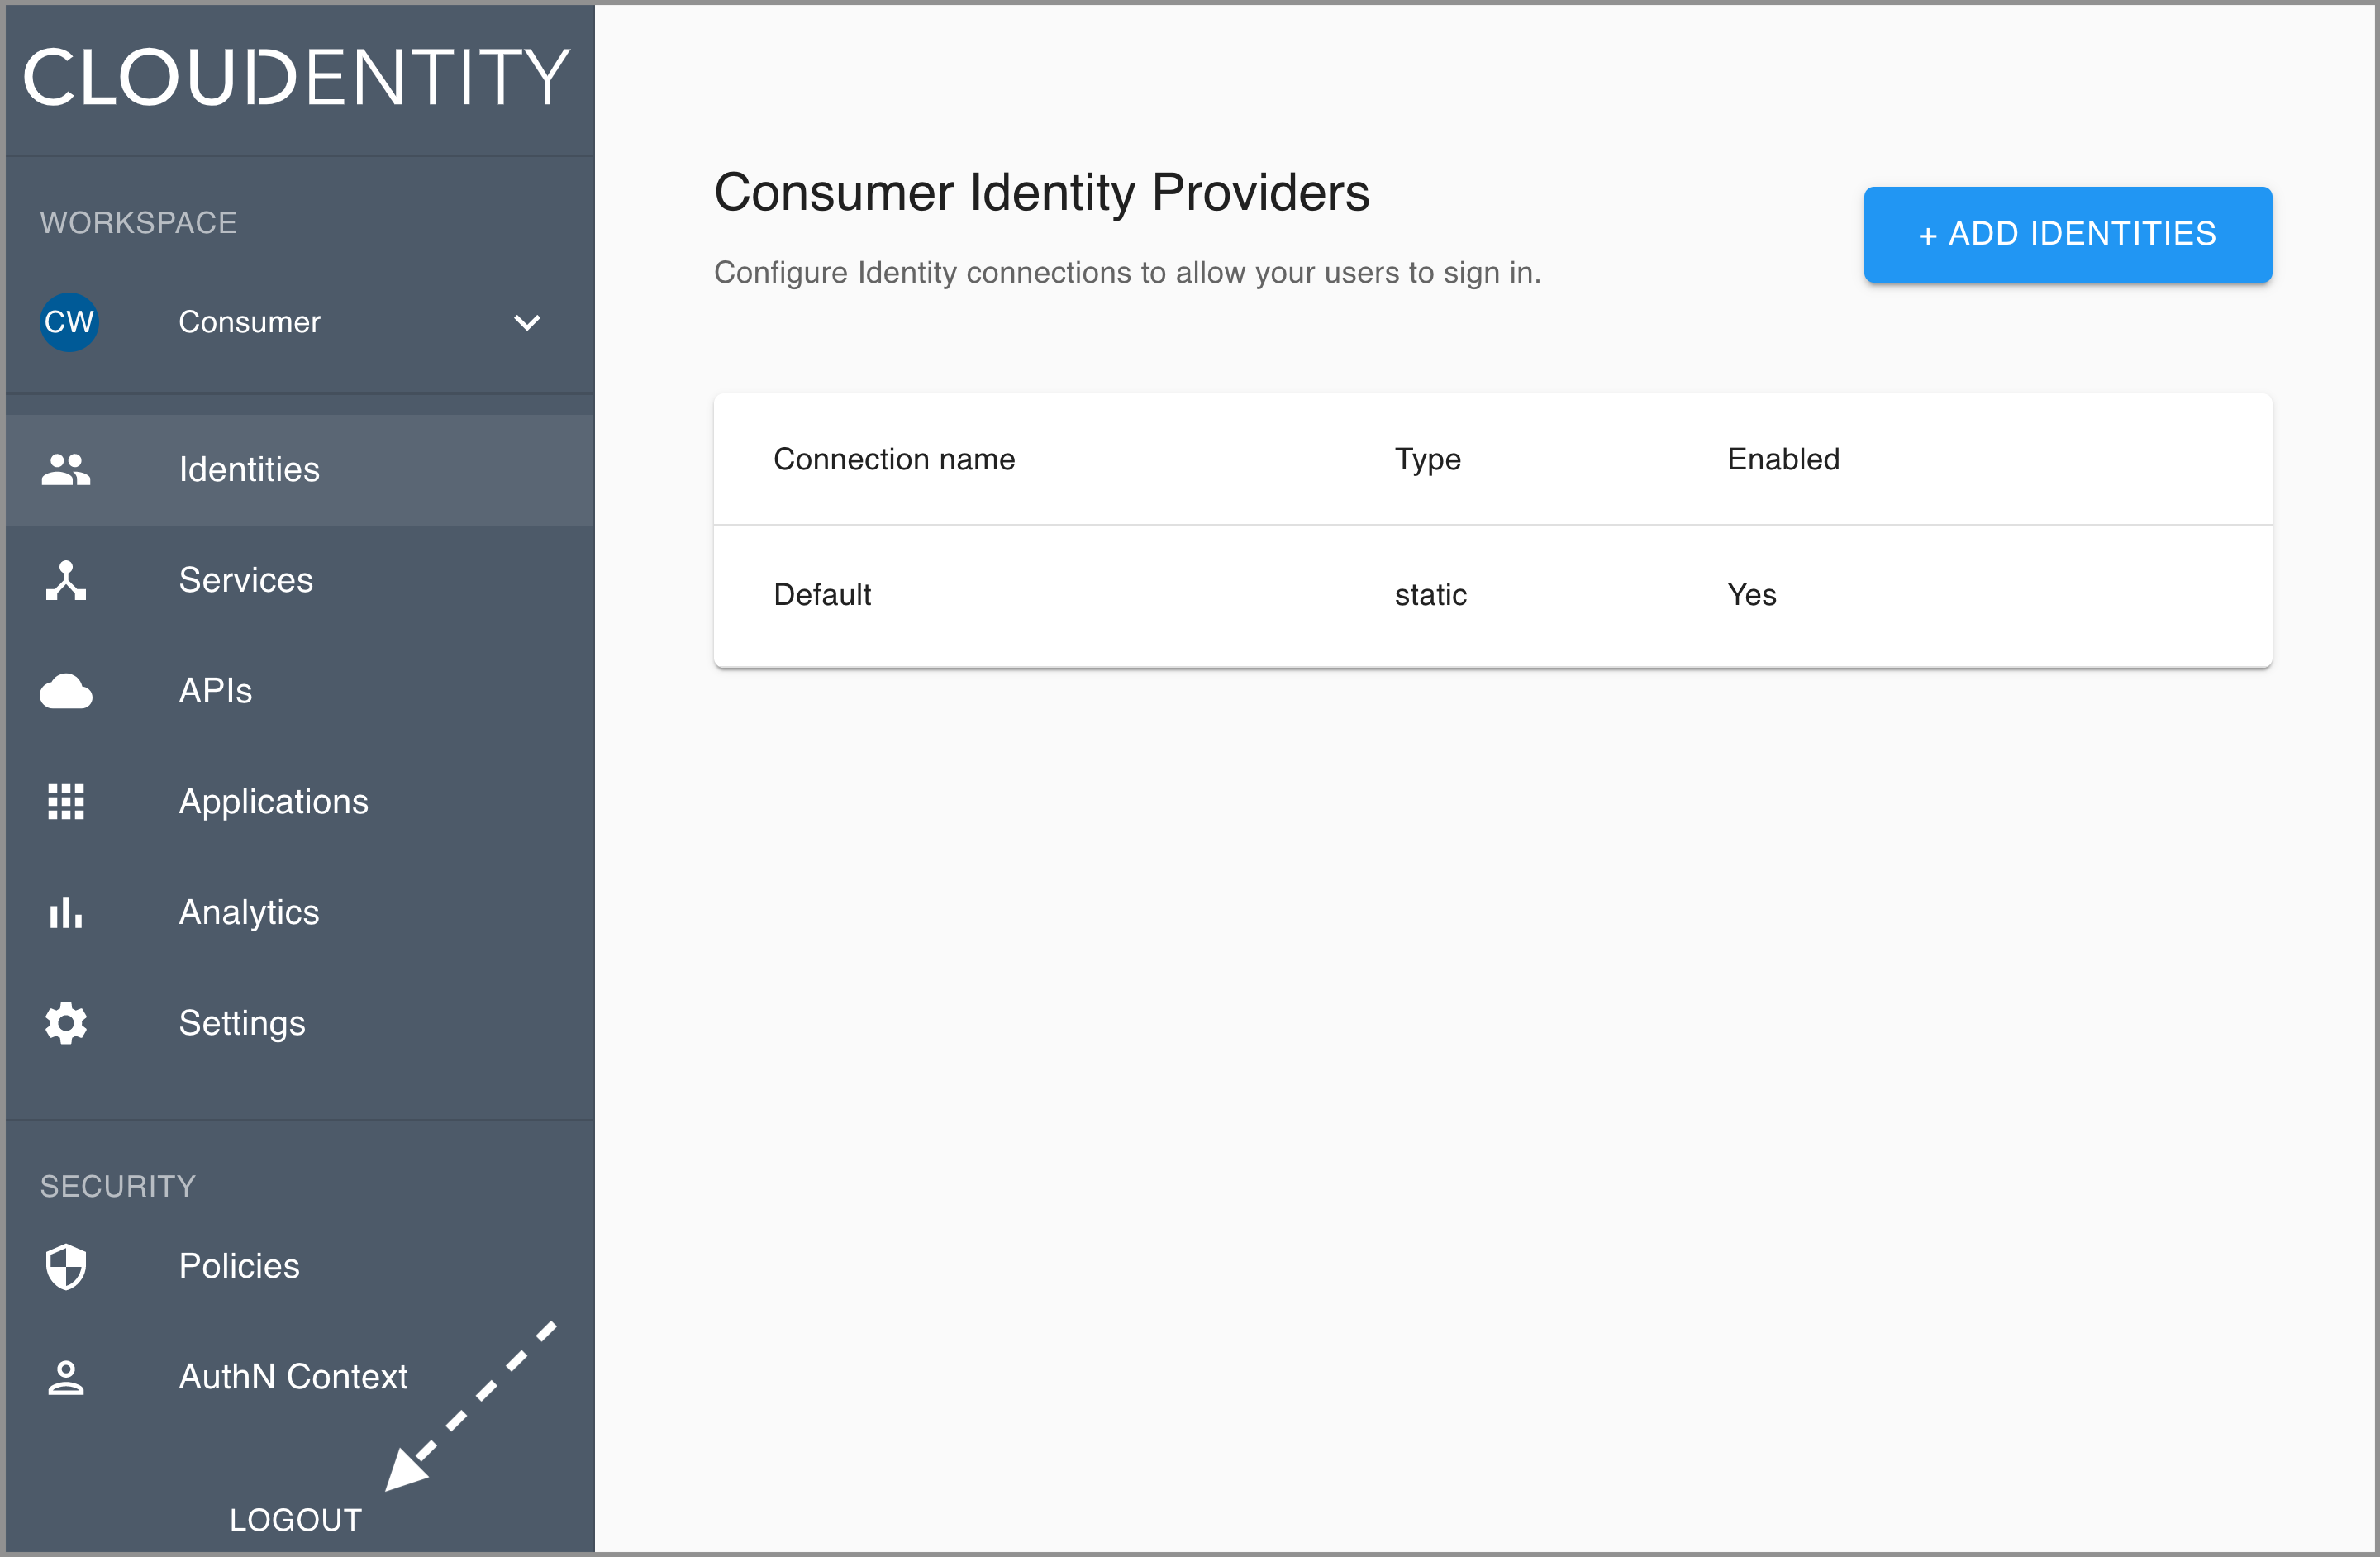
Logout
Select LOGOUT at the bottom of the sidebar to log out of the ACP administrator portal.