Protecting APIs deployed behind the AWS API Gateway
Instructions on how to protect your APIs deployed behind the AWS API Gateway using ACP's AWS Lambda Authorizer. You will learn how to create an AWS API Gateway Lambda Authorizer in ACP. You will configure AWS Lambda service and its permissions. You will learn how to connect a service to ACP from your gateway or your service. Then, you will test your integration by applying authorization policies and confirming access control enforcement.
About AWS API Gateway integration
Amazon API Gateway is an Amazon Web Service (AWS) for creating, developing, publishing, maintaining, and monitoring stateless (REST and HTTP) and stateful (WebSocket) APIs. It allows the users to secure their APIs using built-in AWS features, but it also provides a possibility to delegate access control enforcement to external products that specialize in API protection such as Authorization Control Plane.
Supported API types
ACP and its AWS API Gateway Lambda Authorizer supports access control for REST APIs.
In AWS API Gateway, you can delegate access control to the ACP’s Amazon Gateway
Lambda Authorizer using Amazon’s API Gateway Lambda authorizers.
Lambda authorizers use lambda functions to control access to your APIs. When a client application
calls a method on the AWS Gateway, the gateway checks if the lambda authorizer is configured for the
method. If yes, it calls the lambda function. The ACP’s Amazon
Gateway Lambda Authorizer is, in fact, a lambda function. It evaluates the result of the policy
assigned to the called method in ACP and either grants access or denies it.
If access is denied the Amazon API Gateway returns the HTTP 403 ACCESS_DENIED status code.
If access is allowed, the gateway executes the method. The authorizer is also responsible for
pulling authorization policies definition from ACP and providing
ACP with a possibility to discover the APIs that have the authorizer attached.
Prerequisites
-
You have an Amazon Web Services account with permissions that allow you to access your API Gateway and AWS Lambda configuration.
Context
You need those permissions as you will be working with your API Gateway and attach your Lambda Authorizer to your service and gateway.
-
REST APIs deployed behind the Amazon API Gateway service.
Deploying APIs
If you do not have any APIs deployed yet, you can go to your AWS account, search for Amazon API Gateway, and select Create API. Remember that it must be a REST API that you create. You can create a new API, clone an already existing API, or import API from Swagger or Open API 3 specification.
If you do not have any APIs at hand, you can create an Example Petstore API (by selecting the Example API option from the menu).
Remember that after creating an API, you must deploy it so that the ACP can discover it later on in the process.
To learn more about developing REST APIs with AWS Gateway, see AWS Working with REST APIs documentation.
-
You have admin access to your ACP tenant.
Create AWS GW Lambda Authorizer
-
In the workspace of your choice go to APIs > Gateways > ADD GATEWAY.
-
Select Amazon API Gateway and provide a name for your Lambda Authorizer.
-
Optionally, enable the Create and bind services automatically check box.
Tip
When enabled, all services protected by your Lambda Authorizer instance are discovered and added to the ACP service list automatically when the authorizer is connected to ACP. Otherwise, you need to add them manually.
Multiple Lambda Authorizers and APIs
It is recommended to use only one Lambda Authorizer within the AWS console. If multiple authorizers are running at the same time, disable automatic binding for services. If it is enabled, there may be conflicts between different authorizers trying to discover and protect your APIs.
-
Select Next.
Result
AWS Gateway Lambda Authorizer is created and you are presented with the Quick Start menu.
-
From the Quick Start menu, download the authorizer.
cloudentity-mp-aws-gw-authorizer
The
cloudentity-mp-aws-gw-authorizerZIP file is a lambda function that you use to delegate access control from the AWS API Gateway to the Lambda Authorizer and ACP with its policies definition. You will use this file in the configure AWS Lambda section.
Configure AWS Lambda
Create a function
-
Go to AWS Lambda in AWS and select Functions > Create Function.
-
Enter the function name (for example,
cloudentity-microperimeter-authorizer) and set the runtime toGo 1.x.Additional settings
If you wish, you can configure your function using additional lambda function settings, like code signing or network specification. This article does not cover those settings and uses the default values. Do not worry about changing the default execution role, you will configure permissions in the Configure Lambda permissions section.
-
Select Create function.
-
Go to the Code source section and upload the ZIP archive that you had downloaded from your ACP tenant.
-
Go to the Runtime settings section and select Edit.
Runtime settings
For AWS lambda functions deployed with a .zip archive, you must specify the runtime to use and the name of the function handler. You had already set the runtime to
Go 1.xwhen creating a function. Now, you are going to set the handler. -
Set the handler to
cloudentity-mp-aws-gw-authorizer. Save your changes.Handler
By setting the handler to
cloudentity-mp-aws-gw-authorizeryou are telling the Lambda runtime which handler method (cloudentity-mp-aws-gw-authorizer) to invoke. For functions invoked in theGo 1.xruntime, the value of the handler setting is an executable file name. In this case, this is the name of the file that you would receive after extracting the .zip archive you had downloaded from ACP. -
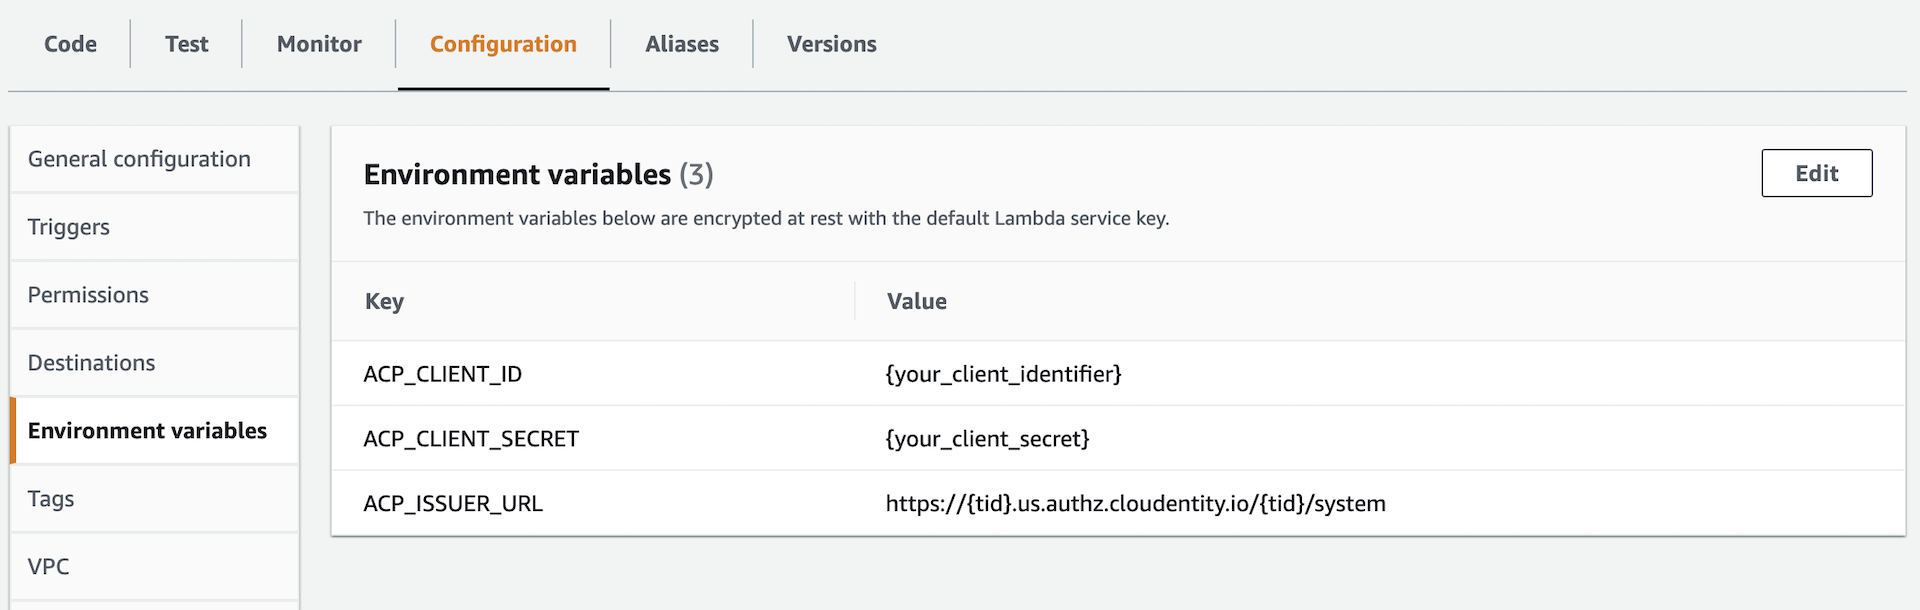
Navigate to the Configuration tab in your function view. Select the Environment variables section and add the following variables:
-
ACP_CLIENT_ID- must point to the client identifier of the AWS Lambda Authorizer you had created in ACP. -
ACP_CLIENT_SECRET- must point to the client secret of the AWS Lambda Authorizer you had created in ACP. -
ACP_ISSUER_URL- must point to the issuer URL of the AWS Lambda Authorizer you had created in ACP.
Variables values
In ACP, you can find all three credentials in your AWS Lambda Authorizer settings.
Optional authorizer’s settings
You can also add the following variables:
-
CONFIG_REFRESH_INTERVAL, which represents the frequency of retrieving policies from ACP by the authorizer and defaults to 5 seconds. -
DISABLE_ANALYTICS, which can be changed from its default value (false) totrueto turn off the analytics for the Lambda Authorizer in ACP’s Admin Panel Analytics.
-
Result
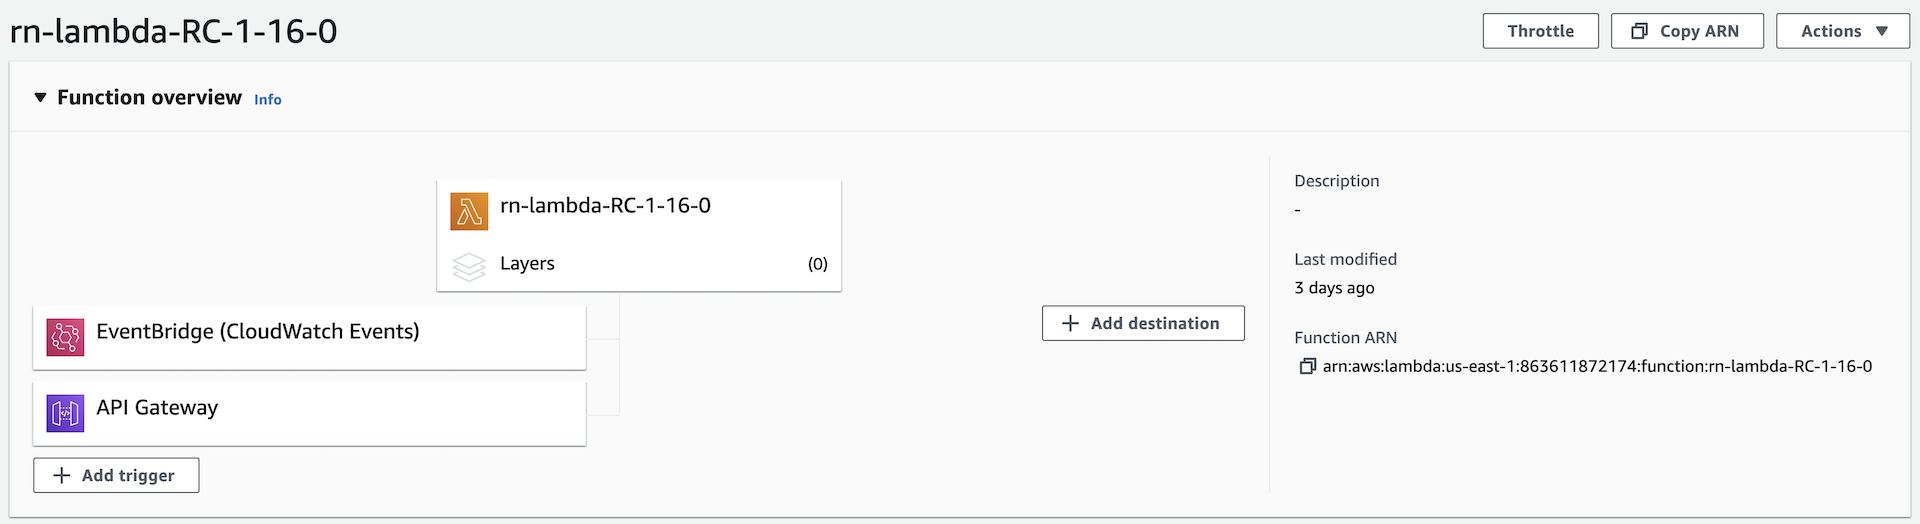
You have configured your Lambda Authorizer function and now you can add a trigger to it. Triggers are AWS services or resources responsible for invoking your function.
Add a trigger
A trigger in AWS is a service or resource that invokes your function. Most services invoke your functions directly with an event structure that is specific per service. In this section, you will add an EventBridge (CloudWatch Events) trigger to your Lambda function and a trigger that is responsible for the communication between the Gateway and the authorizer. This type of trigger helps you to respond to state changes in your AWS resources. You will create a rule that matches a selected event in the events stream and route this rule to your AWS Lambda function to take action.
-
In your function overview, select + Add trigger.
-
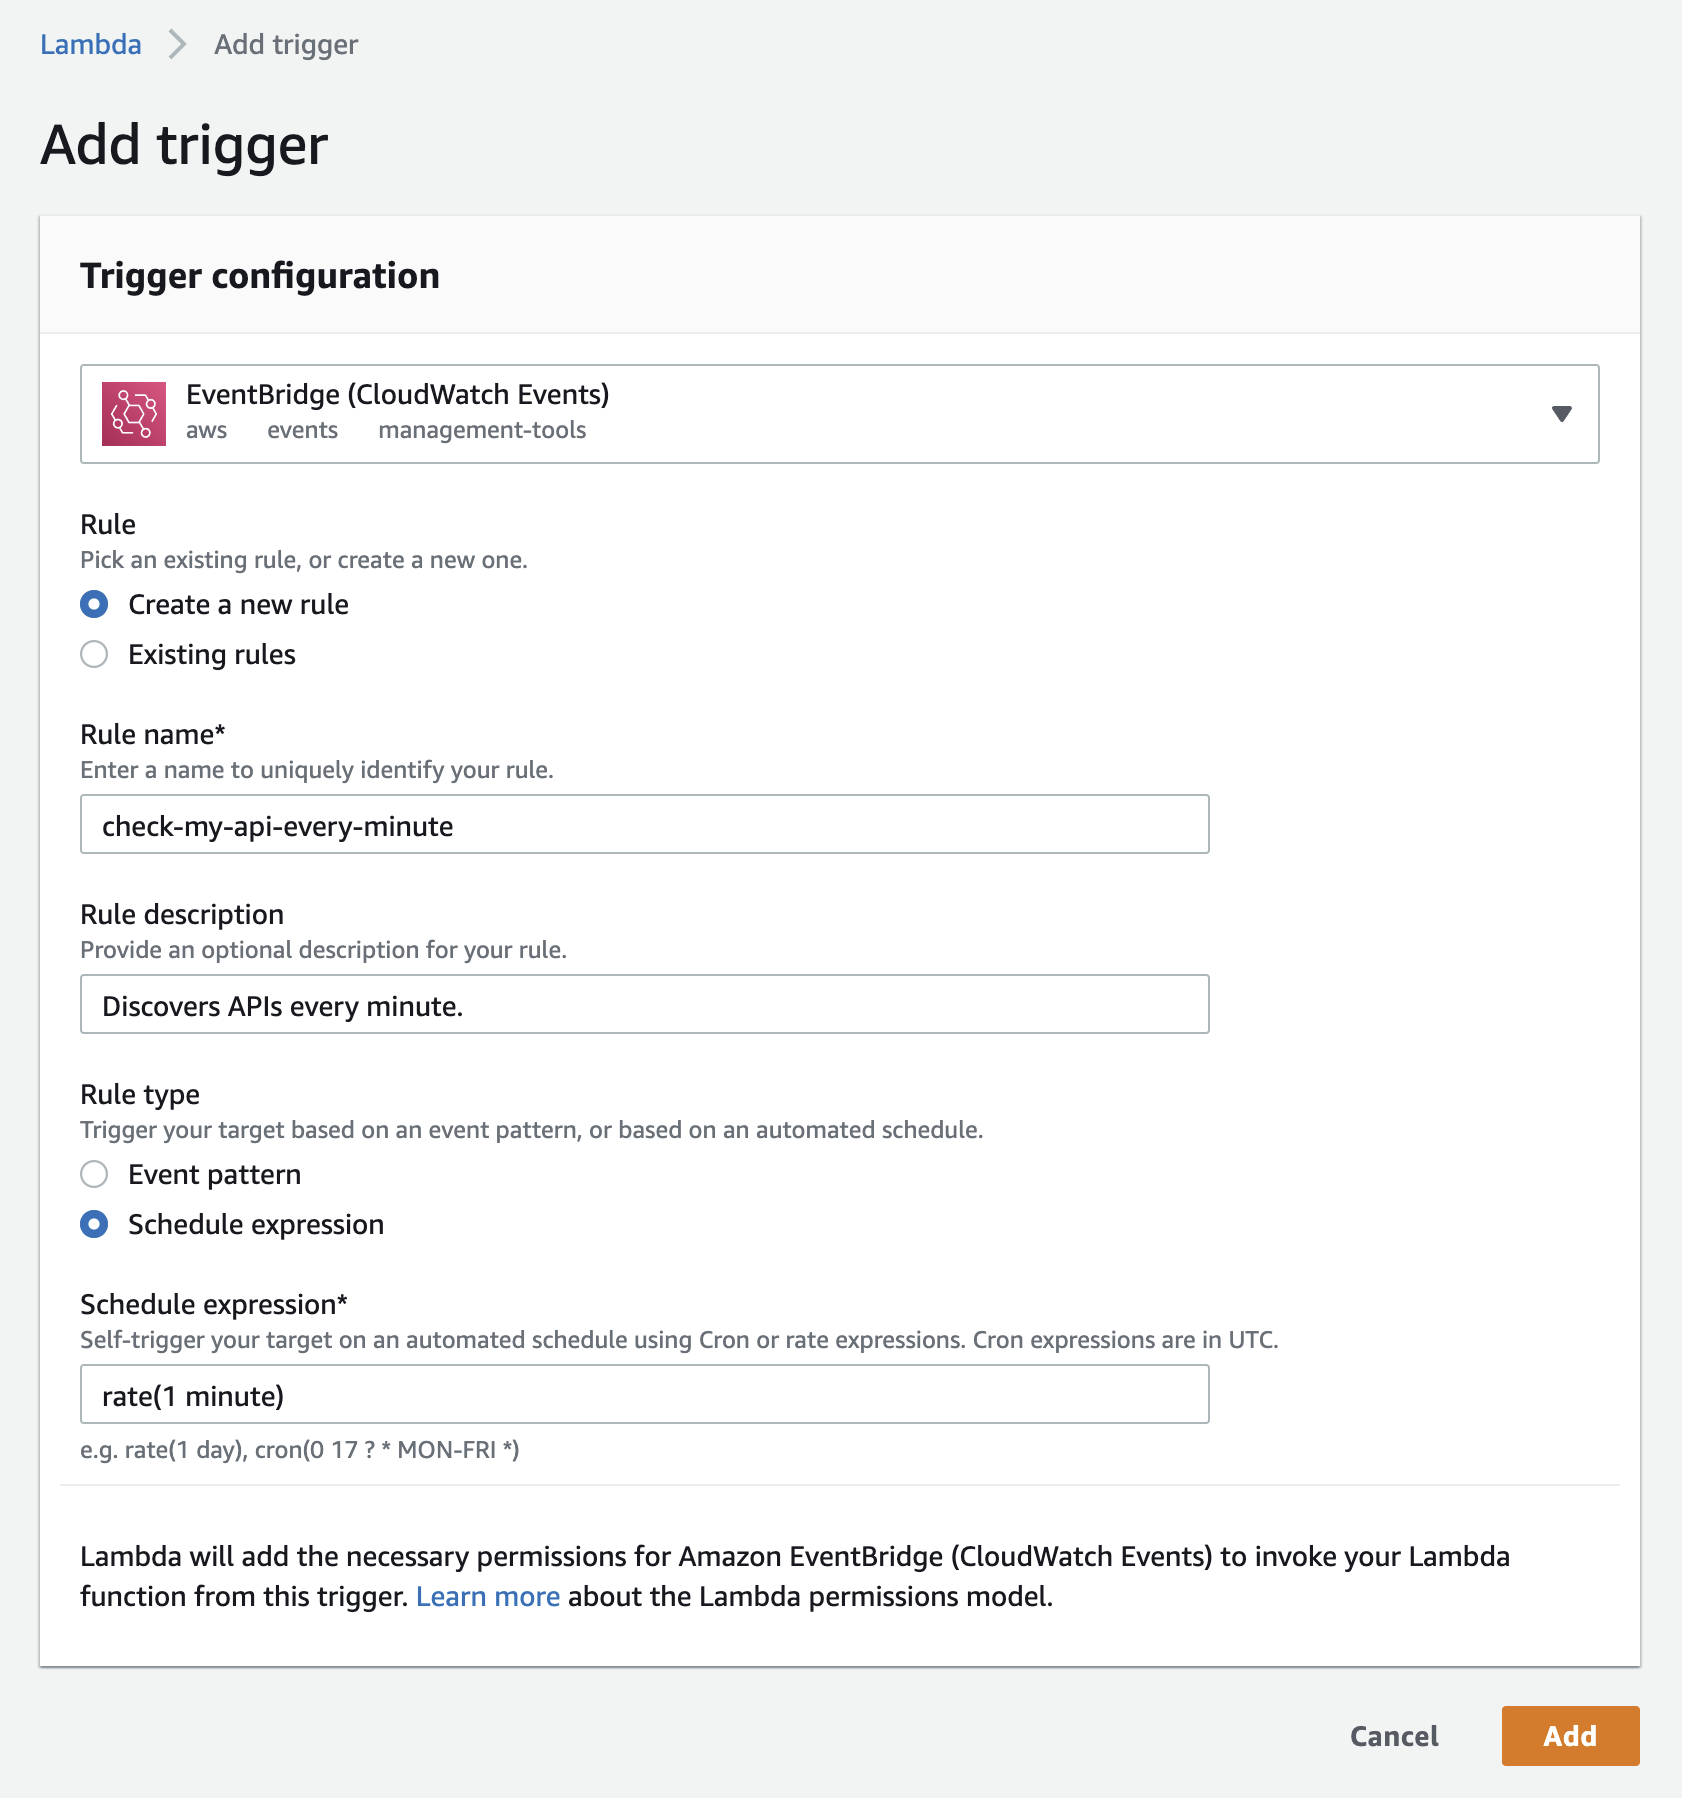
In the Add trigger view,
-
Select EventBridge (CloudWatch Events) from the top select box.
-
Select Create a new rule from the Rule select box.
-
Enter a name for the rule into the Rule name field, for example check-my-api-every-minute.
-
Specify Rule type by selecting Schedule expression.
-
Enter a schedule expression into the Schedule expression field, for example, rate(1 minute).
-
Select Add.
-
Configure Lambda permissions
In this section, you will attach permissions policies to your AWS API Gateway and your Lambda function.
-
In your Lambda function overview, navigate to Configuration > Permissions.
-
For convenience, manually copy the Function ARN or select the Copy ARN button that is just above your function overview. You will need that later.
-
Select the Role name link in the Execution role field.
-
In the Summary view, select Add inline policy.
-
In the Create policy view, add permissions for the API Gateway service.
-
In the Visual editor tab, set Service to API Gateway.
-
In the Actions section, enable All API Gateway actions.
-
In the Resources section, select All resources.
-
-
In the same Create policy view, add permissions for the Lambda service.
-
Select Add additional permissions.
-
Set Service to Lambda.
-
In the Actions section, enable All Lambda actions.
-
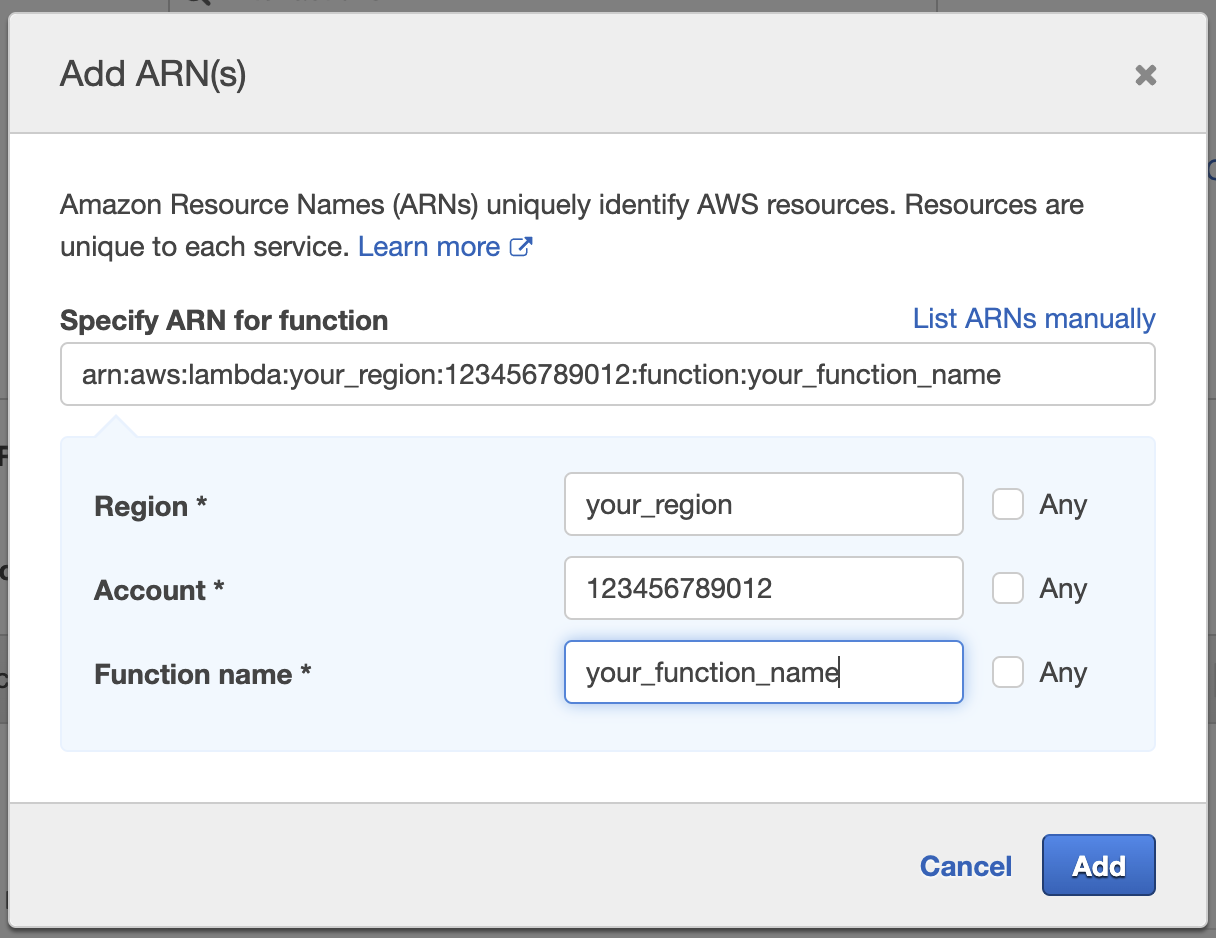
In the Resources section, go to the Function area and select Add ARN.
-
In the Add ARN pop-up window, paste the ARN that you copied in the second step as the value for the Specify ARN for function input field. If you did not copy the ARN, fill in all necessary fields to construct your ARN.
-
Select Add.
-
-
In the Create policy view, select Review policy.
-
In the Review policy view, enter the name for your policy and select Create policy.
Note
The time required for propagating AWS permissions can vary and it may take a while. In your CloudWatch logs you may notice that your authorizer gets
HTTP 403 access forbiddenresponses until the permissions are successfully propagated and the authorizer is able to connect to your gateway and ACP.
Result
Your new policy is ready and attached. You have configured permissions for your Lambda function. ACP’s AWS Lambda Authorizer can now communicate with your ACP. Your ACP tenant is now able to discover the APIs that you have deployed behind the AWS API Gateway.
You may notice that when permissions policies are propagated, a trigger for your API Gateway is automatically added to your Lambda Authorizer in AWS. It is because your API Gateway can now invoke your Lambda function when there is a request coming that needs to be validated by the authorizer.
If you enabled the Create and bind services automatically option when creating the AWS Lambda Authorizer in ACP, your APIs are discovered and bound to your Authorizer.
Tip
If you did not enable the Create and bind services automatically option when creating the AWS Lambda Authorizer in ACP, you need to connect them manually. To do so, in ACP, go to APIs > Gateways > Your Gateway > APIs tab. Select Connect next to an unbound API and connect the API to an already existing service or create a new service.
Apply a sample policy
-
In ACP, create a policy or reuse one of the already existing ones.
Learn more
To know more about authorization policies, see:
-
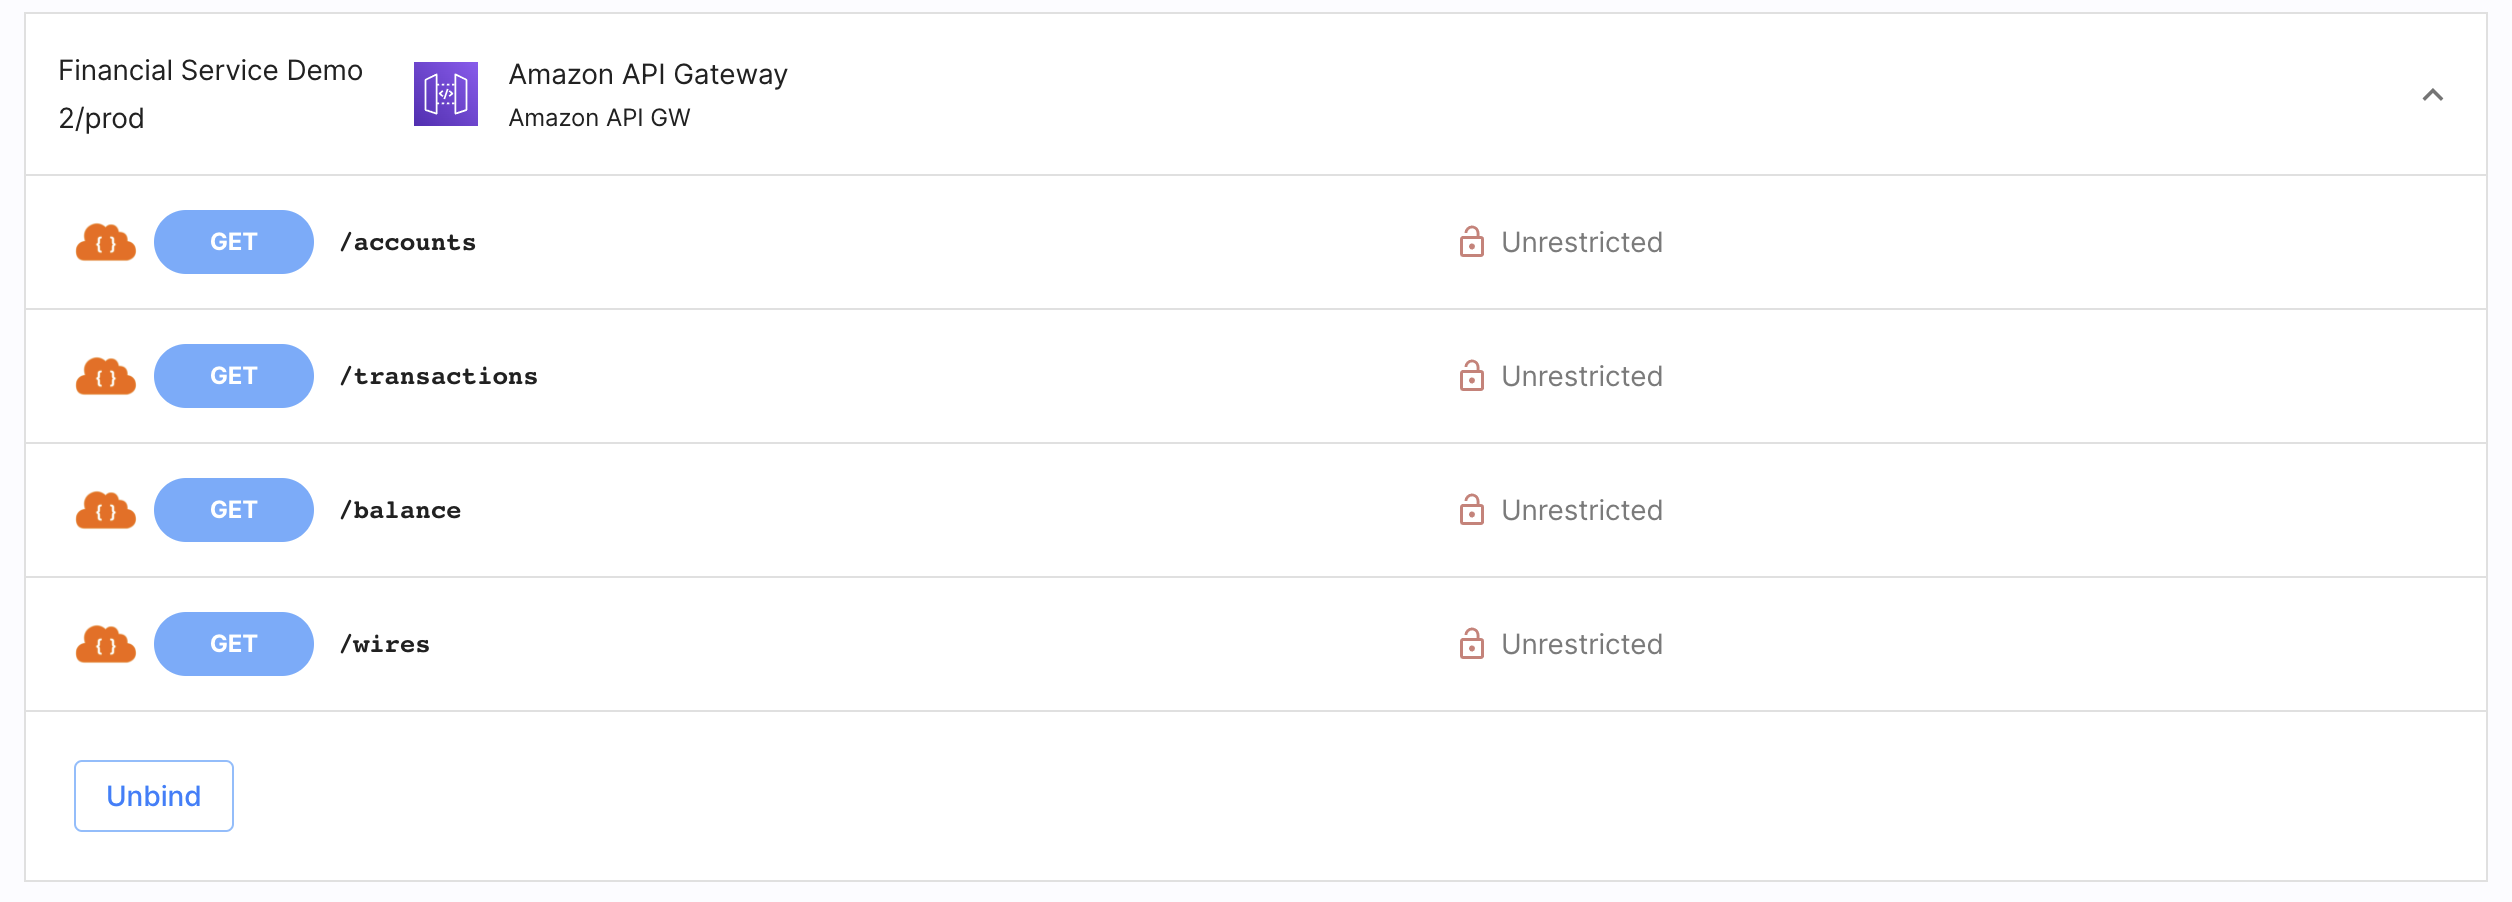
Select APIs from the left sidebar and go to the AUTHORIZATION tab.
-
Select a service protected by the ACP AWS Lambda Authorizer and any API with authorization status Unrestricted.
-
In the Edit API popup window, select Policy from the dropdown list and click Update to proceed.
Result
You have successfully assigned a policy to your API.
Confirm the enforcement
-
Go to your Amazon API Gateway dashboard and select the API secured with ACP.
-
From the left sidebar, go to Stages and select the stage with your API.
-
Copy the invoke URL of the stage.
-
Execute the
curlcommand in the terminal of your computer.curl {invoke_url}/{api}The
{invoke_url}variable stands for the invoke URL that you copied from your APIs stage. Theapivariable points to the particular API you wish to request. For example, it may bepetsif you had deployed the example service from AWS API Gateway.Result
You receive an
HTTP 200status code. -
In ACP, assign the Block API policy to the API of your choice.
-
Execute the
curlcommand in the terminal of your computer.curl {invoke_url}/{api}The
{api}should point to the API you had protected with the Block API policy in the previous step.Result
You receive the
HTTP 403 Access Forbiddenstatus code as the Block API policy denies all API requests.
Different policy
If you wish, you may use the
NIST-AAL-1authorization policy. The policy enforces access protection with an additional requirement: the HTTP request must contain an access token. In such case, thecurlcommand from the sixth step fails unless you include a valid access token in your request. See example:curl {invoke_url}/{api} -H "Authorization: Bearer {AT}"The
{AT}variable stands for the access token. If you wish to know how to get an access token using ACP’s API, see the Getting started with ACP REST API documentation.
Follow-up
With your AWS API Gateway set up, you can configure your Lambda function to retrieve contextual information on users accessing the Lambda function. For more information, see Acquiring contextual information on users accessing your Lambda.